

Growing Basil Kitchen Garden dreams are within your reach, even if you think you don’t have a green thumb! Have you ever craved the fresh, vibrant taste of basil straight from your garden, only to be disappointed by store-bought herbs that lack that intense flavor? I know I have! That’s why I’m so excited to share some simple, yet incredibly effective, DIY tricks to help you cultivate your own thriving basil patch right in your kitchen.
Basil, a culinary staple with roots stretching back to ancient India, has been cherished for centuries not only for its delicious taste but also for its purported medicinal properties. From traditional Italian pesto to fragrant Thai curries, basil elevates countless dishes. But beyond its culinary uses, growing your own basil offers a sense of connection to nature and a rewarding experience.
In today’s fast-paced world, taking a moment to nurture something living can be incredibly therapeutic. Plus, let’s be honest, who wouldn’t want to save money on groceries while enjoying the freshest, most flavorful basil imaginable? This DIY guide will equip you with the knowledge and simple techniques to successfully start growing basil kitchen garden, regardless of your experience level. Get ready to transform your kitchen into a fragrant oasis and enjoy the satisfaction of harvesting your own homegrown basil!
Growing Your Own Basil Kitchen Garden: A DIY Guide
Hey there, fellow plant enthusiasts! I’m so excited to share my experience and guide you through creating your very own thriving basil kitchen garden. There’s nothing quite like snipping fresh basil leaves right from your windowsill to add that perfect touch to your pasta sauce, pesto, or even a refreshing summer cocktail. Trust me, once you taste homegrown basil, you’ll never go back to the store-bought stuff!
This guide will walk you through everything you need to know, from choosing the right container to harvesting your fragrant bounty. Let’s get started!
Choosing the Right Basil Variety
First things first, let’s talk basil! There are so many different varieties, each with its own unique flavor and aroma. Here are a few of my favorites:
* Sweet Basil: This is the classic, go-to basil for Italian dishes. It has a sweet, slightly peppery flavor.
* Genovese Basil: Similar to sweet basil, but with a slightly more intense flavor. It’s perfect for pesto!
* Thai Basil: This variety has a distinct anise or licorice flavor. It’s commonly used in Southeast Asian cuisine.
* Lemon Basil: As the name suggests, this basil has a lovely citrusy aroma and flavor. It’s great in salads and teas.
* Purple Basil: Not only does it add a pop of color to your garden, but it also has a slightly spicier flavor than sweet basil.
I recommend starting with sweet basil or Genovese basil if you’re a beginner. They’re easy to grow and incredibly versatile.
Gathering Your Supplies
Okay, now that we’ve chosen our basil variety, let’s gather our supplies. Here’s what you’ll need:
* Basil Seeds or Seedlings: You can start from seeds or buy seedlings from your local garden center. Seedlings will give you a head start.
* Container: Choose a pot that’s at least 6 inches deep and wide. Make sure it has drainage holes!
* Potting Mix: Use a high-quality potting mix that’s well-draining. Avoid using garden soil, as it can compact and suffocate the roots.
* Watering Can or Spray Bottle: For gentle watering.
* Sunny Location: Basil needs at least 6 hours of sunlight per day. A south-facing windowsill is ideal.
* Optional: Liquid fertilizer, plant labels, small gardening tools.
Planting Your Basil
Alright, let’s get our hands dirty! Here’s how to plant your basil, whether you’re starting from seeds or seedlings:
Starting from Seeds:
1. Prepare the Pot: Fill your container with potting mix, leaving about an inch of space at the top. Gently pat down the soil.
2. Sow the Seeds: Sprinkle the basil seeds evenly over the surface of the soil. You don’t need to bury them too deep; just lightly press them into the soil.
3. Water Gently: Use a spray bottle to mist the soil thoroughly. You want to keep the soil moist but not soggy.
4. Cover the Pot: Cover the pot with plastic wrap or a clear plastic bag to create a mini-greenhouse. This will help retain moisture and speed up germination.
5. Place in a Sunny Spot: Place the pot in a warm, sunny location.
6. Wait for Germination: Basil seeds typically germinate in 5-10 days. Once the seedlings emerge, remove the plastic wrap.
7. Thin the Seedlings: Once the seedlings have a few sets of true leaves (the leaves that look like basil leaves, not the initial seed leaves), thin them out so that they’re spaced about 2-3 inches apart. This will give them enough room to grow.
Planting Seedlings:
1. Prepare the Pot: Fill your container with potting mix, leaving about an inch of space at the top.
2. Dig a Hole: Dig a hole in the soil that’s slightly larger than the root ball of the seedling.
3. Remove the Seedling: Gently remove the seedling from its container. If the roots are tightly bound, gently loosen them with your fingers.
4. Place the Seedling: Place the seedling in the hole and fill in around it with potting mix. Gently pat down the soil.
5. Water Thoroughly: Water the seedling thoroughly until the water drains out of the bottom of the pot.
Caring for Your Basil Plant
Now that your basil is planted, it’s time to take care of it! Here’s what you need to do to keep your basil plant happy and healthy:
* Watering: Basil needs consistent moisture, but it doesn’t like to be waterlogged. Water your basil when the top inch of soil feels dry to the touch. Water deeply, until the water drains out of the bottom of the pot. Avoid getting the leaves wet, as this can lead to fungal diseases.
* Sunlight: Basil needs at least 6 hours of sunlight per day. If you don’t have a sunny windowsill, you can supplement with a grow light.
* Fertilizing: Basil is a heavy feeder, so it benefits from regular fertilization. Use a liquid fertilizer diluted to half strength every 2-3 weeks.
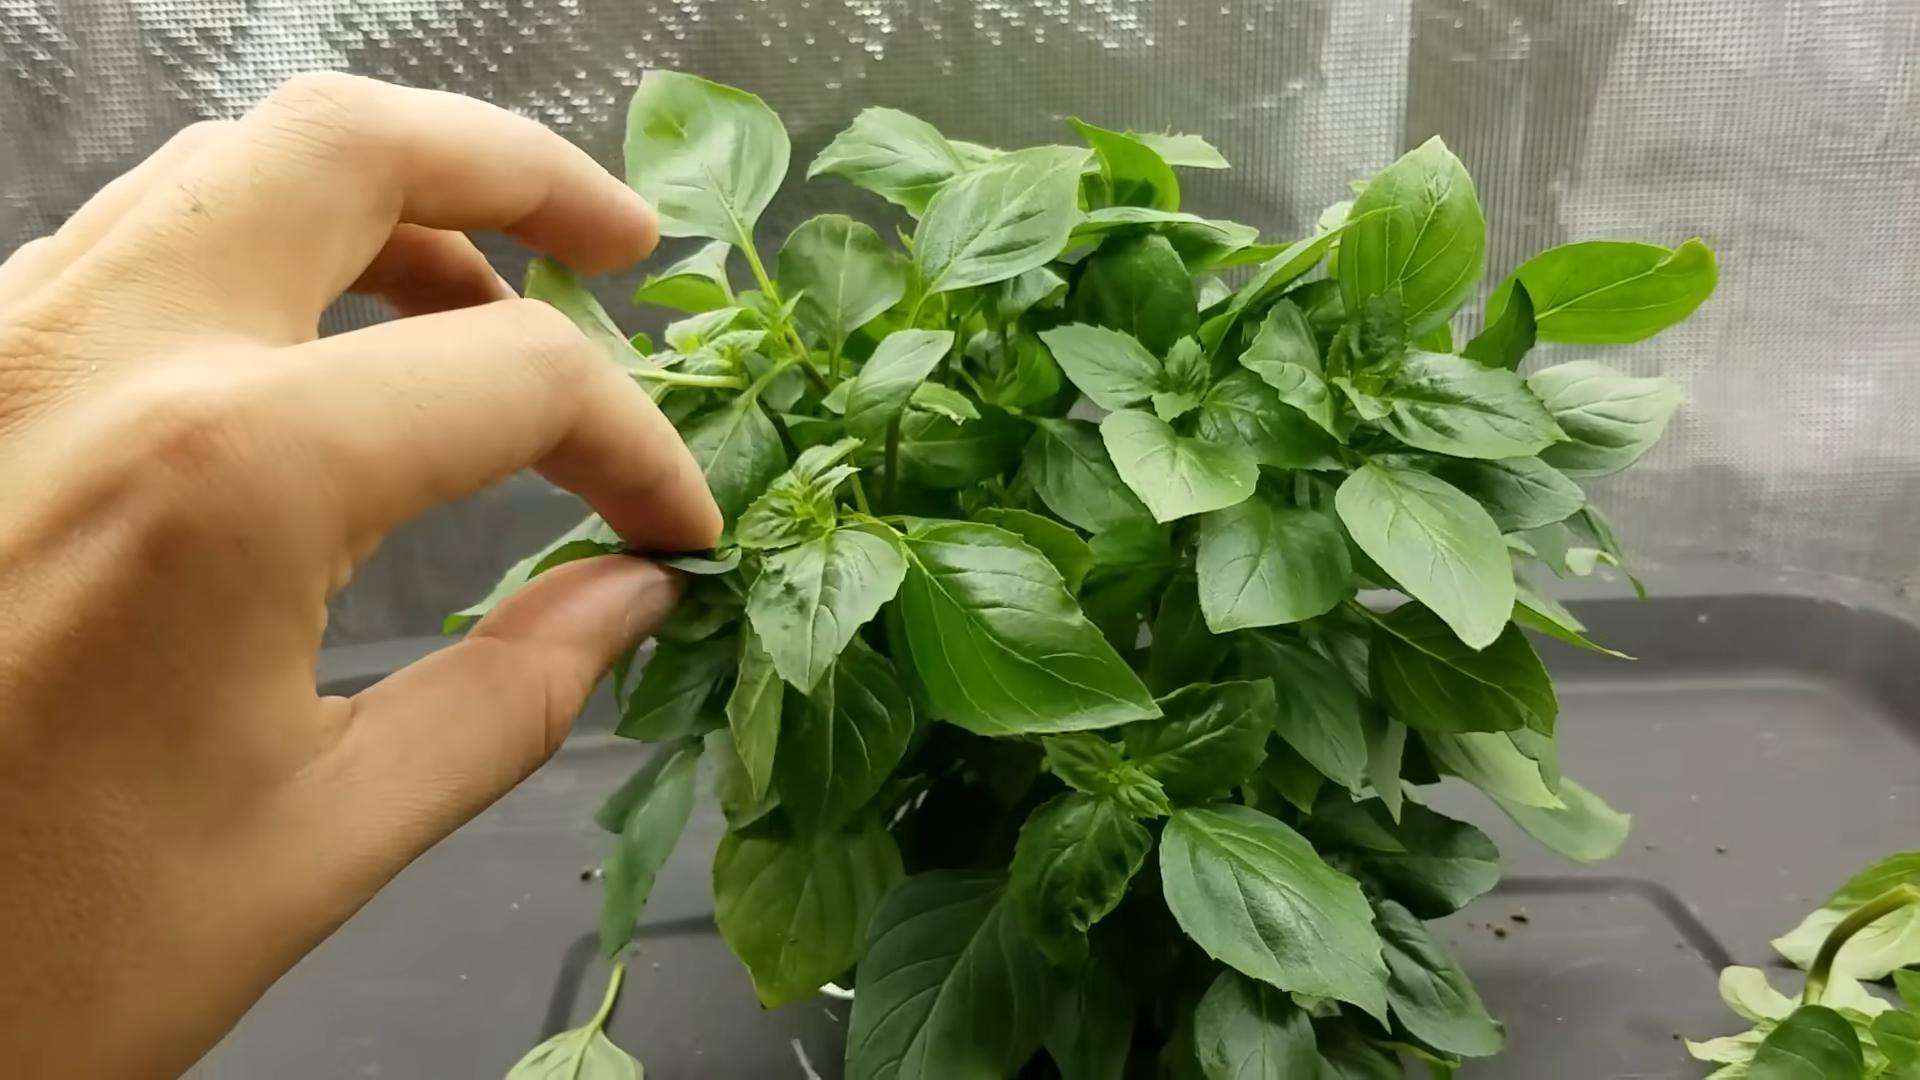
* Pinching: Pinching is essential for encouraging bushy growth. When your basil plant is about 6 inches tall, pinch off the top set of leaves. This will encourage the plant to branch out and produce more leaves. Continue pinching off the top sets of leaves every few weeks.
* Removing Flowers: Basil plants will eventually produce flowers. While the flowers are pretty, they will divert energy away from leaf production. To keep your basil plant producing leaves, pinch off the flower buds as soon as you see them.
* Pest Control: Basil is generally pest-resistant, but it can be susceptible to aphids, spider mites, and whiteflies. If you notice any pests, try spraying them off with a strong stream of water. You can also use insecticidal soap or neem oil.
* Disease Prevention: Basil can be susceptible to fungal diseases, such as powdery mildew and downy mildew. To prevent these diseases, avoid getting the leaves wet, provide good air circulation, and don’t overcrowd your plants.
Harvesting Your Basil
The best part of growing your own basil is, of course, harvesting it! Here’s how to harvest your basil properly:
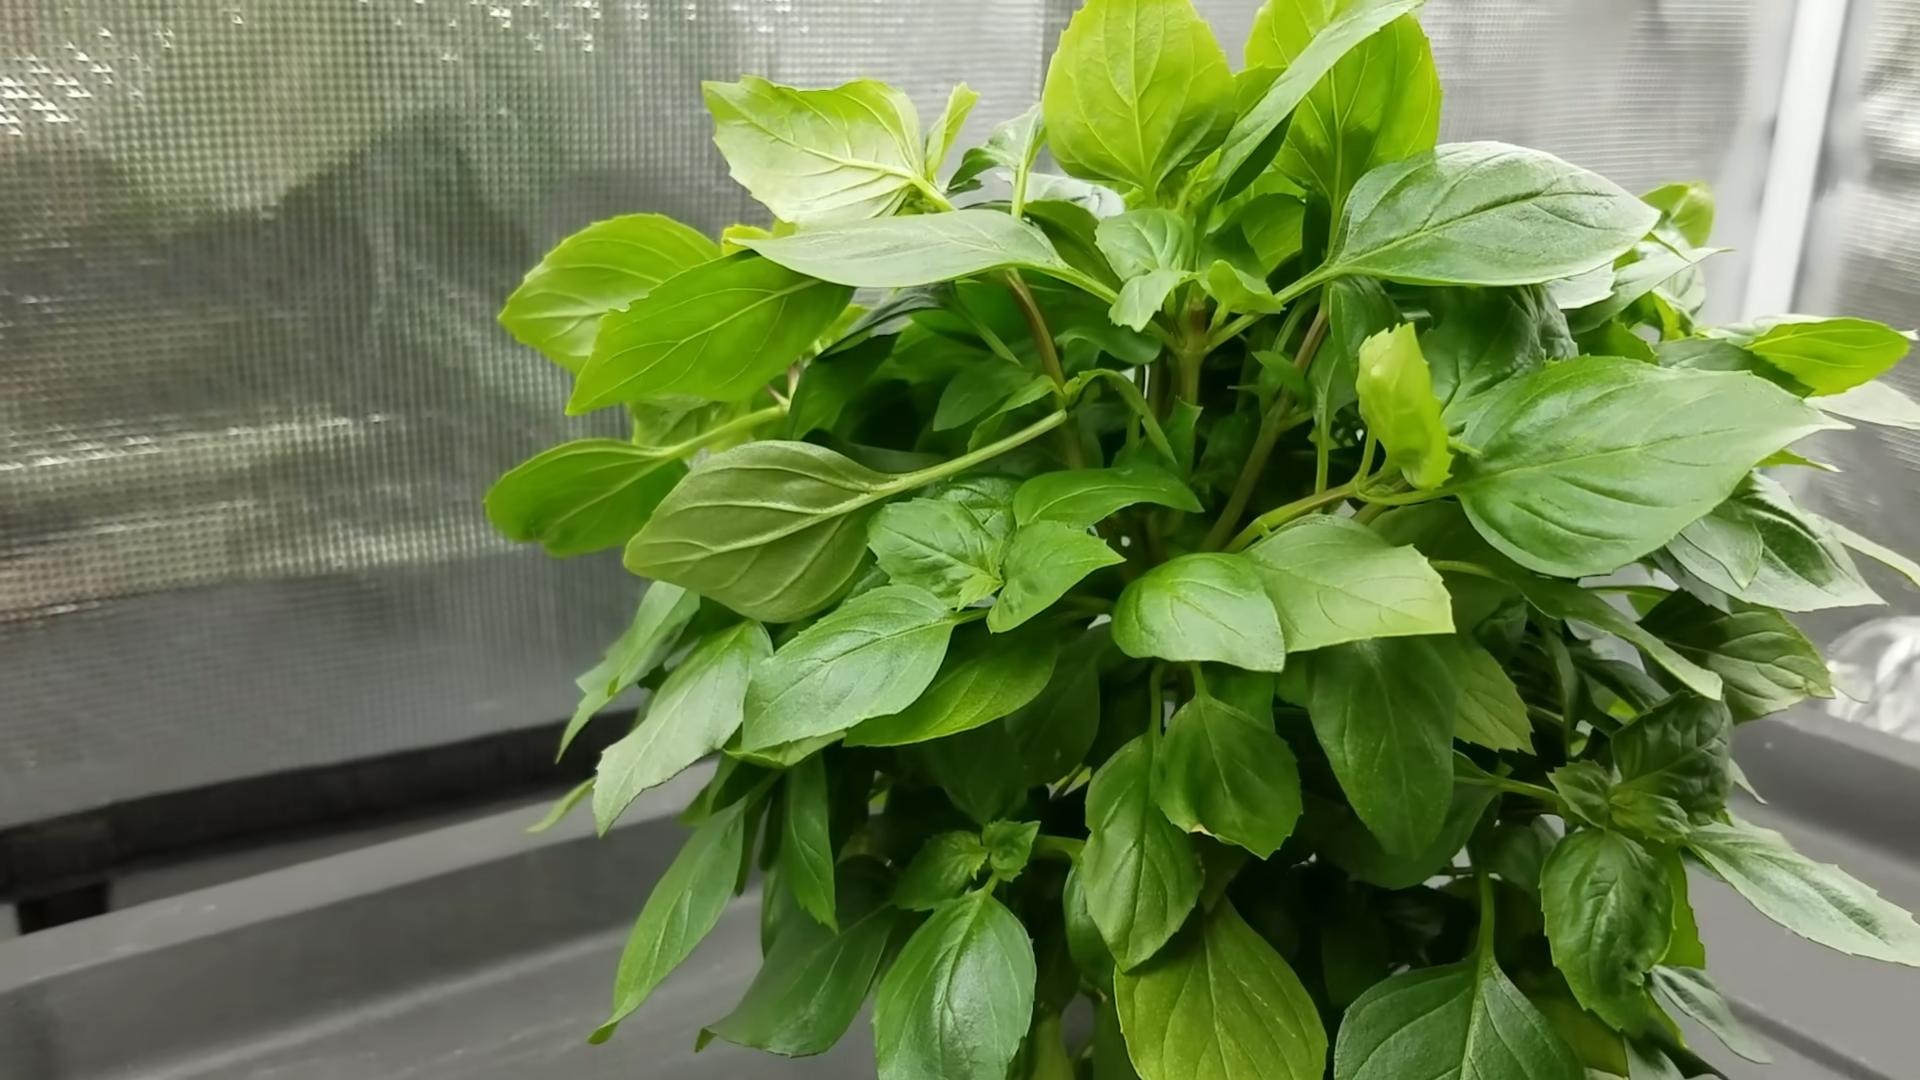
1. Wait Until Mature: Wait until your basil plant is at least 6 inches tall before you start harvesting.
2. Harvest Regularly: The more you harvest, the more your basil plant will produce. Harvest regularly to encourage bushy growth.
3. Pinch or Cut: You can either pinch off the leaves with your fingers or use scissors to cut them off.
4. Harvest from the Top: Always harvest from the top of the plant, just above a set of leaves. This will encourage the plant to branch out.
5. Don’t Harvest Too Much: Don’t harvest more than one-third of the plant at a time. This will give the plant time to recover.
6. Use Fresh: Basil is best used fresh. If you have more basil than you can use, you can store it in the refrigerator for a few days. To store basil, wrap the stems in a damp paper towel and place them in a plastic bag. You can also freeze basil leaves for longer storage.
Troubleshooting
Even with the best care, you might encounter some problems with your basil plant. Here are a few common issues and how to fix them:
* Yellowing Leaves: Yellowing leaves can be caused by overwatering, underwatering, nutrient deficiencies, or pests. Check the soil moisture and adjust your watering accordingly. Fertilize your plant regularly. Inspect the leaves for pests.
* Drooping Leaves: Drooping leaves can be caused by underwatering, heat stress, or root rot. Water your plant thoroughly. Move it to a cooler location. Check the roots for signs of rot.
* Leggy Growth: Leggy growth is caused by insufficient sunlight. Move your plant to a sunnier location or supplement with a grow light.
* Powdery Mildew: Powdery mildew is a fungal disease that appears as a white, powdery coating on the leaves. To treat powdery mildew, improve air circulation, avoid getting the leaves wet, and spray with a fungicide.
* Downy Mildew: Downy mildew is another fungal disease that causes yellow spots on the leaves. To treat downy mildew, improve air circulation, avoid getting the leaves wet, and spray with a fungicide.
Enjoying Your Homegrown Basil
Now that you’ve successfully grown your own basil, it’s time to enjoy the fruits (or rather, leaves!) of your labor. Here are a few ideas for using your homegrown basil:
* Pesto:
Conclusion
So, there you have it! Creating your own basil kitchen garden isn’t just a fun project; it’s a gateway to fresher, more flavorful meals and a more sustainable lifestyle. We’ve walked through the simple steps, from selecting the right basil variety to nurturing your plants for a bountiful harvest. The beauty of this DIY project lies in its accessibility – even if you’re a complete beginner, you can successfully grow your own basil.
Why is this a must-try? Because the difference between store-bought basil and freshly picked, homegrown basil is truly remarkable. The aroma is more intense, the flavor is brighter, and you have the satisfaction of knowing exactly where your food comes from. Plus, you’ll save money in the long run by reducing your reliance on expensive grocery store herbs.
But don’t stop there! Experiment with different basil varieties. Try growing Thai basil for Asian-inspired dishes, lemon basil for a citrusy twist, or purple basil for a beautiful and unique addition to your garden and your plate. You can also explore different container options, from repurposed jars to stylish terracotta pots, to create a basil garden that reflects your personal style. Consider companion planting your basil with tomatoes, peppers, or other vegetables to enhance their growth and flavor.
Growing your own basil kitchen garden is an incredibly rewarding experience. It connects you to nature, provides you with fresh, delicious herbs, and adds a touch of green to your home. We encourage you to give it a try! Start small, learn as you go, and don’t be afraid to experiment.
Once you’ve harvested your first batch of fragrant basil, we’d love to hear about your experience. Share your tips, tricks, and photos in the comments below. Let’s build a community of basil-loving gardeners and inspire others to embrace the joy of growing their own food. What are you waiting for? Get planting!
Frequently Asked Questions (FAQs)
What is the best time of year to start a basil kitchen garden?
The best time to start your basil kitchen garden is in the spring, after the last frost. Basil is a warm-weather herb and thrives in temperatures between 60°F and 80°F (15°C and 27°C). You can start seeds indoors 6-8 weeks before the last expected frost and then transplant them outdoors once the weather warms up. If you live in a warmer climate, you can plant basil directly outdoors in the spring or early summer.
How much sunlight does basil need?
Basil requires at least 6-8 hours of direct sunlight per day to thrive. Choose a sunny location for your basil kitchen garden, whether it’s a windowsill, balcony, or outdoor garden bed. If you’re growing basil indoors, consider using a grow light to supplement natural sunlight, especially during the winter months. Insufficient sunlight can lead to leggy growth and reduced flavor.
What kind of soil is best for growing basil?
Basil prefers well-draining soil that is rich in organic matter. A good potting mix for containers or a garden soil amended with compost or aged manure will provide the nutrients and drainage that basil needs. Avoid heavy clay soils, as they can retain too much moisture and lead to root rot. The ideal soil pH for basil is between 6.0 and 7.5.
How often should I water my basil plants?
Water your basil plants regularly, especially during hot, dry weather. The soil should be kept consistently moist but not waterlogged. Check the soil moisture by sticking your finger about an inch deep into the soil. If it feels dry, it’s time to water. Water at the base of the plant to avoid wetting the leaves, which can increase the risk of fungal diseases. In general, water deeply once or twice a week, depending on the weather and soil conditions.
How do I harvest basil to encourage growth?
Harvesting basil regularly is essential for encouraging bushy growth and preventing the plant from flowering. Once the plant has several sets of leaves, start pinching off the top sets of leaves, just above a leaf node (where the leaves grow out from the stem). This will encourage the plant to branch out and produce more leaves. Avoid cutting off more than one-third of the plant at a time. Once the plant starts to produce flower buds, pinch them off to prolong leaf production.
What are some common pests and diseases that affect basil?
Basil can be susceptible to several pests and diseases, including aphids, spider mites, whiteflies, and fungal diseases like powdery mildew and downy mildew. Inspect your plants regularly for signs of infestation or disease. If you notice any problems, take action promptly. For aphids, spider mites, and whiteflies, you can try spraying the plants with a strong stream of water or using insecticidal soap. For fungal diseases, ensure good air circulation around the plants and avoid overhead watering. You can also use a fungicide if necessary.
Can I grow basil indoors year-round?
Yes, you can grow basil indoors year-round if you provide the right conditions. Basil needs plenty of sunlight, well-draining soil, and regular watering. Place your basil plant in a sunny windowsill or under a grow light. Maintain a consistent temperature and humidity level. You may need to fertilize your basil plant regularly, especially during the growing season.
How do I propagate basil from cuttings?
Propagating basil from cuttings is a simple and effective way to create new plants. Take a 4-6 inch cutting from a healthy basil plant, just below a leaf node. Remove the lower leaves from the cutting, leaving only the top few sets of leaves. Place the cutting in a glass of water, making sure that the lower nodes are submerged. Change the water every few days. After a week or two, roots will begin to form. Once the roots are about an inch long, you can transplant the cutting into a pot filled with well-draining soil.
Can I freeze basil for later use?
Yes, you can freeze basil for later use. There are several ways to freeze basil. One method is to blanch the basil leaves in boiling water for a few seconds, then plunge them into ice water. Drain the leaves and pat them dry. Arrange the leaves in a single layer on a baking sheet and freeze them until solid. Then, transfer the frozen leaves to a freezer bag or container. Another method is to puree the basil leaves with olive oil and freeze the mixture in ice cube trays. Once the cubes are frozen, transfer them to a freezer bag or container. Frozen basil will retain its flavor for several months.
What are some creative ways to use my homegrown basil?
The possibilities are endless! Use it in pesto, salads, pasta sauces, soups, and sandwiches. Add it to pizzas, omelets, and stir-fries. Infuse it in olive oil or vinegar. Make basil lemonade or iced tea. Experiment with different flavor combinations and discover your own favorite ways to enjoy your homegrown basil.

Leave a Comment