

Growing Bitter Melon Easily can seem daunting, I know! But trust me, with a few clever tricks and a little DIY spirit, you can harvest this unique and nutritious vegetable right in your own backyard. Forget those expensive grocery store prices and questionable freshness – imagine stepping outside and picking your own vibrant, bumpy bitter melon, ready to add a distinctive flavor to your next stir-fry or soup.
Bitter melon, also known as bitter gourd or karela, has a rich history, deeply rooted in Asian and African cultures. For centuries, it’s been prized not only for its culinary uses but also for its medicinal properties. From traditional remedies to modern cuisine, this fascinating fruit has earned its place as a staple ingredient.
But why should you bother Growing Bitter Melon Easily at home? Well, for starters, it’s incredibly rewarding to nurture a plant from seed to harvest. Plus, you’ll have complete control over the growing process, ensuring your bitter melons are free from harmful pesticides and chemicals. More importantly, mastering these DIY tricks will empower you to cultivate a thriving garden, regardless of your experience level. So, let’s dive in and unlock the secrets to a bountiful bitter melon harvest!

Growing Bitter Melon Like a Pro: My Foolproof DIY Guide
Hey there, fellow gardening enthusiasts! I’m so excited to share my tried-and-true method for growing bitter melon, also known as bitter gourd or karela. It’s a unique and nutritious vegetable, and while it might seem intimidating, I promise you can grow it successfully at home with a little know-how. I’ve broken down the process into easy-to-follow steps, so let’s get started!
Choosing Your Bitter Melon Variety
Before we dive into the nitty-gritty, let’s talk about choosing the right variety. There are several types of bitter melon, each with slightly different characteristics. Some are longer and thinner, while others are shorter and rounder. Some are darker green, and others are lighter.
* Chinese Bitter Melon: These are typically longer, smoother, and have a lighter green color. They tend to be less bitter than other varieties.
* Indian Bitter Melon: These are usually shorter, more pointed, and have a darker green color with pronounced ridges. They are generally more bitter.
* Japanese Bitter Melon: This variety is often smaller and rounder, with a bumpy texture.
I personally prefer the Chinese variety because of its milder flavor, but feel free to experiment and find the one that suits your taste! You can usually find seeds at your local garden center or online.
Preparing for Planting: Seeds and Soil
Okay, now that we’ve chosen our variety, let’s get our hands dirty! Proper preparation is key to a successful harvest.
* Seed Starting vs. Direct Sowing: Bitter melon thrives in warm weather, so if you live in a cooler climate, I highly recommend starting your seeds indoors about 4-6 weeks before the last expected frost. If you live in a warmer climate with a long growing season, you can direct sow the seeds directly into the ground after the soil has warmed up. I’ve had success with both methods, but starting indoors gives you a head start.
* Seed Scarification: Bitter melon seeds have a tough outer shell, which can make germination difficult. To improve germination rates, I like to scarify the seeds. This involves gently nicking or scratching the seed coat to allow water to penetrate more easily. You can do this with a nail file, sandpaper, or even a sharp knife (be careful!). Just make a small nick, being careful not to damage the inside of the seed.
* Seed Soaking: After scarifying, soak the seeds in warm water for 24-48 hours. This will further soften the seed coat and encourage germination. I usually change the water every 12 hours.
* Soil Preparation: Bitter melon needs well-draining soil that is rich in organic matter. Before planting, amend your soil with compost, aged manure, or other organic materials. This will improve drainage, fertility, and water retention. I aim for a slightly acidic to neutral soil pH (around 6.0-7.0).
Planting Your Bitter Melon
Alright, let’s get those seeds in the ground!
Starting Seeds Indoors (if applicable)
1. Fill Seed Trays or Pots: Fill seed trays or small pots with a good quality seed starting mix.
2. Plant the Seeds: Plant the scarified and soaked seeds about ½ inch deep in the soil.
3. Water Gently: Water the soil gently to moisten it, but avoid overwatering.
4. Provide Warmth and Light: Place the seed trays or pots in a warm location (around 75-85°F) and provide plenty of light. A heat mat can be helpful for maintaining consistent warmth. If you don’t have a grow light, a sunny windowsill will work, but be sure to rotate the trays regularly to prevent the seedlings from leaning towards the light.
5. Keep Soil Moist: Keep the soil consistently moist, but not soggy.
6. Transplant Seedlings: Once the seedlings have developed a few sets of true leaves (usually after 4-6 weeks), they are ready to be transplanted outdoors.
Direct Sowing (if applicable)
1. Prepare the Planting Area: Choose a sunny location with well-drained soil. Amend the soil with compost or other organic matter.
2. Sow the Seeds: Sow the scarified and soaked seeds directly into the ground about ½ inch deep, spacing them about 12-18 inches apart.
3. Water Gently: Water the soil gently to moisten it, but avoid overwatering.
4. Keep Soil Moist: Keep the soil consistently moist until the seedlings emerge.
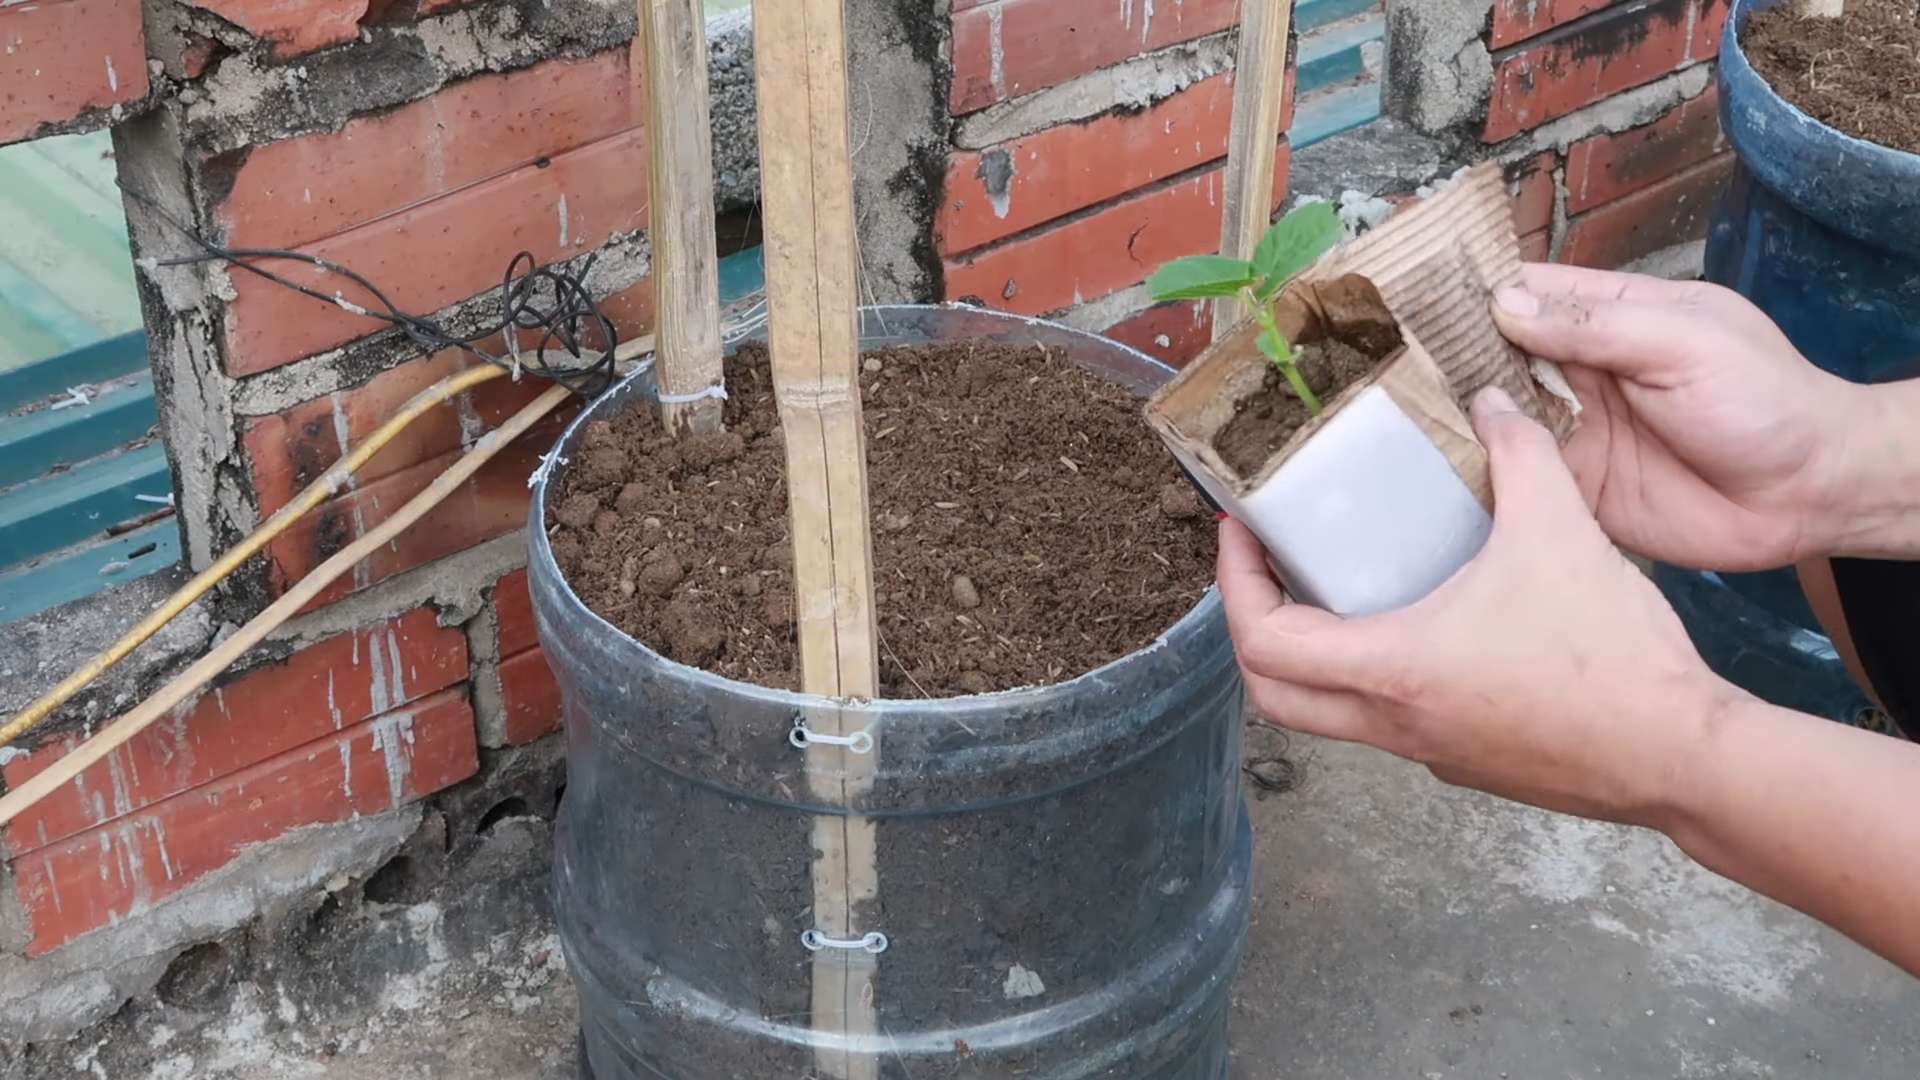
Transplanting Seedlings Outdoors
1. Harden Off Seedlings: Before transplanting your seedlings outdoors, you’ll need to harden them off. This process gradually acclimates the seedlings to outdoor conditions. Start by placing the seedlings outdoors in a sheltered location for a few hours each day, gradually increasing the amount of time they spend outdoors over the course of a week.
2. Choose a Sunny Location: Select a sunny location with well-drained soil.
3. Prepare the Planting Hole: Dig a hole that is slightly larger than the root ball of the seedling.
4. Gently Remove Seedling: Gently remove the seedling from its pot, being careful not to damage the roots.
5. Place Seedling in Hole: Place the seedling in the hole and backfill with soil.
6. Water Thoroughly: Water the seedling thoroughly after planting.
7. Add Support: Bitter melon vines need support to climb. Install a trellis, fence, or other support structure near the seedlings.
Providing Support: Trellising is Key!
Bitter melon is a vine, so it needs a strong support system to climb. This is crucial for healthy growth and a good harvest.
* Types of Support: I’ve used trellises, fences, and even sturdy tomato cages with great success. The key is to provide a structure that the vines can easily grip and climb.
* Installing the Support: Install the support structure before or shortly after transplanting the seedlings. This will prevent you from disturbing the roots later on.
* Training the Vines: As the vines grow, gently guide them onto the support structure. You may need to tie them loosely to the support with twine or plant ties.
Watering and Fertilizing
Consistent watering and fertilization are essential for healthy growth and abundant fruit production.
* Watering: Water your bitter melon plants regularly, especially during hot, dry weather. Aim to keep the soil consistently moist, but not soggy. I usually water deeply a couple of times a week, depending on the weather.
* Fertilizing: Feed your bitter melon plants with a balanced fertilizer every 2-3 weeks. I like to use a fertilizer that is high in phosphorus and potassium, which promotes flowering and fruit development. You can also use a liquid seaweed fertilizer or compost tea.
Pest and Disease Control
Like any plant, bitter melon can be susceptible to pests and diseases. Here’s what I do to keep my plants healthy:
* Common Pests: Aphids, spider mites, and squash bugs are common pests that can attack bitter melon plants. I usually control these pests with insecticidal soap or neem oil.
* Common Diseases: Powdery mildew and downy mildew are common fungal diseases that can affect bitter melon plants. To prevent these diseases, make sure your plants have good air circulation and avoid overhead watering. If you notice signs of disease, treat the plants with a fungicide.
* Prevention is Key: The best way to prevent pests and diseases is to keep your plants healthy and strong. This means providing them with adequate water, fertilizer, and sunlight.
Harvesting Your Bitter Melon
The moment we’ve all been waiting for! Harvesting your own homegrown bitter melon is incredibly rewarding.
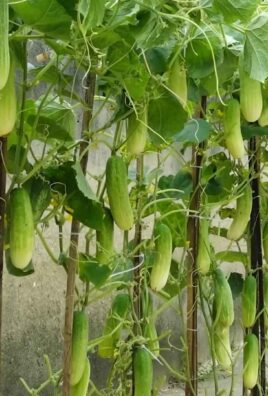
* When to Harvest: Bitter melon is typically ready to harvest about 2-3 months after planting. The fruits should be firm and have a vibrant green color. The size of the fruit will vary depending on the variety.
* How to Harvest: Use a sharp knife or pruning shears to cut the fruit from the vine. Be careful not to damage the vine.
* Taste Test: The bitterness of the fruit increases as it ripens, so harvest it when it’s at the desired level of bitterness. I usually harvest mine when they are still relatively young and green.
Enjoying Your Harvest
Now that you’ve harvested your bitter melon, it’s time to enjoy it! There are many ways to cook and eat bitter melon.
* Popular Dishes: Bitter melon can be stir-fried, stuffed, curried, or even juiced. It’s a popular ingredient in many Asian cuisines.
* Reducing Bitterness: If you find the bitterness too strong, you can soak the sliced bitter melon in salt water for about 30 minutes before cooking. This will help to draw out some of the bitterness.
* Storage: Store your harvested
Conclusion
So, there you have it! Growing bitter melon easily at home is not only achievable, but it’s also incredibly rewarding. Forget those expensive, often lackluster, store-bought bitter melons. Imagine stepping into your own backyard and harvesting fresh, vibrant, and intensely flavorful bitter melon whenever you need it. This DIY trick, focusing on [specific technique mentioned in the article, e.g., vertical gardening and strategic pruning], empowers you to take control of your harvest, ensuring you get the best possible quality and taste.
This isn’t just about saving money; it’s about connecting with your food, understanding its growth cycle, and enjoying the satisfaction of nurturing something from seed to table. The vibrant green vines climbing your trellis, the delicate yellow flowers, and finally, the bumpy, intriguing fruit – it’s a miniature ecosystem unfolding right before your eyes.
But the benefits extend beyond the purely aesthetic and emotional. Homegrown bitter melon allows you to control the growing environment, ensuring it’s free from harmful pesticides and chemicals. You know exactly what your bitter melon has been exposed to, giving you peace of mind and a healthier, more nutritious final product.
Why is this a must-try? Because it simplifies the process, maximizes your yield, and delivers a superior product compared to what you can typically find in stores. Plus, it’s a fantastic learning experience for gardeners of all levels.
Looking for variations? Consider experimenting with different varieties of bitter melon. Some are smaller and more compact, perfect for container gardening, while others are larger and more suited for sprawling trellises. You can also adjust the soil composition to influence the bitterness level. Adding more organic matter can sometimes mellow the flavor slightly. Another variation is to try companion planting. Marigolds, for example, can help deter pests, while basil can improve the overall health of your bitter melon plants.
Don’t be afraid to get creative with your trellis design! A simple bamboo structure works wonders, but you can also repurpose old ladders, fences, or even create a living wall. The possibilities are endless.
We wholeheartedly encourage you to give this DIY trick a try. It’s easier than you think, and the rewards are well worth the effort. Once you’ve tasted the difference between homegrown and store-bought bitter melon, you’ll never go back.
And most importantly, we want to hear about your experience! Share your photos, tips, and challenges in the comments section below. Let’s build a community of bitter melon enthusiasts and learn from each other. What worked for you? What didn’t? What unique variations did you try? Your insights could help other gardeners achieve success. So, grab your seeds, prepare your soil, and get ready to embark on a rewarding journey of growing bitter melon easily at home. Happy gardening!
Frequently Asked Questions (FAQ)
What is the best time of year to plant bitter melon?
Bitter melon thrives in warm weather, so the best time to plant is in late spring or early summer, after the last frost. The soil temperature should be consistently above 65°F (18°C) for optimal germination. If you live in a region with a short growing season, you can start the seeds indoors 4-6 weeks before the last expected frost and transplant them outdoors once the weather warms up.
How much sunlight does bitter melon need?
Bitter melon requires at least 6-8 hours of direct sunlight per day to produce a good yield. Choose a location in your garden that receives full sun throughout the day. If you’re growing bitter melon in containers, make sure to place them in a sunny spot. Insufficient sunlight can lead to stunted growth and reduced fruit production.
What kind of soil is best for growing bitter melon?
Bitter melon prefers well-drained, fertile soil that is rich in organic matter. Amend your soil with compost, aged manure, or other organic materials before planting to improve its drainage and fertility. The ideal soil pH for bitter melon is between 6.0 and 7.0. You can test your soil pH using a soil testing kit and adjust it accordingly.
How often should I water my bitter melon plants?
Bitter melon plants need consistent moisture, especially during hot weather. Water deeply and regularly, aiming to keep the soil consistently moist but not waterlogged. Check the soil moisture regularly by sticking your finger into the soil. If the top inch feels dry, it’s time to water. Avoid overhead watering, as this can increase the risk of fungal diseases. Drip irrigation or soaker hoses are excellent options for delivering water directly to the roots.
What kind of fertilizer should I use for bitter melon?
Bitter melon benefits from regular fertilization throughout the growing season. Use a balanced fertilizer with equal amounts of nitrogen, phosphorus, and potassium (e.g., 10-10-10) or a fertilizer specifically formulated for vegetables. Apply the fertilizer according to the package instructions. You can also supplement with organic fertilizers such as compost tea or fish emulsion. Avoid over-fertilizing, as this can lead to excessive vegetative growth and reduced fruit production.
How do I control pests and diseases on my bitter melon plants?
Bitter melon can be susceptible to various pests and diseases, including aphids, spider mites, cucumber beetles, and powdery mildew. Regularly inspect your plants for signs of infestation or disease. Use organic pest control methods such as insecticidal soap, neem oil, or horticultural oil to control pests. For fungal diseases, ensure good air circulation around the plants and avoid overhead watering. You can also use fungicides if necessary. Companion planting with herbs like basil and marigolds can also help deter pests.
When is bitter melon ready to harvest?
Bitter melon is typically ready to harvest 8-12 weeks after planting. The fruit should be firm, green, and slightly immature. The size and shape of the fruit will vary depending on the variety. Harvest the fruit before it turns yellow or orange, as this indicates that it is overripe and will become more bitter. Use a sharp knife or pruning shears to cut the fruit from the vine, leaving a short stem attached.
How do I store bitter melon after harvesting?
Store harvested bitter melon in the refrigerator for up to a week. Wrap the fruit in a paper towel or place it in a plastic bag to prevent it from drying out. Bitter melon can also be frozen for longer storage. Blanch the fruit in boiling water for 2-3 minutes, then transfer it to an ice bath to stop the cooking process. Drain the fruit and store it in freezer bags or containers.
Can I eat the seeds of bitter melon?
The seeds of bitter melon are edible, but they are very bitter. Some people remove the seeds before cooking, while others leave them in for added flavor. The seeds contain a compound called vicine, which can cause favism in some individuals. If you have a history of favism, avoid eating the seeds.
How can I reduce the bitterness of bitter melon?
There are several ways to reduce the bitterness of bitter melon. One method is to soak the sliced fruit in salted water for 30 minutes before cooking. This helps to draw out some of the bitter compounds. Another method is to blanch the fruit in boiling water for a few minutes before cooking. You can also remove the white pith inside the fruit, as this is where most of the bitterness is concentrated. Cooking bitter melon with acidic ingredients such as vinegar or lemon juice can also help to balance the flavor.
Leave a Comment