

Homemade Wood Polish Recipe: Unlock the secret to restoring your furniture’s natural beauty with a simple, effective, and surprisingly affordable DIY solution! Are you tired of dull, lifeless wood surfaces? Do you cringe at the thought of harsh chemicals and expensive store-bought polishes? I know I used to! That’s why I’m so excited to share this incredible homemade wood polish recipe with you.
The art of wood polishing dates back centuries, with ancient civilizations using natural oils and waxes to protect and enhance their prized wooden possessions. Think of the gleaming furniture in royal palaces or the meticulously cared-for instruments of master craftsmen – all testament to the enduring value of a well-polished surface. Today, we can tap into that same tradition with ingredients readily available in our own homes.
Let’s face it, maintaining the luster of our wooden furniture can feel like a constant battle. Dust, scratches, and everyday wear and tear can quickly diminish its appeal. But with this homemade wood polish recipe, you can easily revive your furniture, protect it from future damage, and save money in the process. Plus, you’ll have the satisfaction of knowing you’re using a natural, eco-friendly solution that’s gentle on your furniture and the environment. Get ready to say goodbye to dullness and hello to a radiant, revitalized home!
DIY Homemade Wood Polish: Revive Your Furniture with Natural Ingredients
Hey there, fellow DIY enthusiasts! Are your wooden furniture pieces looking a little dull? Don’t rush out to buy expensive commercial polishes filled with questionable chemicals. I’m going to show you how to create your own amazing wood polish using simple, natural ingredients you probably already have in your kitchen! This recipe is not only cost-effective but also much gentler on your furniture and the environment. Let’s get started!
What You’ll Need: The Essential Ingredients
Before we dive into the process, let’s gather our supplies. This recipe is super flexible, and you can adjust the ratios to suit your preferences and the type of wood you’re working with.
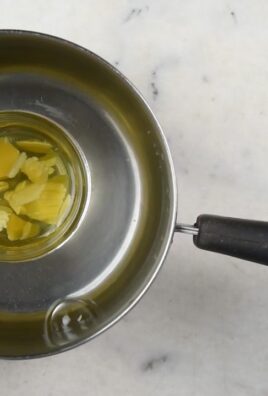
* Olive Oil: This is our primary polishing agent. It nourishes the wood, adds shine, and helps protect it from drying out.
* Lemon Juice: Lemon juice acts as a mild cleaner and helps to cut through any grime or build-up on the wood surface. It also adds a lovely, fresh scent.
* White Vinegar (Optional): For tougher stains or watermarks, a little white vinegar can be added. It’s a powerful cleaner, so use it sparingly.
* Essential Oils (Optional): For a pleasant fragrance and added benefits, you can incorporate a few drops of your favorite essential oils. Orange, lemon, cedarwood, and lavender are all excellent choices for wood polish.
* Soft Cloths: You’ll need at least two clean, soft cloths – one for applying the polish and one for buffing. Microfiber cloths work best.
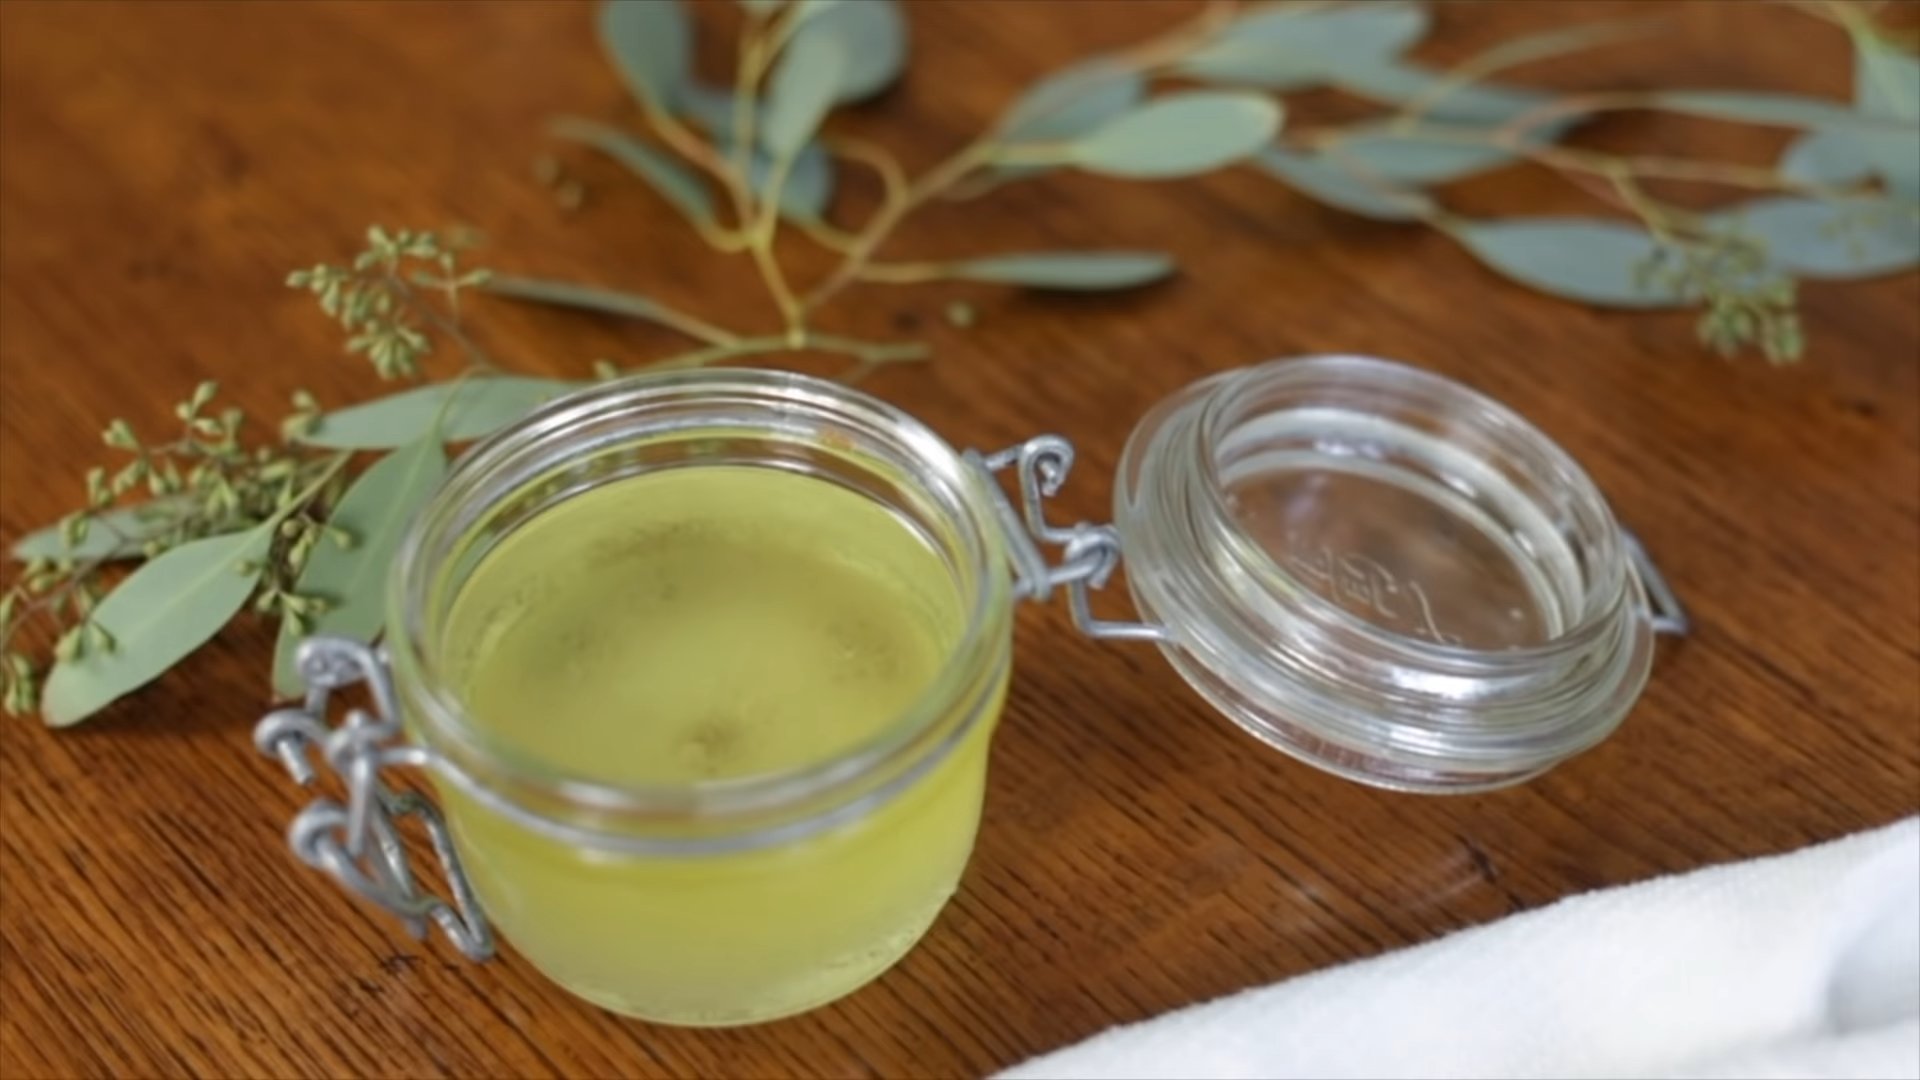
* Glass Jar or Bottle: To store your homemade wood polish. Make sure it’s clean and airtight.
* Measuring Spoons or Cups: For accurate measurements.
* Funnel (Optional): To help pour the polish into the jar or bottle without spilling.
The Basic Recipe: Getting the Ratios Right
The foundation of our homemade wood polish is a simple blend of olive oil and lemon juice. Here’s the basic ratio I like to use:
* 2 parts Olive Oil
* 1 part Lemon Juice
For example, you could use 1/2 cup of olive oil and 1/4 cup of lemon juice. Feel free to adjust this ratio based on the condition of your furniture. If your wood is very dry, you might want to use a bit more olive oil. If it’s particularly dirty, a little extra lemon juice can help.
Step-by-Step Instructions: Polishing Like a Pro
Now that we have our ingredients and equipment ready, let’s get to the fun part – making and applying our homemade wood polish!
1. Combine the Ingredients: In your glass jar or bottle, carefully pour in the olive oil and lemon juice. If you’re using white vinegar, add a small amount (about 1 tablespoon for every 1/2 cup of olive oil). If you’re adding essential oils, add a few drops (3-5 drops per 1/2 cup of olive oil).
2. Mix Thoroughly: Close the jar or bottle tightly and shake well to combine all the ingredients. The mixture might look a little cloudy at first, but that’s perfectly normal.
3. Test in an Inconspicuous Area: Before applying the polish to the entire piece of furniture, it’s always a good idea to test it in a small, hidden area, such as the back of a leg or under a table. This will ensure that the polish doesn’t react negatively with the wood finish. Apply a small amount of polish to the test area, let it sit for a few minutes, and then wipe it off with a clean cloth. Check for any discoloration or damage.
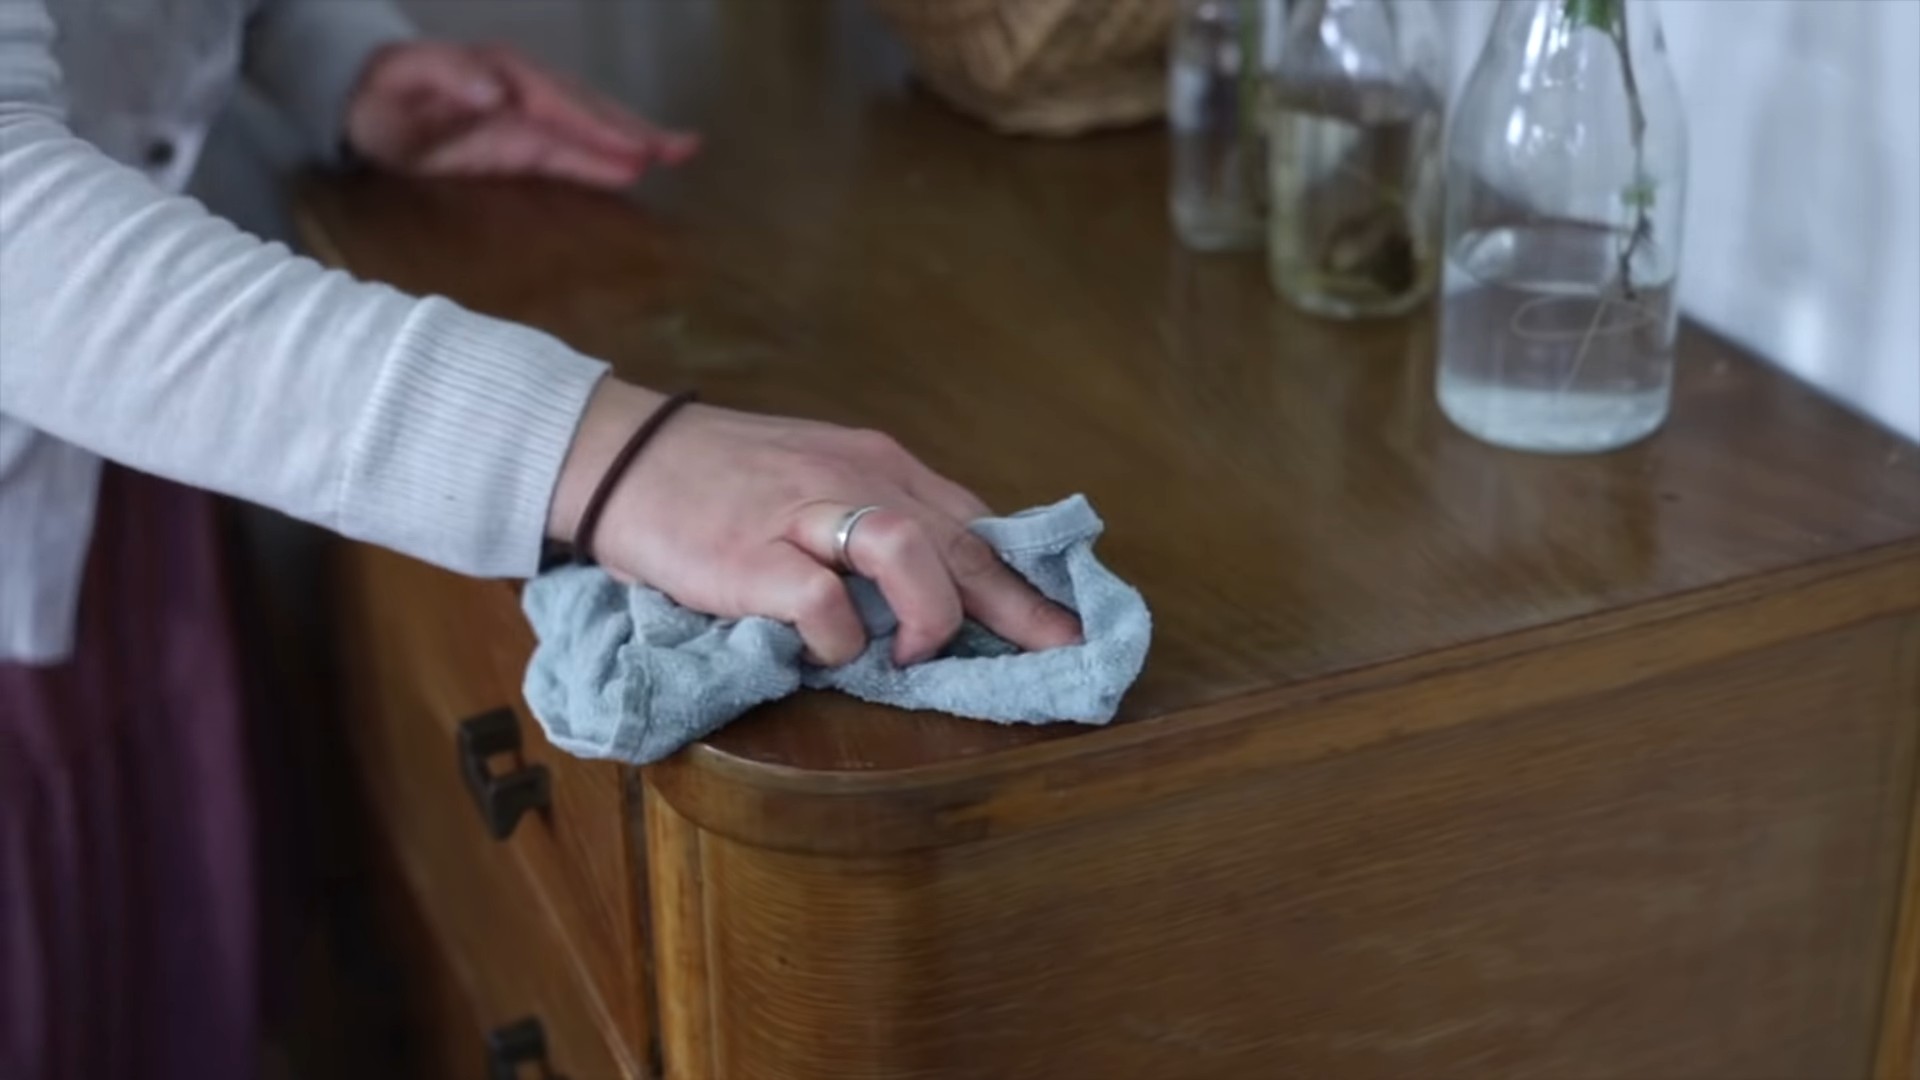
4. Apply the Polish: Once you’re satisfied with the test, you can start applying the polish to the rest of the furniture. Dip a clean, soft cloth into the polish and wring out any excess. You want the cloth to be damp, not dripping wet.
5. Work in Small Sections: Apply the polish to the wood surface in small, circular motions. Work in sections, making sure to cover the entire surface evenly.
6. Let it Sit: Allow the polish to sit on the wood for a few minutes (5-10 minutes is usually sufficient). This will give the oil time to penetrate the wood and nourish it.
7. Buff to a Shine: Using a clean, dry cloth, buff the wood surface in circular motions until it shines. This will remove any excess polish and bring out the natural luster of the wood.
8. Repeat as Needed: If your furniture is particularly dry or dull, you may need to repeat the polishing process.
Dealing with Specific Issues: Troubleshooting Tips
Sometimes, you might encounter specific issues when polishing your furniture. Here are a few tips to help you troubleshoot:
* Watermarks: For watermarks, try using a slightly stronger solution of lemon juice and olive oil. You can also try gently rubbing the watermark with a soft cloth dampened with white vinegar. Be sure to test in an inconspicuous area first.
* Greasy Residue: If you’re left with a greasy residue after polishing, you’ve probably used too much polish. Simply buff the surface again with a clean, dry cloth until the residue is gone.
* Dull Finish: If your furniture still looks dull after polishing, it might be due to a build-up of old wax or polish. You may need to clean the furniture with a mild soap and water solution before polishing. Make sure the wood is completely dry before applying the polish.
Adding Extra Oomph: Customizing Your Polish
Want to take your homemade wood polish to the next level? Here are a few ideas for customizing it to suit your specific needs and preferences:
* Beeswax Polish: For a more durable and protective finish, you can add a small amount of melted beeswax to your polish. Melt the beeswax in a double boiler and then stir it into the olive oil and lemon juice mixture. The beeswax will create a hard, protective layer on the wood surface. Use about 1 tablespoon of beeswax per 1/2 cup of olive oil.
* Walnut Oil Polish: Walnut oil is another excellent option for wood polish. It’s a drying oil, which means it will eventually harden and create a protective finish. It also has a beautiful, rich color that can enhance the natural beauty of the wood. You can substitute walnut oil for olive oil in the basic recipe.
* Tea Tree Oil: If you’re concerned about mold or mildew, you can add a few drops of tea tree oil to your polish. Tea tree oil has antifungal and antibacterial properties that can help protect your furniture from damage.
Safety First: Important Precautions
While our homemade wood polish is generally safe and gentle, it’s still important to take a few precautions:
* Always test in an inconspicuous area before applying to the entire piece of furniture.
* Avoid using the polish on delicate or antique furniture without consulting a professional.
* Keep the polish out of reach of children and pets.
* Store the polish in a cool, dry place away from direct sunlight.
* If you experience any skin irritation after using the polish, discontinue use and wash your hands thoroughly with soap and water.
Storing Your Homemade Polish: Keeping it Fresh
To keep your homemade wood polish fresh and effective, store it in an airtight glass jar or bottle in a cool, dry place away from direct sunlight. The polish should last for several months. If you notice any changes in color or odor, discard it.
Frequency of Polishing: How Often Should You Polish?
The frequency of polishing depends on the type of wood, the finish, and how often the furniture is used. In general, you should polish your furniture every few months to maintain its shine and protect it from damage. However, if your furniture is exposed to a lot of sunlight or humidity, you may need to polish it more frequently.
Beyond Furniture: Other Uses for Your Homemade Polish
Our homemade wood polish isn’t just for furniture! You can also use it to polish other wooden items, such as:
* Wooden Floors: Add a small amount of polish to a damp mop and use it to clean and shine your wooden floors.
* Wooden Cutting Boards: Polish your wooden cutting boards with the polish to keep them moisturized and prevent them from cracking.
* Wooden Utensils: Polish your wooden spoons, spatulas, and other utensils to keep them looking their best.
* Wooden Picture Frames: Give your wooden picture frames a quick polish to bring out their shine.
Why Choose Homemade? The Benefits are Clear
Making your own wood polish offers a multitude of benefits:
* Cost-Effective: It’s significantly cheaper than buying commercial polishes.
* Natural Ingredients: You know exactly what’s going into your polish, avoiding harsh chemicals and toxins.
* Environmentally Friendly: Reduces your reliance on products with potentially harmful environmental impacts.
* Customizable:
Conclusion
So, there you have it! A simple, effective, and surprisingly affordable way to breathe new life into your wooden furniture. This homemade wood polish recipe isn’t just about saving money; it’s about knowing exactly what’s going onto your cherished pieces. No harsh chemicals, no mystery ingredients – just natural goodness that nourishes and protects.
Why is this DIY trick a must-try? Because it delivers professional-quality results without the professional price tag. Store-bought polishes often contain silicones and other additives that can build up over time, dulling the finish and making future refinishing more difficult. Our homemade version avoids these pitfalls, leaving your wood looking naturally radiant and feeling smooth to the touch. Plus, the subtle scent of essential oils (if you choose to add them) is far more pleasant than the chemical odor of many commercial products.
Beyond the basic recipe, there’s plenty of room for customization. For darker woods like walnut or mahogany, consider adding a teaspoon of strong brewed coffee to the mixture. This will enhance the depth of the color and provide an extra layer of richness. If you prefer a thicker polish, slightly increase the amount of beeswax. Conversely, for a lighter polish that’s easier to apply, reduce the beeswax and add a touch more olive oil. Experiment with different essential oil combinations to create your signature scent. Lavender and lemon offer a fresh, clean aroma, while cedarwood and orange provide a warm, inviting fragrance. Remember to always test your polish on an inconspicuous area first to ensure compatibility with your wood finish.
We’re confident that once you try this homemade wood polish, you’ll never go back to store-bought alternatives. It’s a sustainable, eco-friendly, and cost-effective way to care for your wooden furniture and keep it looking its best for years to come.
Don’t just take our word for it – give it a try! We encourage you to experiment with the recipe, find the variations that work best for your furniture, and share your experiences with us. Post photos of your revitalized furniture on social media using #HomemadeWoodPolish and let us know what you think. We can’t wait to see the amazing results you achieve! Your feedback will not only inspire others but also help us refine and improve this recipe for everyone. Let’s bring back the shine to our wooden treasures, one homemade batch at a time!
Frequently Asked Questions (FAQ)
What types of wood is this homemade wood polish suitable for?
This homemade wood polish is generally safe for most types of finished wood, including hardwoods like oak, maple, cherry, and walnut, as well as softwoods like pine and cedar. However, it’s crucial to test the polish on an inconspicuous area first, especially if you’re unsure about the type of finish on your furniture. Avoid using this polish on unfinished wood, as it may not absorb properly and could leave a sticky residue. Also, be cautious when using it on antique furniture with delicate finishes; consult with a professional if you have any concerns.
How often should I use this homemade wood polish?
The frequency of polishing depends on the type of wood, the level of use, and the environment. For furniture that gets frequent use, such as dining tables or coffee tables, polishing every 1-2 months is recommended. For furniture that sees less use, such as side tables or dressers, polishing every 3-6 months may be sufficient. In dry climates, wood may require more frequent polishing to prevent it from drying out and cracking. Always observe your furniture and polish it when it starts to look dull or feel dry. Over-polishing can lead to a buildup of residue, so it’s best to err on the side of less frequent polishing.
Can I use this homemade wood polish on wood floors?
While the ingredients in this homemade wood polish are generally safe for wood, we don’t recommend using it on wood floors. Floors require a different type of finish and maintenance than furniture. The polish may make the floors slippery and could potentially damage the finish over time. There are specific wood floor polishes available that are designed to provide the necessary protection and shine without compromising safety or durability.
How should I store the homemade wood polish?
Store your homemade wood polish in an airtight container in a cool, dark place. A glass jar is ideal, as it won’t react with the ingredients. Avoid storing it in direct sunlight or near heat sources, as this can cause the beeswax to melt and the oils to degrade. Properly stored, the polish should last for several months. If you notice any changes in color, texture, or smell, it’s best to discard it and make a fresh batch.
What if I don’t have beeswax? Can I substitute it with something else?
Beeswax is a key ingredient in this recipe, as it provides a protective layer and adds shine to the wood. While there aren’t any perfect substitutes, you could try using carnauba wax as an alternative. However, carnauba wax is much harder than beeswax and may require more heat to melt and blend properly. The resulting polish may also be harder and more difficult to apply. We highly recommend using beeswax for the best results. You can typically find beeswax at craft stores, health food stores, or online retailers.
My homemade wood polish is too thick/thin. How can I adjust the consistency?
If your homemade wood polish is too thick, gently warm it in a double boiler or microwave (in short intervals) and add a small amount of olive oil until you reach the desired consistency. If it’s too thin, melt a small amount of beeswax and add it to the mixture, stirring until it’s fully incorporated. Remember to let the polish cool completely before assessing the final consistency.
Can I add essential oils to the homemade wood polish? What are the best ones to use?
Yes, adding essential oils is a great way to customize your homemade wood polish and add a pleasant scent. Some popular choices include lemon, orange, lavender, cedarwood, and pine. Lemon and orange offer a fresh, clean aroma, while lavender is calming and relaxing. Cedarwood and pine provide a warm, woody scent. When adding essential oils, start with a small amount (5-10 drops per batch) and adjust to your preference. Be sure to use high-quality, pure essential oils for the best results.
Is this homemade wood polish safe for use around children and pets?
This homemade wood polish is generally safer than commercial polishes, as it doesn’t contain harsh chemicals. However, it’s still important to exercise caution when using it around children and pets. Keep the polish out of their reach and avoid allowing them to lick or ingest it. If you’re concerned about potential allergies, test the polish on a small area first and monitor for any reactions. If you’re using essential oils, be sure to choose ones that are safe for children and pets. Some essential oils can be toxic if ingested or applied topically.
How do I clean my furniture before applying the homemade wood polish?
Before applying the homemade wood polish, it’s important to clean your furniture to remove any dust, dirt, or grime. You can use a soft cloth dampened with water and a mild soap. Be sure to wring out the cloth thoroughly to avoid getting the wood too wet. After cleaning, allow the furniture to dry completely before applying the polish. For stubborn stains or buildup, you may need to use a specialized wood cleaner.
What kind of cloth should I use to apply the homemade wood polish?
Use a soft, lint-free cloth to apply the homemade wood polish. Microfiber cloths are a great option, as they are gentle on wood and won’t leave behind any fibers. Avoid using abrasive cloths or sponges, as they can scratch the finish. Apply the polish in a thin, even layer, working in the direction of the wood grain. After applying the polish, use a clean, dry cloth to buff the furniture to a shine.
Leave a Comment