

Natural Grout Cleaner DIY: Are you tired of dingy, stained grout lines that make your beautiful tile look, well, less than beautiful? I know I am! It’s amazing how quickly grout can go from pristine to practically prehistoric, harboring dirt, grime, and who-knows-what-else. But before you reach for those harsh chemical cleaners that smell like a science experiment gone wrong, let’s talk about a better way.
For generations, resourceful homeowners have relied on natural ingredients to keep their homes sparkling. Think about it – before the advent of mass-produced cleaning products, people used simple, readily available items like vinegar, baking soda, and lemon juice to tackle even the toughest cleaning challenges. This tradition isn’t just about nostalgia; it’s about effectiveness and sustainability.
That’s why I’m so excited to share this natural grout cleaner DIY recipe with you. Not only is it incredibly effective at lifting stubborn stains and restoring your grout to its former glory, but it’s also safe for your family, your pets, and the environment. Plus, you probably already have most of the ingredients in your pantry! Say goodbye to harsh chemicals and hello to a sparkling clean home with this simple, effective, and budget-friendly solution. Let’s get cleaning!
DIY Natural Grout Cleaner: Say Goodbye to Grime!
Okay, let’s face it: grout is the bane of every homeowner’s existence. It’s porous, it stains easily, and it seems to attract dirt like a magnet. But don’t despair! You don’t need harsh chemicals to get your grout sparkling again. I’m going to show you how to make a super effective, all-natural grout cleaner using ingredients you probably already have in your pantry. Trust me, this stuff works wonders!
What You’ll Need
Before we dive in, let’s gather our supplies. This is a pretty simple recipe, so you won’t need anything fancy.
* Baking Soda: This is our main cleaning agent. It’s mildly abrasive and helps to lift dirt and grime.
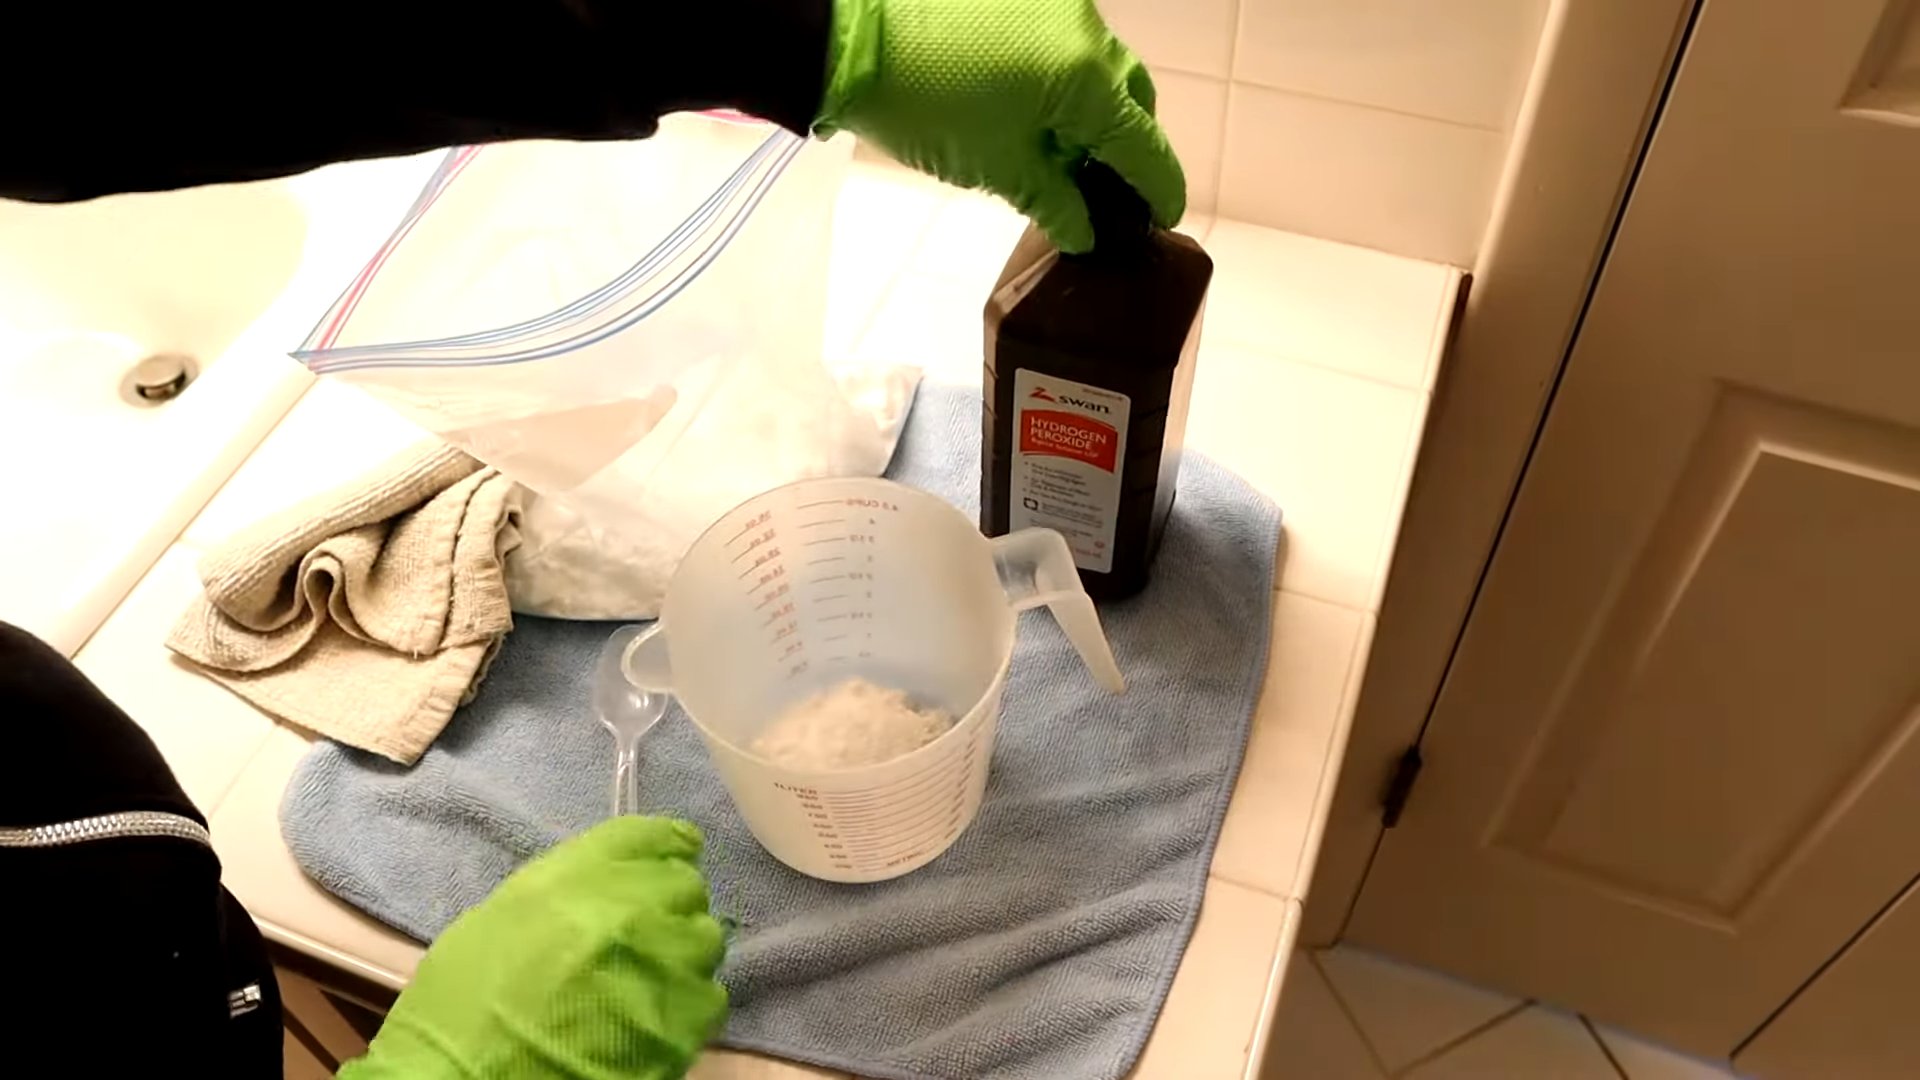
* Hydrogen Peroxide (3%): This acts as a bleaching agent and disinfectant. It helps to brighten the grout and kill any mold or mildew.
* Dish Soap (Optional): A little bit of dish soap can help to cut through grease and grime. I prefer using a natural dish soap, but any kind will do.
* Spray Bottle: For applying the cleaner.
* Old Toothbrush or Grout Brush: For scrubbing the grout lines. An old toothbrush works great for smaller areas, but a grout brush will make the job easier if you have a lot of grout to clean.
* Spoon or Mixing Utensil: For mixing the ingredients.
* Small Bowl or Container: For mixing the cleaner.
* Gloves (Optional): To protect your hands.
* Water (Optional): For rinsing.
* Paper Towels or Cloth Rags: For wiping up excess cleaner.
Mixing the Magic Potion: Two Different Recipes
I’m going to give you two different recipes. The first one is a paste, which is great for really stubborn stains. The second one is a spray, which is better for general cleaning and maintenance.
Recipe 1: Baking Soda and Hydrogen Peroxide Paste
This is my go-to for tackling really tough grout stains. The paste allows the ingredients to sit on the grout longer, giving them more time to work their magic.
1. **Combine the Baking Soda and Hydrogen Peroxide:** In your small bowl, pour about 1/2 cup of baking soda. Then, slowly add hydrogen peroxide, a little at a time, while mixing with your spoon or utensil. You want to create a thick paste, similar in consistency to toothpaste. Be careful not to add too much hydrogen peroxide, or the paste will become too runny.
2. **Add Dish Soap (Optional):** If you’re using dish soap, add a squirt (about a teaspoon) to the paste and mix well. This will help to cut through any grease or grime.
3. **Mix Thoroughly:** Make sure all the ingredients are well combined and there are no lumps of baking soda.
Recipe 2: Baking Soda, Hydrogen Peroxide, and Dish Soap Spray
This spray is perfect for regular cleaning and maintenance. It’s easy to apply and works well on less stubborn stains.
1. **Combine the Baking Soda and Hydrogen Peroxide:** In your spray bottle, pour about 1/4 cup of baking soda. Then, slowly add 1/2 cup of hydrogen peroxide.
2. **Add Dish Soap (Optional):** Add a squirt (about a teaspoon) of dish soap to the spray bottle.
3. **Add Water (Optional):** If you want to dilute the spray a bit, you can add about 1/4 cup of water. This is especially helpful if you’re using a strong dish soap.
4. **Shake Well:** Secure the spray bottle lid and shake vigorously to combine all the ingredients. Make sure the baking soda is fully dissolved.
Time to Get Scrubbing!
Now for the fun part – cleaning! Here’s how to use your homemade grout cleaner:
Using the Baking Soda and Hydrogen Peroxide Paste
1. **Apply the Paste:** Using your finger or a spoon, apply the baking soda paste liberally to the grout lines you want to clean. Make sure to cover the entire grout line.
2. **Let it Sit:** This is the key! Let the paste sit on the grout for at least 5-10 minutes. For really stubborn stains, you can let it sit for up to 30 minutes. The longer it sits, the better it will work.
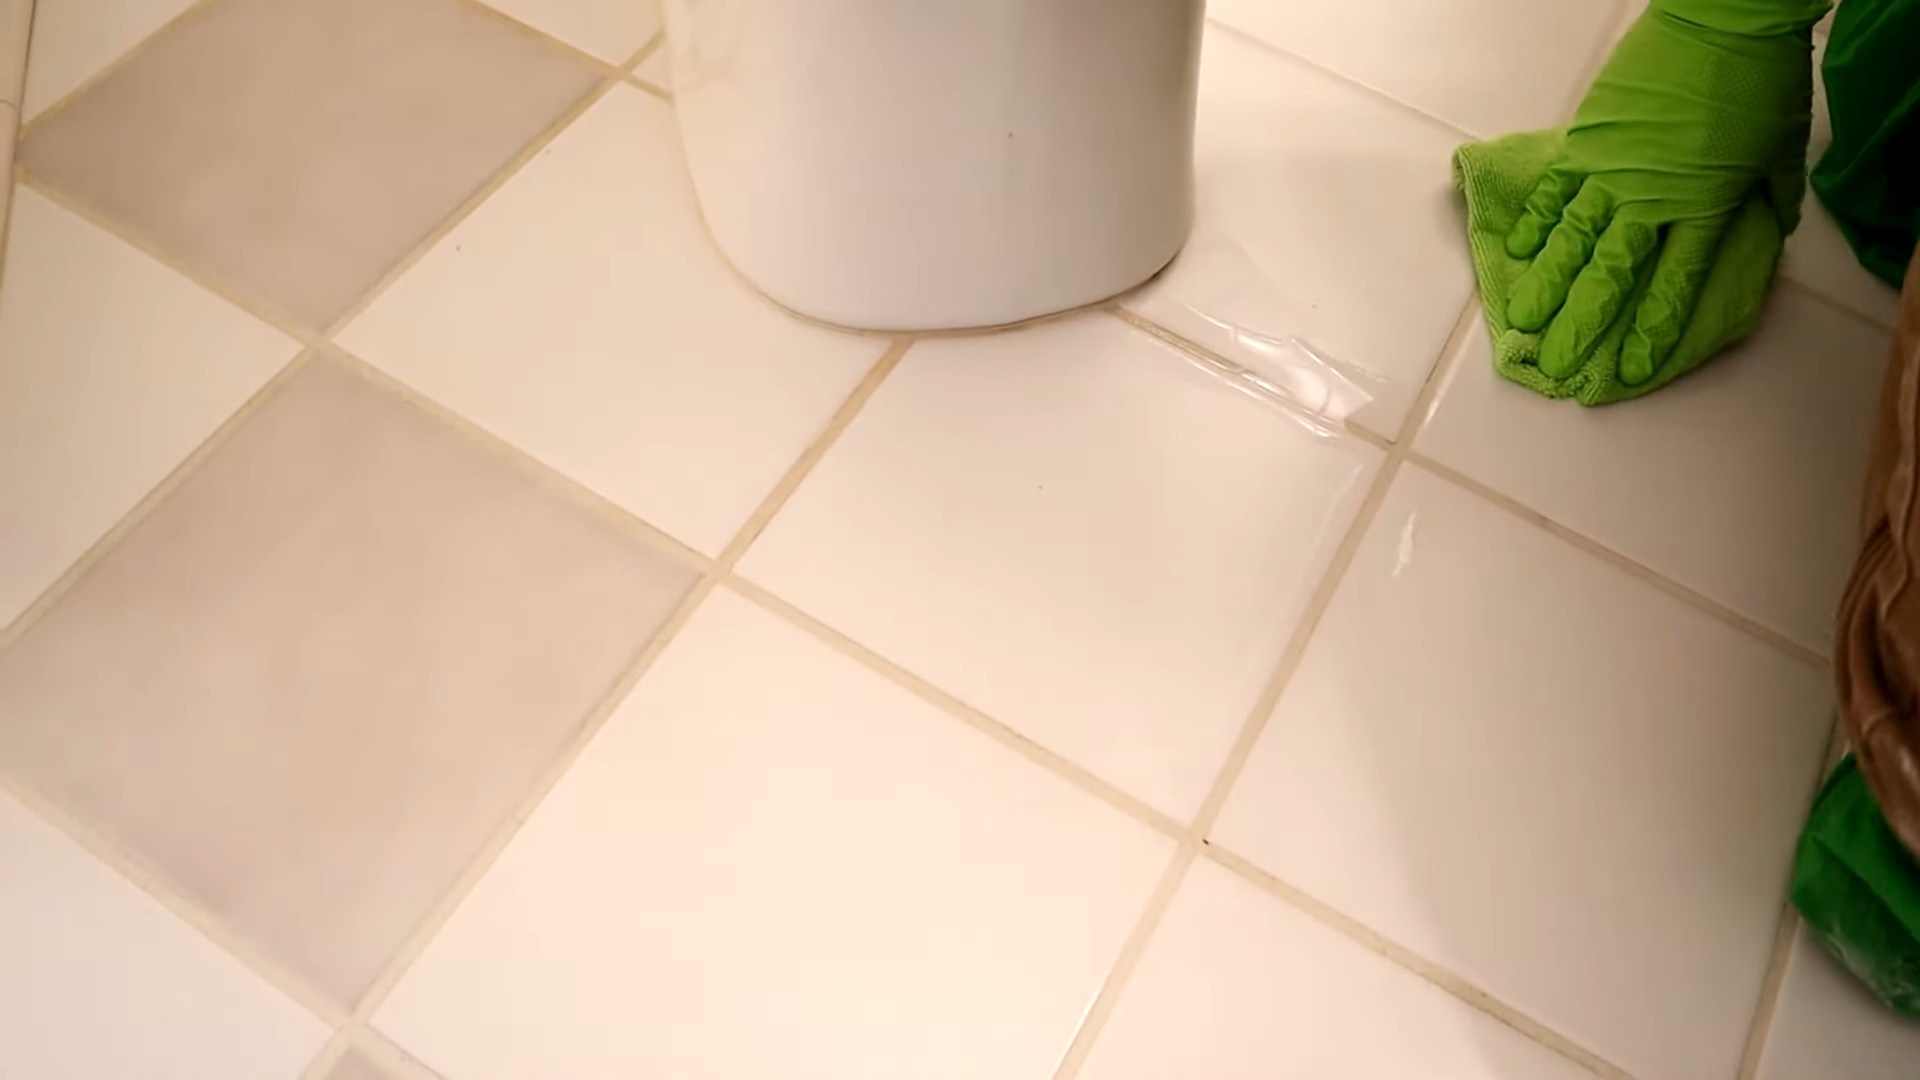
3. **Scrub, Scrub, Scrub:** Using your old toothbrush or grout brush, scrub the grout lines vigorously. Apply firm pressure and work in small sections. You should start to see the dirt and grime lifting away.
4. **Rinse (Optional):** If you’re using a lot of paste, you may want to rinse the grout lines with water after scrubbing. This will help to remove any remaining residue.
5. **Wipe Clean:** Use a paper towel or cloth rag to wipe up any excess cleaner and dirt.
6. **Repeat if Necessary:** For really stubborn stains, you may need to repeat the process.
Using the Baking Soda, Hydrogen Peroxide, and Dish Soap Spray
1. **Spray the Grout:** Spray the grout lines liberally with the cleaner. Make sure to cover the entire grout line.
2. **Let it Sit:** Let the spray sit on the grout for a few minutes (2-3 minutes) to allow the ingredients to work.
3. **Scrub:** Using your old toothbrush or grout brush, scrub the grout lines.
4. **Wipe Clean:** Use a paper towel or cloth rag to wipe up any excess cleaner and dirt.
5. **Repeat if Necessary:** For stubborn stains, repeat the process.
Tips and Tricks for Sparkling Grout
Here are a few extra tips to help you get the best results:
* Test in an Inconspicuous Area: Before cleaning your entire grout surface, test the cleaner in a small, hidden area to make sure it doesn’t damage the tile or grout.
* Ventilate the Area: Make sure the area you’re cleaning is well-ventilated. Open windows or turn on a fan to avoid inhaling the fumes from the hydrogen peroxide.
* Wear Gloves: While the ingredients are natural, hydrogen peroxide can be irritating to the skin. Wear gloves to protect your hands.
* Use a Grout Sealer: Once your grout is clean, consider applying a grout sealer. This will help to protect the grout from future stains and make it easier to clean. You can find grout sealers at most home improvement stores.
* Clean Regularly: The best way to keep your grout clean is to clean it regularly. A quick spray and scrub once a week can prevent dirt and grime from building up.
* For Colored Grout: Be extra cautious when cleaning colored grout. Hydrogen peroxide can sometimes lighten the color. Test in an inconspicuous area first and avoid letting the cleaner sit for too long.
* Mold and Mildew: If you have mold or mildew in your grout, you can add a few drops of tea tree oil to your cleaner. Tea tree oil is a natural antifungal agent.
* Stubborn Stains: For really stubborn stains, you can try making a paste of baking soda and water. Apply the paste to the stain and let it sit overnight. Then, scrub and rinse in the morning.
* Preventative Measures: After showering, squeegee the walls and floor to remove excess water. This will help to prevent mold and mildew from growing in your grout.
Alternative Ingredients (If You’re Feeling Adventurous!)
While baking soda and hydrogen peroxide are my go-to ingredients, here are a few other things you can try:
* Vinegar: Vinegar is a natural disinfectant and can help to remove hard water stains. You can use it instead of hydrogen peroxide, but be careful when using it on natural stone tiles, as it can etch the surface.
* Lemon Juice: Lemon juice is another natural disinfectant and can help to brighten grout. You can use it instead of hydrogen peroxide, or add a few drops to your baking soda paste.
* Borax: Borax is a natural mineral that has cleaning and disinfecting properties. You can add a tablespoon of borax to your baking soda paste or spray.
* Essential Oils: Adding a few drops of essential oils, like tea tree oil, lavender oil, or eucalyptus oil, can give your cleaner a pleasant scent and add extra disinfecting power.
Troubleshooting
* Grout Still Dirty? If your grout is still dirty after cleaning, try letting the cleaner sit for longer or scrubbing more vigorously. You may also need to repeat the process.
* Cleaner Not Working? If your cleaner isn’t working, make sure you’re using the right consistency. The paste should be thick enough to stick to the grout, and the spray should be well-mixed. You may also need to try a different recipe or ingredient.
* Tile Damaged? If you notice any damage to your tile after cleaning, stop using the cleaner immediately. You may need to consult with a professional tile cleaner.
I hope this guide helps you get your grout sparkling
Conclusion
So, there you have it! A simple, effective, and incredibly affordable way to tackle grimy grout without resorting to harsh chemicals. This natural grout cleaner DIY method is a game-changer for anyone looking to maintain a sparkling clean bathroom or kitchen. We’ve walked you through the steps, highlighted the benefits, and hopefully, dispelled any doubts you might have had about its efficacy.
Why is this a must-try? Because it’s not just about cleaning; it’s about cleaning responsibly. You’re avoiding the fumes and potential health hazards associated with commercial cleaners, opting instead for ingredients you likely already have in your pantry. Plus, think of the money you’ll save! No more expensive trips to the store for specialized grout cleaners. This DIY solution is budget-friendly and environmentally conscious.
But the beauty of DIY lies in its adaptability. Feel free to experiment with variations to suit your specific needs and preferences. For instance, if you’re dealing with particularly stubborn stains, consider adding a few drops of tea tree oil to your mixture for its natural antibacterial and antifungal properties. Or, if you prefer a thicker paste for vertical surfaces, simply add a bit more baking soda until you achieve the desired consistency. Another variation is to use a different type of vinegar. While white vinegar is the most common and effective, apple cider vinegar can also be used, although it may not be quite as potent. Lemon juice is another option, offering a fresh scent and mild cleaning power. Remember to always test any variation on an inconspicuous area first to ensure it doesn’t damage your grout or tiles.
Beyond the basic recipe, consider the tools you use. While an old toothbrush is a reliable standby, a grout brush with stiffer bristles can provide more aggressive cleaning power for heavily soiled areas. For larger tiled surfaces, a scrub brush attached to a long handle can save your back and knees. And don’t underestimate the power of a good microfiber cloth for wiping away the cleaner and revealing the sparkling grout beneath.
We’re confident that once you try this natural grout cleaner DIY, you’ll be amazed by the results. It’s a simple yet powerful solution that will leave your grout looking fresh and clean, without the harsh chemicals or hefty price tag.
Now, it’s your turn! We encourage you to give this DIY trick a try and see the difference for yourself. Don’t be afraid to experiment with variations and find what works best for your specific needs. And most importantly, we want to hear about your experience! Share your before-and-after photos, your tips and tricks, and any variations you’ve tried in the comments below. Let’s build a community of clean grout enthusiasts and share our knowledge and experiences with each other. Together, we can conquer grimy grout and create cleaner, healthier homes. So go ahead, grab your baking soda, vinegar, and toothbrush, and get ready to transform your grout! You won’t regret it.
Frequently Asked Questions (FAQ)
What exactly makes this natural grout cleaner DIY so effective?
The effectiveness of this DIY cleaner lies in the chemical reaction between baking soda (a mild abrasive and deodorizer) and vinegar (an acid that helps to dissolve dirt and grime). The fizzing action helps to lift stains and debris from the grout, while the abrasive nature of baking soda gently scrubs away stubborn residue. It’s a powerful combination that’s surprisingly effective on a variety of grout stains.
Is this natural grout cleaner DIY safe for all types of grout and tile?
While this cleaner is generally safe for most types of grout and tile, it’s always a good idea to test it on an inconspicuous area first, especially if you have colored grout or delicate tiles like natural stone. The acidity of vinegar could potentially damage certain types of stone, such as marble or limestone. If you’re unsure, consult with a tile and grout professional before using this cleaner. For colored grout, test a small area to ensure the vinegar doesn’t cause any discoloration. If you notice any adverse effects, dilute the vinegar with water or try a different cleaning method.
How often should I use this natural grout cleaner DIY to maintain clean grout?
The frequency of cleaning depends on the amount of traffic and exposure to dirt and grime in the area. For high-traffic areas like bathrooms and kitchens, you may need to clean your grout every few weeks. For less frequently used areas, cleaning every few months may be sufficient. Regular cleaning will prevent stains from setting in and make the cleaning process easier in the long run.
Can I use this natural grout cleaner DIY on vertical surfaces, like shower walls?
Yes, you can use this cleaner on vertical surfaces. However, you may need to adjust the consistency to prevent it from running down the wall too quickly. Add more baking soda to create a thicker paste that will adhere better to vertical surfaces. You can also use a spray bottle to apply the cleaner, but be sure to wipe it down thoroughly after scrubbing.
What if the stains are really stubborn and this natural grout cleaner DIY doesn’t seem to be working?
For particularly stubborn stains, you can try a few different approaches. First, let the cleaner sit on the grout for a longer period of time, up to 30 minutes, before scrubbing. This will give the cleaner more time to penetrate and loosen the stains. Second, use a grout brush with stiffer bristles to provide more aggressive scrubbing power. Third, consider adding a small amount of hydrogen peroxide to the mixture. Hydrogen peroxide is a mild bleaching agent that can help to lighten stains. However, be sure to test it on an inconspicuous area first to ensure it doesn’t discolor your grout. Finally, for extremely stubborn stains, you may need to resort to a commercial grout cleaner, but always follow the manufacturer’s instructions carefully and wear appropriate safety gear.
What are some alternative ingredients I can use in this natural grout cleaner DIY if I don’t have baking soda or vinegar?
While baking soda and vinegar are the most common and effective ingredients, there are a few alternatives you can try. For baking soda, you can use borax, which is another mild abrasive and deodorizer. For vinegar, you can use lemon juice, which is a natural acid that can help to dissolve dirt and grime. However, lemon juice may not be as potent as vinegar, so you may need to use more of it or let it sit on the grout for a longer period of time. Another option is to use a paste of dish soap and water, which can help to loosen dirt and grime. However, be sure to rinse thoroughly to remove any soap residue.
How do I prevent grout from getting dirty in the first place?
Prevention is key to keeping your grout clean and avoiding the need for frequent cleaning. Here are a few tips:
* Seal your grout: Sealing your grout creates a barrier that prevents dirt and grime from penetrating the grout. Reapply sealant every year or two, or as recommended by the manufacturer.
* Wipe up spills immediately: The longer spills sit on your grout, the more likely they are to stain. Wipe up spills as soon as they occur to prevent staining.
* Use doormats and rugs: Place doormats at entrances to trap dirt and debris before they can be tracked onto your floors. Use rugs in high-traffic areas to protect your grout from wear and tear.
* Ventilate your bathroom: Proper ventilation in your bathroom will help to prevent mold and mildew growth, which can stain your grout. Run the exhaust fan during and after showers to remove excess moisture.
* Regularly sweep or vacuum: Regularly sweeping or vacuuming your floors will remove loose dirt and debris that can scratch and stain your grout.
Is there any safety precautions I should take when using this natural grout cleaner DIY?
While this cleaner is generally safe, it’s always a good idea to take a few safety precautions. Wear gloves to protect your hands from irritation. Avoid getting the cleaner in your eyes. If you do, rinse immediately with plenty of water. Ensure adequate ventilation in the area you’re cleaning. And as always, keep cleaning products out of reach of children and pets. Although the ingredients are natural, ingestion could still cause discomfort.


Leave a Comment