

Grow Pechay at Home and unlock the secrets to a thriving, delicious garden right outside your door! Imagine stepping into your backyard and harvesting fresh, crisp pechay for your next stir-fry or soup. Sounds amazing, right? Well, it’s more achievable than you think, and I’m here to guide you through every step of the process.
For centuries, cultivating your own food has been a cornerstone of self-sufficiency and a connection to nature. In many Asian cultures, pechay (also known as bok choy) is a staple, symbolizing prosperity and good health. But you don’t need to be a seasoned gardener to enjoy the benefits of growing your own.
In today’s fast-paced world, knowing where your food comes from and ensuring its quality is more important than ever. Plus, store-bought vegetables can sometimes lack that fresh, vibrant flavor. That’s where these simple, yet effective, DIY tricks come in. I’m going to show you how to grow pechay at home, even if you have limited space or gardening experience. These hacks will help you maximize your yield, protect your plants from pests, and enjoy the satisfaction of harvesting your own homegrown goodness. Let’s get started!
Grow Your Own Delicious Pechay at Home: A Beginner’s Guide
Hey there, fellow gardening enthusiasts! I’m so excited to share my experience growing pechay (also known as bok choy) right in my backyard. It’s surprisingly easy, super rewarding, and you get to enjoy fresh, homegrown veggies. Trust me, once you taste the difference, you’ll never want to buy store-bought again! This guide will walk you through every step, from seed to harvest.
What You’ll Need
Before we dive in, let’s gather our supplies. Here’s a list of everything you’ll need to successfully grow pechay:
* Pechay Seeds: Choose a variety that suits your climate. I personally love the ‘Black Behi’ variety for its robust flavor.
* Seed Trays or Small Pots: For starting your seeds indoors.
* Potting Mix: A well-draining mix specifically designed for seedlings.
* Garden Soil: Rich, fertile soil for transplanting your seedlings. You can amend your existing soil with compost or well-rotted manure.
* Compost or Well-Rotted Manure: To enrich the soil and provide essential nutrients.
* Fertilizer: A balanced fertilizer (e.g., 10-10-10) or a fertilizer specifically formulated for leafy greens.
* Watering Can or Hose: For regular watering.
* Gardening Gloves: To protect your hands.
* Trowel or Small Shovel: For transplanting seedlings.
* Optional: Insect Netting or Row Covers: To protect your plants from pests.
* Optional: Slug and Snail Bait: If you have a slug or snail problem in your area.
Getting Started: Sowing Your Seeds
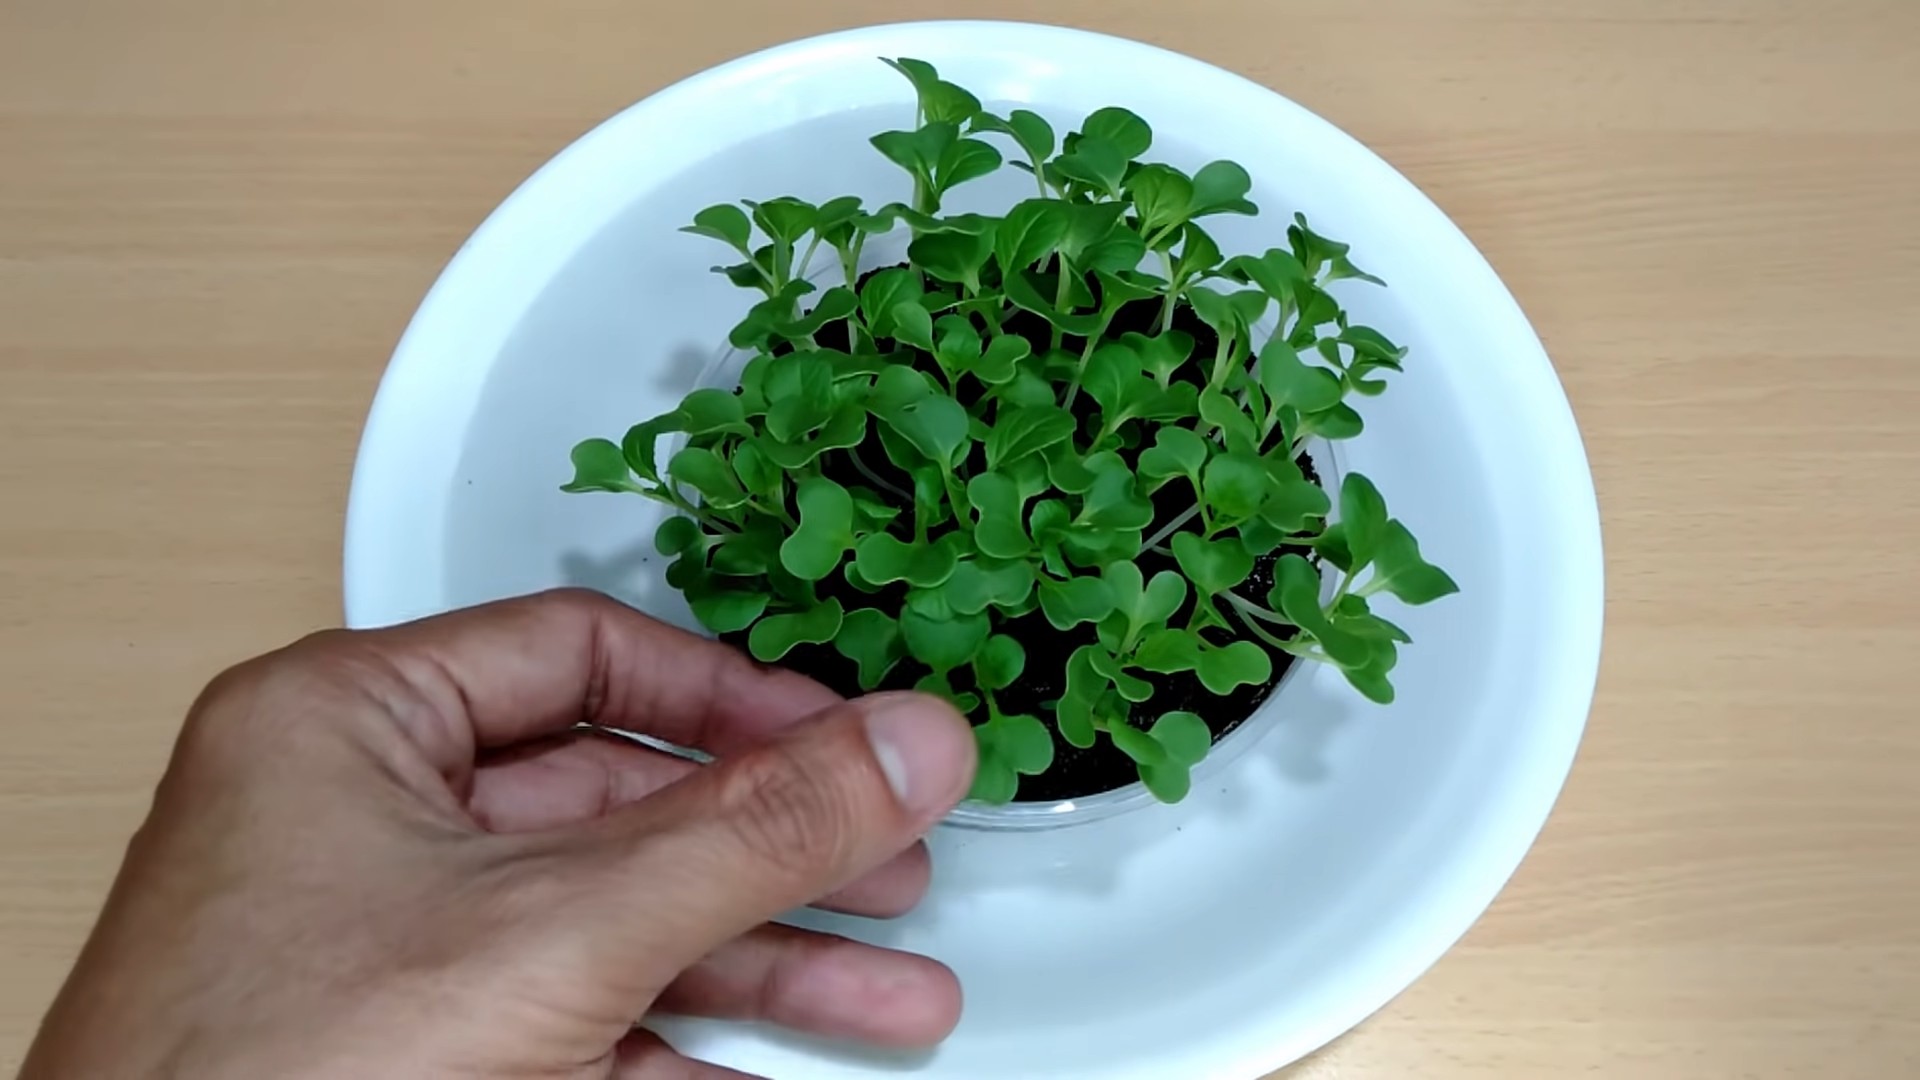
The first step is to get those seeds germinating! You can either sow them directly into the garden bed or start them indoors. I prefer starting them indoors because it gives them a head start and protects them from harsh weather and pests.
1. Prepare Your Seed Trays or Pots: Fill your seed trays or small pots with potting mix. Gently press down the soil to create a firm surface.
2. Sow the Seeds: Sow 2-3 seeds per cell or pot, about ¼ inch deep.
3. Cover the Seeds: Lightly cover the seeds with potting mix.
4. Water Gently: Water the soil gently using a watering can or spray bottle. Avoid overwatering, as this can lead to damping-off disease.
5. Provide Warmth and Light: Place the seed trays or pots in a warm, sunny location or under grow lights. Pechay seeds need warmth and light to germinate.
6. Keep the Soil Moist: Keep the soil consistently moist but not waterlogged. Check the soil moisture daily and water as needed.
7. Germination: The seeds should germinate within 5-7 days.
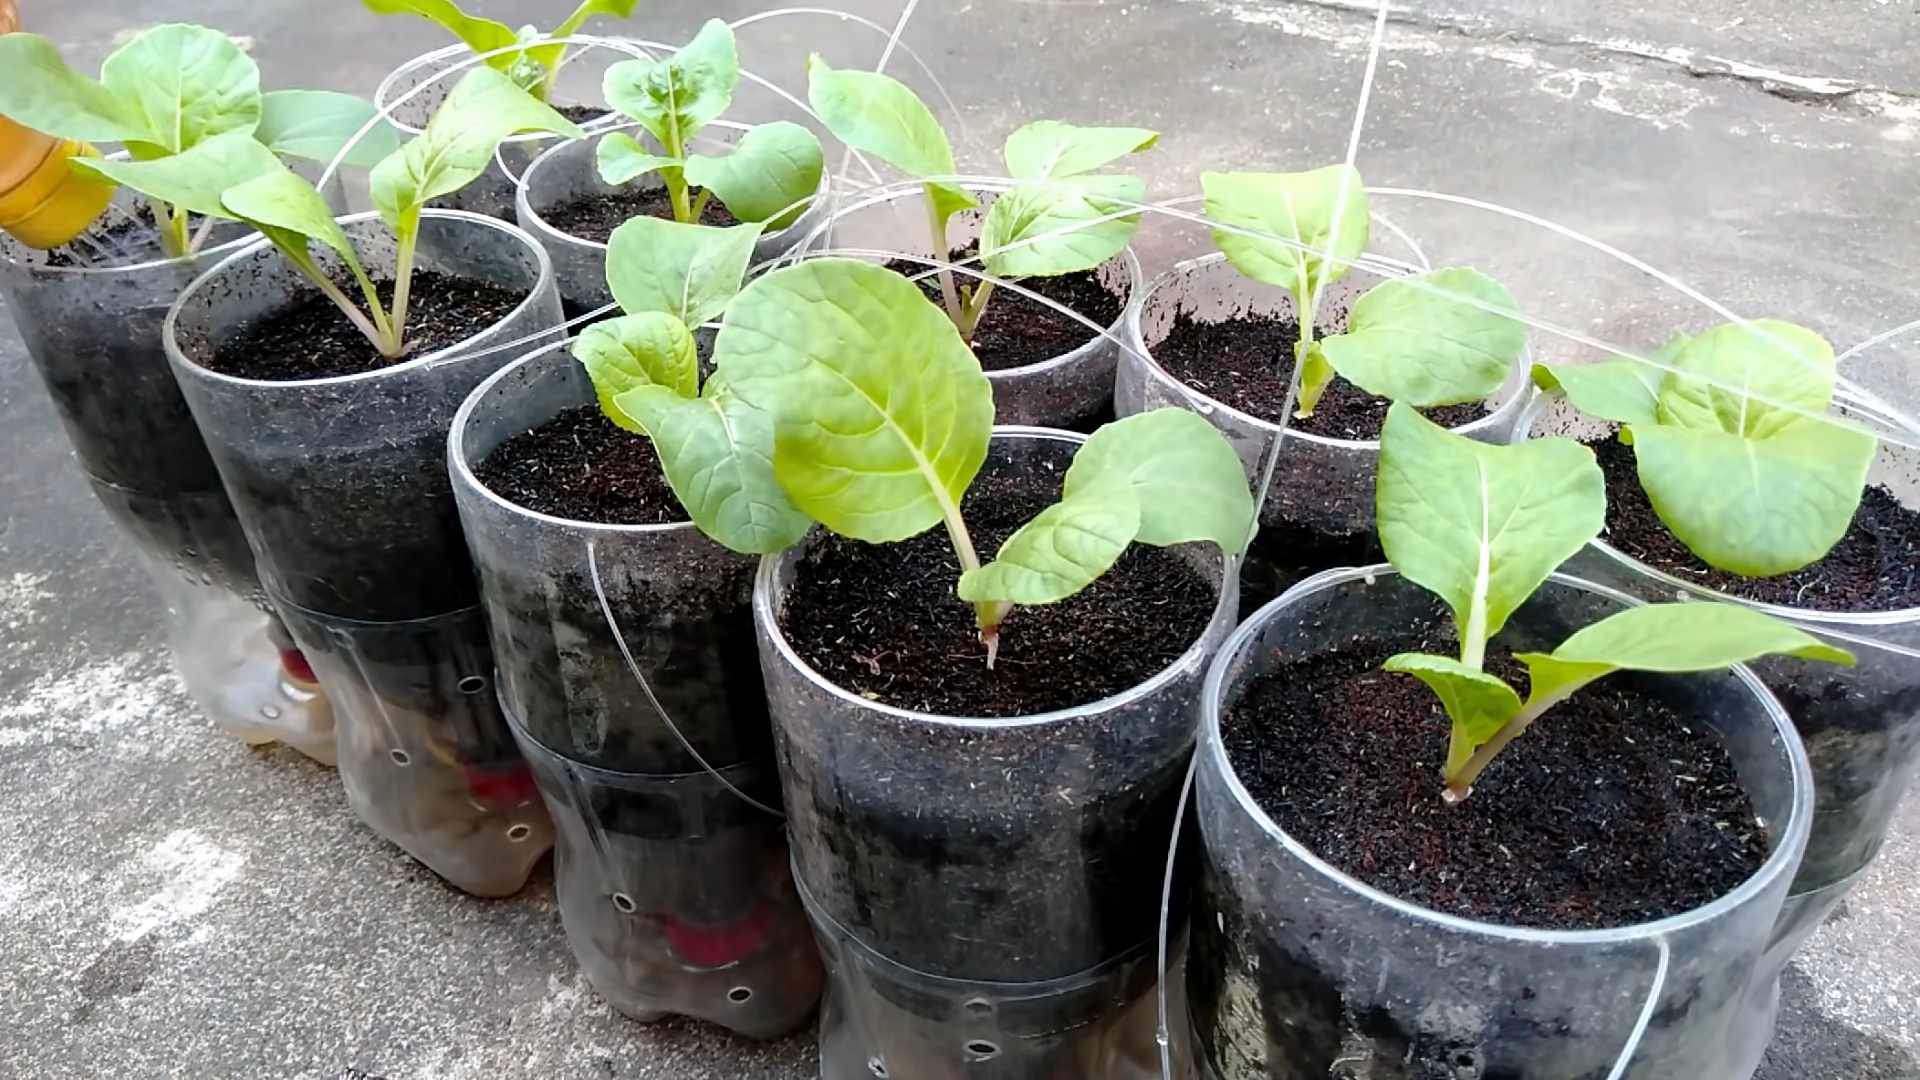
Transplanting Your Seedlings
Once your seedlings have developed a few true leaves (usually after 2-3 weeks), it’s time to transplant them into your garden bed.
1. Prepare Your Garden Bed: Choose a sunny location with well-draining soil. Pechay needs at least 6 hours of sunlight per day. Amend the soil with compost or well-rotted manure to improve its fertility.
2. Harden Off the Seedlings: Before transplanting, you need to harden off the seedlings. This process gradually acclimates them to outdoor conditions. Start by placing the seed trays or pots outdoors for a few hours each day, gradually increasing the amount of time they spend outside over the course of a week.
3. Dig Holes: Dig holes in your garden bed that are slightly larger than the root balls of your seedlings. Space the holes about 6-8 inches apart.
4. Carefully Remove the Seedlings: Gently remove the seedlings from the seed trays or pots. Be careful not to damage the roots.
5. Transplant the Seedlings: Place the seedlings into the holes and gently backfill with soil.
6. Water Thoroughly: Water the seedlings thoroughly after transplanting.
Caring for Your Pechay Plants
Now that your pechay plants are in the ground, it’s important to provide them with the care they need to thrive.
1. Watering: Water your pechay plants regularly, especially during dry periods. Keep the soil consistently moist but not waterlogged. Water deeply and less frequently, rather than shallowly and more often.
2. Fertilizing: Fertilize your pechay plants every 2-3 weeks with a balanced fertilizer or a fertilizer specifically formulated for leafy greens. Follow the instructions on the fertilizer package.
3. Weeding: Keep your garden bed free of weeds. Weeds compete with your pechay plants for nutrients and water. Hand-pull weeds regularly or use a hoe to cultivate the soil.
4. Pest Control: Pechay plants can be susceptible to pests such as aphids, cabbage worms, and slugs. Inspect your plants regularly for signs of pests. If you find pests, you can control them with insecticidal soap, neem oil, or other organic pest control methods. You can also use insect netting or row covers to protect your plants from pests. For slugs and snails, use slug and snail bait.
5. Sunlight: Ensure your pechay plants receive at least 6 hours of sunlight per day. If you live in a hot climate, provide some afternoon shade to prevent the leaves from scorching.
6. Soil pH: Pechay prefers a slightly acidic to neutral soil pH (6.0-7.0). You can test your soil pH using a soil testing kit and amend it if necessary.
Dealing with Common Problems
Even with the best care, you might encounter some problems while growing pechay. Here are a few common issues and how to address them:
* Aphids: These tiny insects can suck the sap from your plants, causing them to become weak and stunted. Spray your plants with insecticidal soap or neem oil to control aphids.
* Cabbage Worms: These caterpillars can devour the leaves of your pechay plants. Hand-pick them off the plants or use Bacillus thuringiensis (Bt), a natural insecticide, to control them.
* Slugs and Snails: These pests can chew holes in the leaves of your pechay plants. Use slug and snail bait or hand-pick them off the plants at night.
* Damping-Off Disease: This fungal disease can kill seedlings. Prevent damping-off by using a well-draining potting mix, avoiding overwatering, and providing good air circulation.
* Bolting: Bolting is when the plant prematurely flowers and goes to seed. This can happen when the weather gets too hot. To prevent bolting, plant your pechay in the early spring or late summer, and provide some afternoon shade during hot weather.
Harvesting Your Pechay
The best part of growing pechay is harvesting your own fresh, delicious veggies! You can start harvesting your pechay plants about 45-50 days after planting.
1. Harvesting Individual Leaves: You can harvest individual leaves as needed, starting with the outer leaves. This will allow the plant to continue growing and producing new leaves.
2. Harvesting the Entire Plant: You can also harvest the entire plant at once. To do this, cut the plant at the base with a sharp knife.
3. Timing: Harvest your pechay plants in the morning, when the leaves are crisp and fresh.
4. Storage: Store your harvested pechay in the refrigerator for up to a week. To keep it fresh, wrap it in a damp paper towel and place it in a plastic bag.
Enjoying Your Homegrown Pechay
Now that you’ve harvested your pechay, it’s time to enjoy it! Pechay is a versatile vegetable that can be used in a variety of dishes. Here are a few ideas:
* Stir-fries: Add pechay to your favorite stir-fry recipes.
* Soups: Use pechay in soups and stews.
* Salads: Add raw pechay to salads for a crunchy and nutritious boost.
* Steamed: Steam pechay and serve it as a side dish.
* Grilled: Grill pechay and serve it with a drizzle of olive oil and lemon juice.
Tips for Success
Here are a few extra tips to help you succeed at growing pechay:
* Choose the Right Variety: Select a pechay variety that is well-suited to your climate.
* Provide Adequate Sunlight: Pechay needs at least 6 hours of sunlight per day.
* Water Regularly: Keep the soil consistently moist but not waterlogged.
*
Conclusion
So, there you have it! Growing your own pechay at home is not only achievable, but it’s also incredibly rewarding. From the satisfaction of nurturing a plant from seed to harvest, to the unparalleled freshness of having organic greens right at your fingertips, the benefits are numerous. This DIY approach to cultivating pechay offers a sustainable and cost-effective way to enjoy this nutritious vegetable regularly.
But why is this DIY trick a must-try? Beyond the obvious advantages of fresh, organic produce, growing your own pechay empowers you to control every aspect of its growth. You decide what goes into the soil, ensuring a chemical-free harvest. You can tailor the growing conditions to optimize flavor and texture. And, perhaps most importantly, you connect with the natural world in a tangible and meaningful way.
Consider these variations to personalize your pechay-growing experience. Experiment with different varieties of pechay, from the classic Bok Choy to the more delicate Shanghai Bok Choy. Try companion planting with herbs like basil or cilantro to deter pests and enhance flavor. If you’re short on space, explore container gardening options, utilizing vertical planters or hanging baskets to maximize your yield. You can even try succession planting, sowing new seeds every few weeks to ensure a continuous harvest throughout the growing season. For those in colder climates, consider using a cold frame or greenhouse to extend the growing season.
This method of growing pechay at home is a game-changer for anyone looking to add fresh, healthy greens to their diet. It’s a simple, accessible, and incredibly satisfying project that can transform your kitchen into a mini-farm.
We wholeheartedly encourage you to give this DIY pechay-growing trick a try. Don’t be intimidated if you’re a beginner; pechay is a relatively easy vegetable to cultivate. Start small, be patient, and enjoy the process. And most importantly, share your experience with us! We’d love to hear about your successes, your challenges, and any tips or tricks you discover along the way. Post photos of your pechay plants, share your favorite recipes using your homegrown harvest, and connect with other gardening enthusiasts in the comments section below. Let’s build a community of passionate pechay growers and inspire others to embrace the joys of homegrown food.
Ready to embark on your pechay-growing adventure?
Don’t wait any longer! Grab some seeds, prepare your soil, and get ready to experience the unparalleled satisfaction of harvesting your own fresh, organic pechay. We’re confident that you’ll be amazed by the results. Happy gardening!
Frequently Asked Questions (FAQs)
What is the best time of year to plant pechay?
Pechay thrives in cooler weather, making spring and fall the ideal times to plant. In warmer climates, you can grow pechay year-round, but be mindful of providing shade during the hottest parts of the day. Aim for temperatures between 15°C and 25°C (59°F and 77°F) for optimal growth. If you live in an area with hot summers, consider starting your seeds indoors and transplanting them outdoors when the weather cools down.
How much sunlight does pechay need?
Pechay requires at least 4-6 hours of sunlight per day. While it can tolerate partial shade, especially during the hottest part of the day, insufficient sunlight can lead to leggy growth and reduced yields. Choose a location in your garden that receives ample sunlight, or supplement with grow lights if necessary.
What type of soil is best for growing pechay?
Pechay prefers well-draining, fertile soil that is rich in organic matter. Amend your soil with compost or well-rotted manure before planting to improve its fertility and drainage. A slightly acidic to neutral soil pH of 6.0 to 7.5 is ideal. You can test your soil pH using a soil testing kit and adjust it accordingly.
How often should I water my pechay plants?
Pechay needs consistent moisture to thrive. Water deeply and regularly, especially during dry periods. Aim to keep the soil consistently moist but not waterlogged. Overwatering can lead to root rot, so ensure your soil has good drainage. Mulching around your plants can help retain moisture and suppress weeds.
What are some common pests and diseases that affect pechay?
Common pests that can affect pechay include aphids, cabbage worms, and flea beetles. Regularly inspect your plants for signs of infestation and take appropriate action, such as hand-picking pests, using insecticidal soap, or applying neem oil. Diseases that can affect pechay include downy mildew and clubroot. Ensure good air circulation around your plants and avoid overhead watering to prevent these diseases. Crop rotation can also help reduce the risk of soilborne diseases.
How long does it take for pechay to mature?
Pechay is a fast-growing vegetable, typically maturing in 45-60 days from seed. You can start harvesting the outer leaves as soon as they are large enough to eat, or harvest the entire plant when it reaches its desired size.
Can I grow pechay in containers?
Yes, pechay can be successfully grown in containers. Choose a container that is at least 6-8 inches deep and wide to allow for adequate root growth. Use a well-draining potting mix and ensure the container has drainage holes. Water regularly and fertilize as needed. Container-grown pechay may require more frequent watering than plants grown in the ground.
How do I harvest pechay?
You can harvest pechay by either cutting off the outer leaves as needed or harvesting the entire plant. To harvest the entire plant, simply cut it off at the base with a sharp knife. For continuous harvesting, remove the outer leaves as they mature, allowing the inner leaves to continue growing.
How do I store harvested pechay?
Store harvested pechay in the refrigerator in a plastic bag or container. It will typically last for 3-5 days. To prolong its shelf life, you can wrap the pechay in a damp paper towel before storing it in the refrigerator.
Can I save seeds from my pechay plants?
Yes, you can save seeds from your pechay plants, but it requires allowing the plants to bolt (flower and produce seeds). This is more likely to happen in warmer weather. Allow the seed pods to dry on the plant before harvesting them. Once dry, break open the pods and collect the seeds. Store the seeds in a cool, dry place for future planting. Be aware that pechay can cross-pollinate with other members of the Brassica family, so the seeds may not be true to type if other Brassicas are growing nearby.
What are some ways to use homegrown pechay in cooking?
Homegrown pechay is incredibly versatile and can be used in a variety of dishes. It can be stir-fried, steamed, boiled, or added to soups and stews. It’s also delicious in salads, especially when paired with other Asian-inspired ingredients. Try adding it to your favorite noodle dishes, spring rolls, or even using it as a wrap for fillings. The possibilities are endless!
Leave a Comment