

Shaving Cream Mirror Hack: Ever wished you could wave goodbye to foggy mirrors after a hot shower? I know I have! It’s a daily annoyance, right? Well, get ready to have your mind blown because I’m about to share a super simple, incredibly effective, and surprisingly affordable DIY trick that will keep your bathroom mirror crystal clear.
This isn’t some newfangled invention; people have been using similar principles for ages to defog everything from car windshields to diving masks. Think of it as a modern twist on old-school wisdom! The beauty of this shaving cream mirror hack lies in its simplicity. You probably already have everything you need sitting in your bathroom cabinet.
Why is this hack a game-changer? Because nobody enjoys wiping down a foggy mirror every single morning! It’s time-consuming, often leaves streaks, and frankly, it’s just plain frustrating. This DIY solution not only saves you precious minutes but also keeps your mirror looking its best, making your bathroom feel cleaner and more inviting. Plus, it’s a fun little project that you can tackle in under five minutes. So, are you ready to ditch the fog and embrace a clearer view? Let’s get started!

DIY Shaving Cream Mirror Defogger: See Clearly, Save Money!
Okay, let’s be honest, foggy mirrors are the bane of every bathroom experience, right? I’m constantly wiping down my mirror after a shower, and it’s just plain annoying. But guess what? I’ve discovered a super simple, incredibly cheap, and surprisingly effective hack to keep your bathroom mirror fog-free: shaving cream! Yes, you read that right. That can of shaving cream sitting in your cabinet is about to become your new best friend.
This isn’t just some internet myth; it actually works! The shaving cream creates a thin, protective layer on the mirror that prevents condensation from forming. And the best part? It’s so easy to do. So, ditch the constant wiping and let’s get started!
What You’ll Need
Before we dive in, let’s gather our supplies. You probably already have most of these on hand, which is even better!
* **Shaving Cream:** Any kind will do, but I prefer the foamy kind. Gel shaving cream works too, but I find the foam spreads more easily. Don’t go for the super fancy, expensive stuff; the cheap stuff works just as well!
* **Clean Microfiber Cloth:** This is crucial! A microfiber cloth won’t leave streaks or lint on your mirror.
* **Water (Optional):** A little bit of water in a spray bottle can help with the final buffing, but it’s not always necessary.
The Process: Defogging Your Mirror with Shaving Cream
Alright, let’s get down to business. This process is so simple, you’ll wonder why you haven’t been doing it all along.
Step 1: Prepare Your Mirror
1. **Clean the Mirror:** Before you apply the shaving cream, make sure your mirror is clean. Any dirt, dust, or grime will just get smeared around and trapped under the shaving cream, which we definitely don’t want. I usually just use a glass cleaner and a microfiber cloth to give it a good wipe down. Let it dry completely before moving on to the next step. A clean surface is key for optimal results.
Step 2: Apply the Shaving Cream
1. **Apply a Thin Layer:** This is important: you don’t need a ton of shaving cream. A thin, even layer is all you need. I usually spray a small amount directly onto the mirror, covering the entire surface. You can also put a dollop of shaving cream on your finger and spread it around. The goal is to cover the entire mirror with a thin, white film.
2. **Spread Evenly:** Using your fingers or a clean, dry cloth, spread the shaving cream evenly across the entire surface of the mirror. Make sure you get into all the corners and edges. You want a consistent layer of shaving cream covering the whole mirror. Don’t worry about making it perfect; we’ll buff it out later.
Step 3: Let it Sit
1. **Wait a Few Minutes:** Now, this is the hardest part: patience! Let the shaving cream sit on the mirror for a few minutes. This allows the ingredients in the shaving cream to work their magic and create that protective layer. I usually wait about 2-3 minutes. You’ll notice the shaving cream starts to dry out a little bit.
Step 4: Buff it Out
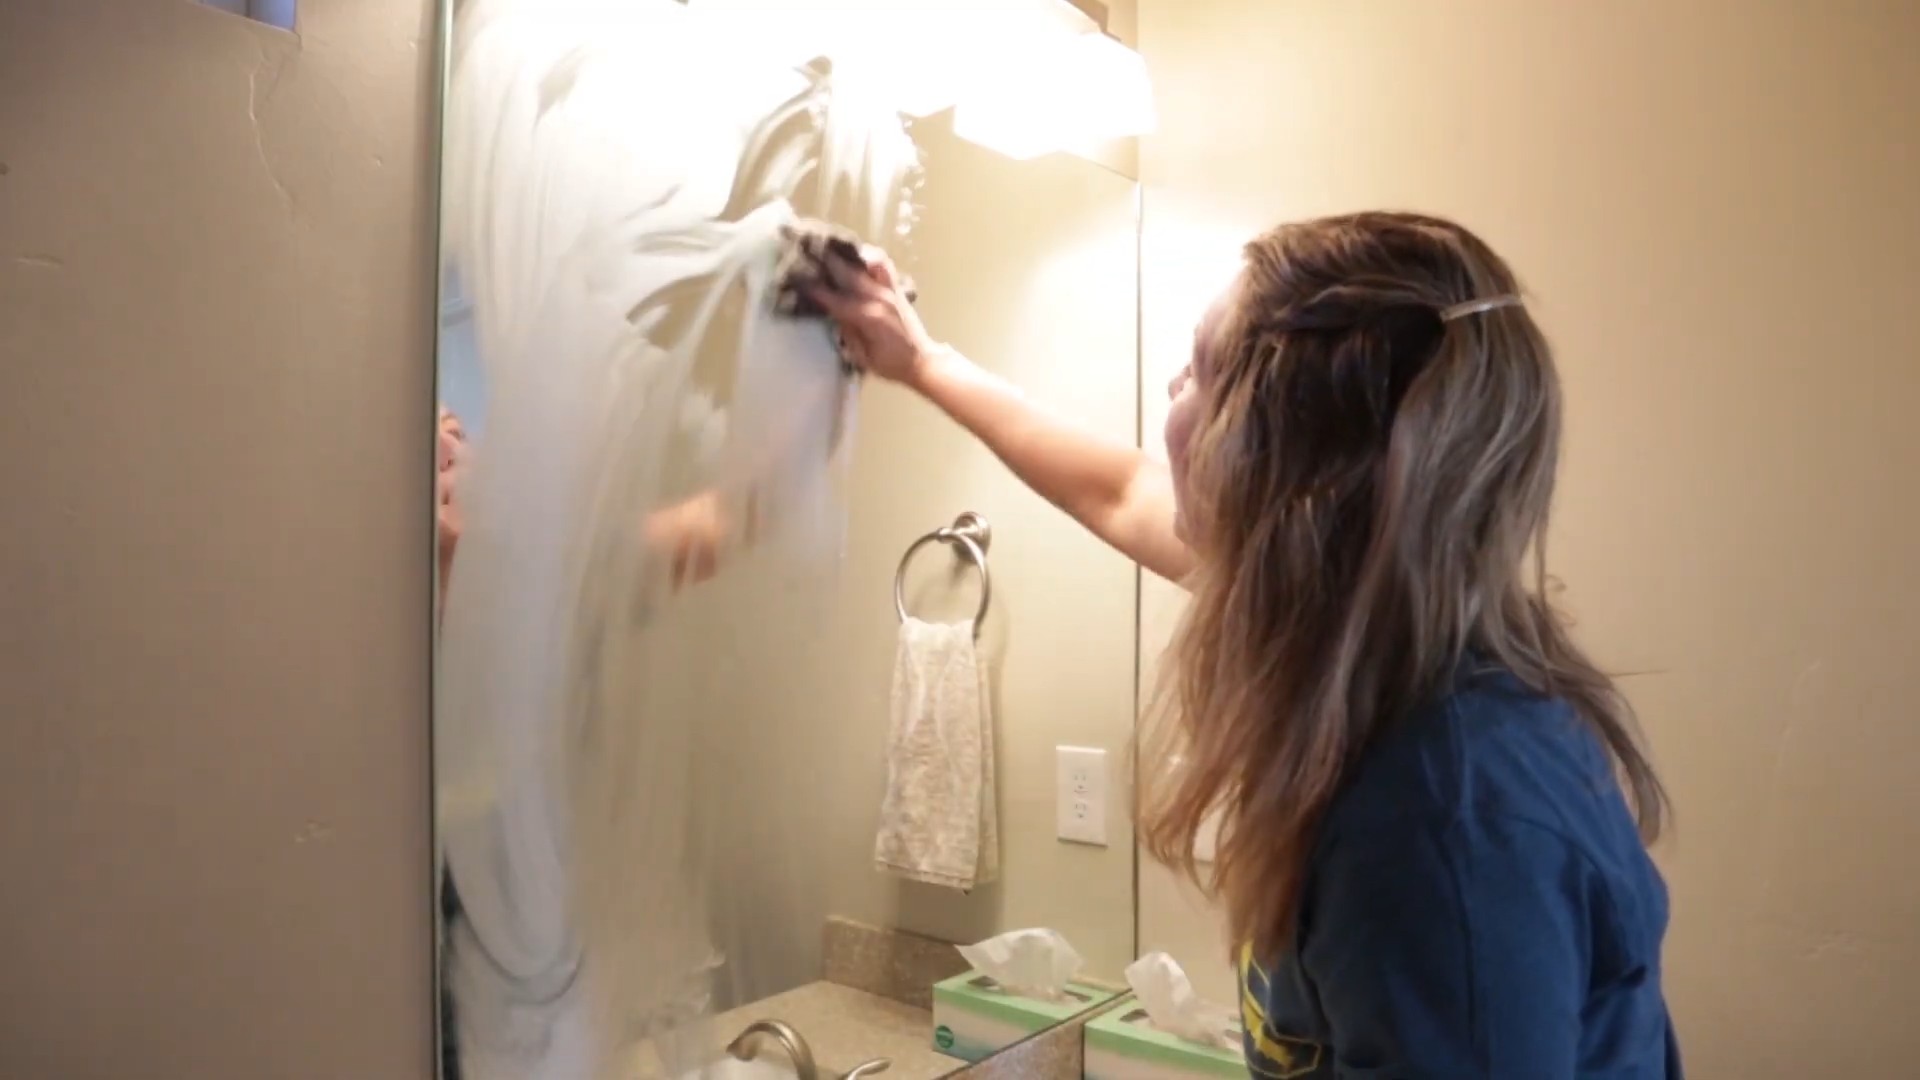
1. **Buff with a Microfiber Cloth:** This is where the magic happens! Take your clean, dry microfiber cloth and start buffing the shaving cream off the mirror. Use circular motions and apply gentle pressure. You’ll see the shaving cream disappear, leaving behind a clear, streak-free surface.
2. **Keep Buffing:** Keep buffing until all the shaving cream is gone and the mirror is crystal clear. This might take a little bit of elbow grease, but it’s worth it! Make sure you’re using a clean section of the microfiber cloth as you go.
3. **Check for Streaks:** Once you’ve buffed off all the shaving cream, take a step back and check for any streaks or residue. If you see any, just buff them out with a clean section of the microfiber cloth.
Step 5: Optional: Lightly Mist with Water (If Needed)
1. **Lightly Mist:** If you’re having trouble getting rid of all the streaks, you can lightly mist the mirror with water from a spray bottle.
2. **Buff Again:** Immediately buff the mirror with a clean, dry microfiber cloth. This will help to remove any remaining residue and leave your mirror sparkling clean.
Tips and Tricks for the Best Results
Okay, now that you know the basic process, here are a few extra tips and tricks I’ve learned along the way to make sure you get the best possible results:
* **Don’t Use Too Much Shaving Cream:** I can’t stress this enough! A thin layer is all you need. Using too much shaving cream will just make it harder to buff off and can leave behind a sticky residue.
* **Use a Good Quality Microfiber Cloth:** This is essential for a streak-free finish. Cheap microfiber cloths can leave lint behind, which is not what we want.
* **Buff Thoroughly:** Take your time and buff the mirror thoroughly. This is the key to getting rid of all the shaving cream and leaving behind a clear, fog-free surface.
* **Reapply as Needed:** The frequency with which you need to reapply the shaving cream will depend on how often you shower and how steamy your bathroom gets. I usually reapply it every couple of weeks, but you might need to do it more or less often.
* **Test in a Small Area First:** If you’re worried about the shaving cream damaging your mirror, test it in a small, inconspicuous area first. This will give you peace of mind that it’s safe to use.
* **Ventilate Your Bathroom:** While the shaving cream helps prevent fog, proper ventilation is still important. Make sure to run your bathroom fan during and after showers to help reduce moisture in the air.
* **Experiment with Different Shaving Creams:** While I prefer the foamy kind, you can experiment with different types of shaving cream to see what works best for you. Some people swear by gel shaving cream, while others prefer the kind with added moisturizers.
* **Clean Your Mirror Regularly:** Even with the shaving cream treatment, it’s still a good idea to clean your mirror regularly to remove any dust or grime that may accumulate.
Why This Works: The Science Behind the Magic
So, why does this shaving cream trick actually work? It all comes down to the ingredients in shaving cream. Shaving cream contains surfactants, which are substances that reduce the surface tension of water. This means that when water vapor (steam) comes into contact with the mirror, it spreads out into a thin, even layer instead of forming droplets. These droplets are what cause the fog that obscures your reflection.
The thin layer of shaving cream also creates a barrier between the mirror and the humid air, further preventing condensation from forming. It’s like a microscopic shield protecting your mirror from the dreaded fog!
Troubleshooting: Common Problems and Solutions
Even with the best instructions, sometimes things don’t go exactly as planned. Here are a few common problems you might encounter and how to fix them:
* **Streaks:** If you’re seeing streaks after buffing, it’s likely that you didn’t buff thoroughly enough or that you used too much shaving cream. Try buffing again with a clean section of the microfiber cloth. If that doesn’t work, lightly mist the mirror with water and buff again.
* **Residue:** If you’re seeing a sticky residue on the mirror, it’s probably because you used too much shaving cream. Try wiping the mirror down with a damp cloth and then buffing it dry.
* **Fog Returns Quickly:** If the fog returns quickly after applying the shaving cream, it could be that your bathroom is extremely humid or that you didn’t apply enough shaving cream. Try reapplying the shaving cream and making sure to ventilate your bathroom properly.
* **Shaving Cream Damaged My Mirror:** This is unlikely, but if you’re concerned about the shaving cream damaging your mirror, test it in a small, inconspicuous area first. Also, make sure to use a gentle touch when buffing to avoid scratching the surface.
Beyond the Bathroom: Other Uses for This Hack
While this hack is primarily used for bathroom mirrors, it can also be used on other surfaces that are prone to fogging, such as:
* **Car Windows:** Apply a thin layer of shaving cream to your car windows to prevent them from fogging up in the winter.
* **Eyeglasses:** A tiny dab of shaving cream can prevent your eyeglasses from fogging up when you’re wearing a mask.
* **Swimming Goggles:** Apply a thin layer of shaving cream to the inside of your swimming goggles to prevent them from fogging up while you’re swimming.
So, there you have it! A simple, effective, and affordable way to keep your bathroom mirror fog-free. I hope this hack helps you enjoy clearer reflections and less frustration in your daily routine. Happy
Conclusion
So, there you have it! The shaving cream mirror hack – a simple, affordable, and surprisingly effective way to banish foggy mirrors and enjoy crystal-clear reflections after every shower. This isn’t just about convenience; it’s about reclaiming those precious few minutes in the morning, eliminating frustration, and starting your day with a clear view – literally!
Why is this a must-try? Because it’s a game-changer. Forget expensive anti-fog sprays or constantly wiping down your mirror. This DIY solution uses a product you likely already have in your bathroom, making it incredibly accessible. The application is quick, the results are long-lasting (typically several weeks), and the cost is negligible. It’s a small effort with a significant payoff.
But the beauty of this hack lies in its adaptability. While classic shaving cream works wonders, feel free to experiment! Some users have reported success with shaving gels, although the results may vary slightly. If you have sensitive skin, consider using a hypoallergenic or fragrance-free shaving cream to avoid any potential irritation. You can also adjust the application technique to suit your preferences. Some prefer a thick layer, while others find a thin, even coat more effective. The key is to find what works best for you and your bathroom environment.
Beyond the standard bathroom mirror, consider using this trick on other glass surfaces prone to fogging. Car windows, especially during the colder months, can benefit from a shaving cream treatment. Just be sure to test a small, inconspicuous area first to ensure compatibility with the glass or coating. You can also use it on your glasses or goggles, but be extremely careful to avoid getting any in your eyes.
We’re confident that once you try this simple yet effective **shaving cream mirror hack**, you’ll wonder how you ever lived without it. It’s a testament to the power of DIY solutions and a reminder that sometimes the best answers are right under our noses (or, in this case, in our shaving kits!).
Don’t just take our word for it – give it a try! We’re eager to hear about your experiences. Did you find it as effective as we did? Did you discover any variations that worked particularly well for you? Share your tips, tricks, and photos in the comments below. Let’s build a community of fog-free mirror enthusiasts! Your feedback will not only help others but also inspire us to explore even more innovative DIY solutions. So go ahead, grab that can of shaving cream, and say goodbye to foggy mirrors forever! We can’t wait to see your sparkling reflections!
Frequently Asked Questions (FAQ)
What kind of shaving cream works best for the shaving cream mirror hack?
Generally, most types of shaving cream will work for this hack. However, classic, foamy shaving cream tends to provide the best and most consistent results. Gel-based shaving creams can also work, but you might need to experiment with the application to achieve the same level of fog prevention. Avoid using shaving creams with excessive moisturizers or oils, as these can leave a residue on the mirror. If you have sensitive skin, opt for a hypoallergenic or fragrance-free shaving cream to minimize the risk of irritation. Ultimately, the best shaving cream is the one that works best for you and your mirror type.
How long does the anti-fog effect last?
The duration of the anti-fog effect can vary depending on several factors, including the humidity levels in your bathroom, the frequency of showers, and the type of shaving cream used. On average, you can expect the effect to last for several weeks, typically between 2 to 4 weeks. Some users have reported the effect lasting even longer, up to a month or more. To maximize the longevity of the treatment, ensure your bathroom is well-ventilated and avoid directly spraying water onto the treated mirror surface. When you notice the fog starting to reappear, simply reapply the shaving cream.
Will the shaving cream damage my mirror?
No, shaving cream will not damage your mirror. Mirrors are typically made of glass with a protective backing, and shaving cream is a mild, non-abrasive product that won’t harm these materials. However, it’s always a good idea to test the shaving cream on a small, inconspicuous area of the mirror first, especially if you have an antique or particularly delicate mirror. This will ensure that there are no adverse reactions or discoloration. As long as you use a standard shaving cream and follow the application instructions carefully, you can rest assured that your mirror will remain safe and undamaged.
Can I use this hack on other glass surfaces besides mirrors?
Yes, the shaving cream hack can be used on other glass surfaces prone to fogging, such as car windows, shower doors, and even eyeglasses or goggles. However, it’s crucial to exercise caution and test the shaving cream on a small, inconspicuous area first to ensure compatibility with the specific type of glass or coating. For car windows, this hack can be particularly useful during the colder months to prevent fogging and improve visibility. When applying to eyeglasses or goggles, be extremely careful to avoid getting any shaving cream in your eyes. Rinse thoroughly with water if contact occurs.
What if I accidentally leave streaks on the mirror after wiping off the shaving cream?
Streaks are a common occurrence when first trying the shaving cream mirror hack. Don’t worry, they’re easily remedied! The key is to use a clean, dry microfiber cloth to buff the mirror after wiping off the majority of the shaving cream. The microfiber cloth will help to remove any remaining residue and leave a streak-free finish. You can also try using a slightly damp cloth followed by a dry cloth for optimal results. If streaks persist, you may have used too much shaving cream or not wiped it off thoroughly enough. Simply reapply a small amount of shaving cream, wipe it off more carefully, and buff with a microfiber cloth.
Is there a specific technique for applying the shaving cream?
While there’s no single “right” way to apply the shaving cream, here’s a recommended technique:
1. Ensure the mirror is clean and dry before starting.
2. Apply a thin, even layer of shaving cream to the entire surface of the mirror. You don’t need to use a lot; a thin coating is sufficient.
3. Let the shaving cream sit on the mirror for a minute or two. This allows it to penetrate the surface and create a protective barrier.
4. Using a clean, damp cloth, gently wipe off the shaving cream.
5. Buff the mirror with a clean, dry microfiber cloth to remove any remaining residue and streaks.
Experiment with the amount of shaving cream and the wiping technique to find what works best for you. Some users prefer to use circular motions when wiping, while others prefer straight lines. The key is to be gentle and thorough.
Can I use this hack on tinted or coated mirrors?
While the shaving cream hack is generally safe for most mirrors, it’s always best to exercise caution when dealing with tinted or coated mirrors. These types of mirrors may have delicate surfaces that could be affected by certain chemicals or cleaning agents. Before applying shaving cream to a tinted or coated mirror, test it on a small, inconspicuous area to ensure that it doesn’t cause any discoloration, streaking, or damage. If you’re unsure about the compatibility of the shaving cream with your mirror, consult the manufacturer’s instructions or contact a professional mirror cleaner.
What are some alternative DIY anti-fog solutions?
If you’re looking for alternatives to the shaving cream hack, there are several other DIY anti-fog solutions you can try. One popular option is to use a mixture of vinegar and water. Simply combine equal parts white vinegar and water in a spray bottle, spray it onto the mirror, and wipe it off with a clean cloth. Another option is to use dish soap. Apply a small amount of dish soap to a damp cloth, wipe it onto the mirror, and then buff it dry with a clean cloth. Glycerin can also be used as an anti-fog agent. Apply a thin layer of glycerin to the mirror and wipe it off with a clean cloth. These alternatives may not be as effective or long-lasting as the shaving cream hack, but they can be useful if you don’t have shaving cream on hand.
Leave a Comment