

Clean Humidifier DIY: Are you tired of that musty smell wafting from your humidifier? Or maybe you’re just concerned about the gunk lurking inside, potentially polluting the air you breathe? I get it! A clean humidifier is crucial for a healthy home, and let’s be honest, those store-bought cleaning solutions can be pricey and full of mystery ingredients.
Humidifiers have been around for centuries, with early forms used in ancient civilizations to preserve precious artifacts and even aid in respiratory health. While the technology has evolved, the core purpose remains the same: to add moisture to the air. But with that moisture comes the potential for mold, mildew, and bacteria to thrive. That’s where our DIY cleaning magic comes in!
This isn’t just about saving money (though that’s a definite perk!). It’s about taking control of your indoor air quality and ensuring you’re breathing clean, healthy air. A clean humidifier DIY project is surprisingly simple, using ingredients you likely already have in your pantry. I’m going to walk you through a step-by-step guide to effectively and safely clean your humidifier, banishing those unwanted odors and ensuring your home stays fresh and healthy. Let’s get started!
DIY Deep Clean: Breathe Easy with a Sparkling Humidifier
Hey everyone! Let’s face it, humidifiers are lifesavers, especially during dry winter months or allergy season. But they can quickly become breeding grounds for mold, mildew, and bacteria if we don’t keep them clean. And nobody wants to breathe in *that*. So, I’m going to walk you through my tried-and-true method for a deep clean that will leave your humidifier fresh and ready to work its magic.
Why Deep Cleaning Matters
Before we dive in, let’s talk about why this is so important. A dirty humidifier doesn’t just smell bad; it can actually make you sick. Those nasty microorganisms can get aerosolized and spread into the air, potentially causing respiratory problems, allergic reactions, and even infections. Regular cleaning prevents all of that!
What You’ll Need
Here’s a list of everything you’ll need to get your humidifier sparkling clean:
* White vinegar (the star of the show!)
* Hydrogen peroxide (for extra disinfecting power)
* Mild dish soap (optional, for stubborn grime)
* Soft cloths or sponges (avoid abrasive scrubbers)
* Small brushes (an old toothbrush works great for tight spots)
* Cotton swabs (for detail work)
* Water (duh!)
* A clean sink or tub (depending on the size of your humidifier)
* Gloves (optional, but recommended if you have sensitive skin)
* Safety glasses (recommended when working with hydrogen peroxide)
Disassembling Your Humidifier
Important: Always unplug your humidifier before you start cleaning! Safety first, friends.
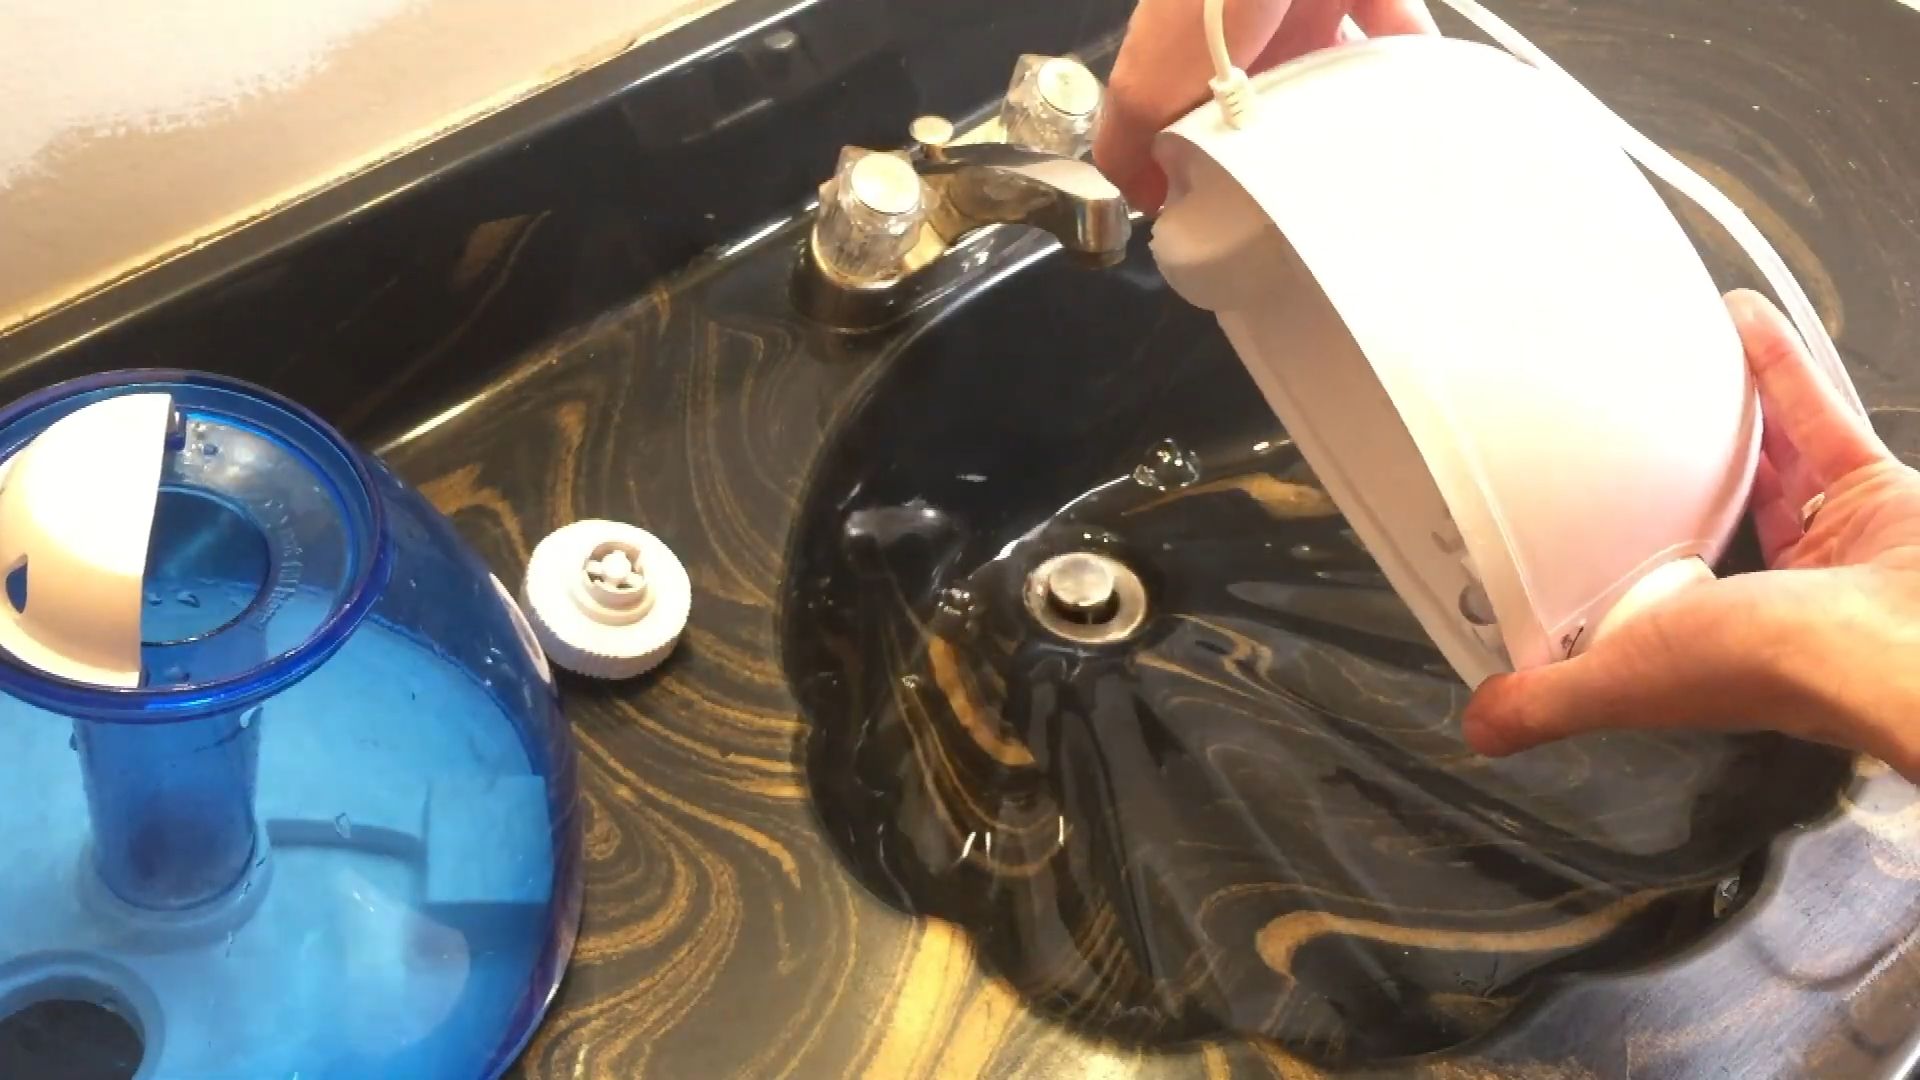
1. Empty the Water Tank: Pour out any remaining water from the tank and the base. Don’t just leave it sitting there!
2. Disassemble the Components: Carefully take apart all the removable parts of your humidifier. This usually includes the water tank, the base, any filters, and any other small components. Refer to your humidifier’s manual if you’re unsure how to disassemble it properly. Different models have different designs, so it’s best to be sure.
3. Inspect for Buildup: Take a good look at each part and identify any areas with mineral buildup, mold, or mildew. These are the areas we’ll need to focus on.
Cleaning the Water Tank
The water tank is where all the action happens, so it’s usually the dirtiest part. Here’s how I tackle it:
1. Vinegar Soak: Fill the water tank with undiluted white vinegar. Make sure the vinegar covers all the areas with mineral buildup. If the buildup is particularly bad, you can let it soak for several hours, or even overnight. I usually go for at least 30 minutes for a regular cleaning.
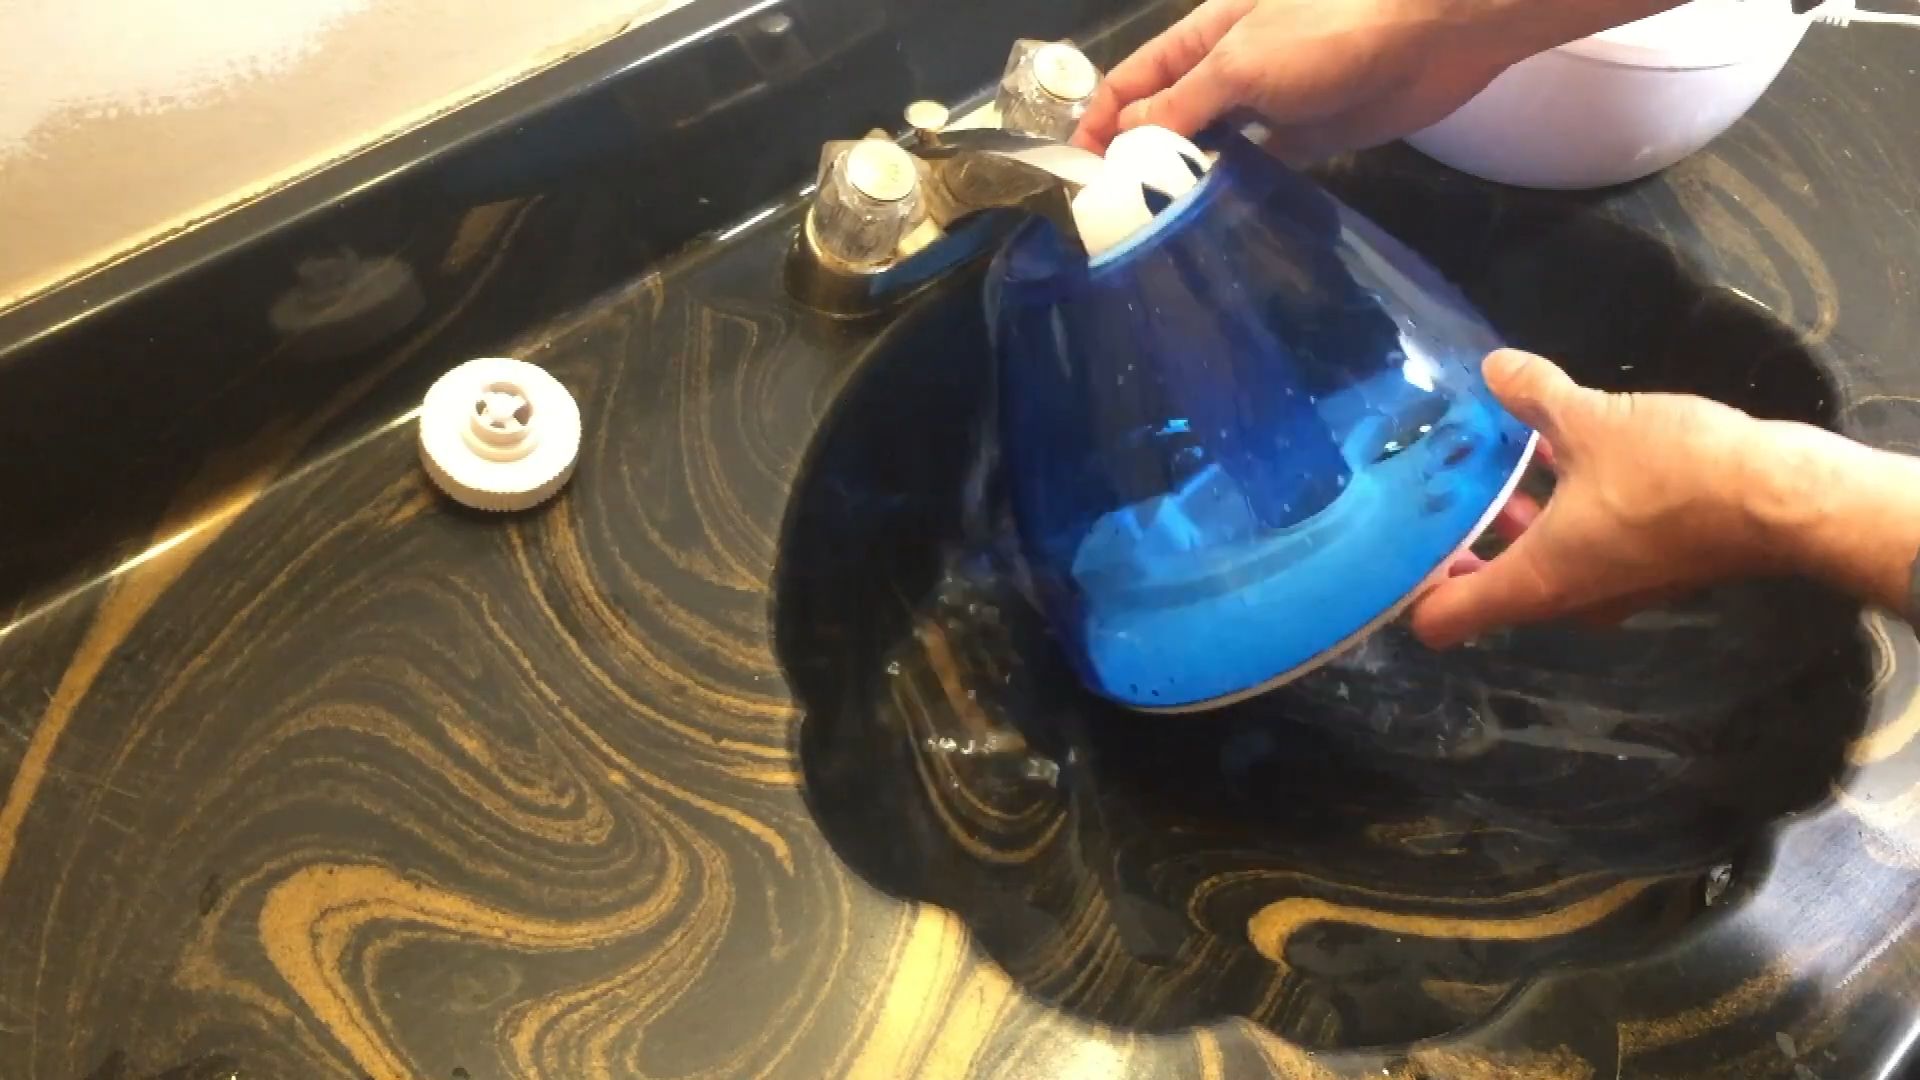
2. Scrubbing Time: After soaking, use a soft cloth or sponge to scrub the inside of the tank. Pay close attention to the bottom and sides, where mineral deposits tend to accumulate. For hard-to-reach areas, use a small brush or an old toothbrush.
3. Rinse Thoroughly: Once you’ve scrubbed away all the buildup, rinse the tank thoroughly with clean water. Make sure to remove all traces of vinegar. You don’t want your humidifier smelling like salad dressing!
4. Hydrogen Peroxide Rinse (Optional): For extra disinfecting power, you can rinse the tank with hydrogen peroxide after rinsing with water. Pour a small amount of hydrogen peroxide into the tank, swish it around to coat all surfaces, and then let it sit for about 5-10 minutes. Rinse thoroughly with clean water again.
5. Air Dry: Allow the water tank to air dry completely before reassembling your humidifier. This helps prevent the growth of mold and mildew.
Cleaning the Humidifier Base
The base of the humidifier is another area that can accumulate mineral buildup and bacteria. Here’s how to clean it:
1. Vinegar Solution: Mix equal parts white vinegar and water in a bowl or container.
2. Wipe Down: Dip a soft cloth or sponge into the vinegar solution and wipe down all the surfaces of the humidifier base. Pay special attention to any areas with visible buildup or discoloration.
3. Clean the Reservoir: The reservoir is the part of the base that holds the water. If it’s removable, take it out and clean it separately using the same vinegar solution. If it’s not removable, carefully wipe it down with the vinegar solution, making sure to reach all the corners and crevices.
4. Use a Brush for Tight Spots: Use a small brush or cotton swabs to clean any hard-to-reach areas in the base, such as the nozzle or any small openings.
5. Rinse Thoroughly: Rinse the base thoroughly with clean water to remove all traces of vinegar.
6. Hydrogen Peroxide (Optional): As with the tank, you can use hydrogen peroxide to disinfect the base. Spray or wipe the base with hydrogen peroxide, let it sit for a few minutes, and then rinse thoroughly with clean water.
7. Air Dry: Allow the base to air dry completely before reassembling your humidifier.
Cleaning the Filter (If Applicable)
Some humidifiers have filters that need to be cleaned or replaced regularly. Check your humidifier’s manual for specific instructions on how to clean or replace the filter.
1. Rinse or Wash: Depending on the type of filter, you may be able to rinse it with water or wash it with a mild soap solution. Follow the manufacturer’s instructions carefully.
2. Air Dry: Allow the filter to air dry completely before reassembling your humidifier.
3. Replace if Necessary: If the filter is damaged or heavily soiled, it’s best to replace it with a new one.
Dealing with Stubborn Buildup
Sometimes, mineral buildup can be really stubborn and difficult to remove with just vinegar and scrubbing. Here are a few tips for dealing with stubborn buildup:
1. Longer Soak: If the buildup is particularly bad, try soaking the affected parts in vinegar for a longer period of time, such as overnight.
2. Vinegar Paste: Make a paste of baking soda and vinegar and apply it to the affected areas. Let it sit for a few minutes, and then scrub with a brush or sponge.
3. Lemon Juice: Lemon juice is another natural cleaning agent that can help dissolve mineral buildup. You can use it in the same way as vinegar.
4. CLR: If all else fails, you can try using a commercial cleaner like CLR (Calcium, Lime, and Rust Remover). However, be sure to follow the manufacturer’s instructions carefully and rinse thoroughly to remove all traces of the cleaner. I personally try to avoid harsh chemicals, but sometimes you gotta do what you gotta do!
Reassembling Your Humidifier
Once all the parts are clean and dry, it’s time to reassemble your humidifier.
1. Follow the Instructions: Refer to your humidifier’s manual for specific instructions on how to reassemble it properly.
2. Make Sure Everything is Secure: Make sure all the parts are securely attached before filling the water tank.
3. Fill with Clean Water: Fill the water tank with clean, distilled water. Distilled water helps prevent mineral buildup.
4. Plug it In: Plug in your humidifier and turn it on.
Maintaining a Clean Humidifier
Cleaning your humidifier regularly is the best way to prevent buildup and keep it running smoothly. Here are a few tips for maintaining a clean humidifier:
* Empty and Dry Daily: Empty the water tank and base every day and allow them to air dry completely.
* Clean Weekly: Deep clean your humidifier at least once a week, or more often if you use it frequently.
* Use Distilled Water: Use distilled water instead of tap water to prevent mineral buildup.
* Change the Filter Regularly: If your humidifier has a filter, change it regularly according to the manufacturer’s instructions.
* Store Properly: When you’re not using your humidifier, store it in a clean, dry place.
Troubleshooting Common Issues
Even with regular cleaning, you might encounter some common issues with your humidifier. Here are a few troubleshooting tips:
* Humidifier Not Producing Mist: Make sure the water tank is full and the humidifier is plugged in. Check the filter to see if it’s clogged. Clean the nozzle to remove any buildup.
* Humidifier Smells Bad: This is usually a sign of mold or mildew growth. Deep clean your humidifier thoroughly.
* Humidifier is Leaking: Check the water tank and base for cracks or leaks. Make sure all the parts are securely attached.
* Humidifier is Noisy: This could be due to mineral buildup or a malfunctioning fan. Clean your humidifier thoroughly.
Safety Precautions
* Always unplug your humidifier before cleaning it.
* Avoid using abrasive scrubbers, as they can damage the
Conclusion
So, there you have it! A simple, effective, and budget-friendly way to tackle the grime and build-up that inevitably plagues our humidifiers. We’ve walked you through the process of creating your own powerful cleaning solution using readily available ingredients, saving you money and ensuring a healthier environment in your home.
Why is this DIY humidifier cleaning trick a must-try? Because a clean humidifier is not just about aesthetics; it’s about your health. A dirty humidifier can harbor mold, bacteria, and mineral deposits, all of which can be dispersed into the air you breathe, potentially triggering allergies, asthma, and other respiratory issues. By regularly cleaning your humidifier with this homemade solution, you’re actively safeguarding your well-being and that of your family.
But the benefits don’t stop there. This method is also incredibly versatile. Feel free to experiment with variations to suit your specific needs and preferences. For instance, if you’re dealing with particularly stubborn mineral deposits, you can increase the concentration of white vinegar in the solution. Or, if you prefer a more fragrant cleaning experience, add a few drops of your favorite essential oil, such as tea tree oil (known for its antibacterial properties) or lemon oil (for a fresh, clean scent). Just be sure to use essential oils sparingly and avoid those that could be harmful if inhaled in large quantities.
Another variation to consider is the soaking time. While we recommend a minimum of 30 minutes, you can extend the soaking time to several hours or even overnight for heavily soiled humidifiers. Just remember to rinse thoroughly before reassembling and using your humidifier.
Beyond the basic cleaning solution, consider using a soft-bristled brush or cotton swabs to scrub away any remaining residue in hard-to-reach areas. Pay particular attention to the water tank, the base, and any filters or wicks that your humidifier may have. Regular maintenance is key to preventing build-up and ensuring optimal performance.
We understand that cleaning appliances can sometimes feel like a chore, but this DIY humidifier cleaning method is designed to be as quick and easy as possible. By incorporating it into your regular cleaning routine, you can keep your humidifier running smoothly and efficiently, providing you with the clean, moist air you need to stay healthy and comfortable.
Now, it’s your turn! We encourage you to give this DIY humidifier cleaning trick a try. We’re confident that you’ll be amazed by the results. And more importantly, we want to hear about your experience. Did you find the solution effective? Did you try any variations? What tips and tricks did you discover along the way? Share your thoughts and feedback in the comments below. Your insights could help other readers improve their humidifier cleaning routine and enjoy the benefits of a clean, healthy home. Let’s work together to create a community of clean humidifier enthusiasts!
Frequently Asked Questions (FAQ)
Why is it important to clean my humidifier regularly?
It’s crucial to clean your humidifier regularly because stagnant water provides an ideal breeding ground for mold, bacteria, and mineral deposits. These contaminants can then be dispersed into the air you breathe, potentially causing or exacerbating respiratory problems, allergies, and other health issues. Regular cleaning prevents this build-up and ensures that your humidifier is providing clean, healthy moisture.
How often should I clean my humidifier?
The frequency of cleaning depends on how often you use your humidifier. As a general rule, you should clean your humidifier at least once a week, especially if you use it daily. If you only use it occasionally, you can clean it every two weeks. However, if you notice any visible signs of mold, mildew, or mineral build-up, clean it immediately, regardless of your regular cleaning schedule.
What ingredients do I need for this DIY humidifier cleaning solution?
The basic DIY humidifier cleaning solution requires only two simple ingredients: white vinegar and water. You can also add a few drops of essential oil for fragrance, but this is optional. The ratio of vinegar to water is typically 1:1, but you can adjust it depending on the severity of the build-up.
Can I use other types of vinegar, such as apple cider vinegar?
While white vinegar is the most effective and readily available option, you can use apple cider vinegar as a substitute. However, apple cider vinegar may not be as potent as white vinegar, so you may need to increase the concentration or soaking time. Avoid using other types of vinegar, such as balsamic vinegar, as they may contain sugars or other additives that could damage your humidifier.
How long should I soak the humidifier parts in the cleaning solution?
We recommend soaking the humidifier parts in the cleaning solution for at least 30 minutes. However, if you’re dealing with stubborn mineral deposits or heavy build-up, you can extend the soaking time to several hours or even overnight. Just be sure to rinse thoroughly before reassembling and using your humidifier.
Is it safe to use bleach to clean my humidifier?
While bleach is a powerful disinfectant, it’s generally not recommended for cleaning humidifiers. Bleach can be corrosive and may damage certain humidifier components. Additionally, bleach fumes can be harmful if inhaled, and any residual bleach left in the humidifier could be dispersed into the air. The DIY vinegar solution is a safer and more environmentally friendly alternative.
How do I clean the humidifier filter?
The cleaning process for the humidifier filter depends on the type of filter. Some filters are disposable and should be replaced regularly, while others are reusable and can be cleaned. For reusable filters, rinse them thoroughly with water to remove any loose debris. If necessary, you can soak them in the vinegar solution for a short period of time. Allow the filter to air dry completely before reassembling it. Always refer to the manufacturer’s instructions for specific cleaning recommendations for your humidifier filter.
What if I still see mineral deposits after cleaning?
If you still see mineral deposits after cleaning, you can try scrubbing them gently with a soft-bristled brush or cotton swab. You can also try making a paste of baking soda and water and applying it to the affected areas. Let the paste sit for a few minutes before scrubbing and rinsing. For particularly stubborn deposits, you may need to repeat the cleaning process or use a commercial descaling solution specifically designed for humidifiers.
How can I prevent mineral build-up in my humidifier?
To prevent mineral build-up in your humidifier, use distilled water instead of tap water. Tap water contains minerals that can accumulate over time and form deposits. Distilled water is free of these minerals, which helps to keep your humidifier clean and running smoothly. Additionally, empty and dry your humidifier completely between uses to prevent the growth of mold and bacteria.
Can I use essential oils in my humidifier?
Some humidifiers are designed to be used with essential oils, while others are not. Check the manufacturer’s instructions for your specific humidifier model to determine if it’s safe to use essential oils. If it is, use essential oils sparingly and choose those that are safe for inhalation. Avoid using essential oils that could damage the humidifier or cause respiratory irritation. Always clean your humidifier thoroughly after using essential oils to prevent build-up.

Leave a Comment