

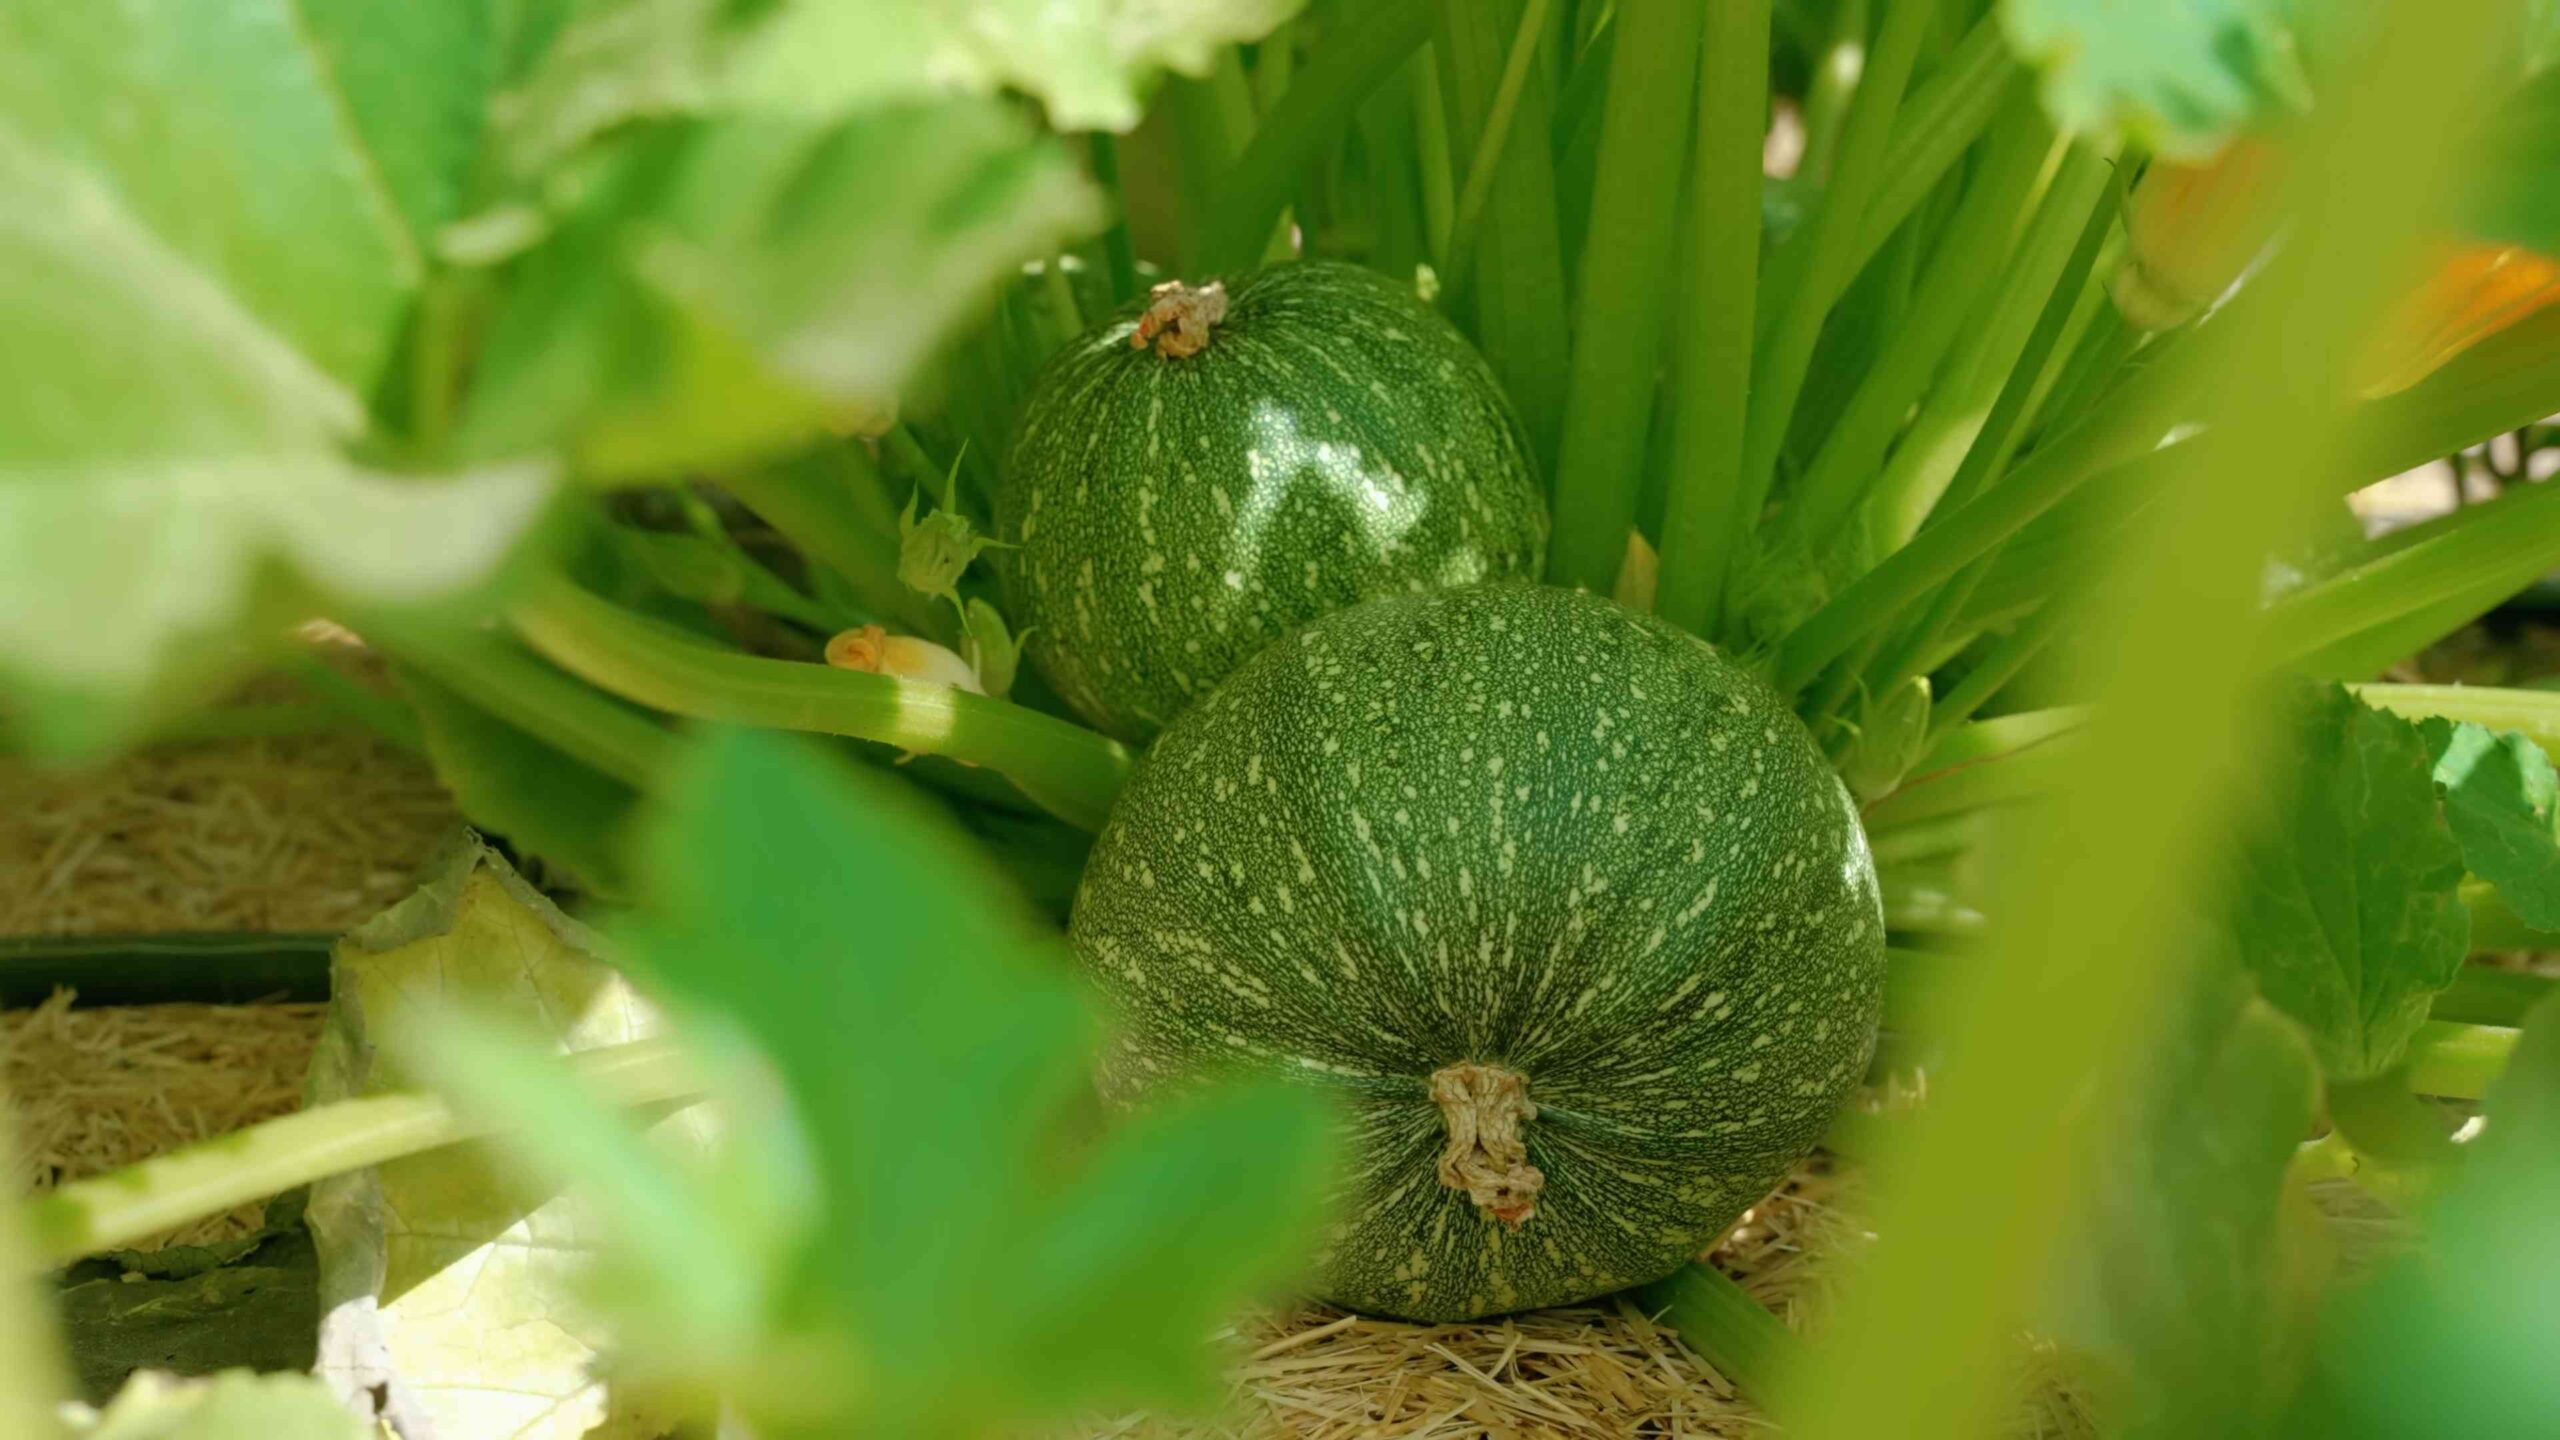
Grow Squash at Home and unlock a world of culinary possibilities right in your backyard! Imagine stepping outside and harvesting your own vibrant, delicious squash, ready to be transformed into comforting soups, savory roasts, or even delectable desserts. Forget those bland, store-bought vegetables – with a few simple tricks and a little DIY spirit, you can cultivate a thriving squash patch that will be the envy of your neighborhood.
Squash has a rich history, dating back thousands of years to Central and South America, where it was a staple food for indigenous populations. From the ancient Aztecs to the early American settlers, squash has nourished generations. Today, we can tap into that legacy and bring this versatile vegetable into our own gardens.
Why should you embark on this DIY adventure? Because growing your own squash is not only incredibly rewarding, but it also allows you to control exactly what goes into your food. No more worrying about pesticides or questionable farming practices! Plus, the taste of homegrown squash is simply unmatched. I’m going to share some easy-to-follow tips and tricks that will help you grow squash at home successfully, even if you’re a complete beginner. Let’s get our hands dirty and create a bountiful harvest together!
Growing Squash at Home: A Comprehensive DIY Guide
Hey there, fellow gardening enthusiasts! I’m so excited to share my tried-and-true method for growing delicious squash right in your own backyard. Squash is a fantastic addition to any garden – it’s relatively easy to grow, incredibly versatile in the kitchen, and offers a bountiful harvest. Whether you’re a seasoned gardener or just starting out, this guide will walk you through every step of the process, from seed to table. Let’s get our hands dirty!
Choosing Your Squash Variety
Before we dive into the nitty-gritty, let’s talk about squash varieties. There are two main types: summer squash and winter squash.
* Summer Squash: These are harvested when immature and have soft skin. Think zucchini, yellow squash, and pattypan squash. They’re best eaten soon after picking.
* Winter Squash: These are harvested when mature and have a hard rind. Think butternut squash, acorn squash, spaghetti squash, and pumpkins (yes, pumpkins are technically squash!). They can be stored for several months.
Consider your climate, space, and personal preferences when choosing your varieties. I personally love growing butternut squash for its sweet flavor and long storage life, and zucchini because it’s so prolific!
Preparing Your Garden Bed
Squash plants are heavy feeders, meaning they need a lot of nutrients to thrive. Proper soil preparation is crucial for a successful harvest.
* Sunlight: Squash needs at least 6-8 hours of direct sunlight per day. Choose a location in your garden that receives plenty of sun.
* Soil: Squash prefers well-drained, fertile soil with a pH between 6.0 and 6.8.
* Compost: Amend your soil with plenty of compost or well-rotted manure. This will improve drainage, add nutrients, and help retain moisture.
* Spacing: Squash plants need plenty of space to spread out. Summer squash plants should be spaced 2-3 feet apart, while winter squash plants need 3-4 feet of space.
Step-by-Step Planting Guide
Now for the fun part – planting! You can either start your squash seeds indoors or direct sow them in your garden. I prefer direct sowing because it avoids transplant shock.
1. Timing: Wait until the danger of frost has passed and the soil has warmed up to at least 60°F (15°C). This is usually a few weeks after the last frost date in your area.
2. Sowing Seeds: Sow seeds 1 inch deep and 2-3 feet apart for summer squash, or 3-4 feet apart for winter squash. I usually plant 2-3 seeds per hill and then thin them to the strongest seedling.
3. Watering: Water the soil thoroughly after planting. Keep the soil consistently moist, but not waterlogged, until the seedlings emerge.
4. Mulching: Once the seedlings are a few inches tall, mulch around the plants with straw or hay. This will help retain moisture, suppress weeds, and keep the soil cool.
Caring for Your Squash Plants
Once your squash plants are established, they’ll need regular care to thrive.
1. Watering: Water deeply and regularly, especially during dry spells. Aim to water at the base of the plants to avoid wetting the foliage, which can lead to fungal diseases.
2. Fertilizing: Squash plants are heavy feeders, so they’ll benefit from regular fertilization. I like to use a balanced organic fertilizer every few weeks. You can also side-dress with compost or well-rotted manure.
3. Weeding: Keep the area around your squash plants free of weeds. Weeds compete with squash plants for nutrients and water.
4. Pest Control: Squash plants are susceptible to several pests, including squash bugs, squash vine borers, and aphids. Inspect your plants regularly for signs of pests and take action promptly. I’ll cover pest control in more detail later.
5. Pollination: Squash plants have separate male and female flowers. Bees are essential for pollination. If you’re not seeing many bees in your garden, you may need to hand-pollinate the flowers.
Dealing with Common Squash Pests and Diseases
Unfortunately, squash plants can be prone to a few pests and diseases. But don’t worry, with a little vigilance, you can keep your plants healthy and productive.
* Squash Bugs: These pesky insects suck the sap from squash leaves, causing them to wilt and die. Hand-picking the bugs and their eggs is the most effective way to control them. You can also use insecticidal soap.
* Squash Vine Borers: These moths lay their eggs at the base of squash plants. The larvae then bore into the stems, causing the plants to wilt and die. To prevent squash vine borers, wrap the base of the stems with aluminum foil or netting. You can also inject Bacillus thuringiensis (Bt) into the stems to kill the larvae.
* Aphids: These tiny insects suck the sap from squash leaves, causing them to curl and distort. Spraying the plants with a strong stream of water or insecticidal soap can control aphids.
* Powdery Mildew: This fungal disease causes a white, powdery coating on squash leaves. To prevent powdery mildew, water at the base of the plants, provide good air circulation, and avoid overcrowding. You can also spray the plants with a fungicide.
Hand-Pollinating Your Squash
As I mentioned earlier, squash plants have separate male and female flowers. The female flowers have a small fruit at the base, while the male flowers do not. Bees are usually responsible for transferring pollen from the male flowers to the female flowers, but sometimes they need a little help.
Here’s how to hand-pollinate your squash:
1. Identify Male and Female Flowers: Look for the female flowers with the small fruit at the base.
2. Collect Pollen: In the early morning, when the male flowers are open, use a small paintbrush or cotton swab to collect pollen from the male flowers.
3. Transfer Pollen: Gently transfer the pollen to the stigma of the female flower.
4. Repeat: Repeat this process for all the female flowers that are open.
Hand-pollinating can significantly increase your squash yield, especially if you live in an area with few bees.
Harvesting Your Squash
The timing of your harvest will depend on the type of squash you’re growing.
* Summer Squash: Harvest summer squash when it’s young and tender, usually about 6-8 inches long. The skin should be smooth and easily pierced with your fingernail.
* Winter Squash: Harvest winter squash when the rind is hard and resistant to scratching. The stem should be dry and brown.
To harvest squash, use a sharp knife to cut the stem a few inches from the fruit. Handle the squash carefully to avoid bruising.
Storing Your Squash
Summer squash is best eaten soon after harvesting. Winter squash, on the other hand, can be stored for several months.
* Summer Squash: Store summer squash in the refrigerator for up to a week.
* Winter Squash: Store winter squash in a cool, dry place with good air circulation. A basement or root cellar is ideal. Avoid storing squash near apples or pears, as they release ethylene gas, which can cause the squash to spoil.
Enjoying Your Harvest
Now for the best part – enjoying the fruits (or vegetables!) of your labor! Squash is incredibly versatile and can be used in a variety of dishes.
* Summer Squash: Grill it, sauté it, roast it, or add it to soups, stews, and salads. Zucchini bread is a classic summer squash recipe.
* Winter Squash: Roast it, bake it, or use it in soups, stews, and pies. Butternut squash soup is a personal favorite.
Troubleshooting Common Squash Problems
Even with the best care, you might encounter some problems while growing squash. Here are a few common issues and how to address them:
* Blossom End Rot: This condition causes the blossom end of the squash to rot. It’s usually caused by calcium deficiency or inconsistent watering. To prevent blossom end rot, amend your soil with calcium before planting and water regularly.
* Poor Fruit Set: If your squash plants are producing flowers but not fruit, it could be due to poor pollination, high temperatures, or nutrient deficiencies. Hand-pollinate your flowers, provide shade during the hottest part of the day, and fertilize regularly.
* Wilting Leaves: Wilting leaves can be caused by squash vine borers, squash bugs, or lack of water. Inspect your plants for pests and water deeply and regularly.
Tips for a Bountiful Harvest
Here are a few extra tips to help you maximize your squash harvest:
* Succession Planting: Plant squash seeds every few weeks to extend your harvest season.
* Companion Planting: Plant squash with companion plants like beans, corn, and marigolds. These plants

Conclusion
So, there you have it! Growing squash at home isn’t just a gardening project; it’s an investment in fresh, flavorful meals, a connection to nature, and a rewarding experience from seed to table. We’ve explored the essential steps, from selecting the right varieties to nurturing your plants and harvesting your bounty. But why is this DIY approach a must-try?
Firstly, the taste difference is undeniable. Store-bought squash, while convenient, often lacks the vibrant flavor and sweetness of homegrown varieties. When you grow your own, you control the entire process, ensuring optimal ripeness and freshness. Imagine the rich, nutty flavor of a butternut squash you’ve nurtured yourself, or the delicate sweetness of a zucchini picked straight from the vine. The difference is truly remarkable.
Secondly, growing squash at home is incredibly cost-effective. While there’s an initial investment in seeds, soil, and perhaps some basic gardening tools, the yield from just a few plants can significantly reduce your grocery bill. Plus, you’ll avoid the often-inflated prices of specialty squash varieties at the supermarket.
Thirdly, it’s an environmentally friendly choice. By growing your own food, you reduce your reliance on commercially grown produce, which often involves long-distance transportation and intensive farming practices. You can also choose to grow organically, avoiding harmful pesticides and herbicides.
But the benefits extend beyond taste, cost, and environmental impact. Gardening is a therapeutic activity that can reduce stress, improve your mood, and provide a sense of accomplishment. Watching your squash plants grow and thrive is a deeply satisfying experience.
Ready to take your squash growing to the next level? Consider these variations:
* Vertical Gardening: If you’re short on space, try growing vining squash varieties like butternut or spaghetti squash on a trellis or fence. This not only saves space but also improves air circulation and reduces the risk of disease.
* Companion Planting: Plant squash alongside beneficial companion plants like marigolds (to deter pests), nasturtiums (to attract pollinators), or beans (to fix nitrogen in the soil).
* Heirloom Varieties: Explore the world of heirloom squash varieties, which offer unique flavors, colors, and textures. Some popular choices include ‘Delicata,’ ‘Hubbard,’ and ‘Marina di Chioggia.’
* Succession Planting: Extend your harvest season by planting squash seeds every few weeks. This will ensure a continuous supply of fresh squash throughout the summer and fall.
We’ve armed you with the knowledge and inspiration to embark on your own squash-growing adventure. Now, it’s time to get your hands dirty! We encourage you to try this DIY trick and experience the joy of growing your own delicious squash. Don’t be afraid to experiment with different varieties, techniques, and companion plants.
Most importantly, share your experience with us! We’d love to hear about your successes, challenges, and favorite squash recipes. Post photos of your homegrown squash on social media using #HomegrownSquash and tag us so we can celebrate your gardening achievements. Let’s build a community of passionate home gardeners who are dedicated to growing their own fresh, healthy food. Happy growing!
Frequently Asked Questions (FAQ)
What are the easiest squash varieties to grow for beginners?
For beginners, some of the easiest squash varieties to grow include zucchini, yellow squash, and crookneck squash. These varieties are known for their rapid growth, high yields, and relatively low maintenance requirements. They are also less susceptible to common squash pests and diseases. Butternut squash is another good option, although it requires a longer growing season. Avoid larger varieties like pumpkins initially, as they need more space and resources.
How much space do squash plants need?
The amount of space required for squash plants varies depending on the variety. Bush varieties, such as zucchini and yellow squash, typically need about 3-4 feet of space between plants. Vining varieties, such as butternut squash and spaghetti squash, can spread much further, requiring 6-8 feet of space between plants or a trellis for vertical growth. Consider the mature size of the squash variety when planning your garden layout. Proper spacing is crucial for air circulation, sunlight penetration, and preventing overcrowding, which can lead to disease.
What kind of soil is best for growing squash?
Squash plants thrive in well-drained, fertile soil that is rich in organic matter. Amend your soil with compost, aged manure, or other organic materials before planting to improve its structure, drainage, and nutrient content. The ideal soil pH for squash is between 6.0 and 7.0. Perform a soil test to determine your soil’s pH and nutrient levels, and adjust accordingly. Avoid heavy clay soils, which can become waterlogged and inhibit root growth.
How often should I water my squash plants?
Squash plants need consistent moisture, especially during hot, dry weather. Water deeply and regularly, aiming to keep the soil consistently moist but not waterlogged. Water at the base of the plants to avoid wetting the foliage, which can increase the risk of fungal diseases. A good rule of thumb is to water when the top inch of soil feels dry to the touch. Mulching around the plants can help retain moisture and suppress weeds. During periods of heavy rain, reduce watering to prevent overwatering.
What are some common pests and diseases that affect squash plants, and how can I control them?
Common pests that affect squash plants include squash bugs, squash vine borers, aphids, and cucumber beetles. Common diseases include powdery mildew, downy mildew, and blossom-end rot. To control pests, use row covers to protect young plants, handpick pests as you see them, and introduce beneficial insects like ladybugs and lacewings. To prevent diseases, ensure good air circulation, avoid overhead watering, and apply organic fungicides if necessary. Blossom-end rot is often caused by calcium deficiency or inconsistent watering, so ensure your soil is properly amended and water regularly.
When is the best time to harvest squash?
The best time to harvest squash depends on the variety. Summer squash, such as zucchini and yellow squash, should be harvested when they are young and tender, typically when they are 6-8 inches long. Winter squash, such as butternut squash and spaghetti squash, should be harvested when they are fully mature and the skin is hard and resistant to scratching. The stem should also be dry and brown. Leave a few inches of stem attached to the squash when harvesting to prolong its storage life.
Can I grow squash in containers?
Yes, you can grow squash in containers, but you’ll need to choose a large container (at least 20 gallons) and select bush varieties like zucchini or yellow squash. Ensure the container has good drainage and use a high-quality potting mix. Container-grown squash will need more frequent watering and fertilization than squash grown in the ground. Provide support for the plants as they grow, and consider using a trellis for vining varieties.
How can I encourage pollination in my squash plants?
Squash plants rely on pollinators, such as bees and butterflies, to produce fruit. To encourage pollination, plant flowers that attract pollinators near your squash plants, such as marigolds, zinnias, and sunflowers. Avoid using pesticides that can harm pollinators. If pollination is poor, you can hand-pollinate the flowers by transferring pollen from the male flowers to the female flowers using a small brush.
What are some good companion plants for squash?
Good companion plants for squash include marigolds (to deter pests), nasturtiums (to attract pollinators), beans (to fix nitrogen in the soil), and radishes (to deter squash vine borers). Avoid planting squash near potatoes or members of the cabbage family, as they can compete for nutrients or attract pests. Companion planting can help improve the health and productivity of your squash plants.
How do I store homegrown squash?
Summer squash, such as zucchini and yellow squash, should be stored in the refrigerator for up to a week. Winter squash, such as butternut squash and spaghetti squash, can be stored in a cool, dry place for several months. Ensure the squash is free from blemishes or bruises before storing it. Do not wash the squash until you are ready to use it. Proper storage is essential for preserving the flavor and quality of your homegrown squash.
Leave a Comment