

Clean Oven with Baking Soda: Are you tired of battling baked-on grime and lingering odors every time you open your oven? I know I was! For generations, keeping the heart of the kitchen sparkling has been a household challenge. From ancient wood-fired ovens to the modern marvels we use today, the struggle to maintain a clean cooking space is a tale as old as time. But what if I told you there’s a simple, non-toxic solution hiding in your pantry?
This DIY trick isn’t just about aesthetics; it’s about ensuring your oven operates efficiently and your food tastes its best. Burnt food residue can affect cooking temperatures and even impart unwanted flavors to your culinary creations. Plus, harsh chemical cleaners can leave behind fumes that are harmful to your health and the environment. That’s where the magic of baking soda comes in!
In this article, I’m going to share a step-by-step guide on how to clean oven with baking soda, a method that’s not only effective but also safe and budget-friendly. Say goodbye to harsh chemicals and hello to a sparkling clean oven using a natural, time-tested ingredient. Let’s get started and transform your oven from a grimy mess to a gleaming masterpiece!
DIY Oven Cleaning with Baking Soda: A Sparkling Clean Oven Without Harsh Chemicals!
Okay, let’s face it, cleaning the oven is one of those chores we all dread. But it doesn’t have to be a toxic nightmare filled with harsh chemicals! I’m going to show you how to clean your oven using the power of baking soda and vinegar – a natural, effective, and budget-friendly method. Trust me, your oven (and your lungs!) will thank you.
What You’ll Need:
* Baking soda
* Water
* White vinegar
* Spray bottle
* Rubber gloves (optional, but recommended)
* Spatula or scraper
* Sponge or cloth
* Old towel or rags
* Small bowl
* Empty spray bottle
Step-by-Step Instructions:
Phase 1: Preparing the Oven
1. Remove Oven Racks and Accessories: First things first, take out everything from your oven – the racks, baking stones, pizza stones, thermometers, anything that’s in there. We want a clean slate to work with. I usually soak my racks in hot, soapy water in the sink while I’m working on the oven itself. This helps loosen the grime and makes them easier to scrub later.
2. Wipe Up Loose Debris: Use a damp cloth or sponge to wipe up any loose crumbs, food particles, or spills from the bottom of the oven. This will prevent them from turning into a gooey mess when we apply the baking soda paste.
Phase 2: Applying the Baking Soda Paste
3. Make the Baking Soda Paste: In a small bowl, mix together ½ cup of baking soda with a few tablespoons of water. Add the water gradually until you form a thick, spreadable paste. The consistency should be similar to frosting. If you add too much water, just add a little more baking soda to thicken it up.
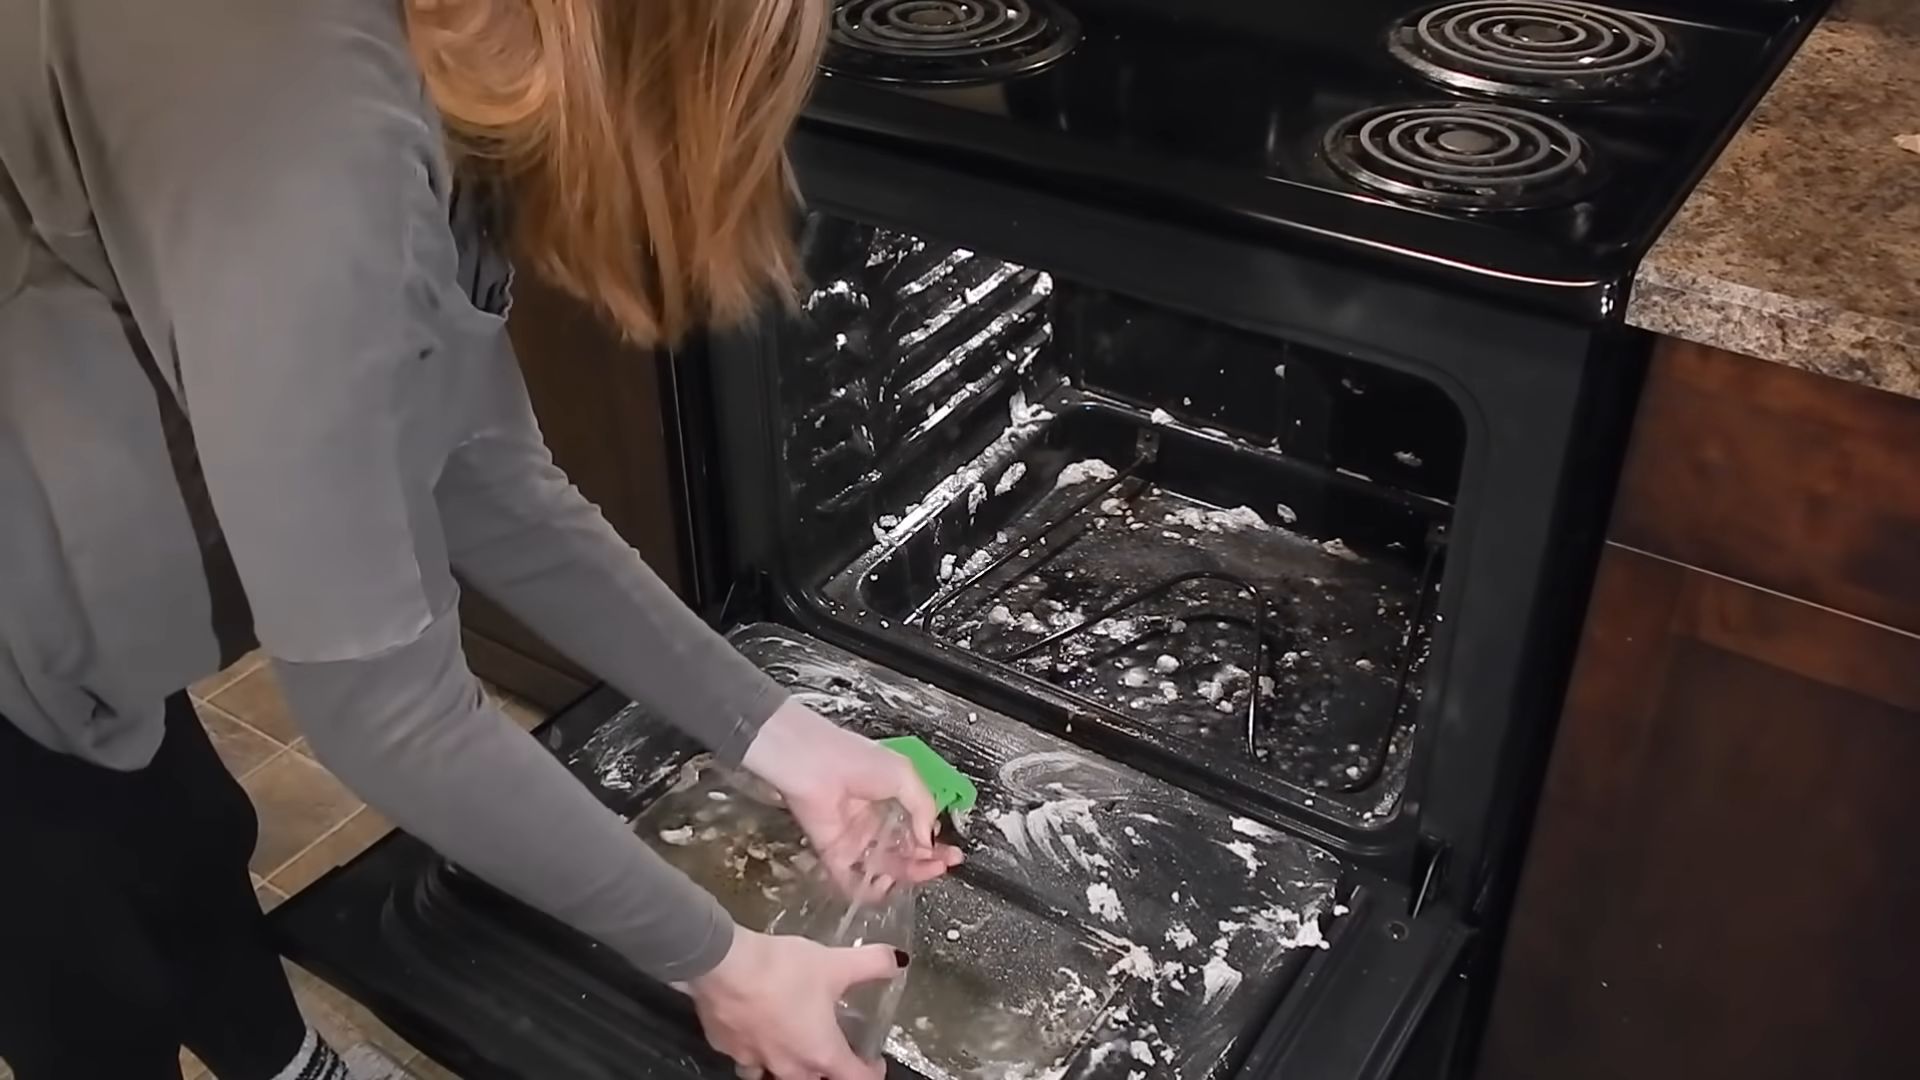
4. Coat the Oven Interior: Now comes the fun part (well, maybe not *fun*, but satisfying!). Using your spatula or scraper (or even your hands with gloves on), spread the baking soda paste all over the interior surfaces of your oven. This includes the bottom, sides, top, and door. Avoid the heating elements! You don’t want to get the paste on those. I usually apply a thicker layer to areas with stubborn stains or baked-on grease.
5. Let it Sit Overnight (or at Least 12 Hours): This is the key to the whole process. The baking soda needs time to work its magic and loosen the grime. I usually apply the paste before I go to bed and let it sit overnight. The longer it sits, the easier it will be to clean later.
Phase 3: Cleaning and Rinsing
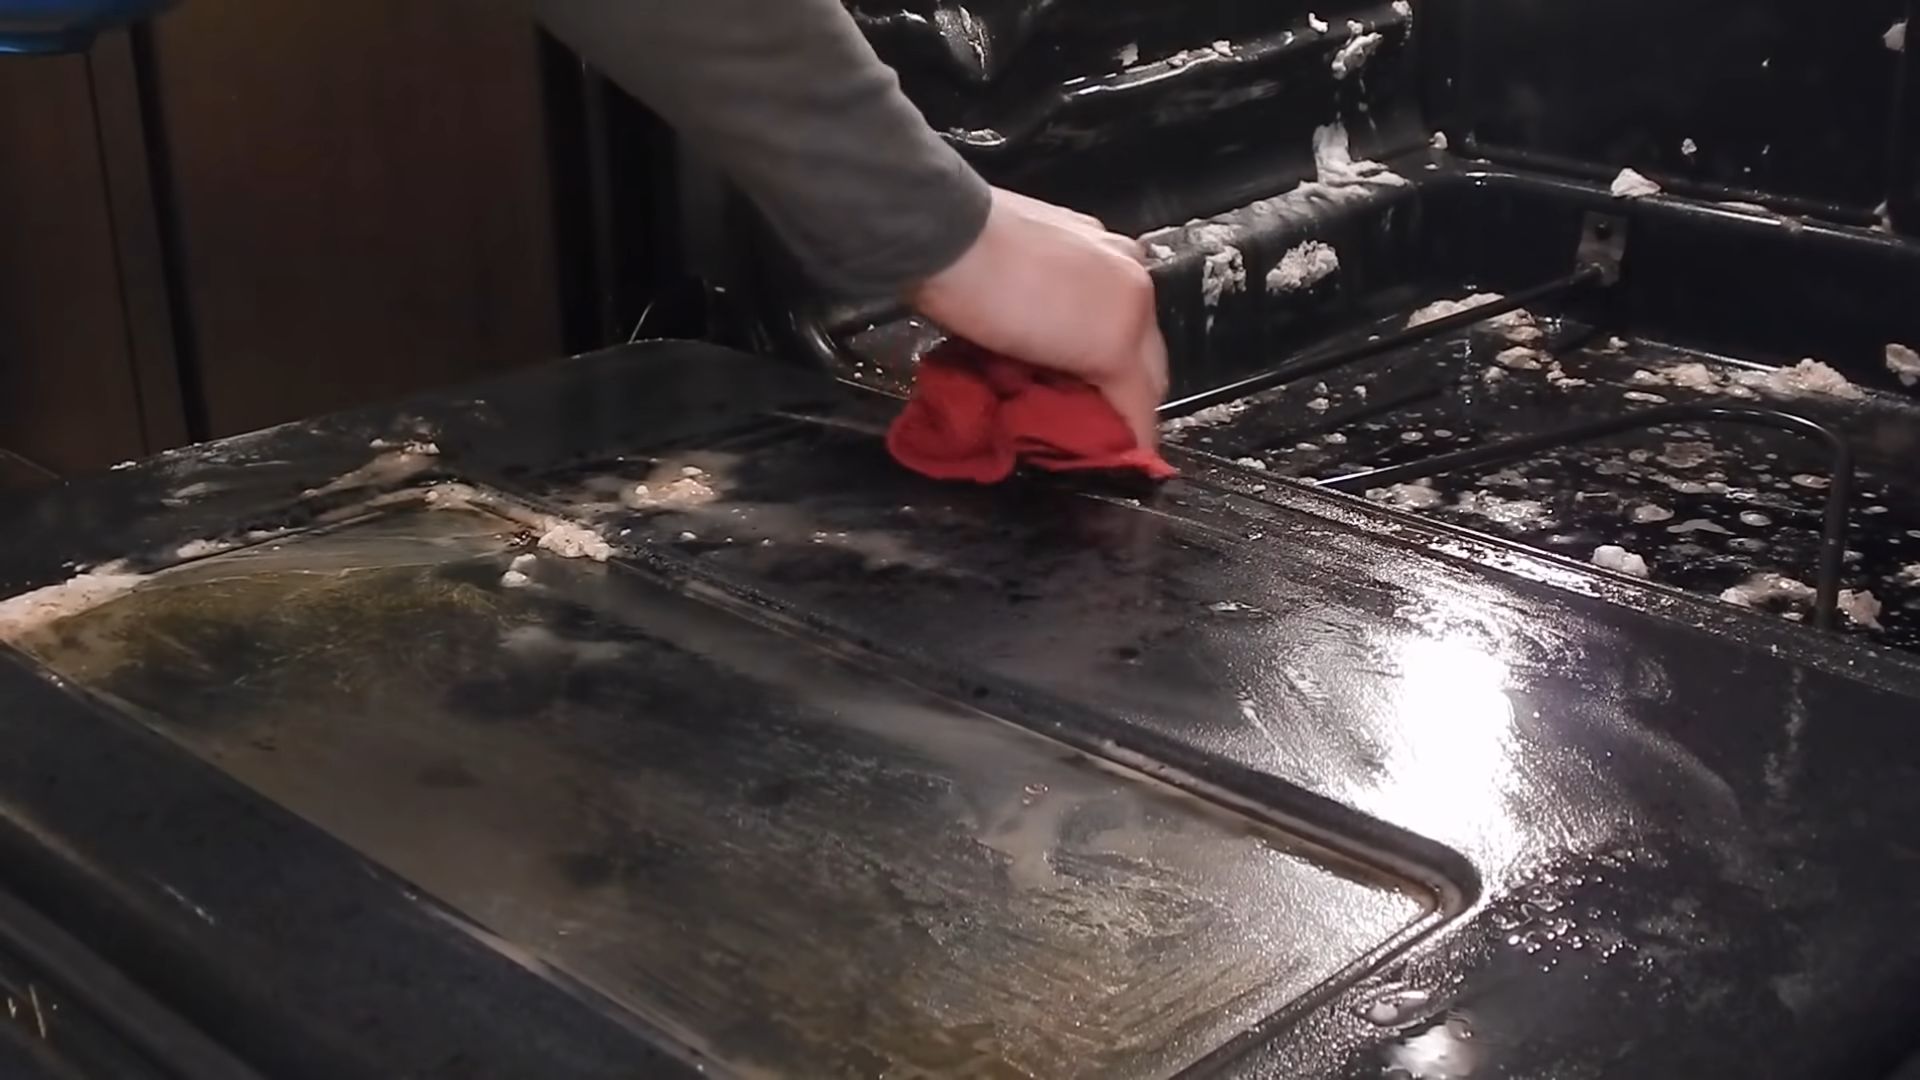
6. Wipe Away the Baking Soda Paste: After the baking soda has had its time to sit, use a damp sponge or cloth to wipe away as much of the dried paste as possible. You might need to use a little elbow grease, especially in areas with heavy buildup. A scraper can be helpful for dislodging stubborn bits. Don’t worry if you can’t get it all off in one go.
7. Vinegar Time! Pour some white vinegar into your empty spray bottle. Generously spray the interior of the oven with vinegar. The vinegar will react with any remaining baking soda, creating a foamy, bubbly action. This is perfectly normal and helps to further loosen any remaining grime.
8. Wipe Again: Once the vinegar has finished fizzing, use a clean, damp sponge or cloth to wipe away the vinegar and any remaining baking soda residue. You might need to rinse your sponge frequently to keep it clean.
9. Rinse Thoroughly: It’s important to rinse the oven thoroughly to remove all traces of baking soda and vinegar. Use a clean, damp cloth and repeatedly wipe down all surfaces until the water runs clear. I usually go over the oven several times to make sure I’ve gotten everything.
10. Dry the Oven: Use a clean, dry towel or rags to dry the interior of the oven. This will prevent any water spots from forming.
Phase 4: Cleaning the Racks and Reassembling
11. Scrub the Oven Racks: Remember those racks you soaked in hot, soapy water? Now it’s time to scrub them clean. Use a sponge or scrub brush to remove any remaining grime. If you have stubborn spots, you can try using a baking soda paste on the racks as well. Rinse them thoroughly with clean water.
12. Dry the Oven Racks: Dry the oven racks completely with a clean towel before placing them back in the oven.
13. Reassemble: Finally, place the clean and dry oven racks back into the oven.
Tips and Tricks for a Sparkling Clean Oven:
* For Extra Stubborn Stains: If you have some really tough, baked-on stains, you can try making a thicker baking soda paste and letting it sit for even longer – up to 24 hours. You can also try using a plastic scraper to gently scrape away the stains before wiping.
* Don’t Forget the Oven Door: Pay special attention to the oven door, especially the glass. You can use the same baking soda paste and vinegar method to clean the glass. For really stubborn spots, you can try using a razor blade scraper (be very careful!).
* Clean Regularly: The best way to keep your oven clean is to clean it regularly. Try to wipe up spills as soon as they happen and do a deep clean every few months. This will prevent grime from building up and make the cleaning process much easier.
* Self-Cleaning Ovens: While this method is great for avoiding harsh chemicals, if you have a self-cleaning oven, you can still use it! However, I recommend wiping down the oven with a damp cloth after the self-cleaning cycle to remove any ash or residue.
* Vinegar Smell: The vinegar smell will dissipate quickly. You can leave the oven door open for a while to help air it out. You can also place a bowl of baking soda inside the oven to absorb any lingering odors.
* Safety First: Always unplug your oven before cleaning it. And be careful when using a scraper, especially on the glass door.
* Alternative to Vinegar: If you really dislike the smell of vinegar, you can substitute lemon juice. It’s not quite as effective, but it still has some cleaning power.
* Preventative Measures: To help prevent future messes, consider using oven liners or baking sheets to catch spills.
* Check for Baking Soda Residue: After cleaning, double-check for any remaining baking soda residue, especially in corners and crevices. This can sometimes leave a white film if not completely removed.
* Ventilation: Ensure proper ventilation while cleaning your oven. Open windows or turn on the exhaust fan to help dissipate any odors.
* Gloves are Your Friend: While baking soda and vinegar are natural, they can still be irritating to the skin. Wearing rubber gloves will protect your hands.
* Patience is Key: Don’t rush the process. Allowing the baking soda paste to sit overnight is crucial for loosening the grime.
* Spot Test: Before applying the baking soda paste to the entire oven interior, test it on a small, inconspicuous area to ensure it doesn’t damage the finish.
* Consider a Steam Clean: After the baking soda and vinegar treatment, you can try a steam clean. Place a bowl of hot water in the oven and let it sit for 20-30 minutes. The steam will help loosen any remaining grime.
* Clean the Oven Exterior: Don’t forget to clean the exterior of your oven as well. You can use a damp cloth and mild detergent to wipe down the surfaces.
* Enjoy Your Sparkling Clean Oven! Now that your oven is clean, you can enjoy cooking and baking without worrying about the mess.
I hope this guide helps you achieve a sparkling clean oven without the use of harsh chemicals! Happy cleaning!
Conclusion
So, there you have it! A simple, effective, and surprisingly satisfying way to achieve a sparkling clean oven using just baking soda and a little elbow grease. Forget harsh chemicals and overpowering fumes; this DIY oven cleaning trick harnesses the natural power of baking soda to lift away stubborn grease and grime, leaving you with an oven that looks and feels brand new.
Why is this a must-try? Because it’s not just about aesthetics. A clean oven operates more efficiently, saving you energy and potentially preventing those unpleasant smoky surprises when you’re trying to bake your favorite dish. Plus, eliminating built-up residue can even improve the taste of your food!
But the benefits extend beyond performance. This method is eco-friendly, relying on a readily available and non-toxic ingredient. It’s also incredibly budget-friendly, saving you money on expensive commercial oven cleaners. And let’s be honest, there’s a certain satisfaction in knowing you’ve tackled a tough cleaning task with a simple, natural solution.
Looking for variations? Consider adding a few drops of your favorite essential oil, like lemon or lavender, to the baking soda paste for a subtle, fresh scent. For particularly stubborn stains, you can let the baking soda paste sit overnight before scrubbing. You can also use a plastic scraper to help loosen baked-on food particles before wiping them away. Another option is to use distilled white vinegar instead of water to create the paste, which can provide an extra boost of cleaning power. Just be sure to ventilate the area well when using vinegar.
We’re confident that once you try this DIY oven cleaning trick, you’ll be amazed by the results. It’s a game-changer for anyone looking for a safe, effective, and affordable way to maintain a clean and efficient kitchen.
Don’t just take our word for it! We encourage you to give this method a try and share your experience with us. Let us know in the comments how it worked for you, any variations you tried, and any tips you discovered along the way. We’re excited to hear your success stories and learn from your experiences. Happy cleaning!
Frequently Asked Questions (FAQs)
Q: Is baking soda safe to use for cleaning my oven?
A: Absolutely! Baking soda is a non-toxic and natural cleaning agent, making it a safe alternative to harsh chemical oven cleaners. It’s gentle on your oven’s surfaces and won’t leave behind any harmful residues. However, as with any cleaning product, it’s always a good idea to wear gloves to protect your skin, especially if you have sensitive skin.
Q: How long should I leave the baking soda paste on the oven surfaces?
A: For best results, we recommend leaving the baking soda paste on for at least 12 hours, or even overnight. This allows the baking soda to effectively penetrate and loosen the baked-on grease and grime. If you’re short on time, you can try leaving it on for a minimum of 2-3 hours, but the longer it sits, the easier it will be to scrub away the mess.
Q: What type of oven is this cleaning method suitable for?
A: This DIY oven cleaning method is generally safe for most types of ovens, including electric, gas, and convection ovens. However, it’s always a good idea to consult your oven’s manufacturer’s instructions before using any cleaning product, especially if you have a self-cleaning oven. Avoid applying the baking soda paste to the heating elements or any sensitive electronic components.
Q: How do I clean the baking soda residue after scrubbing?
A: After scrubbing away the loosened grease and grime, use a damp cloth or sponge to thoroughly wipe down all the oven surfaces. You may need to rinse the cloth or sponge several times to remove all the baking soda residue. For hard-to-reach areas, you can use a spray bottle filled with water to rinse away the residue. Make sure to dry the oven completely before using it.
Q: Can I use this method to clean the oven door glass?
A: Yes, you can use the baking soda paste to clean the oven door glass. Apply a thin layer of the paste to the glass, let it sit for about 30 minutes, and then scrub it gently with a non-abrasive sponge or cloth. Wipe away the residue with a damp cloth. For stubborn stains, you can try using a razor blade scraper to carefully remove the grime, but be sure to avoid scratching the glass.
Q: What if I have a self-cleaning oven? Should I still use this method?
A: While self-cleaning ovens are designed to clean themselves, they often use extremely high temperatures that can produce unpleasant odors and potentially damage the oven’s components. Using the baking soda method is a gentler and more eco-friendly alternative. However, if you choose to use the self-cleaning function, be sure to follow the manufacturer’s instructions carefully and ventilate the area well. You can use the baking soda method for spot cleaning in between self-cleaning cycles.
Q: Can I add other ingredients to the baking soda paste for extra cleaning power?
A: Yes, you can add other ingredients to the baking soda paste to boost its cleaning power. Some popular additions include distilled white vinegar, lemon juice, or a few drops of essential oils like lemon or tea tree oil. Vinegar and lemon juice can help to dissolve grease and grime, while essential oils can add a fresh scent. However, be cautious when using acidic ingredients like vinegar or lemon juice, as they may react with certain oven surfaces. Always test the mixture in an inconspicuous area first.
Q: How often should I clean my oven using this method?
A: The frequency of cleaning depends on how often you use your oven and how much food spills or splatters inside. As a general guideline, we recommend cleaning your oven every 3-6 months. However, if you notice excessive grease buildup or food residue, you may need to clean it more frequently. Regular cleaning will help to prevent stubborn stains and keep your oven operating efficiently.
Q: What if the baking soda paste doesn’t remove all the grease and grime?
A: If the baking soda paste doesn’t remove all the grease and grime, there are a few things you can try. First, make sure you’re using enough paste and that it’s thick enough to adhere to the oven surfaces. Second, try letting the paste sit for a longer period of time, even overnight. Third, use a more abrasive scrubbing tool, such as a scouring pad or a plastic scraper. Finally, you can try adding a small amount of dish soap to the paste for extra cleaning power. If all else fails, you may need to repeat the cleaning process.
Q: Is it necessary to wear gloves when cleaning with baking soda?
A: While baking soda is generally safe, it can be slightly irritating to the skin, especially if you have sensitive skin. Wearing gloves will protect your hands from dryness and irritation. It’s also a good idea to wear gloves when scrubbing, as it can be a bit messy.
Q: Can I use this method to clean the racks and other removable parts of my oven?
A: Yes, you can use this method to clean the racks and other removable parts of your oven. Simply soak the racks in a solution of warm water and baking soda for several hours, or even overnight. Then, scrub them with a brush or sponge to remove any remaining grease and grime. Rinse them thoroughly with water and dry them before placing them back in the oven. For smaller removable parts, you can apply the baking soda paste directly to the surfaces and scrub them clean.


Leave a Comment