

Grow Potatoes Backyard Beginner? Absolutely! Imagine harvesting your own homegrown potatoes, bursting with flavor and freshness, right from your very own backyard. Sounds amazing, right? Well, it’s more achievable than you think, even if you’re a complete beginner!
For centuries, potatoes have been a staple food around the world. Originating in the Andes Mountains of South America, they’ve nourished civilizations and become a cornerstone of countless cuisines. From simple roasted potatoes to hearty stews, their versatility is unmatched. But beyond their culinary appeal, there’s something deeply satisfying about cultivating your own food, connecting with nature, and enjoying the fruits (or rather, tubers!) of your labor.
In today’s fast-paced world, many of us crave a connection to the earth. Growing your own potatoes, even in a small backyard, offers a tangible way to achieve this. Plus, let’s be honest, store-bought potatoes just don’t compare to the taste of freshly harvested, homegrown ones. This DIY guide is designed to empower even the most novice gardener to grow potatoes backyard beginner style, with simple, easy-to-follow steps. I’m going to share some clever tricks and hacks that will help you maximize your yield, even if you’re short on space or time. So, grab your gardening gloves, and let’s get started on this exciting journey to potato-growing success!
Growing Potatoes in Your Backyard: A Beginner’s Guide
Hey there, fellow gardening enthusiasts! I’m so excited to share my experience with growing potatoes in my backyard. It’s surprisingly easy, incredibly rewarding, and you get the freshest, tastiest potatoes imaginable. Forget the grocery store spuds – let’s get our hands dirty and grow our own!
Choosing Your Potato Variety
First things first, you need to decide what kind of potatoes you want to grow. There are tons of options, each with its own unique flavor, texture, and growing characteristics. Here are a few popular choices:
* Russet Potatoes: These are your classic baking potatoes. They’re large, starchy, and perfect for fries, mashed potatoes, and, of course, baking.
* Yukon Gold Potatoes: These have a buttery flavor and creamy texture. They’re great for roasting, boiling, and potato salads.
* Red Potatoes: These have thin, red skin and a waxy texture. They hold their shape well when cooked, making them ideal for potato salads and boiling.
* Fingerling Potatoes: These are small, elongated potatoes with a unique shape and flavor. They’re delicious roasted or boiled.
* Purple Potatoes: These are a fun and colorful option with a slightly nutty flavor. They’re great for adding visual appeal to your dishes.
I personally love Yukon Golds for their versatility, but feel free to experiment and find your favorite!
Preparing Your Seed Potatoes
Now that you’ve chosen your variety, you’ll need seed potatoes. These aren’t seeds in the traditional sense; they’re actually small potatoes that have “eyes” (buds) that will sprout into new plants. You can buy seed potatoes from a garden center or online.
Important: Don’t use potatoes from the grocery store as seed potatoes. They may have been treated to prevent sprouting, and they might carry diseases.
Here’s how to prepare your seed potatoes:
1. Chitting (Optional but Recommended): This process encourages the seed potatoes to sprout before planting. About 2-3 weeks before planting, place your seed potatoes in a cool, bright location (but not direct sunlight). An egg carton works great for this. The eyes will start to sprout, giving your plants a head start.
2. Cutting (If Necessary): If your seed potatoes are large (bigger than an egg), you can cut them into smaller pieces. Each piece should have at least 1-2 eyes. Let the cut pieces dry for a day or two to allow the cut surfaces to callous over. This helps prevent rotting. I usually don’t cut mine unless they are really big.
Preparing Your Planting Area
Potatoes need well-drained soil that’s rich in organic matter. Choose a sunny spot in your backyard that gets at least 6-8 hours of sunlight per day.
1. Soil Testing (Optional but Recommended): A soil test can tell you the pH and nutrient levels of your soil. Potatoes prefer a slightly acidic soil (pH 6.0-6.5). You can buy a soil testing kit at a garden center or send a sample to your local agricultural extension office.
2. Amending the Soil: If your soil is heavy clay or sandy, you’ll need to amend it with organic matter. Compost, well-rotted manure, and peat moss are all great options. Work the organic matter into the soil to a depth of at least 12 inches.
3. Creating Rows or Hills: Potatoes are typically planted in rows or hills. Rows are easier to manage if you have a large garden, while hills are better for smaller spaces.
* Rows: Dig trenches that are about 6-8 inches deep and 2-3 feet apart.
* Hills: Create mounds of soil that are about 8-12 inches high and 2-3 feet apart.
Planting Your Potatoes
Now for the fun part – planting!
1. Planting Time: Potatoes are a cool-season crop, so plant them in early spring, about 2-4 weeks before the last expected frost. The soil temperature should be at least 45°F (7°C).
2. Planting Depth and Spacing: Place your seed potatoes (or cut pieces) in the trenches or hills, with the eyes facing up. Space them about 12 inches apart.
3. Covering the Potatoes: Cover the seed potatoes with 4-6 inches of soil.
4. Watering: Water the soil thoroughly after planting.
Hilling Your Potatoes
This is a crucial step for growing a good crop of potatoes. As the potato plants grow, you’ll need to “hill” them, which means adding more soil around the base of the plants. This encourages the plants to produce more potatoes along the stems.
1. When to Hill: Start hilling when the plants are about 6-8 inches tall.
2. How to Hill: Use a hoe or shovel to pull soil from the sides of the rows or hills up around the base of the plants. Leave about 2-3 inches of the plant exposed.
3. Repeat: Repeat the hilling process every 2-3 weeks as the plants grow, until the hills are about 12-18 inches high.
Caring for Your Potato Plants
* Watering: Potatoes need consistent moisture, especially during tuber formation. Water deeply whenever the top inch of soil feels dry. Avoid overwatering, which can lead to rot.
* Fertilizing: Potatoes are heavy feeders, so fertilize them regularly with a balanced fertilizer. Follow the instructions on the fertilizer package. I like to use a fertilizer that’s high in phosphorus and potassium, which are important for tuber development.
* Weeding: Keep the area around your potato plants free of weeds. Weeds compete with the potatoes for nutrients and water.
* Pest Control: Watch out for common potato pests like potato beetles, aphids, and flea beetles. You can handpick the pests off the plants, use insecticidal soap, or apply an organic insecticide.
* Disease Control: Potatoes are susceptible to several diseases, including early blight, late blight, and scab. Choose disease-resistant varieties and practice good garden hygiene to prevent diseases.
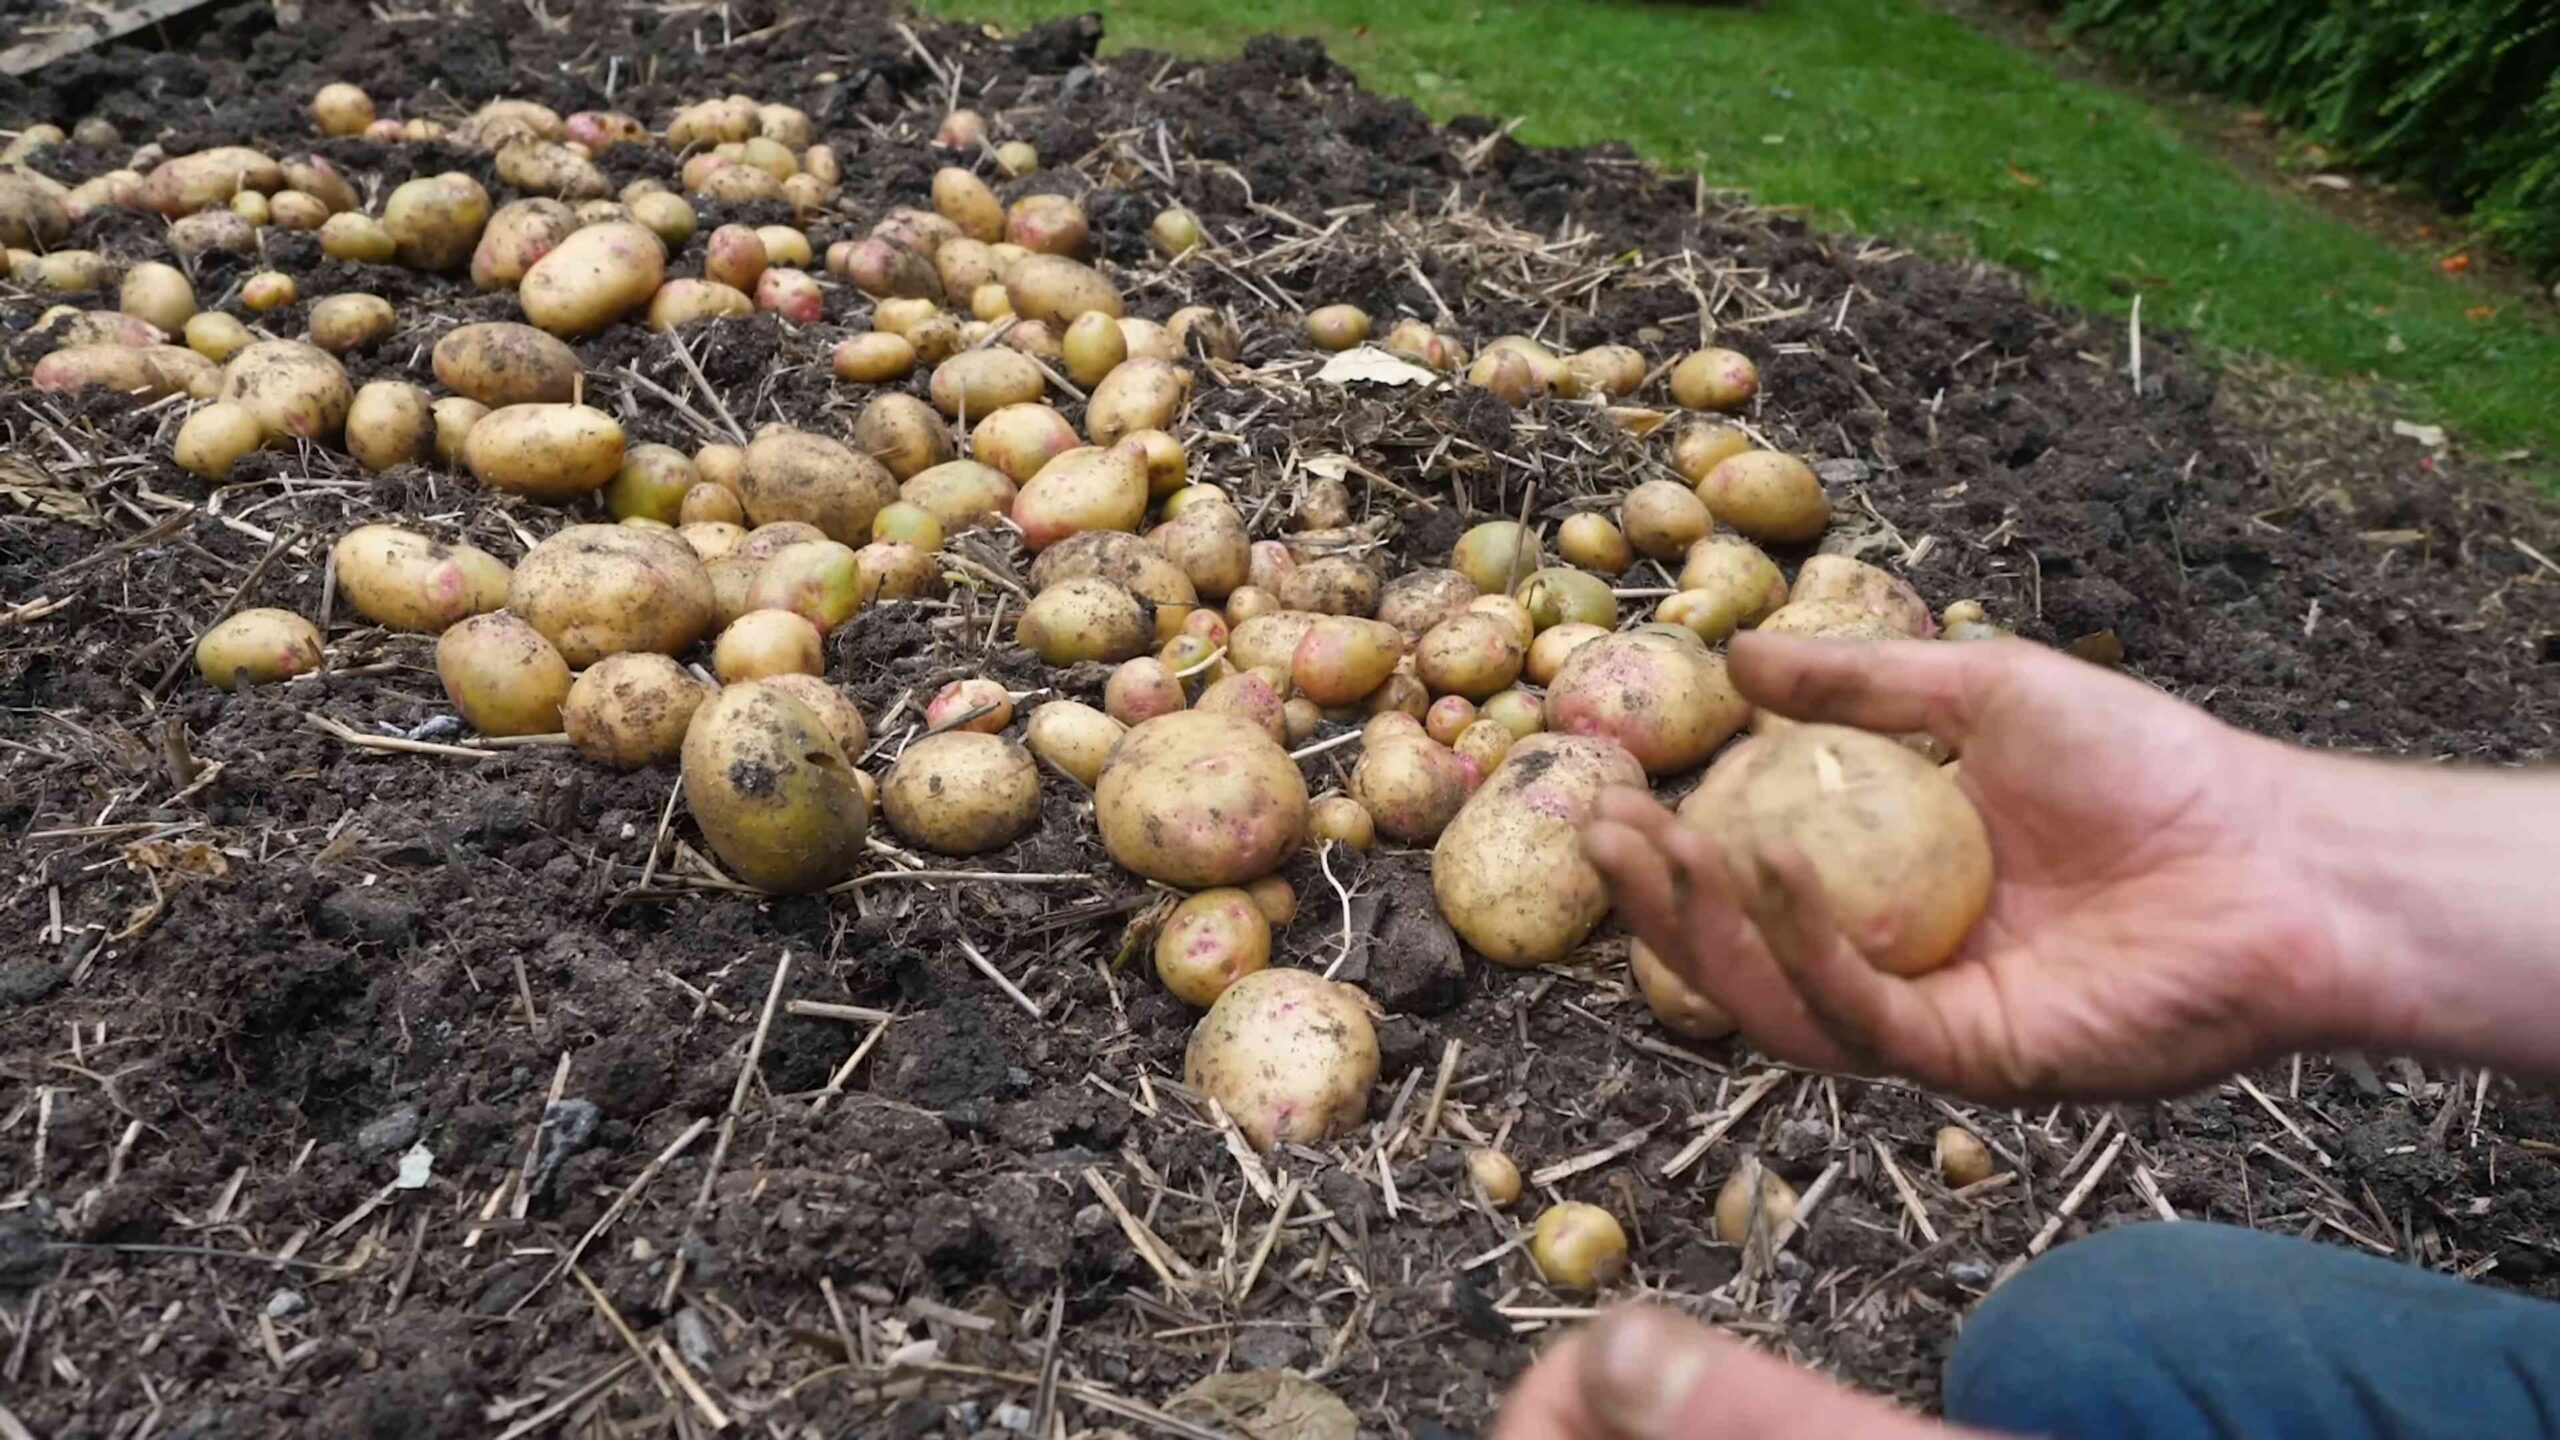
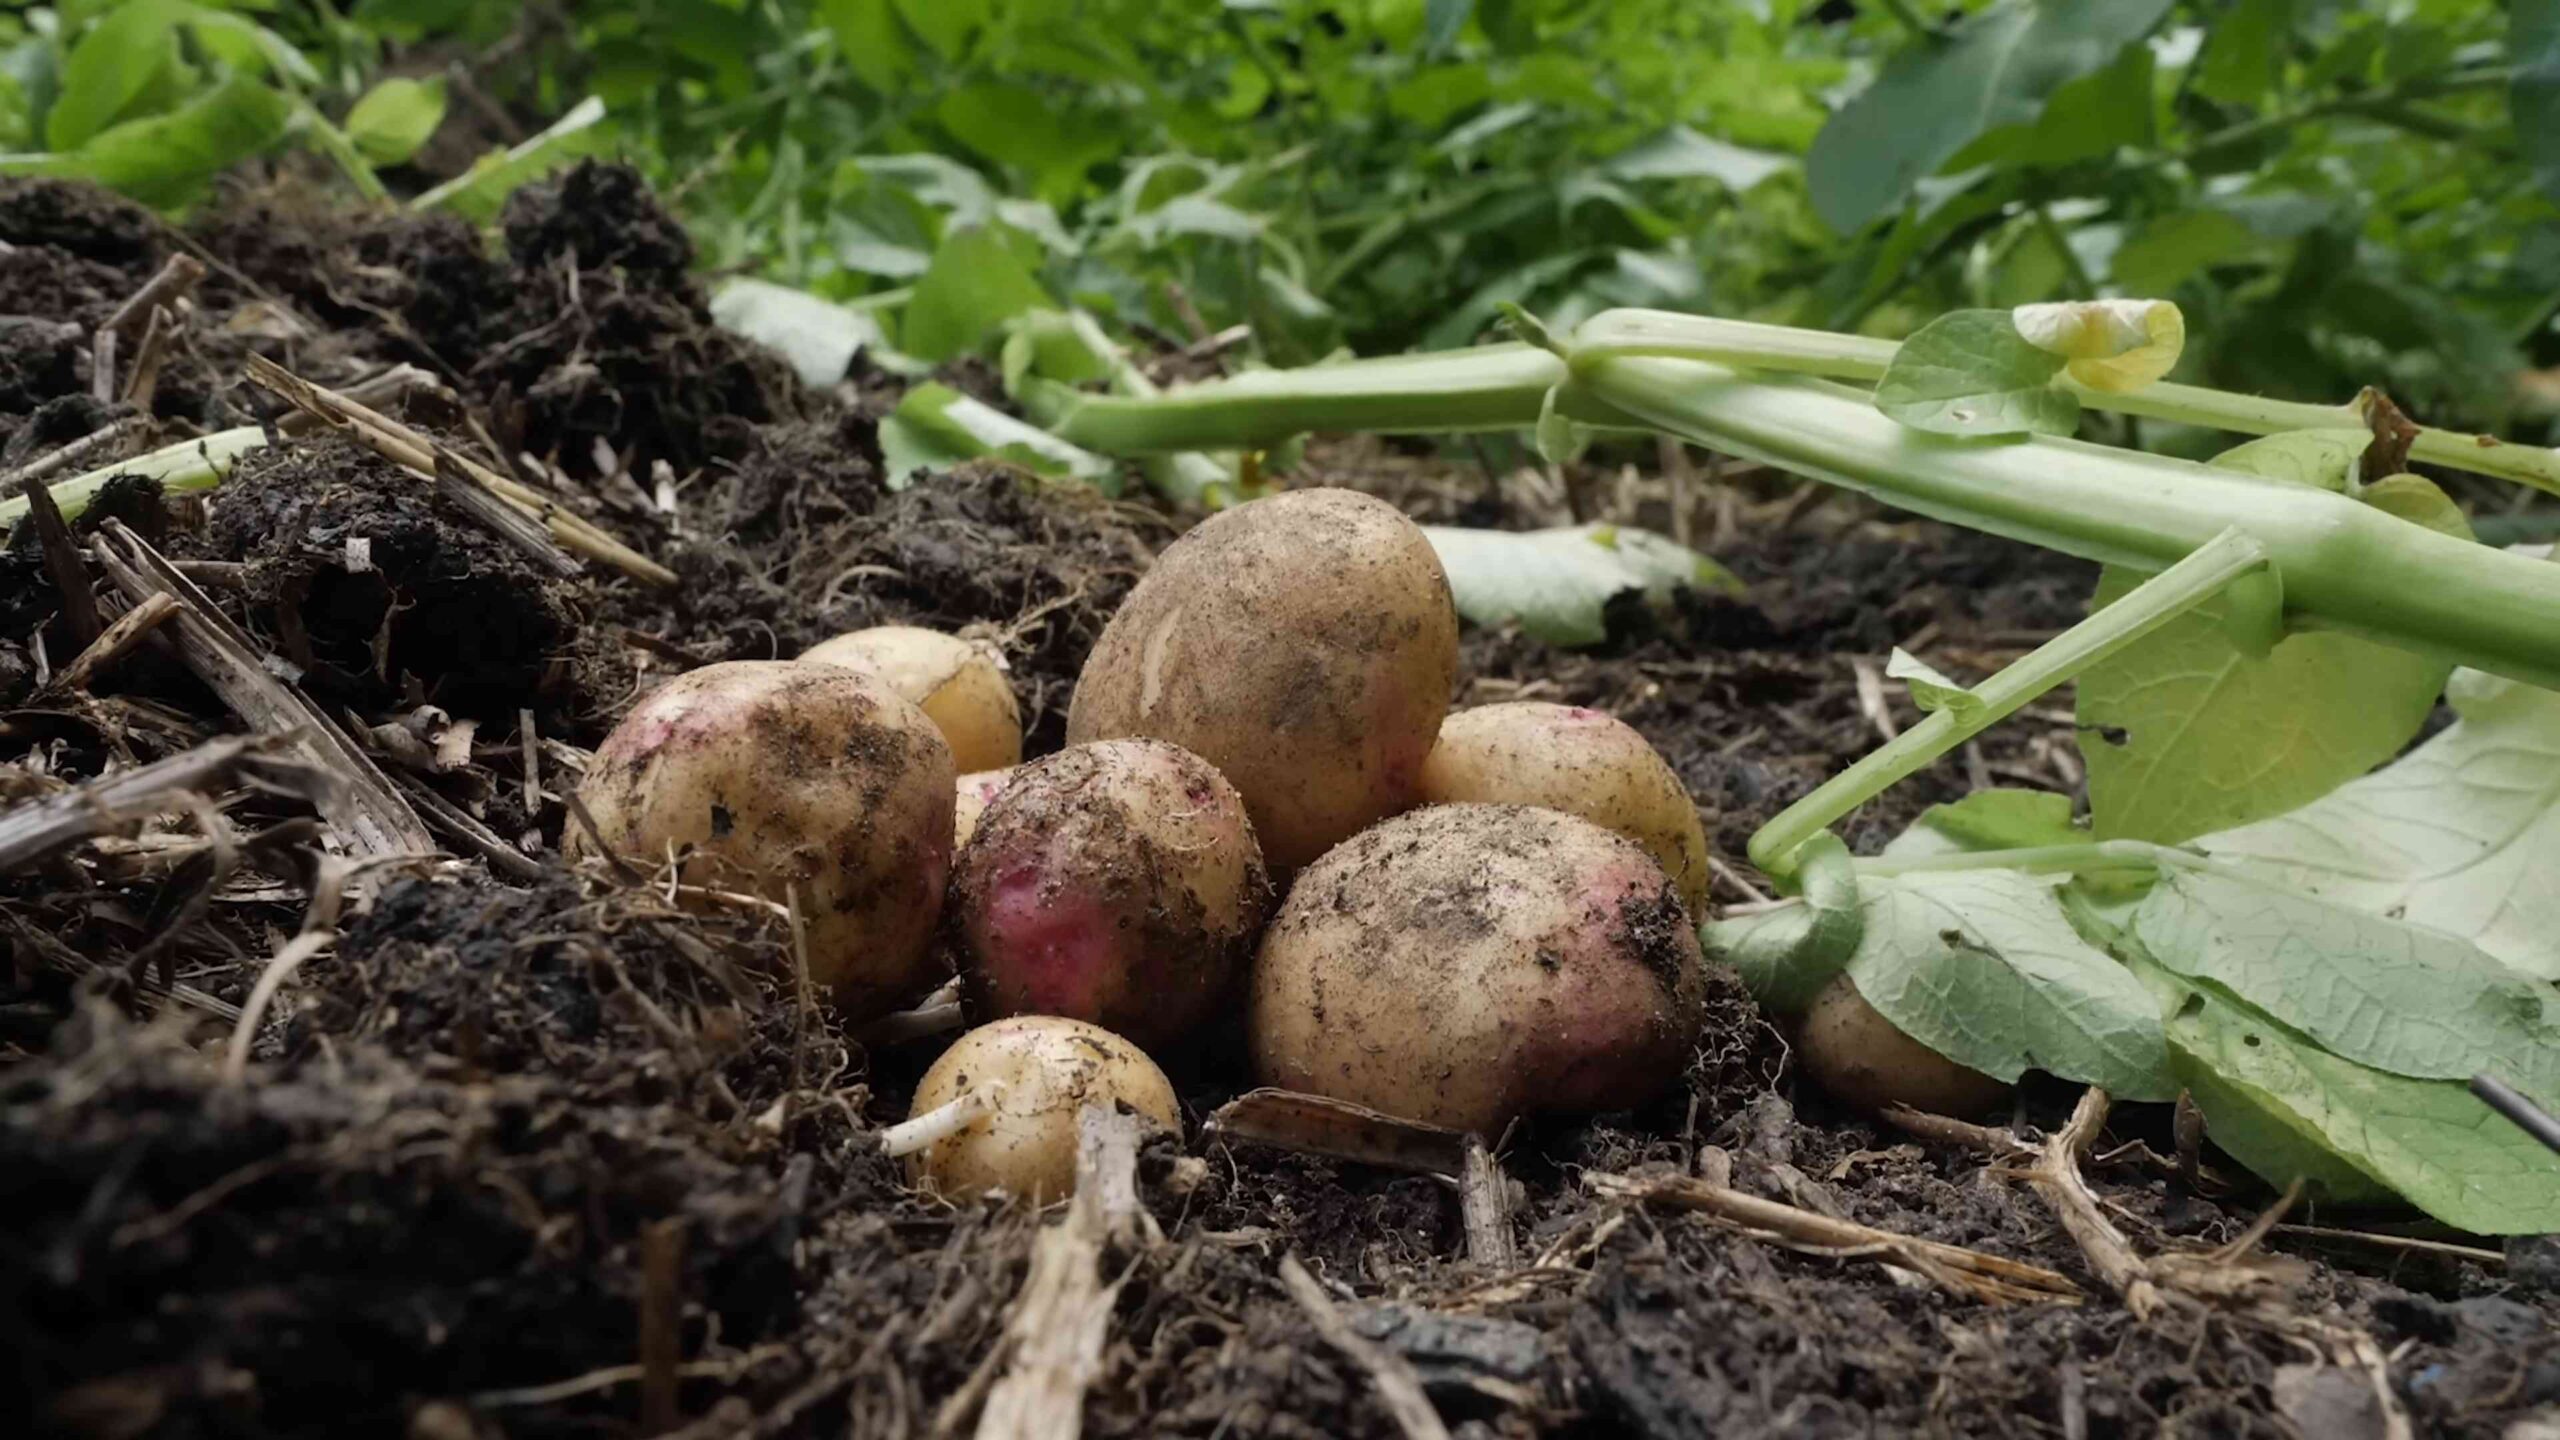
Harvesting Your Potatoes
The moment we’ve all been waiting for!
1. When to Harvest: Potatoes are typically ready to harvest about 80-100 days after planting, depending on the variety. You can harvest “new potatoes” (small, immature potatoes) a few weeks earlier.
2. Signs of Maturity: The potato plants will start to flower, and the foliage will begin to turn yellow and die back. This is a sign that the potatoes are maturing.
3. Harvesting Technique: Use a garden fork to carefully dig up the potatoes. Be careful not to damage the tubers.
4. Curing (For Storage): If you plan to store your potatoes, you’ll need to cure them first. This involves drying them in a cool, dark, well-ventilated place for about 1-2 weeks. Curing helps to toughen the skin and prevent rot.
5. Storing Your Potatoes: Store your cured potatoes in a cool, dark, dry place, such as a root cellar or basement. They should last for several months.
Troubleshooting
* Green Potatoes: Potatoes that are exposed to sunlight will turn green. This is because they produce a toxin called solanine. Green potatoes are not safe to eat. To prevent greening, make sure to hill your potatoes properly and store them in a dark place.
* Small Potatoes: If your potatoes are small, it could be due to several factors, such as poor soil, lack of water, or overcrowding. Make sure to amend your soil with organic matter, water regularly, and space your plants properly.
* Potato Scab: This is a common potato disease that causes rough, scabby patches on the skin of the potatoes. It’s usually not a serious problem, but it can make the potatoes look less appealing. To prevent scab, avoid planting potatoes in alkaline soil and rotate your crops.
Enjoying Your Homegrown Potatoes
Congratulations! You’ve successfully grown your own potatoes. Now it’s time to enjoy the fruits (or rather, tubers) of your labor. There are endless ways to cook and enjoy your homegrown potatoes. Here are a few ideas:
* Roasted Potatoes: Toss your potatoes with olive oil, herbs, and spices, and roast them in the oven until they’re golden brown and crispy.
* Mashed Potatoes: Boil your potatoes until they’re tender, then mash them with butter, milk, and salt.
* Potato Salad: Boil your potatoes, then toss them with mayonnaise, mustard, celery, onion, and other ingredients.
* Potato Soup: Blend cooked potatoes with broth, cream, and seasonings to make a creamy and comforting soup.
* French Fries: Cut your potatoes
Conclusion
So, there you have it! Growing potatoes in your backyard, even as a complete beginner, is not only achievable but also incredibly rewarding. Forget the store-bought spuds – imagine the satisfaction of harvesting your own, knowing exactly where they came from and how they were grown. This DIY trick, focusing on simple techniques and readily available materials, unlocks a world of fresh, flavorful possibilities right outside your back door.
Why is this a must-try? Because it’s empowering! It connects you to your food source, reduces your reliance on commercial agriculture, and provides a tangible, hands-on learning experience. Plus, homegrown potatoes simply taste better. They haven’t traveled miles in a truck, losing freshness along the way. They’re bursting with flavor and nutrients, ready to be transformed into your favorite potato dishes.
But the benefits don’t stop there. This method is also incredibly adaptable. Want to experiment with different varieties? Go for it! Try Yukon Golds for their creamy texture, Russets for their perfect baking qualities, or even colorful fingerling potatoes for a unique culinary experience. You can also adjust the size of your growing containers to fit your available space, making it ideal for small patios or sprawling gardens alike. Consider adding companion plants like marigolds to deter pests naturally, or basil to enhance the flavor of your potatoes.
Don’t be intimidated by the thought of growing your own food. This guide is designed for beginners, providing clear, step-by-step instructions that anyone can follow. The initial setup is minimal, and the ongoing maintenance is surprisingly low. With a little patience and care, you’ll be harvesting a bountiful crop of delicious potatoes in no time.
We encourage you to take the plunge and try this DIY potato-growing trick. It’s a fantastic way to get your hands dirty, learn new skills, and enjoy the fruits (or rather, vegetables) of your labor. And most importantly, don’t forget to share your experience! We’d love to hear about your successes, challenges, and any variations you try along the way. Post photos of your potato plants, share your favorite recipes using your homegrown potatoes, and inspire others to embark on their own backyard gardening adventures. Let’s build a community of potato-growing enthusiasts and celebrate the joy of homegrown goodness! So grab some seed potatoes, prepare your soil, and get ready to experience the magic of growing your own food. You won’t regret it!
Frequently Asked Questions (FAQs)
What kind of potatoes should I use for seed potatoes?
The best potatoes to use for seed potatoes are certified seed potatoes from a reputable source. These are specifically grown to be disease-free and produce healthy plants. You can also use organic potatoes from the grocery store, but be aware that they may be treated with sprout inhibitors, which can hinder growth. Avoid using potatoes that have been treated with chemicals or that show signs of disease. Look for potatoes that have “eyes” or small sprouts already forming. These are ready to be planted.
How much sunlight do potatoes need?
Potatoes need at least six to eight hours of direct sunlight per day to thrive. Choose a location in your backyard that receives ample sunlight throughout the day. If you’re growing potatoes in containers, you can move them around to ensure they get enough sunlight. Insufficient sunlight can result in smaller yields and weaker plants.
What kind of soil is best for growing potatoes?
Potatoes prefer well-drained, loose soil that is rich in organic matter. Amend your soil with compost or well-rotted manure before planting to improve drainage and fertility. Avoid heavy clay soils, as they can become waterlogged and hinder potato growth. The ideal soil pH for potatoes is between 6.0 and 6.8. You can test your soil pH with a home testing kit or send a sample to a local agricultural extension office.
How often should I water my potato plants?
Water your potato plants regularly, especially during dry periods. Keep the soil consistently moist, but avoid overwatering, which can lead to root rot. Water deeply and less frequently, rather than shallowly and more often. Check the soil moisture by sticking your finger into the soil about an inch deep. If the soil feels dry, it’s time to water. During hot weather, you may need to water more frequently.
How do I know when my potatoes are ready to harvest?
Potatoes are typically ready to harvest when the foliage begins to yellow and die back. This usually occurs about 80 to 100 days after planting. You can also dig up a few test potatoes to check their size and maturity. If the skins are firm and the potatoes are the size you desire, they are ready to harvest. To harvest, carefully dig around the plants with a garden fork, being careful not to damage the potatoes.
Can I grow potatoes in containers?
Yes, potatoes can be successfully grown in containers. Choose a large container that is at least 15 gallons in size and has drainage holes. Fill the container with a well-draining potting mix. Plant your seed potatoes about 4 inches deep and cover them with soil. As the plants grow, continue to add more soil to the container, burying the stems. This encourages the formation of more potatoes along the stems.
What are some common pests and diseases that affect potatoes?
Some common pests that affect potatoes include potato beetles, aphids, and flea beetles. Diseases that can affect potatoes include early blight, late blight, and potato scab. Monitor your plants regularly for signs of pests or diseases. Use organic pest control methods, such as insecticidal soap or neem oil, to control pests. Choose disease-resistant potato varieties and practice crop rotation to prevent diseases.
How do I store my harvested potatoes?
Store your harvested potatoes in a cool, dark, and dry place. The ideal storage temperature is between 40 and 50 degrees Fahrenheit. Avoid storing potatoes in direct sunlight or in a humid environment, as this can cause them to sprout or rot. Store potatoes in a well-ventilated container, such as a burlap sack or a wire basket. Do not wash potatoes before storing them, as this can promote spoilage. Properly stored potatoes can last for several months.
Can I grow potatoes from store-bought potatoes?
While you can attempt to grow potatoes from store-bought potatoes, it’s generally recommended to use certified seed potatoes. Store-bought potatoes may be treated with sprout inhibitors, which can prevent them from growing. Additionally, they may carry diseases that can affect your potato crop. If you do choose to use store-bought potatoes, select organic potatoes that have not been treated with chemicals.
What are some good companion plants for potatoes?
Several plants can be grown alongside potatoes to improve their growth and deter pests. Some good companion plants for potatoes include marigolds, basil, thyme, and garlic. Marigolds deter nematodes and other soil pests. Basil repels potato beetles and other insects. Thyme attracts beneficial insects that prey on potato pests. Garlic helps to prevent fungal diseases. Avoid planting potatoes near tomatoes, as they are susceptible to the same diseases.
Leave a Comment