

DIY Concrete Candle Holders: Ever feel like your home decor is missing that certain *something*? I know I have! You scroll through Pinterest, dreaming of perfectly curated spaces, but the price tags on those trendy accessories can be a real buzzkill. Well, what if I told you that you could achieve that high-end look without breaking the bank?
For centuries, humans have been crafting with concrete, from the Roman Colosseum to modern architectural marvels. While we’re not building empires (at least, not today!), we are tapping into that same resourceful spirit to create beautiful and functional pieces for our homes. And trust me, there’s something incredibly satisfying about saying, “I made that!”
That’s where these DIY Concrete Candle Holders come in. Not only are they surprisingly easy to make, but they also add a touch of industrial chic to any room. Plus, they’re incredibly versatile! Whether you’re looking to create a cozy ambiance for a romantic dinner, add a stylish accent to your coffee table, or give a unique handmade gift, these candle holders are the perfect solution. I’m going to show you how to create these stunning pieces with just a few simple materials and easy-to-follow steps. Let’s get our hands dirty and create something beautiful together!
DIY Concrete Candle Holders: A Step-by-Step Guide
Hey there, fellow DIY enthusiasts! I’m super excited to share this project with you – making your own concrete candle holders. They’re surprisingly easy to create, add a touch of industrial chic to any space, and are a fantastic way to personalize your home decor. Plus, they make awesome gifts! Let’s dive in!
Materials You’ll Need
Before we get started, let’s gather all the necessary materials. Trust me, having everything on hand will make the process much smoother.
* Cement Mix: I recommend using a rapid-setting cement mix. It dries faster, which means you can enjoy your candle holders sooner! Look for a mix that’s specifically designed for small projects.
* Sand: Fine sand will help create a smoother texture for your concrete.
* Water: Just regular tap water will do.
* Molds: This is where you can get creative! You’ll need two sets of molds – an outer mold and an inner mold. The space between these molds will determine the thickness of your concrete.
* Outer Molds: Think plastic containers, cardboard boxes (lined with plastic), silicone molds, or even yogurt containers. I’ve used everything from old Tupperware to Pringles cans (cut to size, of course!).
* Inner Molds: These will create the cavity for your candle. Test tubes, smaller plastic cups, or even PVC pipes work great. Just make sure they’re smaller than your outer molds.
* Cooking Spray or Mold Release: This will prevent the concrete from sticking to the molds.
* Mixing Container: A bucket, large bowl, or even an old plastic tub will work.
* Mixing Tool: A trowel, sturdy spoon, or even a garden trowel will do the trick.
* Safety Gear:
* Gloves: Concrete can be harsh on your skin, so protect your hands!
* Dust Mask: Cement dust can irritate your lungs, so wear a mask, especially when mixing.
* Eye Protection: Safety glasses or goggles are a must to prevent cement from splashing into your eyes.
* Weight: Something heavy to hold the inner mold in place (rocks, pebbles, metal washers, etc.).
* Sandpaper (Various Grits): For smoothing out any rough edges after the concrete has cured. I usually start with a coarser grit (like 80 or 120) and then move to a finer grit (like 220 or 320).
* Sealer (Optional): A concrete sealer will protect your candle holders from stains and moisture.
* Candles: Tea lights, votives, or pillar candles – whatever you prefer!
Mixing the Concrete
Okay, let’s get our hands dirty! This is where the magic happens.
1. Prepare Your Workspace: Lay down some newspaper or a drop cloth to protect your work surface. Concrete can be messy!
2. Combine Dry Ingredients: In your mixing container, combine the cement mix and sand. The ratio is generally 3 parts cement to 1 part sand, but always refer to the instructions on your cement mix packaging. I usually start with a smaller batch and add more as needed.
3. Add Water Gradually: Slowly add water to the dry ingredients, mixing continuously. You want to achieve a consistency similar to thick oatmeal or peanut butter. Be careful not to add too much water at once, as this can weaken the concrete.
4. Mix Thoroughly: Make sure there are no dry clumps of cement. Mix for several minutes until the mixture is smooth and consistent.
5. Test the Consistency: To test the consistency, scoop up some of the mixture with your trowel and let it fall back into the container. It should hold its shape for a few seconds before slowly flattening out.
Casting the Candle Holders
Now for the fun part – creating the actual candle holders!
1. Prepare the Molds: Lightly coat the inside of both the outer and inner molds with cooking spray or mold release. This will make it much easier to remove the concrete later.
2. Pour the Concrete: Carefully pour the concrete mixture into the outer mold, filling it about halfway.
3. Tap the Molds: Gently tap the sides of the outer mold to release any trapped air bubbles. This will help create a smoother surface.
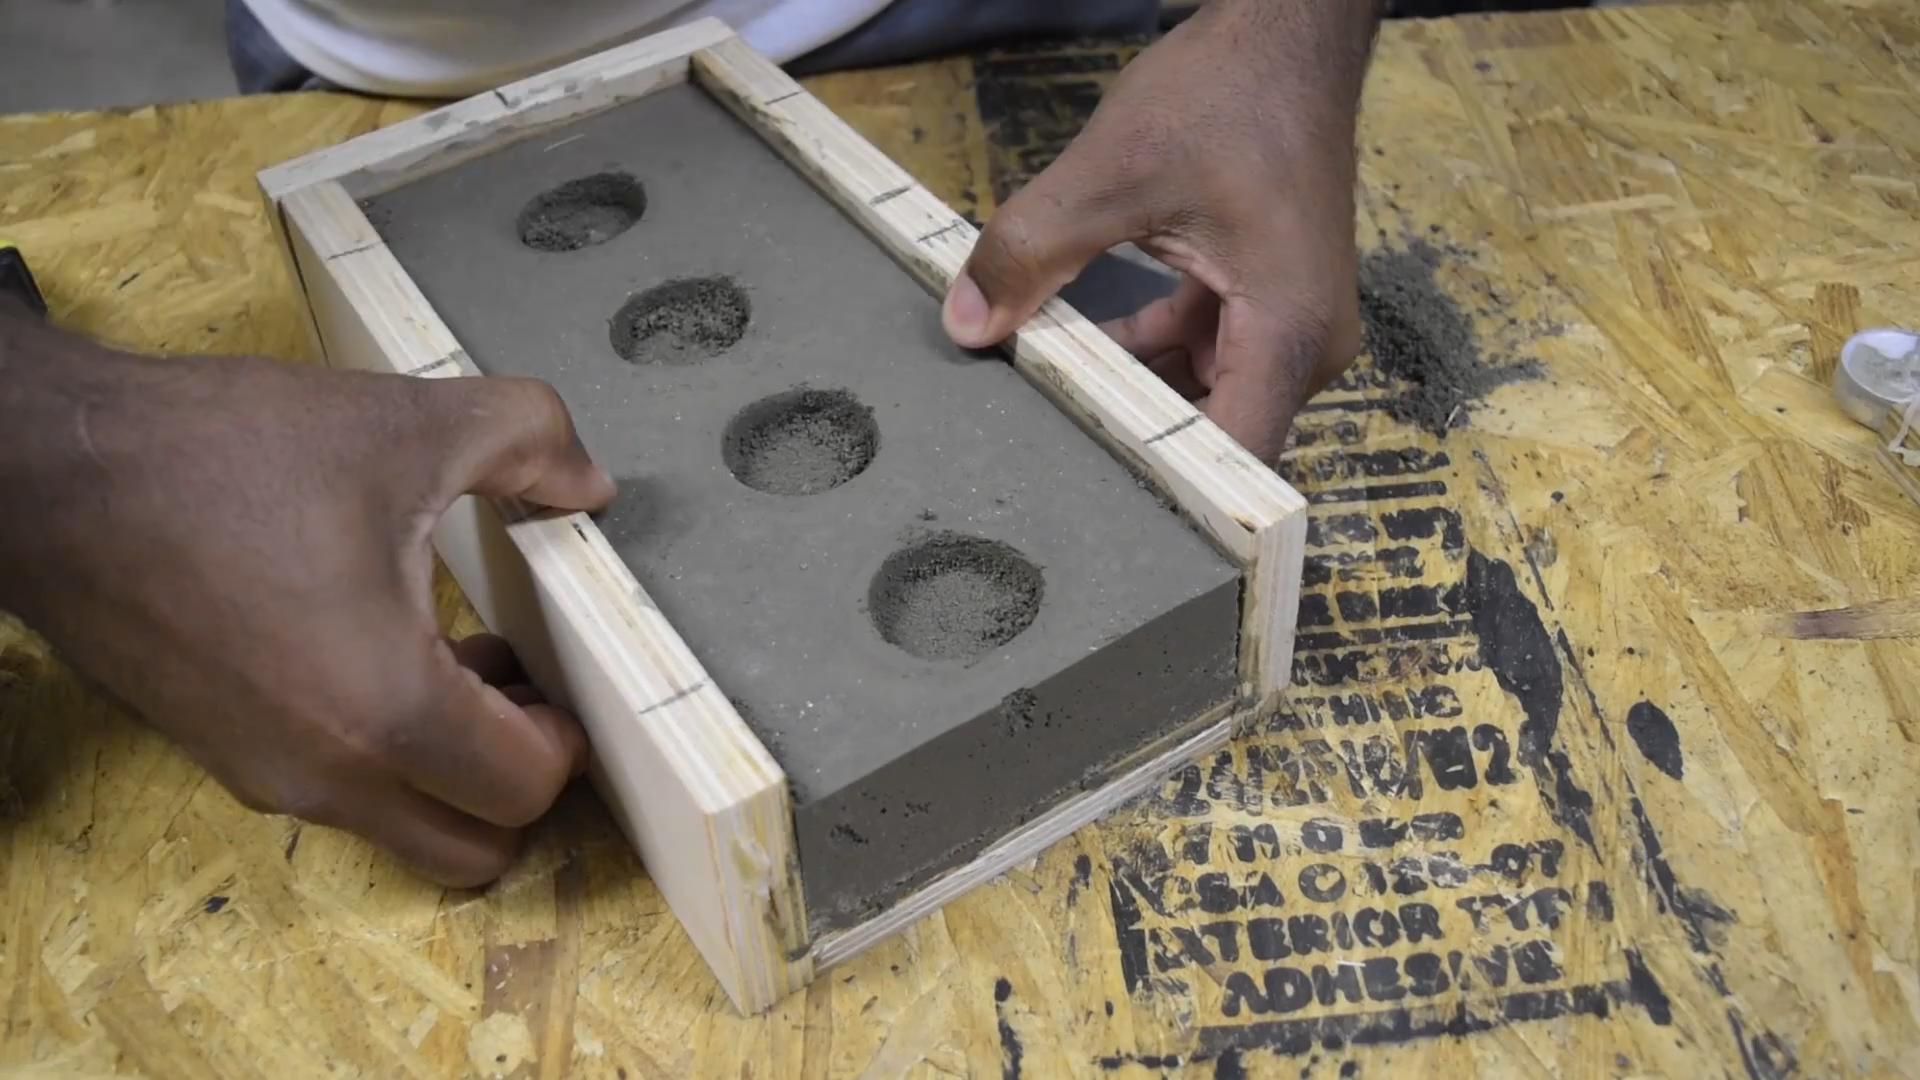
4. Insert the Inner Mold: Center the inner mold inside the outer mold and gently press it down into the concrete. Make sure it’s evenly spaced from the sides of the outer mold.
5. Add Weight to the Inner Mold: Place a weight (rocks, pebbles, etc.) inside the inner mold to prevent it from floating up as the concrete sets. This is crucial for creating a consistent candle cavity.
6. Fill the Remaining Space: Carefully pour the remaining concrete mixture into the space between the outer and inner molds, filling it to the top.
7. Tap Again: Tap the molds again to release any remaining air bubbles.
8. Level the Surface: Use a trowel or spatula to smooth and level the top surface of the concrete.
Curing and Demolding
Patience is key here! Letting the concrete cure properly will ensure a strong and durable candle holder.
1. Curing Time: Allow the concrete to cure for at least 24-48 hours, or according to the instructions on your cement mix packaging. Keep the molds in a cool, dry place away from direct sunlight.
2. Demolding: Once the concrete is fully cured, carefully remove the inner mold. You may need to gently twist or tap it to loosen it.
3. Remove the Outer Mold: Next, remove the outer mold. Again, you may need to gently twist or tap it. If the concrete is stuck, try running warm water around the outside of the mold.
4. Inspect Your Candle Holder: Take a look at your creation! You might see some imperfections, but that’s part of the charm of handmade concrete.
Finishing Touches
Now it’s time to refine your candle holders and give them a polished look.
1. Sanding: Use sandpaper to smooth out any rough edges or imperfections. Start with a coarser grit (like 80 or 120) and then move to a finer grit (like 220 or 320) for a smoother finish.
2. Cleaning: Wipe down the candle holder with a damp cloth to remove any dust from sanding.
3. Sealing (Optional): If you want to protect your candle holder from stains and moisture, apply a concrete sealer according to the manufacturer’s instructions. This is especially important if you plan to use your candle holders outdoors.
4. Adding Details (Optional): Get creative! You can paint your candle holders, add decorative stones or shells, or even embed small objects into the concrete before it sets.
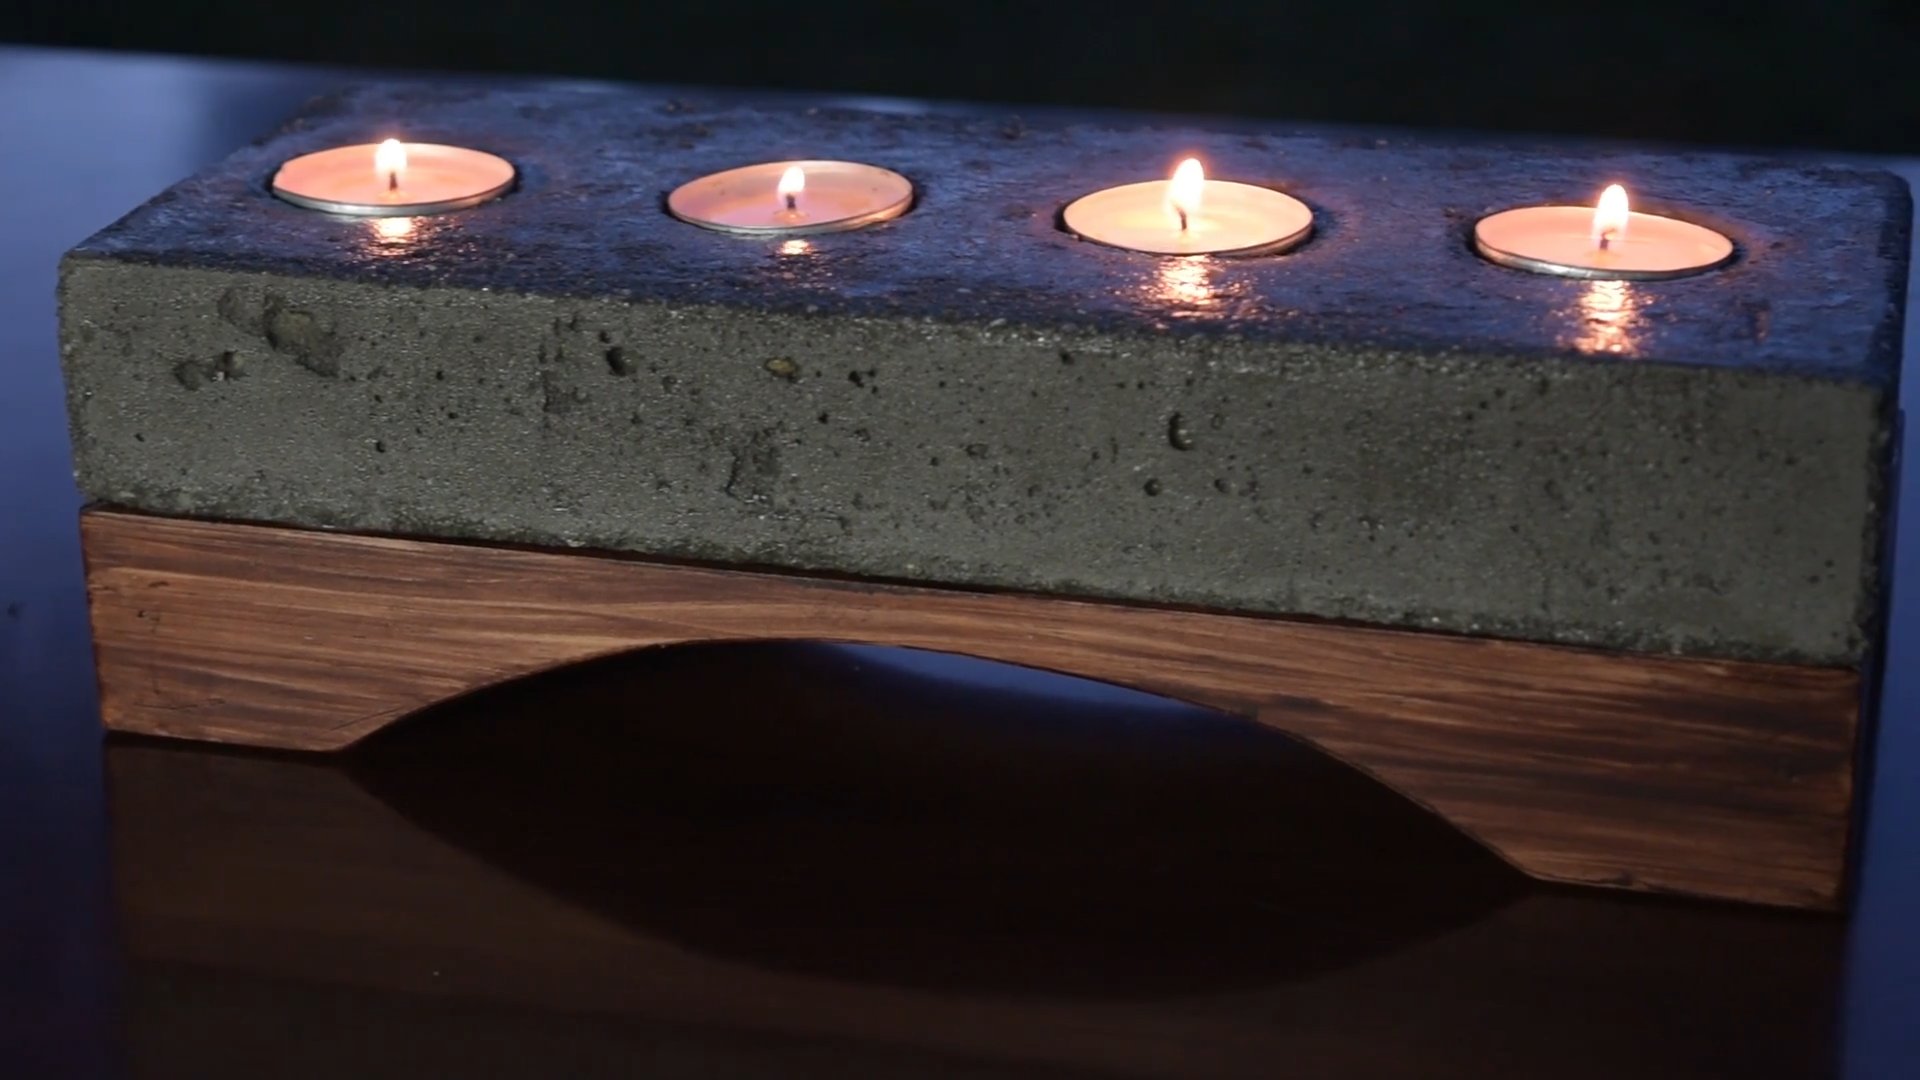
5. Enjoy! Place your favorite candle inside and enjoy the warm, inviting glow of your handmade concrete candle holder.
Troubleshooting Tips
Sometimes things don’t go exactly as planned. Here are a few common issues and how to fix them:
* Cracking: Cracking can occur if the concrete dries too quickly. To prevent this, keep the molds in a cool, humid place during the curing process. You can also cover them with plastic wrap to help retain moisture.
* Air Bubbles: Air bubbles can create unsightly holes in the surface of your concrete. To minimize air bubbles, tap the molds vigorously after pouring the concrete. You can also use a concrete vibrator (if you have one) to help release trapped air.
* Difficulty Removing Molds: If you’re having trouble removing the molds, try running warm water around the outside of the mold. You can also gently tap the mold with a rubber mallet. If all else fails, you may need to carefully cut the mold away from the concrete.
* Weak Concrete: Weak concrete can be caused by adding too much water to the mixture. Be sure to follow the instructions on your cement mix packaging and add water gradually until you achieve the desired consistency.
Creative Ideas and Variations
The possibilities are endless when it comes to designing your concrete candle holders! Here are a few ideas to get your creative juices flowing:
* Different Shapes and Sizes: Experiment with different mold shapes and sizes to create a variety of candle holders.
* Colored Concrete: Add concrete pigment to the mixture to create colored candle holders.
* Embedded Objects: Embed small objects like stones, shells, or glass beads into the concrete before it sets.
* Textured Surfaces: Use textured molds or tools to create interesting surface patterns.
* Multiple Candle Holders: Create a larger mold with multiple inner molds to make a candle holder for several candles.
* Personalized Gifts: Make personalized candle holders as gifts for friends and family. You can even
Conclusion
So, there you have it! Creating your own DIY concrete candle holders is not only surprisingly simple, but it’s also an incredibly rewarding experience. Forget those mass-produced, generic candle holders you see everywhere. With a little bit of concrete mix, some creativity, and this guide, you can craft unique, personalized pieces that perfectly complement your home decor and reflect your individual style.
Why is this DIY trick a must-try? Because it offers a trifecta of benefits: affordability, customization, and satisfaction. Store-bought concrete candle holders, especially those with interesting designs or unique finishes, can be quite expensive. By making your own, you’re saving money while gaining complete control over the final product. You choose the size, shape, color, and any embellishments you desire. And let’s be honest, there’s nothing quite like the feeling of accomplishment that comes from creating something beautiful with your own two hands.
But the fun doesn’t stop there! The possibilities for variations are endless. Experiment with different molds – think geometric shapes, vintage teacups, or even repurposed plastic containers. Add pigments to the concrete mix to create colored candle holders that match your existing color scheme. Embed small stones, glass beads, or shells into the wet concrete for a touch of texture and visual interest. For a rustic look, leave the concrete unsealed. For a more polished finish, seal it with a concrete sealant. You can even add essential oils to the concrete mix for a subtle, fragrant touch when the candle is lit. Consider adding felt pads to the bottom of your candle holders to protect your furniture from scratches.
Don’t be intimidated by the idea of working with concrete. This project is beginner-friendly, and the results are well worth the effort. The process is therapeutic, allowing you to disconnect from the digital world and reconnect with your creative side. Imagine the compliments you’ll receive when guests admire your handcrafted candle holders!
We wholeheartedly encourage you to give this DIY concrete candle holders project a try. Gather your materials, follow the steps outlined in this guide, and let your imagination run wild. We’re confident that you’ll be thrilled with the results.
And most importantly, we want to hear about your experience! Share your creations with us on social media using [Your Hashtag Here]. We can’t wait to see the unique and inspiring candle holders you come up with. Let’s build a community of DIY enthusiasts who appreciate the beauty and versatility of concrete! So go ahead, get your hands dirty, and create something amazing. You won’t regret it.
Frequently Asked Questions (FAQ)
What type of concrete mix should I use?
For this project, a rapid-setting concrete mix is generally recommended. These mixes are designed to harden quickly, which reduces the overall project time. Look for a concrete mix that is specifically formulated for small projects or crafts. You can find these at most hardware stores or online retailers. Avoid using large aggregate concrete mixes, as they may not provide the smooth finish you desire for candle holders. A fine-particle concrete mix will give you the best results. Remember to always follow the manufacturer’s instructions for mixing and curing the concrete.
How long does it take for the concrete to dry?
The drying time for concrete depends on several factors, including the type of concrete mix used, the ambient temperature, and the humidity level. Rapid-setting concrete mixes typically dry within 24-48 hours. However, it’s essential to allow the concrete to fully cure before using the candle holders. Curing involves keeping the concrete moist for several days to allow it to reach its maximum strength and durability. You can do this by covering the candle holders with plastic wrap or misting them with water periodically. Refer to the manufacturer’s instructions for the specific curing time recommended for your concrete mix.
What kind of molds can I use?
The possibilities for molds are virtually endless! You can use anything that is heat-resistant and can hold its shape while the concrete sets. Popular options include silicone molds (which are easy to demold), plastic containers, cardboard boxes (lined with plastic), and even repurposed items like yogurt cups or teacups. Get creative and experiment with different shapes and sizes. Remember to lightly coat the inside of the mold with cooking spray or petroleum jelly to prevent the concrete from sticking. For more intricate designs, consider using flexible silicone molds that can easily release the hardened concrete.
How can I add color to the concrete?
Adding color to your DIY concrete candle holders is a great way to personalize them and match your decor. You can use concrete pigments, which are specifically designed for coloring concrete. These pigments are available in a wide range of colors and can be found at most hardware stores or online retailers. Add the pigment to the dry concrete mix before adding water, and mix thoroughly to ensure even distribution. Start with a small amount of pigment and gradually add more until you achieve the desired color intensity. Alternatively, you can use acrylic paints to paint the candle holders after they have fully dried and cured.
How do I prevent air bubbles in the concrete?
Air bubbles can sometimes form in concrete, resulting in small holes on the surface of the finished product. To minimize air bubbles, thoroughly mix the concrete to a smooth, consistent consistency. After pouring the concrete into the mold, gently tap the sides of the mold to release any trapped air bubbles. You can also use a toothpick or skewer to poke around in the concrete and release any bubbles that are close to the surface. Another technique is to use a vibratory sander (without sandpaper) against the mold to help consolidate the concrete and remove air pockets.
Is it necessary to seal the concrete?
Sealing the concrete is not always necessary, but it can provide several benefits. Sealing helps to protect the concrete from stains, moisture, and wear and tear. It also enhances the color and finish of the concrete. If you plan to use your candle holders outdoors or in a humid environment, sealing is highly recommended. Choose a concrete sealant that is specifically designed for indoor or outdoor use, depending on your needs. Apply the sealant according to the manufacturer’s instructions.
Can I add essential oils to the concrete mix?
Yes, you can add essential oils to the concrete mix to create fragrant candle holders. However, it’s important to use essential oils sparingly, as they can affect the setting time and strength of the concrete. Add a few drops of your favorite essential oil to the water before mixing it with the dry concrete mix. Be aware that the scent may fade over time, especially when exposed to heat. You can also add dried herbs or flowers to the concrete mix for a more natural and long-lasting fragrance.
What if my candle holder cracks?
Cracking can sometimes occur in concrete, especially if it dries too quickly or is subjected to stress. If your candle holder develops small cracks, you can try to repair them with a concrete crack filler. These fillers are available at most hardware stores and can be used to fill in the cracks and restore the structural integrity of the candle holder. For larger cracks, you may need to reinforce the candle holder with wire mesh or fiberglass. To prevent cracking, ensure that the concrete is properly cured and protected from extreme temperatures and humidity.


Leave a Comment