

Easy melon growing tips are what every gardener craves when summer rolls around! Imagine biting into a juicy, homegrown melon, the sweet nectar bursting in your mouth – a taste of pure sunshine. But let’s be honest, cultivating these delicious fruits can sometimes feel like a daunting task. I’ve been there, battling pests, wrestling with watering schedules, and wondering why my melons were the size of golf balls instead of, well, melons!
Melons have a rich history, dating back to ancient Egypt and beyond, where they were prized for their refreshing qualities and nutritional value. Over centuries, different varieties have emerged, each with its unique flavor and growing requirements. But the core challenge remains: how to coax these sun-loving plants into producing a bountiful harvest.
That’s where these DIY tricks and hacks come in! This article is your guide to unlocking the secrets of successful melon cultivation. Whether you’re a seasoned gardener or just starting out, I’m going to share simple, effective techniques that will transform your melon patch. From soil preparation to pest control, I’ll cover everything you need to know to enjoy a summer filled with sweet, homegrown goodness. So, ditch the store-bought melons and get ready to discover how easy melon growing tips can make your garden the envy of the neighborhood!
Grow Delicious Melons at Home: A Beginner’s Guide
Hey there, fellow gardening enthusiasts! I’m so excited to share my secrets for growing juicy, flavorful melons right in your own backyard. It might seem daunting, but trust me, with a little planning and effort, you can be enjoying homegrown melons all summer long. Let’s dive in!
Choosing the Right Melon Variety
First things first, you need to decide what kind of melon you want to grow. There are so many delicious options! Here’s a quick rundown of some popular choices:
* Watermelon: A classic summer favorite! Watermelons need plenty of space and sunshine. Consider smaller “icebox” varieties if you have limited space.
* Cantaloupe: Sweet and aromatic, cantaloupes are relatively easy to grow. They prefer warm weather and well-drained soil.
* Honeydew: Similar to cantaloupe, honeydew melons have a smooth, pale green rind and a sweet, mild flavor.
* Galia Melon: A cross between cantaloupe and honeydew, Galia melons have a distinctive netted rind and a sweet, slightly spicy flavor.
* Casaba Melon: These melons have a smooth, yellow rind and a mild, slightly tangy flavor. They’re known for their long storage life.
When choosing your variety, consider your local climate and the amount of space you have available. Look for disease-resistant varieties to minimize potential problems.
Preparing Your Melon Patch
Melons are sun-loving plants, so you’ll need to choose a location that gets at least 6-8 hours of direct sunlight per day. The soil is also crucial. Melons thrive in well-drained, fertile soil with a pH between 6.0 and 6.8.
Here’s how I prepare my melon patch:
1. Clear the Area: Remove any weeds, rocks, or debris from the planting area.
2. Amend the Soil: Melons are heavy feeders, so it’s important to amend the soil with plenty of organic matter. I like to add compost, well-rotted manure, or leaf mold. Work the organic matter into the soil to a depth of at least 12 inches.
3. Test the Soil pH: Use a soil testing kit to check the pH. If the soil is too acidic (pH below 6.0), add lime to raise the pH. If the soil is too alkaline (pH above 6.8), add sulfur to lower the pH.
4. Create Raised Beds (Optional): Raised beds can improve drainage and warm the soil more quickly in the spring. This is especially helpful in cooler climates.
5. Consider Black Plastic Mulch: Laying down black plastic mulch can help warm the soil, suppress weeds, and conserve moisture. This is a great option for watermelons, which need warm soil to thrive.
Starting Melon Seeds Indoors (Optional)
While you can direct sow melon seeds, starting them indoors gives them a head start, especially in areas with short growing seasons. I usually start my melon seeds about 3-4 weeks before the last expected frost.
Here’s how I do it:
1. Choose Seed Starting Trays or Pots: Use seed starting trays or individual pots filled with a seed starting mix.
2. Sow the Seeds: Plant the seeds about 1 inch deep.
3. Water Gently: Water the soil gently to moisten it, but avoid overwatering.
4. Provide Warmth: Melons need warm temperatures to germinate. Use a heat mat to keep the soil temperature between 70-80°F (21-27°C).
5. Provide Light: Once the seedlings emerge, provide them with plenty of light. Place them under grow lights or in a sunny window.
6. Harden Off the Seedlings: Before transplanting the seedlings outdoors, you’ll need to harden them off. This means gradually exposing them to outdoor conditions over a period of 7-10 days. Start by placing them in a sheltered location for a few hours each day, gradually increasing the amount of time they spend outdoors.
Transplanting Melon Seedlings or Direct Sowing
Once the danger of frost has passed and the soil has warmed up, it’s time to transplant your melon seedlings or direct sow the seeds.
1. Choose a Sunny Day: Transplant or sow on a cloudy or overcast day to minimize stress on the plants.
2. Space the Plants Properly: Melons need plenty of space to grow. Watermelons typically need 3-4 feet between plants, while cantaloupes and honeydews need 2-3 feet. Check the seed packet for specific spacing recommendations.
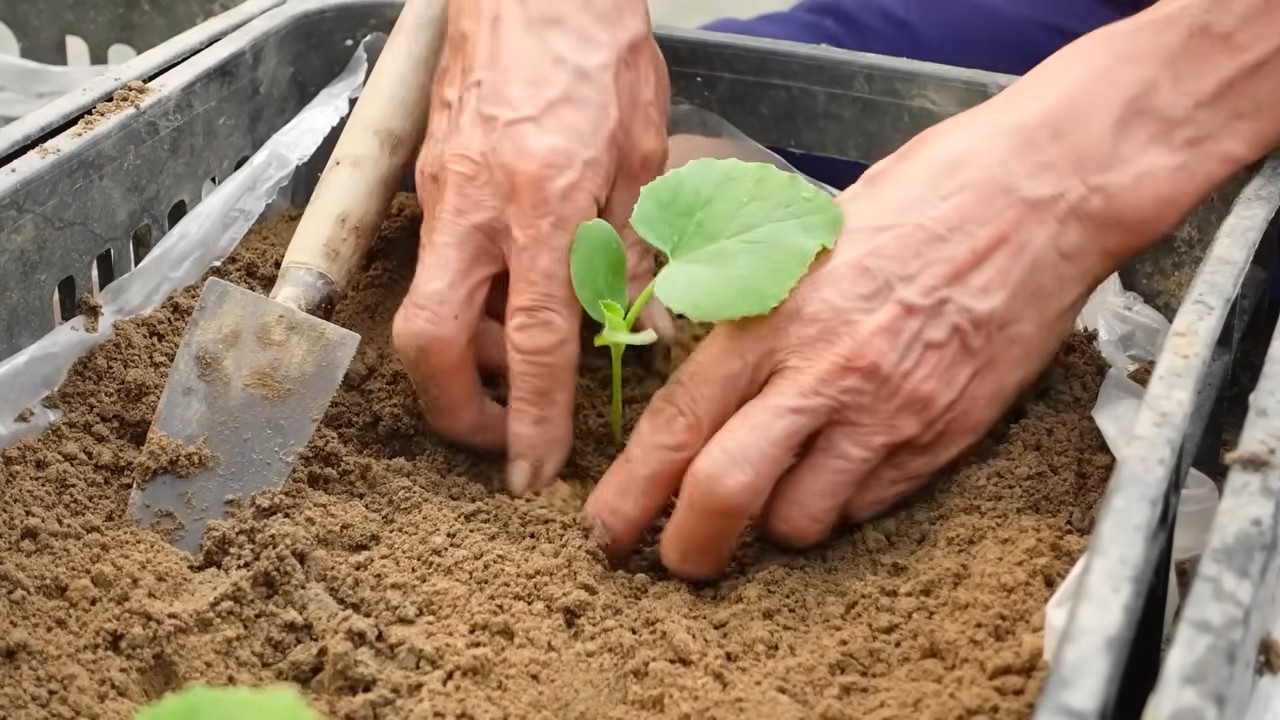
3. Dig the Holes: Dig holes that are slightly larger than the root balls of the seedlings.
4. Transplant Carefully: Gently remove the seedlings from their pots and place them in the holes. Backfill with soil and water thoroughly. If direct sowing, plant seeds according to package instructions.
5. Protect from Pests: Young melon plants are susceptible to pests like cutworms and squash bugs. Use row covers or insecticidal soap to protect them.
Caring for Your Melon Plants
Once your melon plants are established, it’s important to provide them with proper care to ensure a bountiful harvest.
* Watering: Melons need consistent watering, especially during hot, dry weather. Water deeply and regularly, aiming for about 1-2 inches of water per week. Avoid overhead watering, which can promote fungal diseases. Drip irrigation is a great option for melons.
* Fertilizing: Melons are heavy feeders, so you’ll need to fertilize them regularly. Use a balanced fertilizer (e.g., 10-10-10) at planting time, and then side-dress with a nitrogen-rich fertilizer every 2-3 weeks.
* Weeding: Keep the area around your melon plants free of weeds. Weeds compete with melons for water and nutrients.
* Pruning (Optional): Some gardeners prune their melon plants to encourage larger fruit. Pruning involves removing some of the side shoots and leaves. However, pruning is not essential, and it can actually reduce the overall yield.
* Pollination: Melons need to be pollinated in order to produce fruit. Bees are the primary pollinators of melons. If you don’t have enough bees in your garden, you may need to hand-pollinate the flowers. To hand-pollinate, use a small paintbrush to transfer pollen from the male flowers to the female flowers. Female flowers have a small fruit at the base of the flower, while male flowers do not.
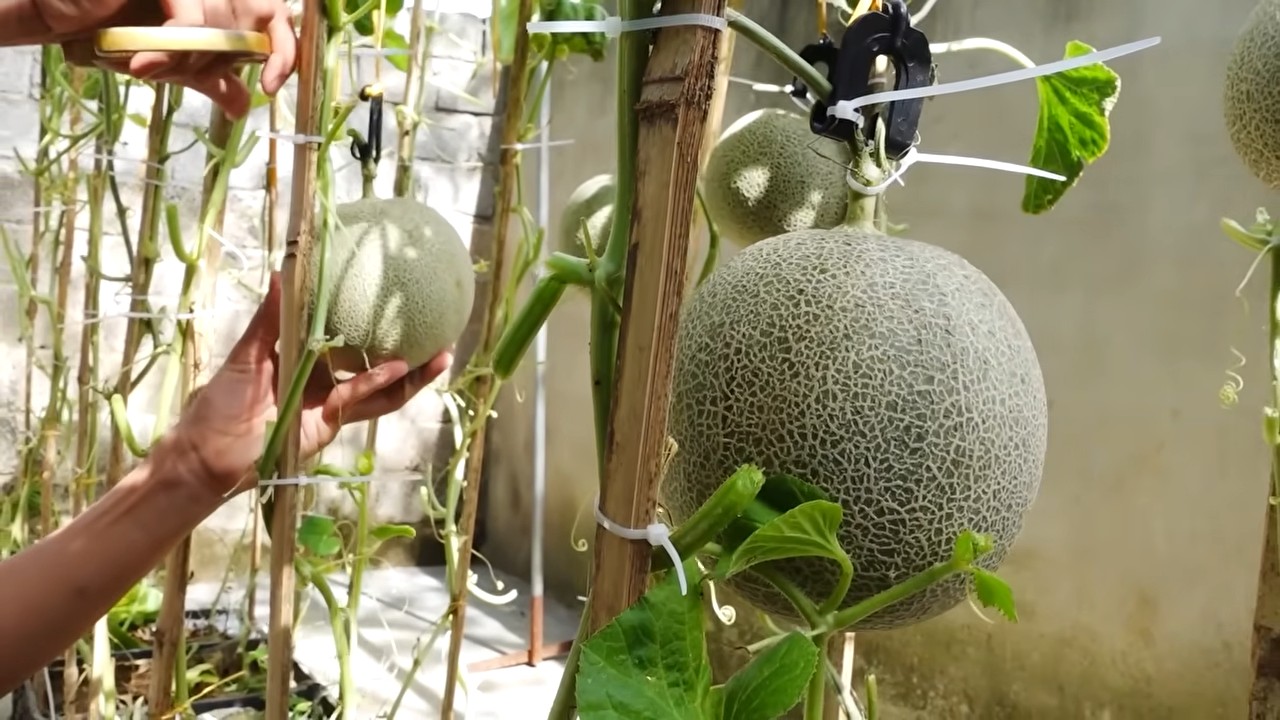
* Support the Fruit (Optional): As the melons grow larger, they may need support to prevent them from rotting on the ground. Use slings made from old pantyhose or netting to support the fruit. This is especially important for watermelons.
Dealing with Pests and Diseases
Melons can be susceptible to a variety of pests and diseases. Here are some common problems and how to deal with them:
* Squash Bugs: Squash bugs are common pests that can damage melon plants. Handpick the bugs and their eggs, or use insecticidal soap.
* Cucumber Beetles: Cucumber beetles can spread diseases and damage melon plants. Use row covers to protect young plants, or use insecticidal soap.
* Aphids: Aphids are small, sap-sucking insects that can weaken melon plants. Spray them with a strong stream of water, or use insecticidal soap.
* Powdery Mildew: Powdery mildew is a fungal disease that can cause white, powdery spots on the leaves. Improve air circulation, avoid overhead watering, and use a fungicide if necessary.
* Fusarium Wilt: Fusarium wilt is a soilborne fungal disease that can cause melon plants to wilt and die. Choose disease-resistant varieties, and practice crop rotation.
Harvesting Your Melons
Knowing when to harvest your melons is key to enjoying their full flavor. Here are some tips for determining when your melons are ripe:
* Watermelon: Look for a dull rind, a yellow spot on the bottom where the melon rested on the ground, and a hollow sound when you thump it. The tendril closest to the melon should also be brown and dry.
* Cantaloupe: The melon should slip easily from the vine when it’s ripe. The rind should also have a sweet, musky aroma.
* Honeydew: The rind should be slightly soft and waxy. The blossom end should also be slightly soft and give slightly to pressure.
* Galia Melon: The rind should turn from green to yellow, and the melon should have a sweet, aromatic fragrance.
* Casaba Melon: The rind should turn from green to yellow, and the melon should feel heavy for its size.
Once you’ve harvested your melons, store them in a cool, dry place. Watermelons can be stored for up
Conclusion
So, there you have it! Mastering these simple yet effective DIY melon growing tips can truly transform your gardening experience and reward you with a bountiful harvest of sweet, juicy melons. Forget the expensive store-bought varieties that often lack flavor and freshness. With a little planning and these easy techniques, you can cultivate your own delicious melons right in your backyard, tailored to your specific taste preferences.
The beauty of these DIY melon growing tips lies in their adaptability. Feel free to experiment with different melon varieties to discover your favorites. Try cantaloupe for its classic sweetness, honeydew for its refreshing flavor, or even watermelon for a summer barbecue staple. Consider grafting different melon varieties onto disease-resistant rootstocks for increased resilience and yield. You can even explore growing smaller, personal-sized melons in containers if you have limited space.
Don’t be afraid to get creative with your soil amendments. While compost is a fantastic all-around choice, you can also incorporate other organic materials like aged manure, leaf mold, or even coffee grounds to enrich the soil and provide essential nutrients for your melon plants. Remember to monitor your soil pH and adjust it as needed to ensure optimal growing conditions.
Beyond the basic techniques, consider exploring companion planting to further enhance your melon garden. Marigolds can help deter pests, while basil can improve the flavor of your melons. Planting legumes like beans or peas nearby can fix nitrogen in the soil, benefiting your melon plants.
The most important thing is to start! Don’t be intimidated by the prospect of growing melons. These DIY melon growing tips are designed to be accessible and easy to follow, even for beginner gardeners. With a little patience and attention, you’ll be amazed at what you can achieve.
We’re confident that these DIY melon growing tips will empower you to grow the best melons you’ve ever tasted. We encourage you to give them a try and share your experiences with us. Let us know what varieties you’re growing, what challenges you’ve encountered, and what successes you’ve celebrated. Your feedback will help us refine these tips and make them even more valuable for other gardeners.
So, grab your gardening gloves, gather your supplies, and get ready to embark on a rewarding journey of growing your own delicious melons. Happy gardening!
Frequently Asked Questions (FAQ)
What are the most common mistakes people make when growing melons, and how can I avoid them?
One of the most frequent errors is neglecting proper soil preparation. Melons are heavy feeders and require nutrient-rich, well-drained soil. Avoid this by amending your soil with plenty of compost and other organic matter before planting. Another common mistake is overwatering, which can lead to root rot. Ensure your soil drains well and water deeply but infrequently, allowing the soil to dry out slightly between waterings. Finally, failing to protect your melons from pests and diseases can significantly impact your harvest. Regularly inspect your plants for signs of trouble and take appropriate action, such as using organic pest control methods or applying fungicides as needed.
How do I know when my melon is ripe and ready to harvest?
Determining ripeness varies slightly depending on the melon variety. For cantaloupe, look for a distinct aroma and a slight softening at the blossom end. The stem should also slip easily from the vine with gentle pressure. Honeydew melons are ripe when the skin turns a creamy yellow color and the blossom end feels slightly soft. Watermelons are a bit trickier. Look for a dull thud when you tap the melon, a yellow spot on the underside where it rested on the ground, and a dried tendril closest to the melon on the vine.
What are the best melon varieties to grow in a small garden or containers?
If you have limited space, consider growing smaller, personal-sized melon varieties. ‘Sugar Baby’ watermelon, ‘Minnesota Midget’ cantaloupe, and ‘Honey Globe’ honeydew are all excellent choices for small gardens or containers. Choose a container that is at least 24 inches in diameter and depth to accommodate the melon’s root system. You may also need to provide support for the vines, such as a trellis or stake.
How can I protect my melon plants from pests and diseases?
Prevention is key when it comes to pests and diseases. Start by choosing disease-resistant melon varieties. Practice crop rotation to prevent soilborne diseases from building up. Keep your garden clean and free of debris, which can harbor pests and diseases. Use row covers to protect young plants from insects. If you do encounter pests, consider using organic pest control methods such as insecticidal soap, neem oil, or diatomaceous earth. For fungal diseases, ensure good air circulation around your plants and apply fungicides as needed.
What are some tips for improving the flavor of my homegrown melons?
Several factors can influence the flavor of your melons. First, ensure your soil is rich in nutrients, particularly potassium, which is essential for sugar production. Provide adequate sunlight, as melons need plenty of sunshine to develop their sweetness. Avoid overwatering, as this can dilute the sugars in the fruit. Finally, harvest your melons at the peak of ripeness for the best flavor.
Can I save seeds from my homegrown melons to plant next year?
Yes, you can save seeds from your homegrown melons, but keep in mind that hybrid varieties may not produce true-to-type offspring. Open-pollinated varieties are more likely to produce plants that resemble the parent plant. To save seeds, scoop them out of a ripe melon, rinse them thoroughly, and spread them out on a paper towel to dry completely. Store the dried seeds in an airtight container in a cool, dark place.
How much sun do melons need?
Melons thrive in full sun, requiring at least 6-8 hours of direct sunlight per day. Adequate sunlight is crucial for photosynthesis, which fuels the growth and development of the plant and the production of sweet, flavorful fruit. If your garden doesn’t receive enough sunlight, consider using grow lights to supplement the natural light.
What kind of fertilizer should I use for melons?
Melons benefit from a balanced fertilizer with a slightly higher phosphorus content to promote root development and flowering. A 10-10-10 or 5-10-5 fertilizer is a good choice. Apply fertilizer at planting time and then again when the plants begin to flower. You can also supplement with compost tea or other organic fertilizers throughout the growing season. Avoid over-fertilizing, as this can lead to excessive vegetative growth at the expense of fruit production.


Leave a Comment