

Grow Coral Cactus and transform your living space into a vibrant, miniature desert oasis! Have you ever looked at a coral cactus and thought, “Wow, that looks like something from another planet!”? I know I have! These quirky, grafted succulents are not only visually stunning but also surprisingly easy to propagate and care for, making them a fantastic DIY project for plant lovers of all levels.
The art of grafting, which is essential to creating these unique plants, has a rich history dating back centuries. Ancient civilizations, including the Chinese and Romans, used grafting techniques to improve fruit production and create disease-resistant varieties. Today, we’re using this time-honored method to create living art!
Why should you try this DIY trick? Well, for starters, it’s incredibly rewarding to create something beautiful with your own hands. Plus, propagating your own coral cactus is a budget-friendly way to expand your succulent collection and share the joy with friends and family. More importantly, understanding how to grow coral cactus and propagate it will give you a deeper appreciation for the fascinating world of plant biology and the magic of grafting. So, grab your gardening gloves, and let’s dive into the wonderful world of coral cactus propagation!
DIY: Propagating and Caring for Your Coral Cactus (Euphorbia Lactea Cristata)
Okay, plant lovers, let’s dive into the fascinating world of Coral Cactus! These quirky, sculptural succulents are actually two plants grafted together, making them a unique and eye-catching addition to any collection. While they might seem intimidating, propagating and caring for them is totally doable with a little know-how. I’m going to walk you through everything you need to know to keep your Coral Cactus thriving and even create new ones!
Understanding Your Coral Cactus
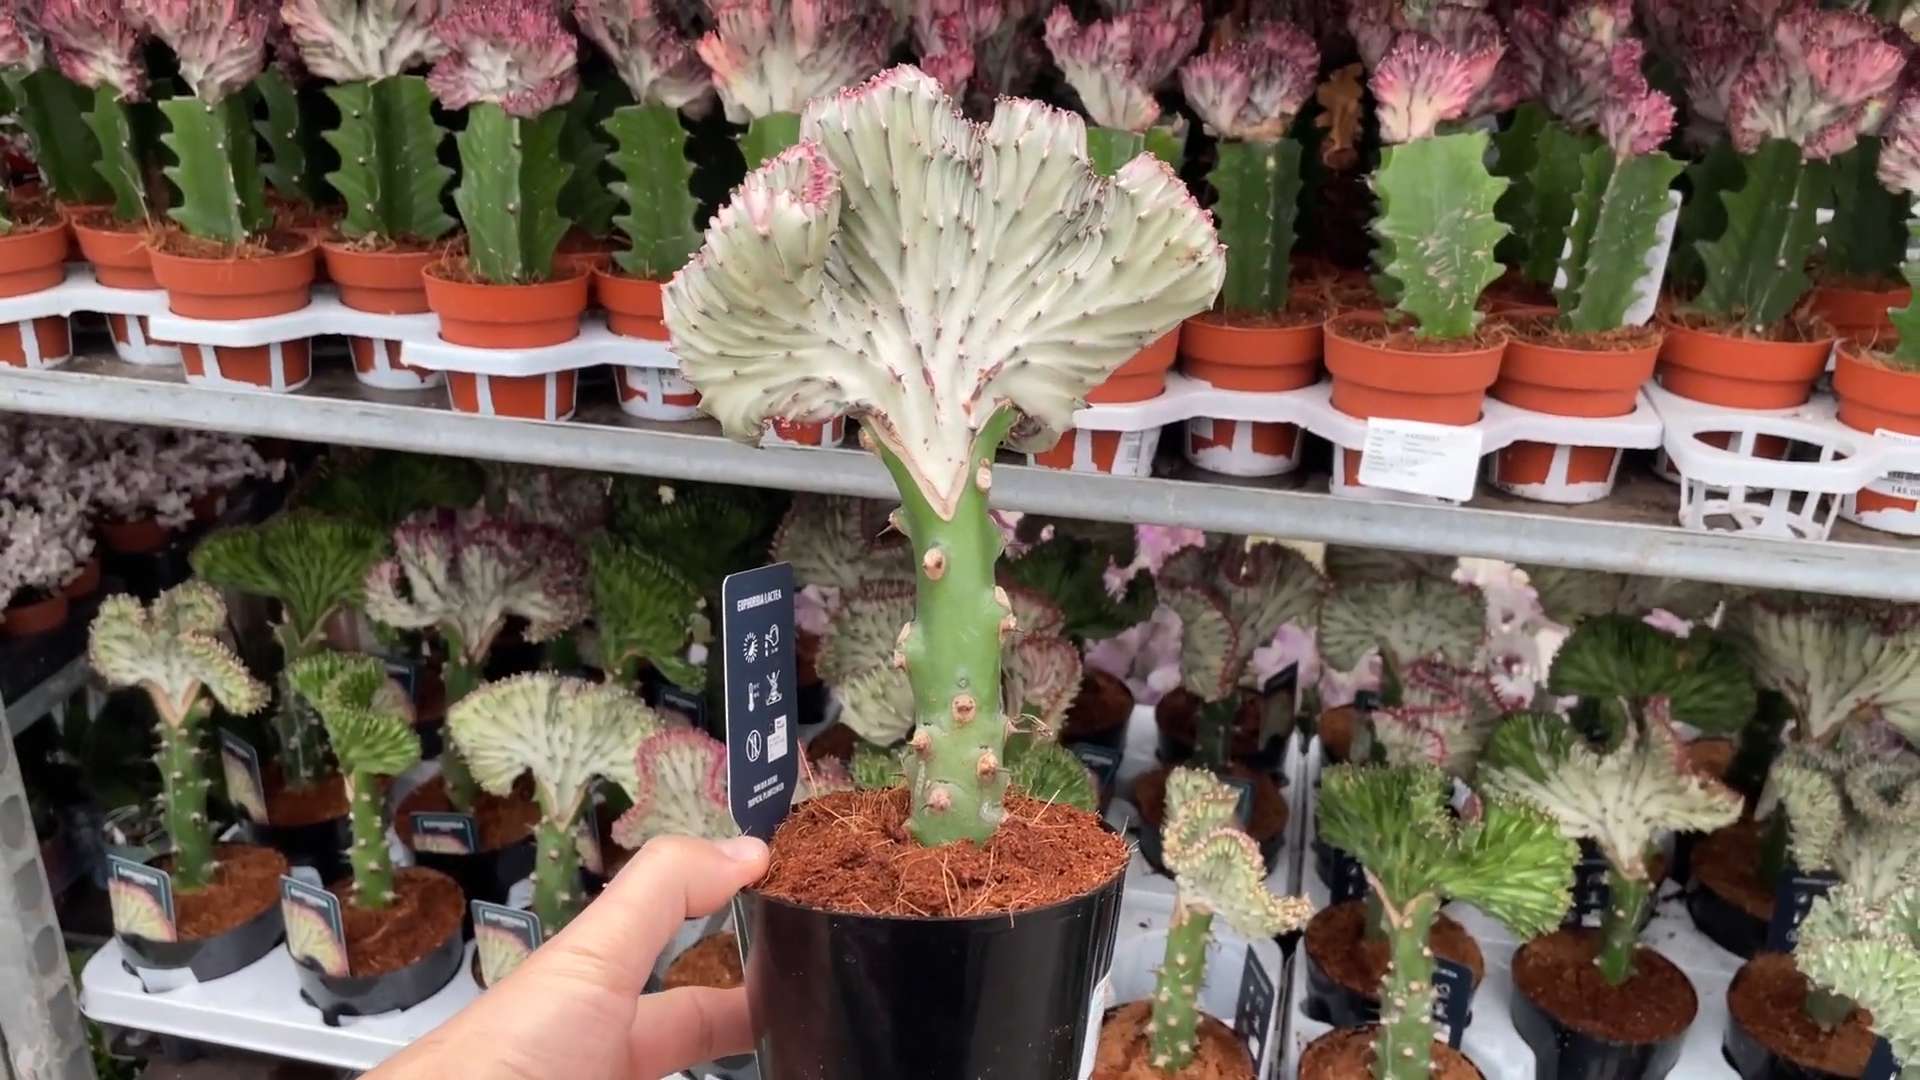
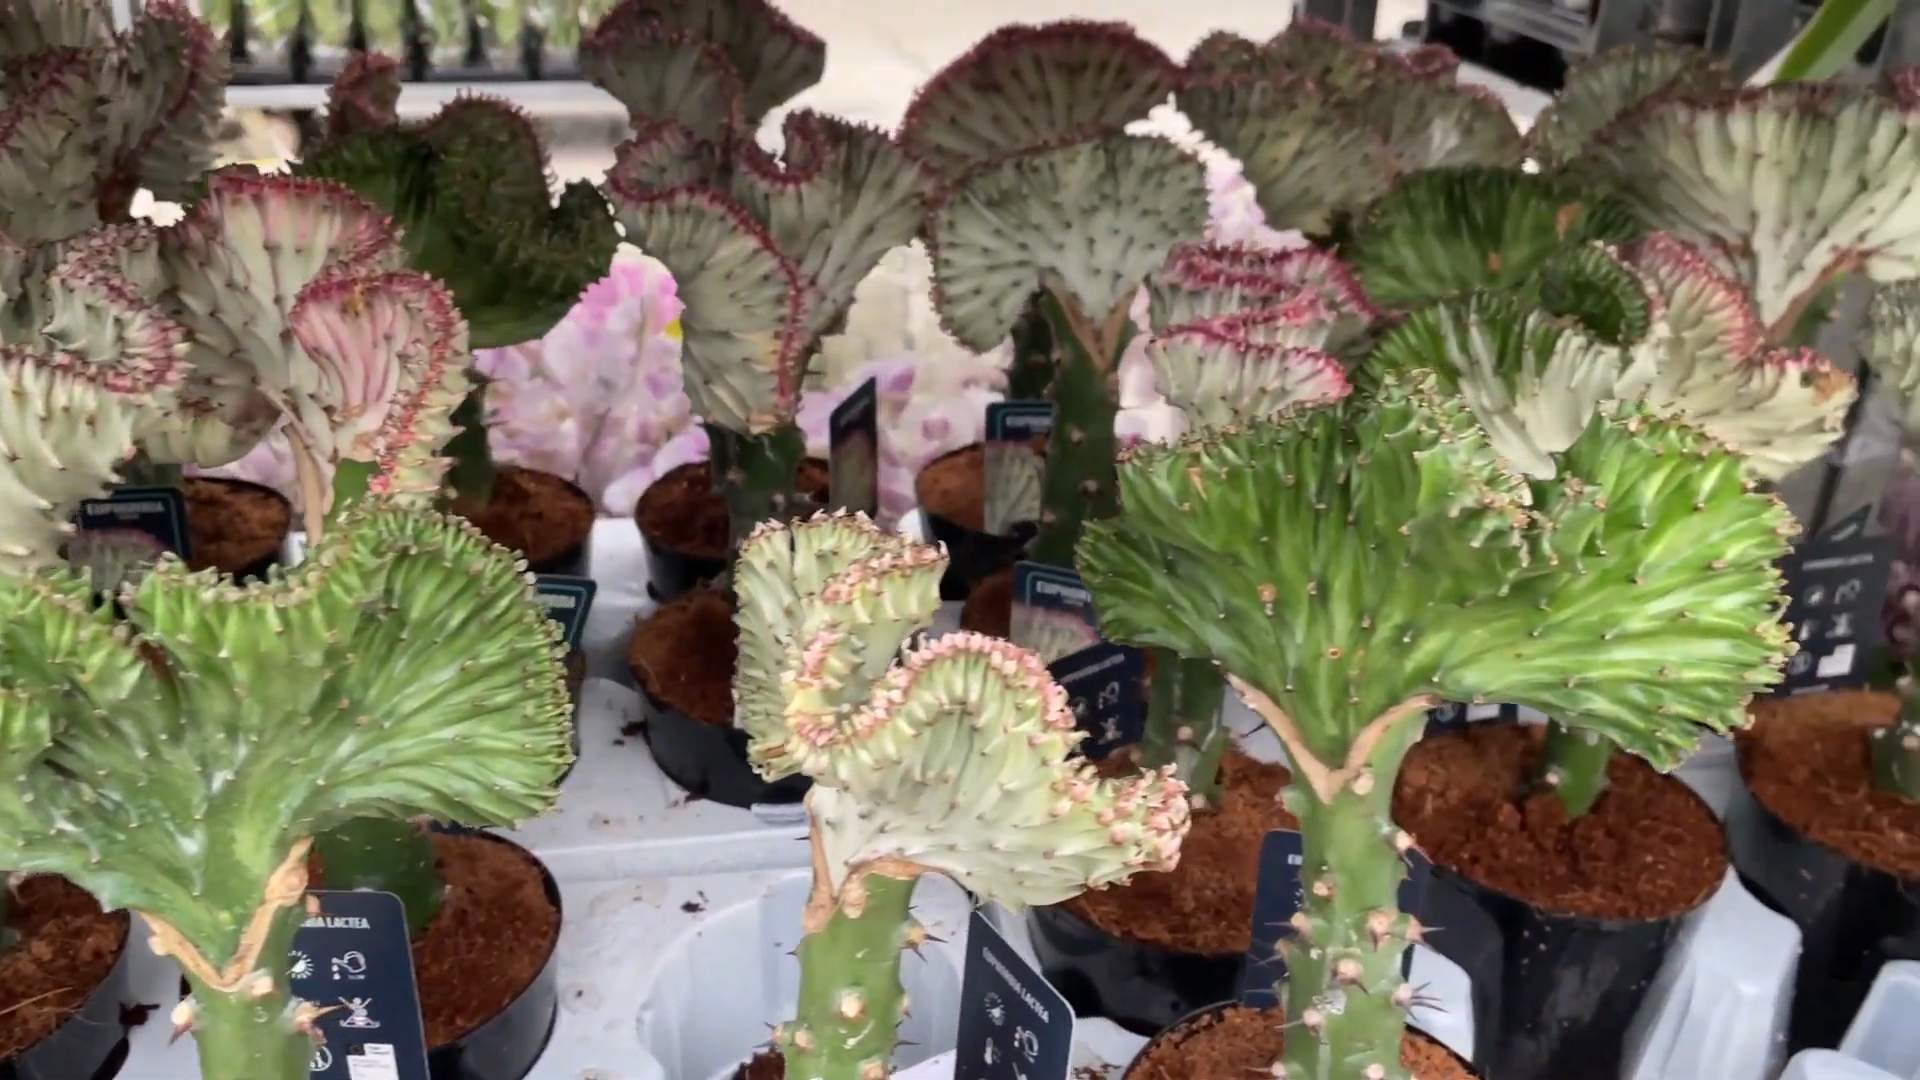
Before we get started, let’s talk about what a Coral Cactus actually *is*. It’s not a single plant, but a graft. Typically, the base is a *Euphorbia neriifolia* (a hardy, upright succulent) and the top is a *Euphorbia lactea cristata* (the crested, fan-like part that resembles coral). The graft allows the crested form, which is often unable to survive on its own roots, to flourish. This means you need to consider the needs of *both* plants when caring for it.
Propagating Coral Cactus: A Bit Tricky, But Rewarding!
Propagating a Coral Cactus isn’t as straightforward as propagating a single succulent. Since it’s a graft, you can’t just take a cutting of the “coral” part and expect it to root. You’ll need to understand how grafting works, or propagate from the base plant. I’ll cover both options, starting with the easier one.
Propagating from the Base Plant (Euphorbia neriifolia)
This is the simplest method, as you’re essentially propagating the rootstock.
What You’ll Need:
* A healthy Coral Cactus with a visible *Euphorbia neriifolia* base.
* A sharp, clean knife or pruning shears.
* Rooting hormone powder (optional, but recommended).
* Well-draining succulent potting mix.
* A pot with drainage holes.
* Gloves (Euphorbia sap is irritating!).
* Rubbing alcohol for sterilizing your tools.
Step-by-Step Instructions:
1. Sterilize Your Tools: This is crucial to prevent infection. Wipe your knife or shears thoroughly with rubbing alcohol.
2. Take a Cutting: Look for a healthy stem on the *Euphorbia neriifolia* base. Make a clean cut, ideally at a node (where a leaf or branch used to grow). Aim for a cutting that’s about 4-6 inches long.
3. Let the Cutting Callous: This is super important! Euphorbia sap will ooze out. Let the cutting sit in a dry, shaded place for several days (usually 3-7 days) until the cut end forms a callous. This prevents rot when you plant it.
4. Apply Rooting Hormone (Optional): Dip the calloused end of the cutting into rooting hormone powder. This encourages root growth.
5. Plant the Cutting: Fill your pot with well-draining succulent potting mix. Make a hole in the center and insert the calloused end of the cutting. Gently firm the soil around it.
6. Water Sparingly: Water the cutting lightly, just enough to moisten the soil. Avoid overwatering, as this can cause rot.
7. Provide Bright, Indirect Light: Place the pot in a location with bright, indirect light. Avoid direct sunlight, which can scorch the cutting.
8. Be Patient: It can take several weeks or even months for the cutting to root. Check for roots by gently tugging on the cutting. If it resists, it has likely rooted.
9. Gradually Increase Watering: Once the cutting has rooted, you can gradually increase watering as needed. Allow the soil to dry out completely between waterings.
Grafting (Advanced): A More Challenging Approach
Grafting is how Coral Cacti are created in the first place. It’s more complex, but if you’re feeling adventurous, you can try it! Be warned, though, it has a lower success rate than propagating from the base.
What You’ll Need:
* A healthy *Euphorbia neriifolia* base plant (the rootstock).
* A healthy *Euphorbia lactea cristata* cutting (the scion).
* A sharp, *extremely* clean grafting knife or scalpel.
* Grafting wax or grafting tape.
* Gloves (Euphorbia sap is irritating!).
* Rubbing alcohol for sterilizing your tools.
* A clean, sterile environment.
Step-by-Step Instructions:
1. Sterilize Everything: This is even *more* critical for grafting. Sterilize your knife/scalpel, your work surface, and even your hands as much as possible.
2. Prepare the Rootstock: Make a clean, horizontal cut across the top of the *Euphorbia neriifolia* base plant. The cut should be smooth and even.
3. Prepare the Scion: Take a cutting of the *Euphorbia lactea cristata* (the “coral” part). Make a clean, horizontal cut across the bottom of the cutting. The cut should be the same size as the cut on the rootstock.
4. Join the Rootstock and Scion: Immediately place the cut surface of the scion onto the cut surface of the rootstock. Align the vascular cambium (the green ring just under the bark) of both plants as closely as possible. This is where the magic happens – the cambium layers need to connect for the graft to take.
5. Secure the Graft: Use grafting wax or grafting tape to tightly secure the scion to the rootstock. This provides support and prevents the graft from drying out. Make sure the tape is snug but not so tight that it damages the plants.
6. Provide a Humid Environment: Place the grafted plant in a humid environment, such as a plastic bag or a humidity dome. This helps prevent the graft from drying out.
7. Provide Bright, Indirect Light: Place the grafted plant in a location with bright, indirect light. Avoid direct sunlight.
8. Be Patient (and Vigilant): Grafting can take several weeks or even months to take. Keep an eye on the graft for signs of success, such as new growth on the scion. Also, watch for signs of failure, such as the scion shriveling or rotting.
9. Remove Grafting Tape Gradually: Once the graft has taken, you can gradually remove the grafting tape. Start by loosening the tape slightly, and then remove it completely over a period of several days.
Important Considerations for Grafting:
* Timing is Key: The best time to graft is during the growing season (spring or summer) when the plants are actively growing.
* Cleanliness is Paramount: Any contamination can lead to graft failure.
* Practice Makes Perfect: Grafting takes practice. Don’t be discouraged if your first few attempts are unsuccessful.
Caring for Your Coral Cactus: Keeping it Happy and Healthy
Whether you’ve propagated a new base plant or are just caring for an existing Coral Cactus, these tips will help you keep it thriving.
Light:
* Coral Cacti need bright, indirect light. Too much direct sunlight can scorch the “coral” part, while too little light can cause it to become etiolated (stretched and pale). An east-facing window is often ideal. If you’re using grow lights, keep them a good distance away from the plant.
Watering:
* Like most succulents, Coral Cacti are drought-tolerant and don’t like to be overwatered. Allow the soil to dry out completely between waterings. When you do water, water thoroughly until water drains out of the drainage holes.
* During the winter months, when the plant is dormant, you can reduce watering even further.
* Pay attention to the plant! Wrinkling of the base can indicate underwatering, while mushy spots can indicate overwatering.
Soil:
* Well-draining soil is essential for Coral Cacti. Use a succulent potting mix or create your own by mixing regular potting soil with perlite and coarse sand. This ensures that excess water drains away quickly, preventing root rot.
Temperature:
* Coral Cacti prefer temperatures between 65°F and 80°F (18°C and 27°C). They can tolerate slightly cooler temperatures, but avoid exposing them to frost.
Humidity:
* Coral Cacti prefer low humidity. Avoid placing them in humid environments, such as bathrooms.
Fertilizing:
* Fertilize your Coral Cactus sparingly during the growing season (spring and summer) with a balanced liquid fertilizer diluted to half strength. Avoid fertilizing during the winter months.
Repotting:
* Repot your Coral Cactus every 1-2 years, or when it becomes root-bound. Choose a pot that
Conclusion
So, there you have it! Growing your own Coral Cactus from cuttings is not only surprisingly simple, but also incredibly rewarding. Forget expensive nursery prices and embrace the satisfaction of propagating your own unique succulent. This DIY trick is a must-try for any plant enthusiast, regardless of experience level. It’s a cost-effective way to expand your collection, a fun project to share with friends and family, and a fantastic way to appreciate the resilience and beauty of these fascinating plants.
Why is this method so compelling? Because it bypasses the often-slow process of seed germination and allows you to essentially clone your existing Coral Cactus, ensuring you get a plant with the exact same characteristics as the parent. Plus, it’s a fantastic way to rescue a healthy piece of a plant that might have suffered damage or outgrown its pot.
Don’t be afraid to experiment with variations! Try using different rooting mediums like perlite or vermiculite alongside the recommended cactus mix. You can also experiment with different sized cuttings, although smaller cuttings might take longer to root. Consider using a rooting hormone powder to further encourage root development, especially if you live in a drier climate or are propagating during the off-season. Another fun variation is to create a multi-stemmed Coral Cactus by planting several rooted cuttings together in a single pot. This will give you a fuller, more dramatic display.
Remember, patience is key. While some cuttings might root quickly, others might take a bit longer. Don’t give up! Keep the soil lightly moist, provide bright, indirect light, and trust the process. The reward of seeing those tiny roots emerge and watching your new Coral Cactus thrive is well worth the wait.
We wholeheartedly encourage you to give this DIY trick a try. It’s an easy and affordable way to add to your succulent collection and experience the joy of plant propagation. Once you’ve successfully grown your own Coral Cactus from cuttings, we’d love to hear about your experience! Share your tips, tricks, and photos in the comments below. Let’s build a community of Coral Cactus enthusiasts and learn from each other’s successes (and occasional setbacks!). Happy growing!
Frequently Asked Questions (FAQ)
What exactly is a Coral Cactus?
The Coral Cactus, also known as Euphorbia neriifolia cristata, isn’t actually a cactus at all! It’s a crested form of the Euphorbia neriifolia succulent. The “coral” appearance comes from the fan-like, convoluted growth at the top of the plant, which resembles coral. It’s grafted onto a base, usually another Euphorbia species, to provide a sturdy root system.
Why is propagating from cuttings the best method for Coral Cactus?
While technically possible to grow from seed (though rare), propagating from cuttings is the preferred and most reliable method for Coral Cactus. This is because it allows you to replicate the exact characteristics of the parent plant, including the unique crested form. Seeds may not produce plants with the same desirable traits. Furthermore, grafting is a complex process best left to experienced growers, making cuttings the ideal DIY solution.
What kind of cutting should I take?
Choose a healthy, mature stem from your existing Coral Cactus. The cutting should be at least 4-6 inches long. Use a clean, sharp knife or pruning shears to make a clean cut. Avoid taking cuttings from damaged or diseased parts of the plant.
How long does it take for a Coral Cactus cutting to root?
Rooting time can vary depending on several factors, including the time of year, temperature, humidity, and the health of the cutting. Generally, it takes anywhere from 4 to 8 weeks for roots to develop. Be patient and avoid disturbing the cutting too often.
What kind of soil should I use for rooting Coral Cactus cuttings?
A well-draining cactus mix is essential. You can purchase a pre-made cactus mix or create your own by combining potting soil, perlite, and coarse sand in equal parts. Good drainage is crucial to prevent root rot.
How often should I water the cuttings?
Water sparingly, only when the soil is almost completely dry. Overwatering is a common cause of root rot. During the rooting process, misting the cutting lightly can help maintain humidity without saturating the soil.
What kind of light do Coral Cactus cuttings need?
Provide bright, indirect light. Avoid direct sunlight, which can scorch the cuttings. A location near an east- or west-facing window is ideal.
Can I use rooting hormone?
Yes, using a rooting hormone powder can significantly increase the chances of successful rooting. Dip the cut end of the cutting into the rooting hormone before planting it in the soil.
What if my cutting starts to rot?
If you notice any signs of rot, such as black or mushy spots, remove the affected area immediately. You can try to salvage the remaining healthy portion of the cutting by allowing it to callous over again and then replanting it in fresh, well-draining soil.
My cutting hasn’t rooted after 8 weeks. What should I do?
Don’t give up! Sometimes, cuttings take longer to root. Check the soil moisture level and ensure the cutting is receiving adequate light. You can also gently tug on the cutting to see if you feel any resistance, which would indicate root development. If you’re still unsure, carefully remove the cutting from the soil and inspect the cut end for root growth. If there are no roots, allow the cut end to callous over again and replant it in fresh soil.
Can I grow Coral Cactus cuttings outdoors?
In warmer climates (USDA zones 9-11), you can grow Coral Cactus cuttings outdoors in a well-draining container. However, protect them from frost and excessive rain. In colder climates, it’s best to grow them indoors.
How do I care for my rooted Coral Cactus cutting?
Once your cutting has rooted, continue to provide bright, indirect light and water sparingly, allowing the soil to dry out completely between waterings. Fertilize occasionally during the growing season (spring and summer) with a balanced cactus fertilizer. Repot as needed into a slightly larger container.
Is Coral Cactus poisonous?
Yes, the sap of the Coral Cactus is toxic and can cause skin irritation and digestive upset if ingested. Wear gloves when handling the plant and keep it out of reach of children and pets.
Where can I find a Coral Cactus to take cuttings from?
You can often find Coral Cactus at local nurseries, garden centers, or online retailers specializing in succulents. You might also be able to obtain a cutting from a friend or neighbor who has a Coral Cactus. Always ask permission before taking a cutting.


Leave a Comment