

DIY Bolster Pillow Tutorial: Ready to add a touch of elegance and comfort to your home decor without breaking the bank? I’m so excited to share this simple and satisfying DIY project with you! For centuries, bolster pillows have been used across various cultures, from adding lumbar support in traditional Japanese seating to providing decorative flair on Victorian sofas. They’re not just pretty; they’re incredibly versatile!
In today’s fast-paced world, finding moments of relaxation and personalization in our living spaces is more important than ever. That’s where this DIY bolster pillow tutorial comes in. Whether you’re looking to spruce up your bedroom, add a touch of sophistication to your living room, or simply create a cozy reading nook, a handmade bolster pillow is the perfect solution. Plus, making it yourself allows you to customize the size, fabric, and embellishments to perfectly match your unique style and needs.
Forget those expensive store-bought options! I’ll guide you through each step, from selecting the right materials to mastering the sewing techniques, ensuring you create a beautiful and functional bolster pillow you’ll be proud to display. Let’s get started and transform your space with this easy and rewarding DIY project!
DIY Bolster Pillow: A Cozy and Stylish Project
Hey there, fellow DIY enthusiasts! Today, I’m super excited to share a project that’s both functional and adds a touch of elegance to any space: a DIY bolster pillow. Bolster pillows are fantastic for adding lumbar support, decorating your bed, or simply creating a cozy reading nook. And the best part? Making one yourself is surprisingly easy and budget-friendly!
What You’ll Need
Before we dive in, let’s gather our supplies. Here’s a comprehensive list of everything you’ll need to create your own beautiful bolster pillow:
* Fabric: Choose a fabric you love! Consider the style of your room and the purpose of the pillow. Durable fabrics like cotton canvas, linen, or upholstery fabric are great for everyday use. For a more luxurious feel, consider velvet or silk. You’ll need enough fabric for the pillow body and the end caps. I usually recommend at least 1 yard, but measure your desired pillow dimensions first to be sure.
* Bolster Pillow Insert: You can purchase a pre-made bolster pillow insert in the size you want, or you can create your own using fiberfill. If you’re making your own, you’ll need a lot of fiberfill!
* Sewing Machine: A sewing machine will make this project much faster and easier, but you can also sew it by hand if you’re feeling ambitious.
* Thread: Choose a thread that matches your fabric.
* Scissors or Rotary Cutter: For cutting your fabric accurately.
* Measuring Tape or Ruler: Essential for precise measurements.
* Pins: To hold your fabric pieces together while sewing.
* Pencil or Fabric Marker: For marking your fabric.
* Compass or Circular Object: To trace perfect circles for the end caps. A plate or bowl works great!
* Iron and Ironing Board: For pressing your fabric.
* Optional: Decorative trim, buttons, tassels, or other embellishments to personalize your pillow.
Measuring and Cutting Your Fabric
Okay, let’s get started! The first step is to measure and cut your fabric. This is crucial for ensuring your pillow turns out the right size and shape.
1. Determine Your Pillow Dimensions: Decide on the desired length and diameter of your bolster pillow. A common size is 24 inches long and 8 inches in diameter, but feel free to adjust this to your liking. Remember to add seam allowances! I usually add 1/2 inch seam allowance on all sides.
2. Calculate Fabric Dimensions for the Pillow Body:
* Length: Add 1 inch to your desired pillow length (1/2 inch seam allowance on each end). For example, if you want a 24-inch pillow, cut the length to 25 inches.
* Width: Calculate the circumference of your pillow (diameter x π, or diameter x 3.14). Add 1 inch for seam allowance. For an 8-inch diameter pillow, the circumference is approximately 25.12 inches. Add 1 inch, and you’ll cut the width to 26.12 inches. Rounding to 26 inches is perfectly fine.
3. Cut the Pillow Body Fabric: Using your measurements, cut a rectangle of fabric for the pillow body. In our example, this would be 25 inches long and 26 inches wide.
4. Cut the End Cap Fabric: You’ll need two circles for the end caps.
* Trace Circles: Using a compass or circular object (like a plate), trace two circles onto your fabric. The diameter of these circles should be the same as the desired diameter of your pillow (in our example, 8 inches).
* Add Seam Allowance: Add 1/2 inch seam allowance around each circle. You can do this by tracing another circle 1/2 inch outside the original circle, or by simply cutting freehand, keeping a consistent 1/2 inch margin.
* Cut Out the Circles: Carefully cut out the two circles.
Sewing the Pillow Body
Now for the fun part – sewing! This is where your pillow starts to take shape.
1. Fold and Press: Fold the rectangle of fabric in half lengthwise, with the right sides (the sides you want to show on the outside) facing each other. Press the fold with an iron to create a crisp crease.
2. Sew the Long Edge: Sew along the long edge of the folded fabric, using a 1/2 inch seam allowance. This will create a tube. Backstitch at the beginning and end of your seam to secure the stitches.
3. Press the Seam Open: Press the seam open with an iron. This will help reduce bulk and create a smoother finish.
Attaching the End Caps
This part can be a little tricky, but with patience, you’ll get it!
1. Pin the End Caps: Pin one of the fabric circles to one end of the fabric tube, with the right sides facing each other. Align the edge of the circle with the edge of the tube. You’ll need to ease the circle around the tube, distributing the fabric evenly. Use plenty of pins to hold everything in place.
2. Sew the End Cap: Sew the circle to the tube, using a 1/2 inch seam allowance. Sew slowly and carefully, easing the fabric as you go. It helps to sew a little bit, then stop, adjust the fabric, and sew some more. Backstitch at the beginning and end of your seam.
3. Repeat for the Other End Cap: Repeat steps 1 and 2 for the other end of the tube, but leave a 6-8 inch opening along the seam. This opening will be used to insert the pillow form.
4. Turn Right Side Out: Carefully turn the pillow cover right side out through the opening. Use a point turner or a blunt object (like a chopstick) to gently push out the seams and create a smooth, rounded shape.
5. Press the Seams: Press all the seams with an iron, paying special attention to the seam where you attached the end caps.
Stuffing the Pillow
Time to give your pillow some plumpness!
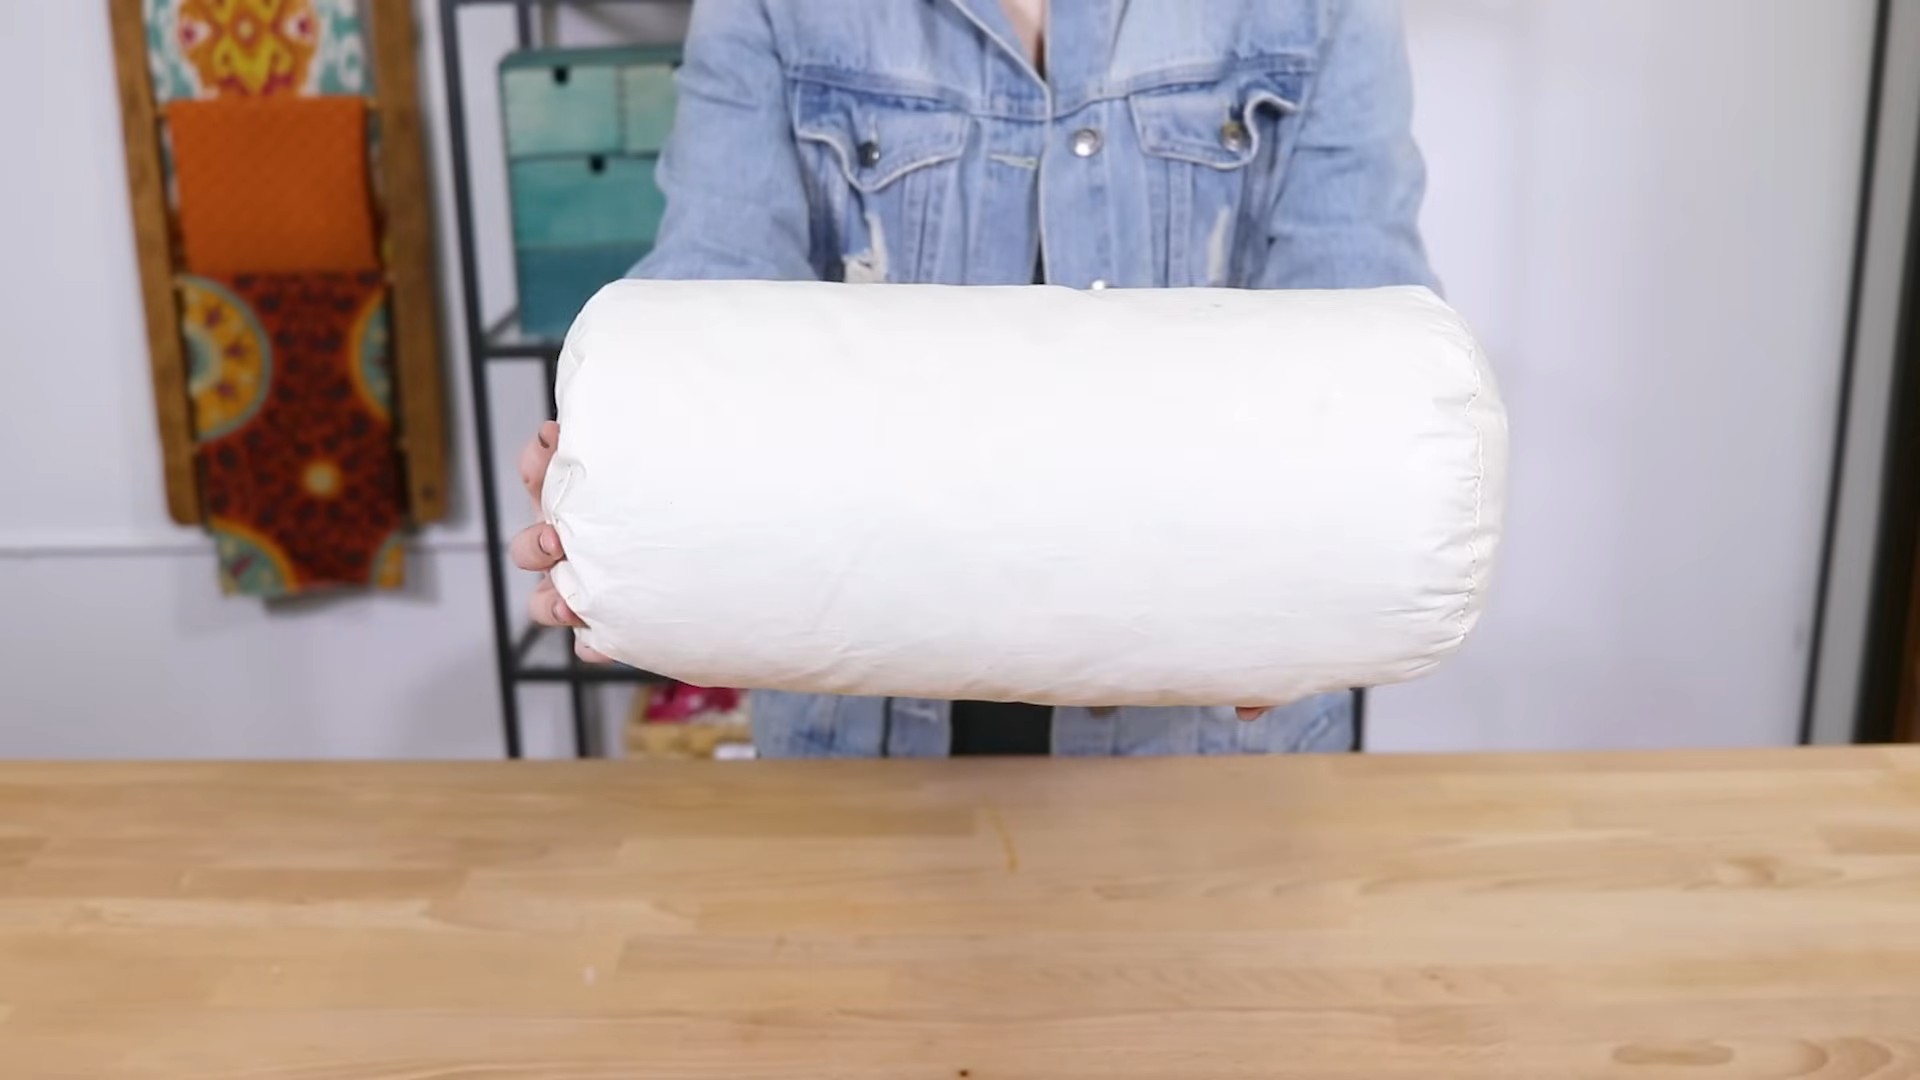
1. Insert the Pillow Form: Carefully insert the bolster pillow form into the pillow cover through the opening. If you’re using fiberfill, stuff the pillow firmly and evenly until it reaches your desired level of firmness.
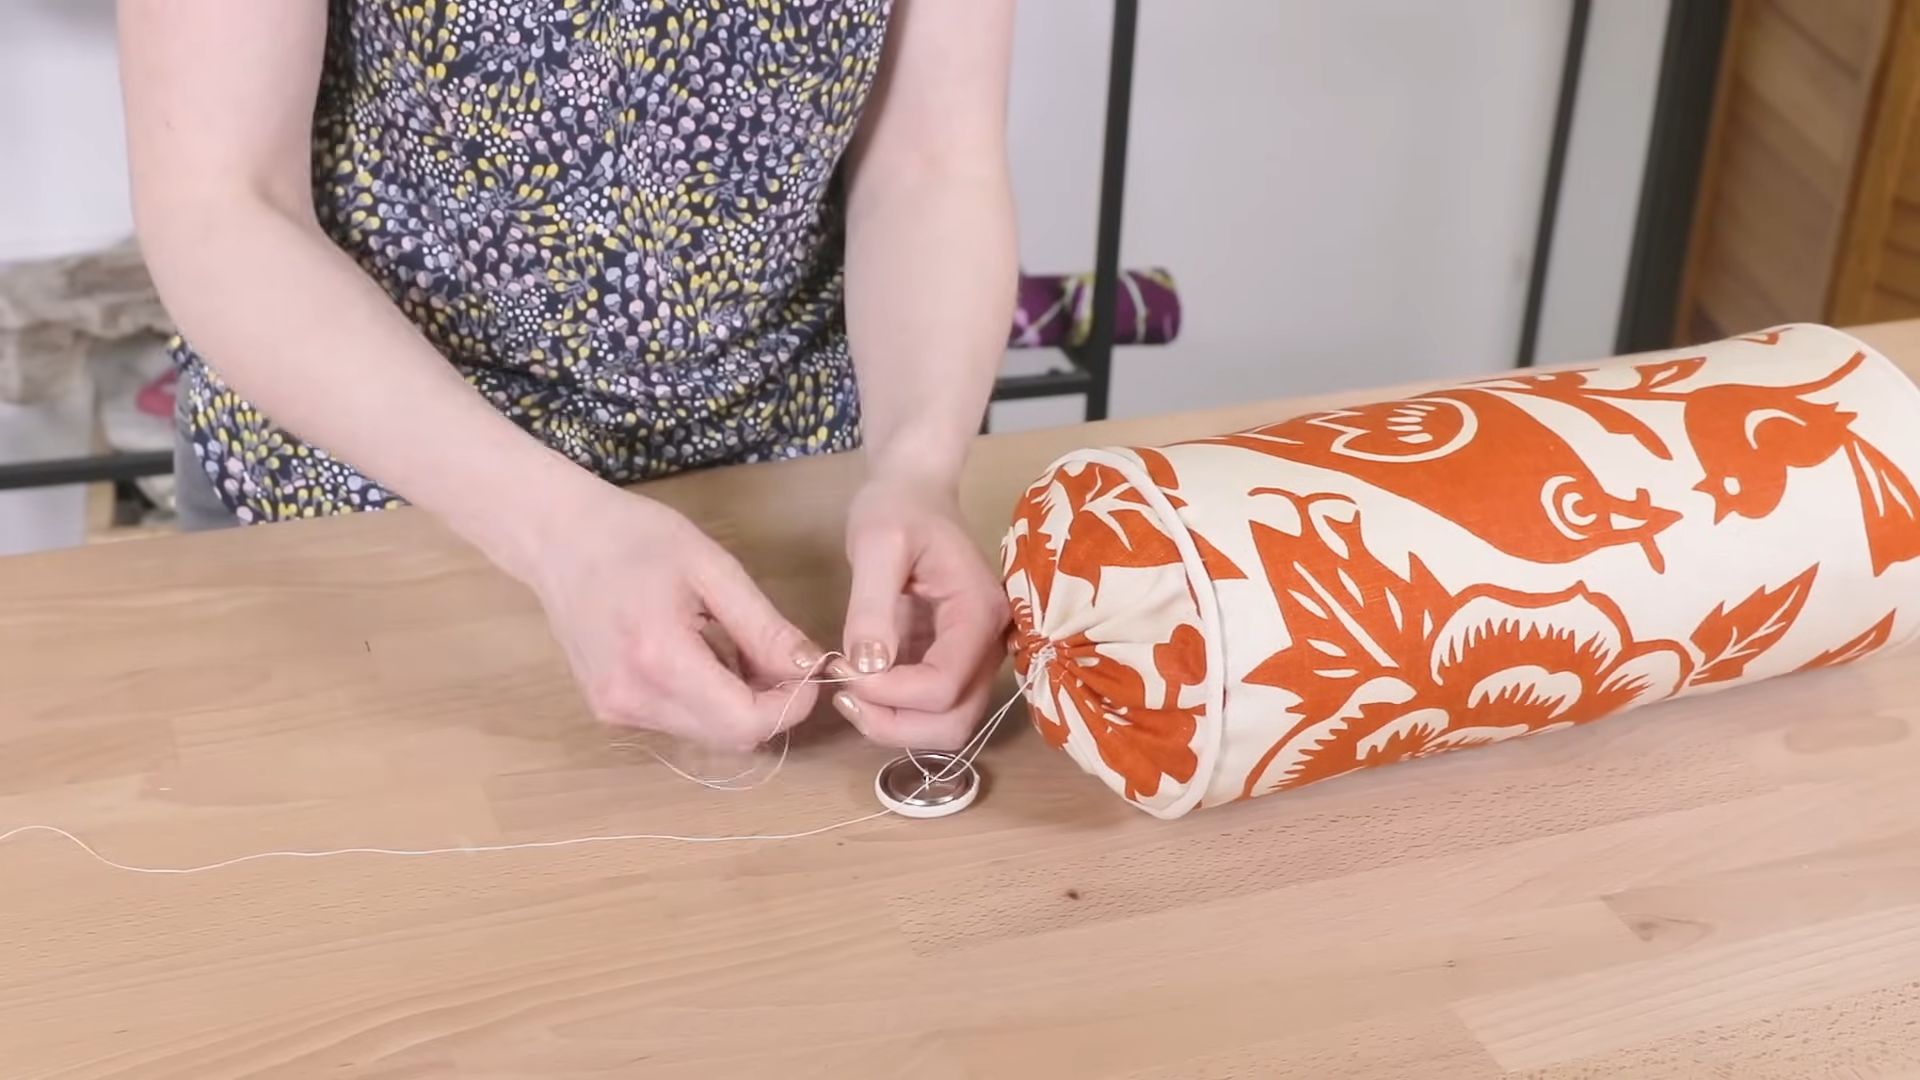
2. Close the Opening: Fold the raw edges of the opening inward, and pin them together.
3. Hand Sew the Opening Closed: Using a needle and thread, hand sew the opening closed with a blind stitch. This will create an invisible seam.
Adding Embellishments (Optional)
Now for the fun part – personalizing your pillow! This is where you can really let your creativity shine.
1. Add Trim: Sew decorative trim, such as pom-pom trim, fringe, or ribbon, around the edges of the pillow or along the seams.
2. Add Buttons or Tassels: Sew buttons or tassels to the ends of the pillow for a touch of elegance.
3. Embroider a Design: Embroider a design onto the pillow cover using embroidery floss.
4. Applique Fabric: Cut out shapes from fabric and applique them onto the pillow cover using fusible webbing or by sewing them on.
Tips and Tricks for a Perfect Bolster Pillow
* Choose the Right Fabric: The fabric you choose will greatly impact the look and feel of your pillow. Consider the durability, texture, and color of the fabric.
* Measure Accurately: Accurate measurements are essential for a well-fitting pillow cover. Double-check your measurements before cutting your fabric.
* Use Plenty of Pins: Pins are your best friend when sewing curves. Use plenty of pins to hold the fabric in place and prevent it from shifting.
* Sew Slowly and Carefully: Sewing curves can be tricky. Sew slowly and carefully, easing the fabric as you go.
* Press Your Seams: Pressing your seams will create a smoother, more professional finish.
* Don’t Be Afraid to Experiment: This is your project, so don’t be afraid to experiment with different fabrics, embellishments, and techniques.
Different Styles of Bolster Pillows
* Cylindrical Bolster Pillow: This is the classic bolster pillow shape.
* Neck Roll Bolster Pillow: This is a smaller, more compact bolster pillow that’s perfect for neck support.
* Lumbar Bolster Pillow: This is a longer, thinner bolster pillow that’s designed to provide lumbar support.
* Decorative Bolster Pillow: This is a bolster pillow that’s primarily used for decoration. It can be made from a variety of fabrics and embellished with trim, buttons, or other decorative elements.
Where to Use Your Bolster Pillow
Conclusion
So, there you have it! Crafting your own bolster pillow isn’t just a fun afternoon project; it’s a gateway to personalized comfort and style. Forget those generic, mass-produced pillows that never quite hit the mark. With this DIY bolster pillow tutorial, you’re in complete control, from the fabric choice to the firmness level.
Why is this a must-try? Because it’s economical, creative, and incredibly satisfying. Think about it: you can save money by using fabric scraps or repurposing old textiles. You get to unleash your inner designer and create a bolster pillow that perfectly complements your existing décor. And, perhaps most importantly, you’ll have a unique piece that reflects your personality and provides unparalleled support.
But the beauty of this project lies in its adaptability. Feel free to experiment with different shapes and sizes. Want a longer, thinner bolster for lumbar support? Go for it! Prefer a rounder, more cylindrical shape for neck support? Absolutely! The possibilities are endless.
Consider these variations to truly make it your own:
* **Add embellishments:** Think tassels, pom-poms, embroidery, or even fabric paint. A little extra detail can elevate your bolster pillow from simple to stunning.
* **Explore different fillings:** While we suggested using fiberfill, you could also try down feathers for a softer feel, buckwheat hulls for firmer support, or even shredded memory foam for ultimate comfort.
* **Play with patterns and textures:** Don’t be afraid to mix and match fabrics. A combination of velvet and linen, or a bold geometric print paired with a solid color, can create a visually striking effect.
* **Incorporate aromatherapy:** Add a few drops of your favorite essential oil to the fiberfill for a calming and relaxing experience. Lavender, chamomile, and eucalyptus are all excellent choices.
* **Make it washable:** Use a zipper closure and create a removable cover so you can easily wash it.
This DIY bolster pillow project is more than just a craft; it’s an investment in your well-being and a chance to express your creativity. It’s about creating something beautiful and functional that you’ll use and enjoy for years to come.
We’re confident that you’ll love the process and the result. So, gather your materials, fire up your sewing machine (or grab your needle and thread), and get ready to create your own custom bolster pillow.
Don’t forget to share your creations with us! We’d love to see your unique designs and hear about your experience. Tag us on social media and use the hashtag #DIYBolsterPillow. We can’t wait to see what you come up with!
Frequently Asked Questions
What kind of fabric is best for a bolster pillow?
The best fabric for your bolster pillow depends on your personal preferences and the intended use. For a durable and easy-to-clean option, consider cotton canvas, linen, or a cotton-polyester blend. These fabrics are relatively inexpensive and can withstand regular use. For a more luxurious feel, velvet, silk, or faux fur are excellent choices. However, these fabrics may require more delicate care. Consider the overall aesthetic you’re aiming for and the level of maintenance you’re willing to undertake when selecting your fabric. Also, consider the weight of the fabric. A heavier fabric will provide more structure to the bolster.
How much filling do I need for a bolster pillow?
The amount of filling required will depend on the size and shape of your bolster pillow, as well as your desired firmness. It’s always better to start with a little less filling and add more as needed until you achieve the perfect level of support. A good rule of thumb is to use approximately 1-2 pounds of fiberfill for a standard-sized bolster pillow (around 6-8 inches in diameter and 20-24 inches long). However, this is just an estimate, so be sure to adjust the amount based on your specific needs. Remember, you can always add more, but it’s much harder to remove excess filling.
Can I use a sewing machine to make a bolster pillow?
Yes, absolutely! A sewing machine will make the process much faster and easier, especially if you’re working with thicker fabrics. However, if you don’t have a sewing machine, you can still make a bolster pillow by hand-sewing. Just be sure to use a strong stitch, such as a backstitch, to ensure that the seams are secure. Hand-sewing will take longer, but it’s a perfectly viable option, especially for smaller bolster pillows or if you enjoy the meditative process of handcrafting.
How do I clean my DIY bolster pillow?
The cleaning method will depend on the fabric and filling you’ve used. If you’ve used a washable fabric and fiberfill, you can typically machine wash the entire pillow on a gentle cycle. However, it’s always best to check the care instructions for your specific fabric. If you’ve used a more delicate fabric or a filling that cannot be machine washed, spot cleaning is the best option. Use a mild detergent and a damp cloth to gently blot any stains. Avoid soaking the fabric, as this can damage the filling. For bolster pillows with removable covers, simply remove the cover and wash it according to the fabric’s care instructions.
What if I don’t have a zipper for the closure?
No problem! There are several alternative closure options you can use. You can create an envelope closure by overlapping the fabric at the open end of the pillow. This is a simple and easy option that doesn’t require any additional hardware. You can also use snaps, buttons, or Velcro to create a secure closure. If you’re feeling more adventurous, you could even try creating a drawstring closure. The key is to choose a closure method that is both functional and aesthetically pleasing.
Can I use recycled materials for this project?
Absolutely! Using recycled materials is a great way to reduce waste and create a unique and eco-friendly bolster pillow. You can repurpose old clothing, curtains, or even bedsheets for the fabric. For the filling, you can use shredded fabric scraps, old towels, or even plastic grocery bags (although this option may not be as comfortable). Get creative and see what you can find around your house to give new life to old materials.
How can I make my bolster pillow more firm?
If you want a firmer bolster pillow, there are a few things you can do. First, use a denser filling, such as buckwheat hulls or shredded memory foam. These materials provide more support than traditional fiberfill. Second, pack the filling tightly into the pillow form. The more filling you use, the firmer the pillow will be. Finally, use a heavier fabric for the outer cover. A thicker fabric will provide more structure and prevent the pillow from collapsing.
What are the benefits of using a bolster pillow?
Bolster pillows offer a variety of benefits, including improved posture, reduced back pain, and enhanced sleep quality. They can be used to support your neck, back, knees, or ankles, providing customized comfort and alignment. Bolster pillows are also great for relaxation and meditation, as they can help you find a comfortable and supportive position. Additionally, they can add a touch of style and elegance to your home décor.
How do I choose the right size for my bolster pillow?
The ideal size for your bolster pillow will depend on your individual needs and preferences. Consider how you plan to use the pillow and where you will be using it. For lumbar support, a longer, thinner bolster pillow is often best. For neck support, a shorter, rounder bolster pillow may be more comfortable. Experiment with different sizes and shapes until you find one that feels just right.
Where can I find inspiration for my DIY bolster pillow design?
There are countless sources of inspiration for your DIY bolster pillow design. Browse online platforms like Pinterest and Instagram for ideas. Look through home décor magazines and websites for color palettes and fabric combinations. Visit fabric stores and craft fairs to see what materials are available. And don’t be afraid to draw inspiration from your own personal style and preferences. The most important thing is to create a bolster pillow that you love and that reflects your unique personality.

Leave a Comment