Grow Acai Berries at Home? Absolutely! Imagine stepping into your backyard and harvesting your own antioxidant-rich superfood. Sounds like a dream, right? Well, it’s more attainable than you might think! For centuries, the indigenous communities of the Amazon rainforest have revered the Acai berry, not just for its nutritional value, but also for its cultural significance. It’s a staple food, a source of income, and a symbol of the rainforest’s bounty.
Now, you might be thinking, “I don’t live in the Amazon! Can I really grow Acai Berries at Home?” The answer is a resounding yes, with a few clever DIY tricks and hacks. While replicating the Amazonian climate perfectly might be impossible, we can create a suitable environment that allows these amazing berries to thrive.
Why bother with this DIY project? Because fresh, homegrown Acai berries are far superior in taste and nutritional value to the processed versions you find in stores. Plus, you’ll have the satisfaction of nurturing your own little piece of the Amazon. In this article, I’m going to share some simple, yet effective, DIY strategies to help you cultivate your own Acai berry paradise, no matter where you live. Get ready to roll up your sleeves and embark on this exciting gardening adventure!

Growing Acai Berries at Home: A Tropical Adventure in Your Backyard (or Balcony!)
Okay, so you want to grow acai berries at home? Awesome! It’s a bit of a challenge, especially if you don’t live in a tropical climate, but definitely doable with some planning and dedication. I’m going to walk you through everything I’ve learned about cultivating these antioxidant powerhouses, from seed to (hopefully!) delicious berries.
Understanding Acai: The Basics
Before we dive in, let’s get a few things straight about acai palms. They’re native to the Amazon rainforest, which means they thrive in warm, humid conditions. They’re also relatively slow-growing, so patience is key. Don’t expect a bountiful harvest overnight!
* Climate: Acai palms need consistently warm temperatures, ideally between 70°F and 90°F (21°C and 32°C). They can tolerate brief dips into the 60s, but prolonged cold will damage them. Frost is a definite no-no.
* Humidity: High humidity is essential. Think rainforest levels!
* Sunlight: They prefer partial shade, especially when young. Mature palms can handle more direct sunlight.
* Soil: Well-draining, slightly acidic soil is ideal.
* Water: Consistent moisture is crucial, but avoid waterlogging.
Sourcing Your Acai: Seeds vs. Seedlings
You have two main options for starting your acai journey: seeds or seedlings.
* Seeds: Starting from seed is the most economical option, but it requires more patience and effort. Acai seeds have a low germination rate, and it can take several months for them to sprout.
* Seedlings: Buying a seedling is more expensive, but it gives you a head start. You’ll be able to skip the germination process and focus on providing the right growing conditions.
I personally recommend starting with a seedling if you’re new to growing acai. It’s less frustrating and you’ll see results sooner. However, if you’re feeling adventurous and want to save some money, go for the seeds!
Germinating Acai Seeds (If You Choose the Seed Route)
If you’re starting from seed, here’s how to germinate them:
1. Scarification: Acai seeds have a hard outer shell that can prevent germination. To help them sprout, you’ll need to scarify them. This involves gently scratching or nicking the seed coat. You can use sandpaper, a file, or even a sharp knife. Be careful not to damage the inner part of the seed!
2. Soaking: After scarification, soak the seeds in warm water for 24-48 hours. This will help soften the seed coat and further encourage germination.
3. Planting: Fill a small pot with well-draining potting mix. Plant the scarified and soaked seed about an inch deep.
4. Humidity Dome: Create a humid environment by covering the pot with a plastic bag or a humidity dome. This will help keep the soil moist and warm.
5. Warmth: Place the pot in a warm location, ideally around 80-85°F (27-29°C). A heat mat can be helpful if you live in a cooler climate.
6. Patience: Now comes the hard part: waiting. Acai seeds can take anywhere from 1 to 6 months to germinate. Keep the soil consistently moist, but not soggy. Check the pot regularly for signs of sprouting.
7. Transplanting: Once the seedling has developed a few leaves, you can transplant it into a larger pot.
Planting Your Acai Palm (Seedling or Germinated Seed)
Whether you’re transplanting a seedling or a germinated seed, the planting process is the same:
1. Choose the Right Pot (If Growing in a Container): Acai palms can grow quite large, so you’ll need a large pot. A 15-20 gallon pot is a good starting point. Make sure the pot has drainage holes to prevent waterlogging.
2. Prepare the Soil: Acai palms prefer well-draining, slightly acidic soil. You can use a commercial potting mix designed for palms or create your own mix by combining equal parts of potting soil, peat moss, and perlite.
3. Planting: Dig a hole in the center of the pot that is large enough to accommodate the root ball of the seedling or germinated seed. Gently remove the plant from its original container and place it in the hole. Backfill with soil and gently pat it down.
4. Watering: Water the plant thoroughly after planting.
5. Mulching: Apply a layer of mulch around the base of the plant to help retain moisture and suppress weeds.
Creating the Ideal Environment: Temperature, Humidity, and Light
As I mentioned earlier, acai palms need warm temperatures, high humidity, and partial shade. Here’s how to create the ideal environment for your plant:
* Temperature: If you live in a climate with cold winters, you’ll need to bring your acai palm indoors during the colder months. Place it in a sunny location, such as a south-facing window. You may also need to use a grow light to supplement the natural light.
* Humidity: To increase humidity, you can use a humidifier, mist the plant regularly, or place the pot on a tray filled with pebbles and water. Make sure the bottom of the pot doesn’t sit directly in the water, as this can lead to root rot.
* Light: Acai palms prefer partial shade, especially when young. If you’re growing your plant outdoors, choose a location that receives morning sun and afternoon shade. If you’re growing it indoors, place it near a window that receives bright, indirect light.
Watering and Fertilizing Your Acai Palm
Proper watering and fertilization are essential for healthy growth and fruit production.
* Watering: Water your acai palm regularly, especially during the growing season (spring and summer). Keep the soil consistently moist, but avoid waterlogging. Allow the top inch of soil to dry out between waterings. Reduce watering during the dormant season (fall and winter).
* Fertilizing: Fertilize your acai palm every 2-3 months during the growing season with a balanced fertilizer designed for palms. Follow the instructions on the fertilizer label. Avoid fertilizing during the dormant season.
Dealing with Pests and Diseases
Acai palms are relatively pest and disease-resistant, but they can be susceptible to certain problems.
* Spider Mites: Spider mites are tiny pests that can suck the sap from leaves, causing them to turn yellow and stippled. To control spider mites, you can spray the plant with insecticidal soap or neem oil.
* Scale: Scale insects are small, armored pests that attach themselves to stems and leaves. They can be difficult to control. You can try scraping them off with a fingernail or using insecticidal soap or horticultural oil.
* Root Rot: Root rot is a fungal disease that can occur if the soil is too wet. To prevent root rot, make sure the soil is well-draining and avoid overwatering. If you suspect root rot, you can try repotting the plant in fresh soil.
Harvesting Acai Berries (The Long Wait!)
Okay, this is the part we’ve all been waiting for! But remember, acai palms are slow-growing, and it can take several years for them to start producing fruit. Be patient!
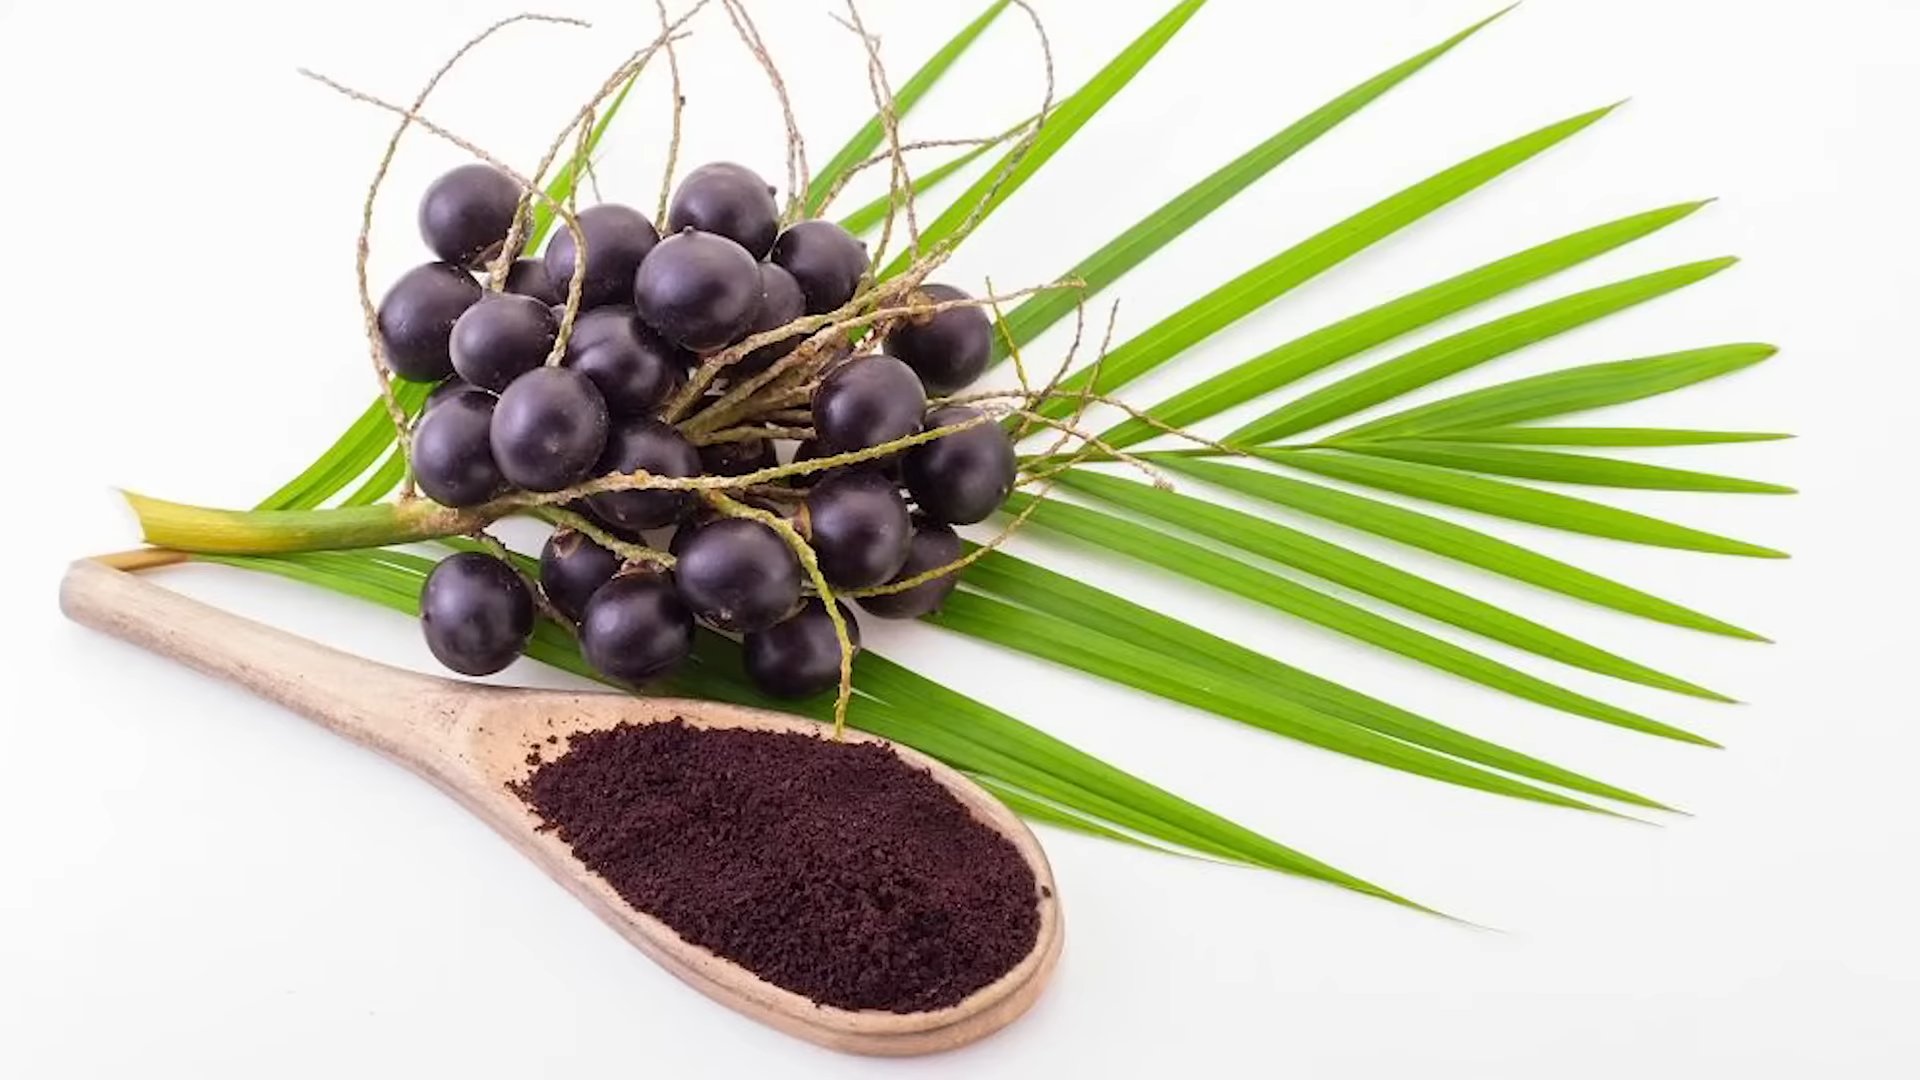
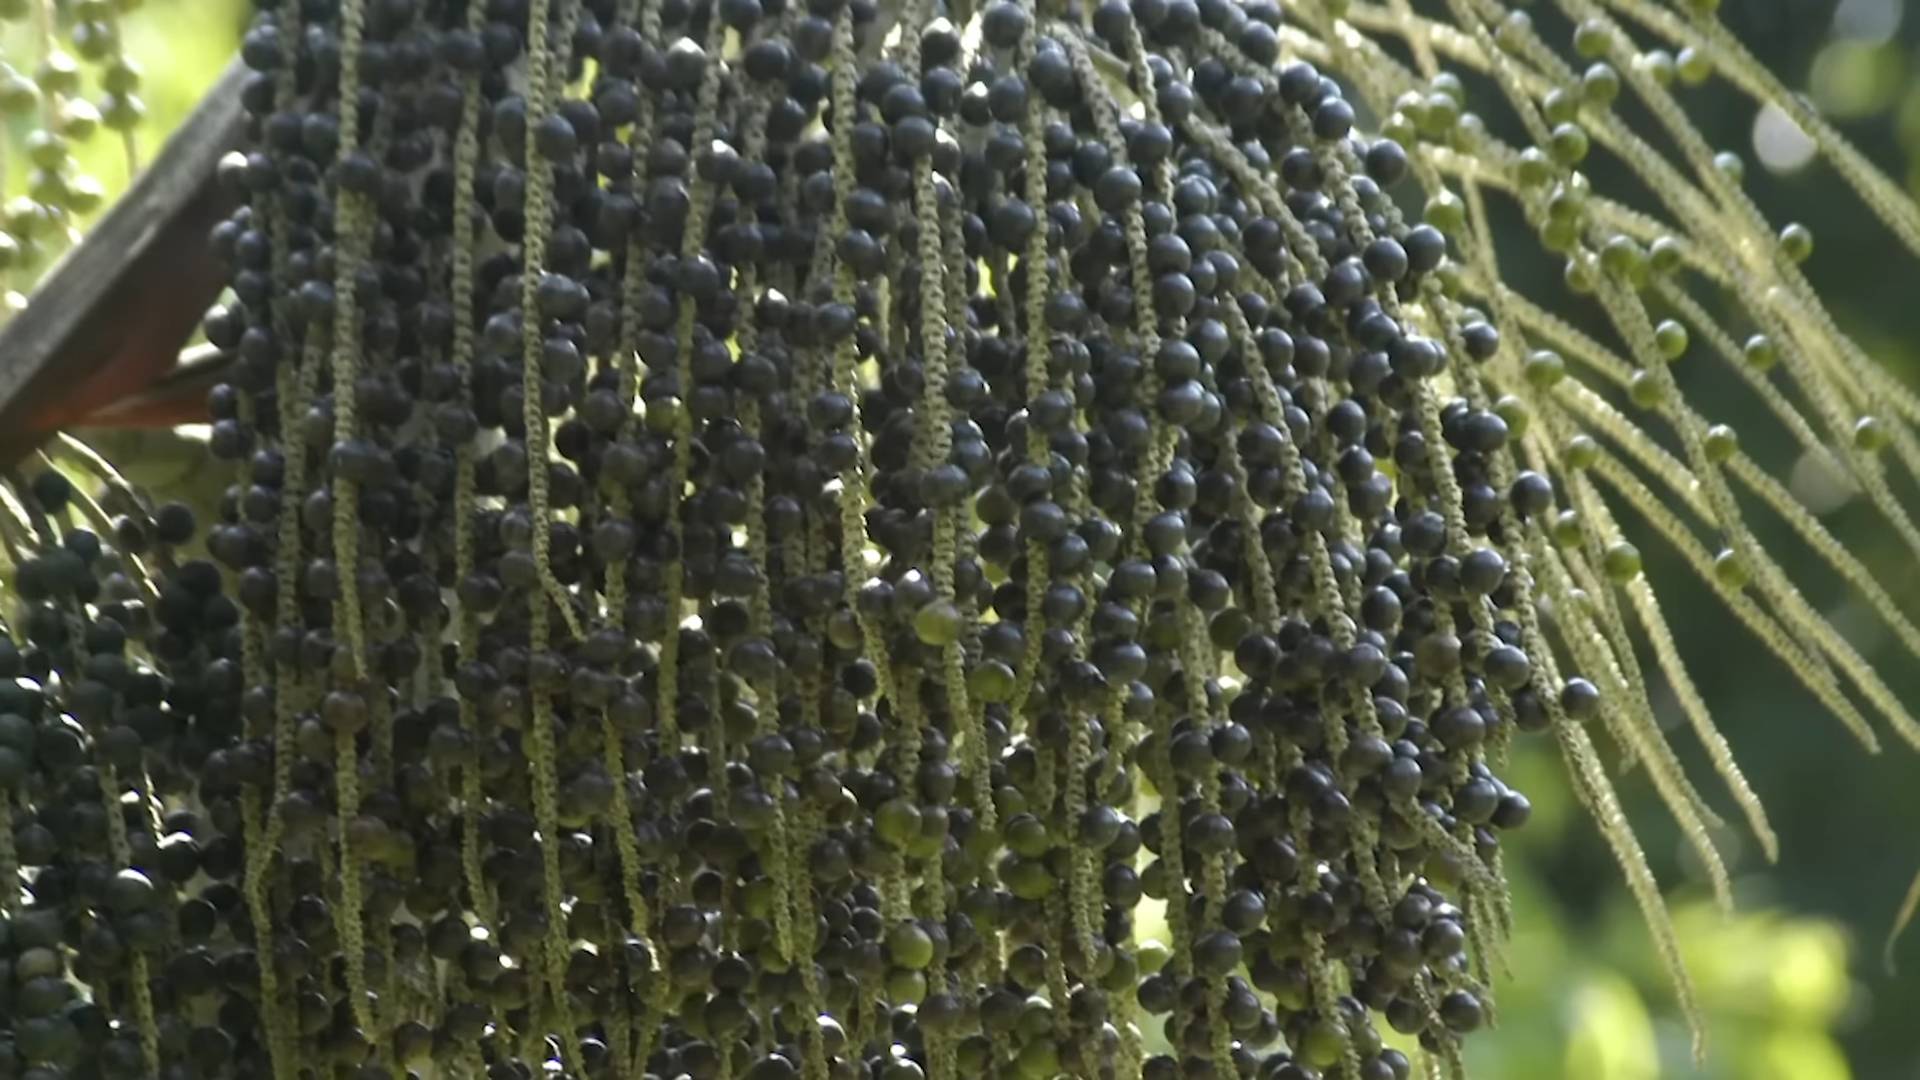
* When to Harvest: Acai berries are typically harvested when they are ripe and dark purple in color. The berries grow in clusters, and you’ll need to harvest the entire cluster at once.
* How to Harvest: Use a sharp knife or pruning shears to cut the cluster of berries from the palm. Be careful not to damage the palm.
* Processing: Acai berries are highly perishable and need to be processed quickly after harvesting. They are typically soaked in water to soften the pulp, then mashed and strained to remove the seeds. The resulting pulp can be used to make smoothies, juices, and other products.
Troubleshooting: Common Problems and Solutions
Even with the best care, you might encounter some problems along the way. Here are a few common issues and how to address them:
* Yellowing Leaves: This could be a sign of overwatering, underwatering, nutrient deficiency, or pest infestation. Check the soil moisture, fertilize the plant, and inspect it for pests.
* Brown Leaf Tips: This is often caused by dry air or salt buildup in the soil. Increase humidity and flush the soil with water to remove excess salts.
* Slow Growth: This could be due to insufficient light, inadequate watering, or nutrient deficiency. Make sure the plant is getting enough light, water it regularly, and fertilize it as needed.
* No Fruit Production: This is often due to the plant being

Conclusion
So, there you have it! Growing your own acai berries at home might seem like a tropical dream, but with the right approach and a little patience, it’s entirely achievable. We’ve walked through the essential steps, from understanding the ideal climate and soil conditions to nurturing your acai palm and eventually harvesting those antioxidant-rich berries.
Why is this DIY trick a must-try? Beyond the sheer satisfaction of cultivating your own food, growing acai berries offers a unique opportunity to access a superfood that’s often expensive and difficult to source fresh. Imagine the vibrant smoothies, delicious bowls, and healthy snacks you can create with berries grown right in your backyard! You’ll also have the peace of mind knowing exactly where your food comes from and how it was grown, free from pesticides and long-distance transportation.
But the benefits extend beyond just personal consumption. Growing acai palms can also contribute to a more sustainable lifestyle. These trees help sequester carbon dioxide, improve soil health, and provide habitat for local wildlife. By embracing this DIY project, you’re not only nourishing yourself but also contributing to a healthier planet.
Variations and Suggestions:
* Hydroponic Acai: For those in colder climates or with limited space, consider exploring hydroponic systems for growing acai. This method allows you to control the environment more precisely and can be adapted for indoor cultivation.
* Grafting for Faster Fruiting: If you’re impatient to harvest your own acai, look into grafting techniques. Grafting a mature acai branch onto a younger seedling can significantly reduce the time it takes for the plant to bear fruit.
* Acai Berry Powder: If you find yourself with an abundance of berries, consider dehydrating them and grinding them into acai berry powder. This powder can be stored for longer periods and added to smoothies, yogurt, and other recipes for a nutritional boost.
* Companion Planting: Research companion plants that thrive alongside acai palms. Plants like bananas, cacao, and coffee can create a mutually beneficial ecosystem, improving soil health and pest control.
* Acai Pulp: If you don’t have the time or resources to grow your own acai, you can still enjoy the benefits of this superfood by purchasing frozen acai pulp. Look for organic and sustainably sourced options.
We strongly encourage you to give this DIY trick a try. It’s a rewarding experience that connects you with nature and provides you with a delicious and nutritious superfood. Don’t be afraid to experiment and adapt the techniques to suit your specific environment and preferences.
And most importantly, we want to hear about your experiences! Share your successes, challenges, and tips in the comments below. Let’s create a community of acai enthusiasts who are passionate about growing their own food and living a healthier, more sustainable lifestyle. Your insights could inspire others to embark on this exciting journey. Let us know how your attempt to grow acai berries at home goes!
Frequently Asked Questions (FAQ)
What is the ideal climate for growing acai berries?
Acai palms thrive in warm, humid climates with consistent rainfall and temperatures between 70°F and 90°F (21°C and 32°C). They are native to the Amazon rainforest and prefer tropical or subtropical environments. If you live in a colder climate, you may need to grow them in a greenhouse or indoors with supplemental heating and humidity.
How long does it take for an acai palm to produce fruit?
It typically takes 3-5 years for an acai palm grown from seed to begin producing fruit. Grafted plants may fruit sooner, sometimes within 1-2 years. Patience is key! Proper care and optimal growing conditions can help accelerate the fruiting process.
What type of soil is best for acai palms?
Acai palms prefer well-draining, slightly acidic soil rich in organic matter. A soil pH between 5.5 and 6.5 is ideal. Amend your soil with compost, peat moss, or other organic materials to improve drainage and fertility.
Can I grow acai berries in a container?
Yes, you can grow acai palms in containers, especially if you live in a colder climate. Choose a large container with drainage holes and use a well-draining potting mix. Be prepared to repot the plant as it grows and provide adequate support for the trunk. Container-grown acai palms may require more frequent watering and fertilization.
How often should I water my acai palm?
Acai palms need consistent moisture, especially during the growing season. Water deeply whenever the top inch of soil feels dry to the touch. Avoid overwatering, which can lead to root rot. In drier climates, you may need to water more frequently.
What kind of fertilizer should I use for acai palms?
Use a balanced fertilizer specifically formulated for palms or tropical plants. Look for a fertilizer with a ratio of 8-2-12 or similar. Fertilize your acai palm every 2-3 months during the growing season (spring and summer). Follow the instructions on the fertilizer label carefully.
How do I protect my acai palm from pests and diseases?
Acai palms are generally resistant to pests and diseases, but they can be susceptible to certain problems, such as spider mites, scale, and fungal infections. Inspect your plant regularly for signs of infestation or disease. Treat any problems promptly with appropriate insecticides or fungicides. Good air circulation and proper watering can help prevent many issues.
How do I harvest acai berries?
Acai berries grow in clusters on the palm. Harvest the berries when they are ripe, which is indicated by a deep purple color. Cut the entire cluster from the palm and then separate the individual berries. Acai berries are highly perishable and should be processed or consumed soon after harvesting.
Can I grow acai berries indoors?
Growing acai berries indoors is challenging but possible, especially if you have a greenhouse or a sunroom with ample light and humidity. You’ll need to provide supplemental lighting, heating, and humidity to create the ideal growing conditions. Choose a dwarf variety of acai palm that is better suited for indoor cultivation.
Where can I buy acai palm seedlings or seeds?
Acai palm seedlings and seeds can be purchased from online nurseries, specialty garden centers, or tropical plant suppliers. Make sure to choose a reputable source that offers healthy and viable plants or seeds. Research the specific variety of acai palm you are interested in and ensure that it is suitable for your climate and growing conditions.


Leave a Comment