

DIY Lavender Sachets: More than just a pleasant fragrance, these little bundles of joy are a time-honored tradition with roots stretching back centuries! Imagine tucking away a piece of Provence in your drawers, a fragrant secret passed down through generations. Lavender, revered for its calming properties and delightful scent, has been used for everything from warding off moths to promoting restful sleep since ancient times.
But why should you bother making your own lavender sachets in today’s world of readily available air fresheners? Well, I’m here to tell you that crafting your own is not only incredibly rewarding but also a fantastic way to embrace sustainability and personalize your living space. Store-bought options often contain harsh chemicals and artificial fragrances, while DIY Lavender Sachets allow you to control exactly what goes into them – pure, natural goodness!
Plus, let’s be honest, who doesn’t love a good DIY project? This is a simple, fun, and budget-friendly way to add a touch of handmade charm to your home. Whether you’re looking to freshen up your linen closet, create a thoughtful gift for a friend, or simply unwind with the soothing aroma of lavender, this guide will walk you through every step of creating your own beautiful and effective lavender sachets. Get ready to unleash your inner crafter and fill your life with the calming scent of lavender!
DIY Lavender Sachets: A Simple Guide to Fragrant Bliss
Hey there, fellow crafters! I’m so excited to share one of my favorite DIY projects with you: making your own lavender sachets. These little bags of fragrant goodness are incredibly versatile. You can tuck them into drawers to keep your clothes smelling fresh, place them under your pillow for a relaxing sleep, or even use them as natural air fresheners in your car or closets. Plus, they make wonderful, thoughtful gifts!
This project is super easy and requires minimal supplies. Let’s dive in!
What You’ll Need
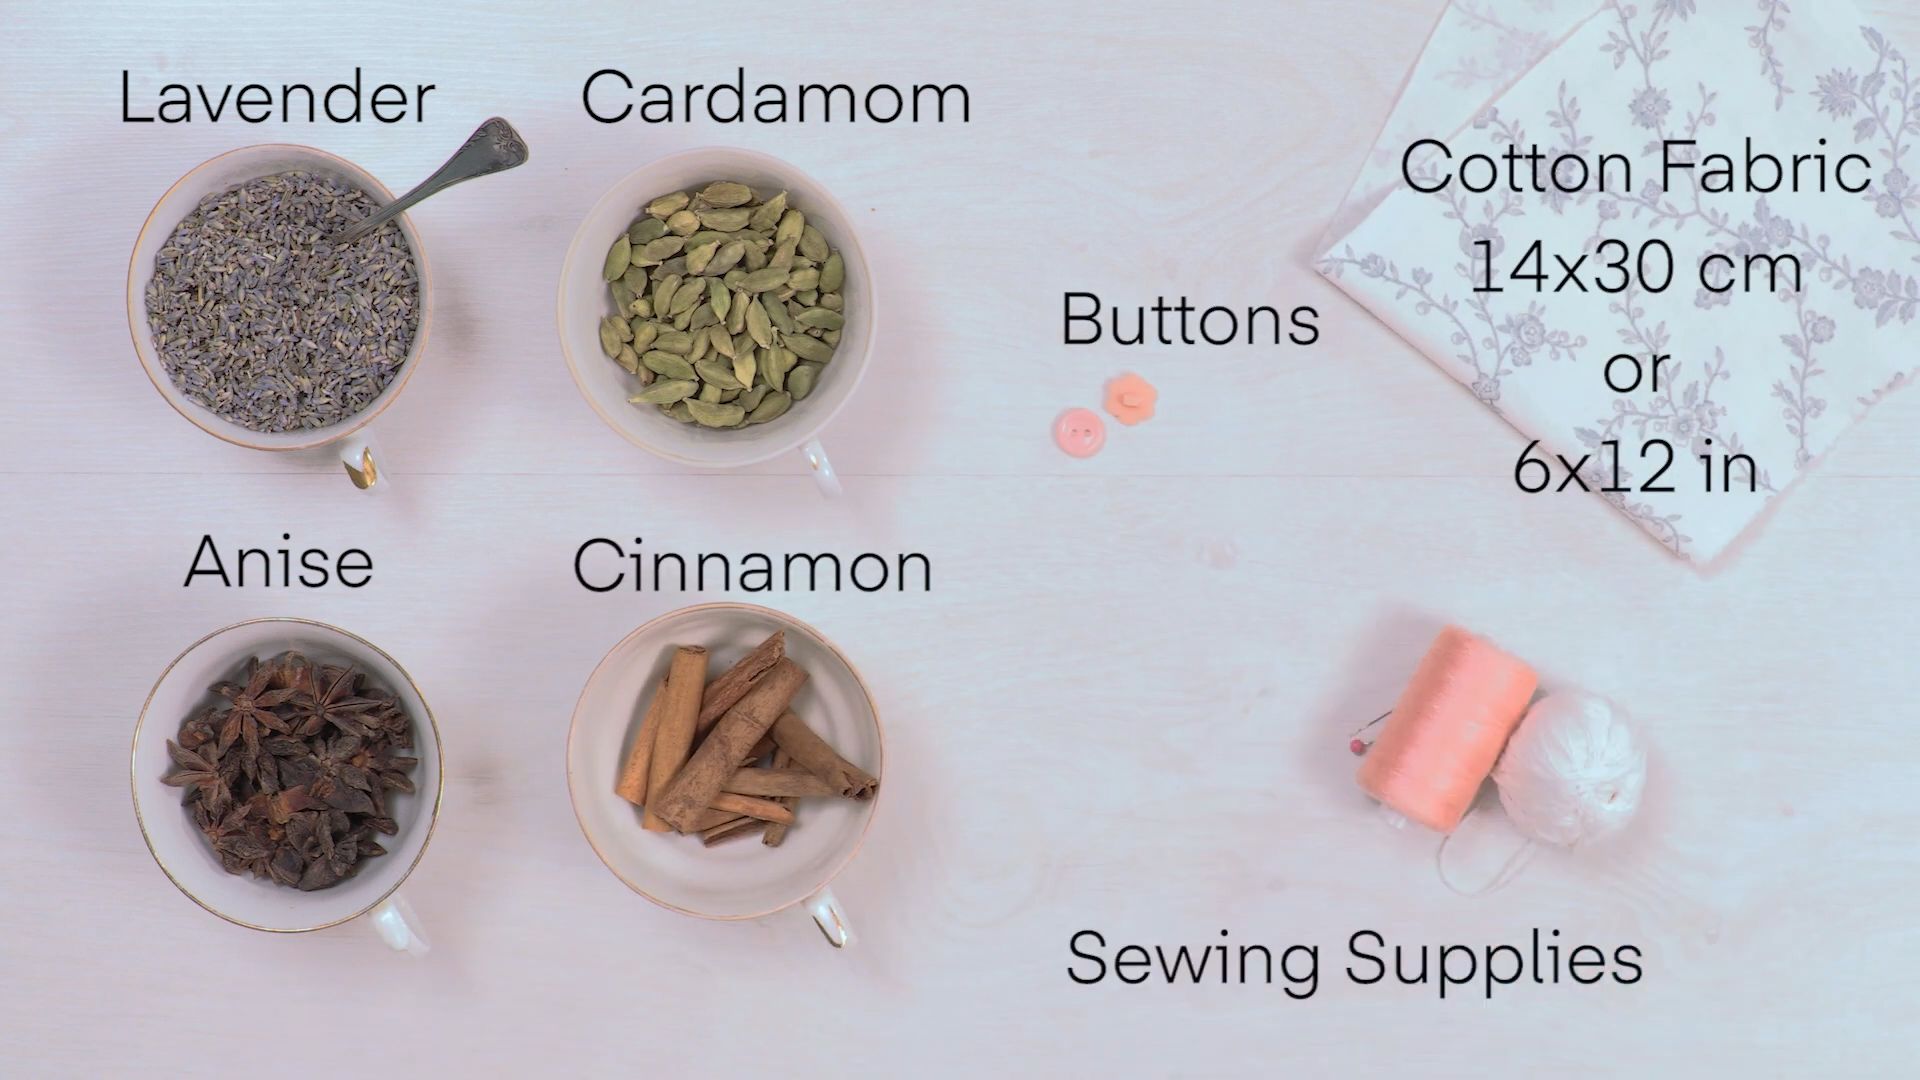
Before we get started, let’s gather all the necessary materials. Here’s a list of everything you’ll need:
* Dried Lavender Buds: This is the star of the show! You can find dried lavender buds at most craft stores, online retailers, or even grow and dry your own. The amount you need will depend on how many sachets you plan to make. I usually buy a large bag to have on hand.
* Fabric: Choose a breathable fabric like cotton, linen, muslin, or even burlap. You can use scraps you have lying around or purchase new fabric specifically for this project. I love using pretty patterned cotton for a pop of color.
* Scissors or Rotary Cutter: For cutting your fabric to size. A rotary cutter and mat can make the process faster and more precise, but scissors work just fine.
* Sewing Machine or Needle and Thread: You’ll need to sew the fabric together to create the sachets. A sewing machine will speed things up, but hand-sewing is perfectly acceptable, especially if you’re only making a few sachets.
* Measuring Tape or Ruler: To ensure your fabric squares are the correct size.
* Pins: To hold the fabric pieces together while sewing.
* Funnel (Optional): A small funnel can be helpful for filling the sachets with lavender, especially if the opening is small.
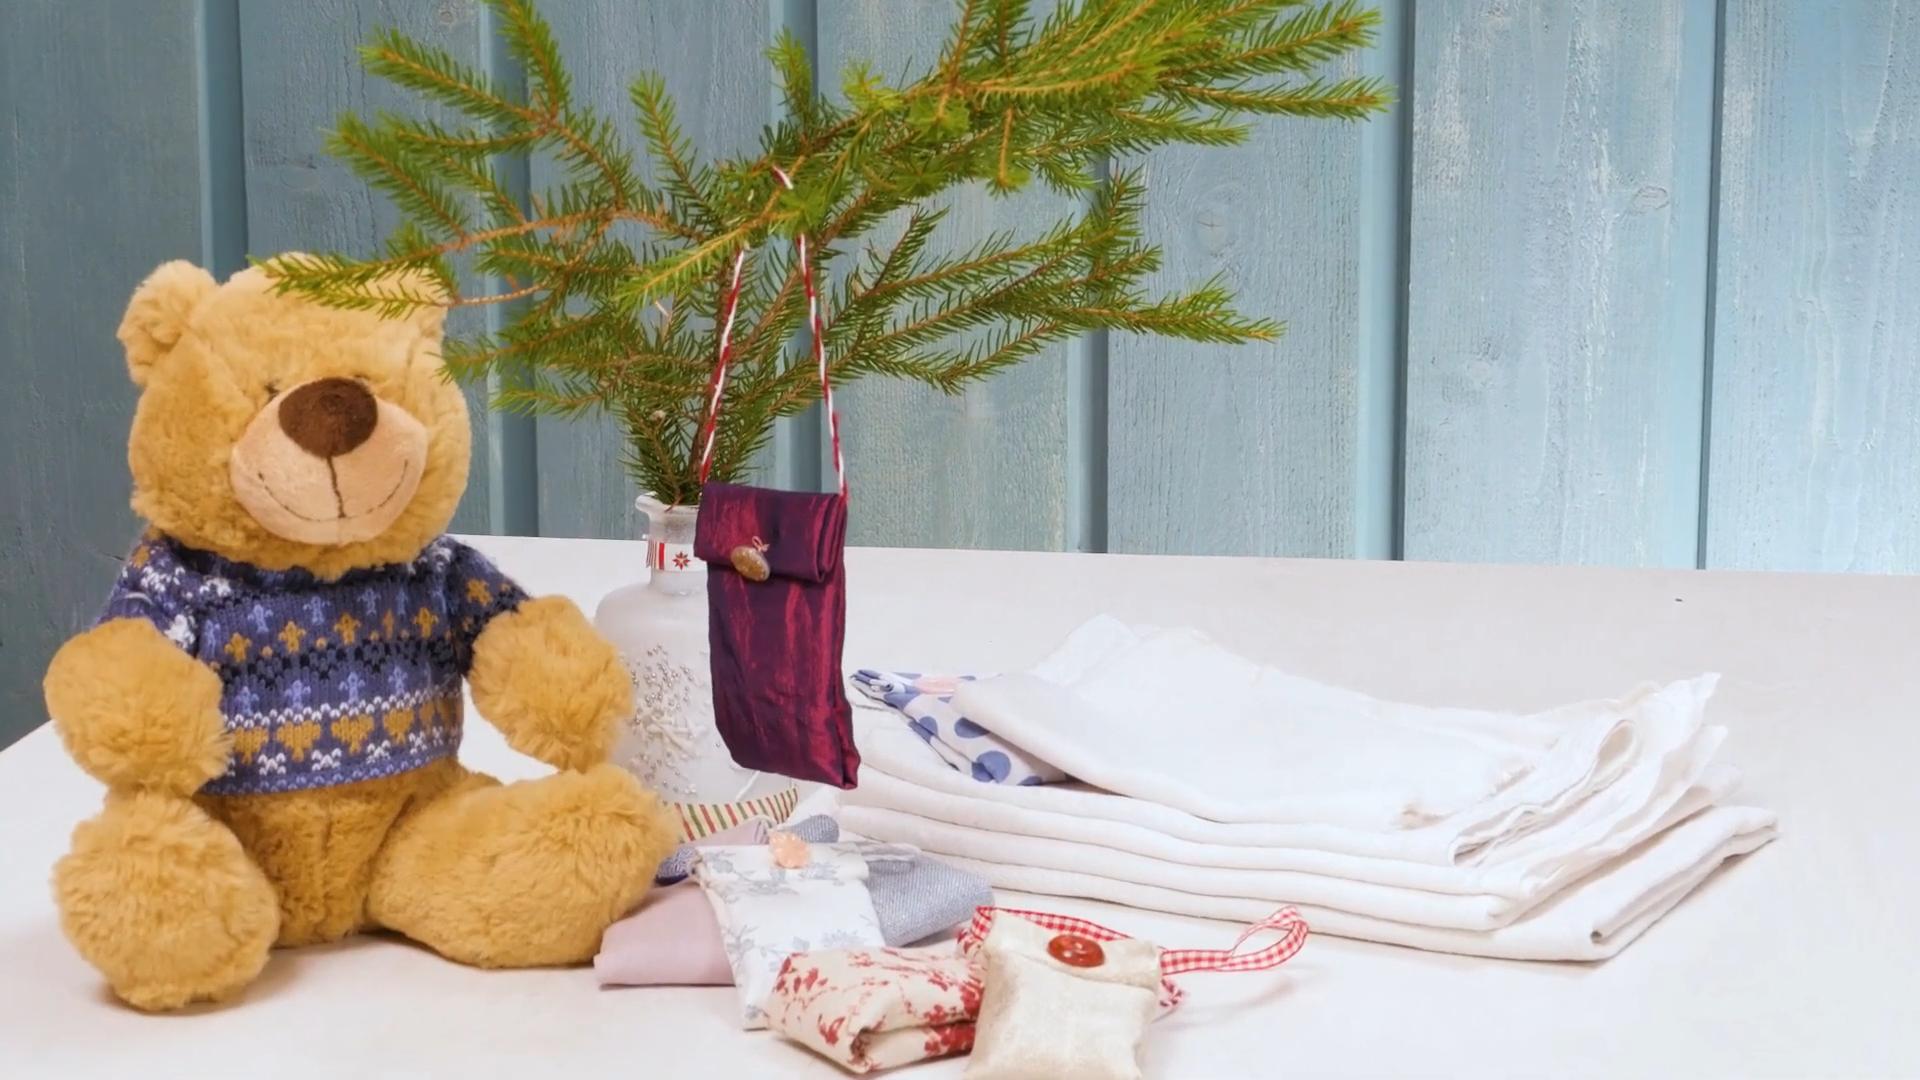
* Embellishments (Optional): Get creative! You can add ribbons, lace, buttons, embroidery, or anything else you like to personalize your sachets.
* Iron and Ironing Board: For pressing the fabric before and after sewing. This will give your sachets a professional finish.
Preparing Your Fabric
This step is crucial for ensuring your sachets look neat and professional.
1. Wash and Iron Your Fabric: Before you start cutting, wash and iron your fabric. This will remove any wrinkles and prevent shrinkage after the sachets are made.
2. Cut Fabric Squares: Decide on the size you want your sachets to be. I usually make mine around 4×4 inches or 5×5 inches. Use a measuring tape or ruler and scissors (or a rotary cutter) to cut out the fabric squares. Remember to cut two squares for each sachet you want to make.
* Tip: If you’re using patterned fabric, pay attention to the placement of the pattern when cutting. You want each square to look consistent.
Sewing the Sachets
Now comes the fun part – putting the sachets together!
1. Pin the Fabric Squares Together: Place two fabric squares right sides together (meaning the patterned sides are facing each other). Pin around three sides of the square, leaving one side open for filling. Make sure the pins are perpendicular to the edge of the fabric for easier sewing.
2. Sew Around Three Sides: Using a sewing machine or needle and thread, sew around the three pinned sides, leaving a seam allowance of about 1/4 inch. If you’re hand-sewing, use a backstitch for a strong and durable seam.
* Tip: If you’re using a sewing machine, remember to backstitch at the beginning and end of each seam to secure the stitches.
3. Trim the Corners: Carefully trim the corners of the sewn square, being careful not to cut into the seam. This will help the corners look sharper when you turn the sachet right side out.
4. Turn the Sachet Right Side Out: Gently turn the sachet right side out, using a pencil or chopstick to push out the corners.
5. Iron the Sachet: Iron the sachet, paying special attention to the seams. This will give it a crisp, clean look. Fold in the raw edges of the open side about 1/4 inch and iron them in place. This will make it easier to sew the opening closed later.
Filling the Sachets
This is where the magic happens!
1. Fill with Lavender: Carefully fill the sachet with dried lavender buds. You can use a funnel to make this easier, or simply spoon the lavender into the opening. Don’t overfill the sachet; you want it to be comfortably full but not bursting at the seams. I usually fill mine about 3/4 full.
* Tip: If you want to add extra fragrance, you can mix a few drops of lavender essential oil with the dried lavender buds before filling the sachets.
2. Sew the Opening Closed: Once the sachet is filled, it’s time to close the opening. You can do this by hand-sewing with a blind stitch or using a sewing machine. If you’re using a sewing machine, sew close to the edge of the fabric. If you’re hand-sewing, use a small, neat stitch to create an invisible closure.
Adding Embellishments (Optional)
This is your chance to get creative and personalize your sachets!
1. Add Ribbons or Lace: Tie a ribbon around the sachet or sew a piece of lace along the edges.
2. Attach Buttons or Beads: Sew buttons, beads, or other embellishments onto the sachet for added detail.
3. Embroider a Design: Embroider a simple design or initial onto the sachet for a personal touch.
4. Add a Tag: Create a small tag with a message or the recipient’s name and attach it to the sachet.
Alternative Sachet Styles
While the basic square sachet is a classic, there are plenty of other fun and creative ways to make lavender sachets. Here are a few ideas to inspire you:
* Heart-Shaped Sachets: Cut your fabric into heart shapes instead of squares. Follow the same sewing and filling instructions as above.
* Drawstring Sachets: Instead of sewing the opening closed, create a drawstring closure by threading a ribbon or cord through a casing at the top of the sachet.
* Quilted Sachets: Create a quilted fabric panel before cutting out your sachet shapes. This will add texture and visual interest.
* Sachets from Upcycled Materials: Use old clothing, linens, or other fabric scraps to create unique and eco-friendly sachets.
* No-Sew Sachets: If you don’t want to sew, you can use fabric glue or fusible webbing to create sachets. Simply glue the fabric pieces together, leaving an opening for filling, and then glue the opening closed. Burlap is a great fabric for this.
Caring for Your Lavender Sachets
To keep your lavender sachets smelling fresh and fragrant, gently squeeze them occasionally to release the scent. The fragrance will naturally fade over time, but you can revive it by adding a few drops of lavender essential oil to the sachet. Store your sachets in a cool, dry place away from direct sunlight.
Troubleshooting Tips
* Sachet is too bulky: You may have overfilled the sachet. Remove some of the lavender buds to make it less bulky.
* Seams are coming undone: Make sure you’re using a strong stitch and backstitching at the beginning and end of each seam.
* Lavender scent is fading quickly: Store your sachets in an airtight container when not in use to help preserve the fragrance.
* Fabric is fraying: Use a fabric with a tight weave or serge the edges of the fabric before sewing.
Uses for Your Lavender Sachets
Now that you’ve made your beautiful lavender sachets, here are some ideas for how to use them:
* Drawer Fresheners: Place sachets in your drawers to keep your clothes smelling fresh and clean.
* Pillow Sachets: Tuck a sachet under your pillow to promote relaxation and restful sleep.
* Closet Air Fresheners: Hang sachets in your closet to keep your clothes and shoes smelling fresh.
* Car Air Fresheners: Place a sachet in your car to create a calming and pleasant driving experience.
* Gift Giving: Lavender sachets make wonderful, thoughtful gifts for friends, family, and teachers.
* Linen Closet: Keep your sheets and towels smelling fresh.
* Suitcases: Prevent musty smells when storing luggage.
* Pet Beds: A small sachet near your pet’s bed can help with relaxation (make sure your pet doesn’t ingest the
Conclusion
So, there you have it! Crafting your own DIY lavender sachets is more than just a fun afternoon project; it’s an investment in your well-being, a fragrant declaration of self-care, and a sustainable alternative to commercially produced air fresheners. We’ve walked you through the simple steps, highlighting the ease and affordability of creating these aromatic wonders. But why is this DIY trick a must-try?
Firstly, the sheer versatility of lavender sachets is undeniable. Imagine tucking one into your linen closet, infusing your sheets and towels with a calming, fresh scent. Picture placing one under your pillow, gently lulling you into a peaceful slumber. Envision adding one to your car, transforming your commute into a more relaxing experience. The possibilities are truly endless.
Secondly, you have complete control over the ingredients. Unlike store-bought sachets that may contain synthetic fragrances and potentially harmful chemicals, your DIY version is made with natural, pure lavender. This is especially important for those with sensitivities or allergies. You know exactly what’s going into your sachets, ensuring a safe and healthy aromatic experience.
Thirdly, it’s incredibly cost-effective. A small bag of dried lavender can go a long way, allowing you to create multiple sachets for a fraction of the price of purchasing them individually. Plus, you can repurpose old fabric scraps or create unique designs, adding a personal touch to your creations.
But the benefits don’t stop there. The act of creating something with your own hands is incredibly therapeutic. It’s a chance to disconnect from the digital world, engage your senses, and tap into your creativity. The gentle aroma of lavender as you work is an added bonus, promoting relaxation and reducing stress.
Ready to take your lavender sachets to the next level? Consider these variations:
* Herbal Blend: Combine dried lavender with other complementary herbs like chamomile, rose petals, or lemon balm for a more complex and nuanced fragrance.
* Essential Oil Boost: Add a few drops of lavender essential oil to your dried lavender for an extra potent aroma.
* Rice Filler: Mix dried lavender with uncooked rice to add bulk and help retain the scent.
* Decorative Touches: Embellish your sachets with embroidery, beads, or ribbons to create personalized gifts or decorative accents.
* Cedar Chips: Add cedar chips to your lavender mixture to naturally repel moths, making these sachets perfect for storing woolens.
We wholeheartedly encourage you to try this DIY trick. It’s a simple, rewarding, and fragrant way to enhance your home and well-being. Once you’ve created your own DIY lavender sachets, we’d love to hear about your experience! Share your photos, tips, and variations in the comments below. Let’s create a community of lavender lovers and inspire others to embrace the power of DIY. What are you waiting for? Get crafting and let the calming aroma of lavender fill your life!
Frequently Asked Questions (FAQ)
What type of lavender is best for making sachets?
The best type of lavender for sachets is generally considered to be English lavender (Lavandula angustifolia). This variety is known for its sweet, floral fragrance and high oil content, which makes it ideal for retaining its scent over time. Other varieties, such as Lavandin (Lavandula x intermedia), have a stronger, more camphoraceous scent and can also be used, but English lavender is typically preferred for its classic aroma. Ultimately, the choice depends on your personal preference. Experiment with different varieties to find the scent that you enjoy the most.
How long will the scent of my lavender sachet last?
The longevity of the scent depends on several factors, including the quality of the lavender, the type of fabric used for the sachet, and the storage conditions. Generally, a well-made lavender sachet can retain its scent for several months to a year. To prolong the scent, you can gently squeeze the sachet periodically to release more of the essential oils. You can also add a few drops of lavender essential oil to the sachet every few months to refresh the aroma. Storing the sachets in a cool, dark place will also help to preserve the scent.
Can I use fresh lavender instead of dried lavender?
While you can technically use fresh lavender, it’s not recommended for sachets. Fresh lavender contains a high water content, which can lead to mold and mildew growth inside the sachet. Dried lavender, on the other hand, has been dehydrated, which prevents spoilage and allows the scent to last longer. If you want to use fresh lavender, you’ll need to dry it thoroughly before using it in your sachets. You can dry lavender by hanging it upside down in a cool, dark, and well-ventilated area for several weeks, or by using a dehydrator.
What kind of fabric should I use for my lavender sachets?
The best fabrics for lavender sachets are breathable, natural materials like cotton, linen, muslin, or burlap. These fabrics allow the scent of the lavender to permeate through the sachet. Avoid using synthetic fabrics like polyester, as they can trap moisture and prevent the scent from escaping. You can also use lace or other decorative fabrics to add a personal touch to your sachets. Consider the weave of the fabric as well; a tighter weave will retain the lavender better, while a looser weave will allow the scent to be more pronounced.
How do I refresh the scent of my lavender sachet?
If your lavender sachet starts to lose its scent, there are several ways to refresh it. The simplest method is to gently squeeze the sachet to release more of the essential oils. You can also add a few drops of lavender essential oil directly to the sachet. Another option is to place the sachet in a sealed bag with a few drops of lavender essential oil for a few days, allowing the lavender to reabsorb the scent. Alternatively, you can replace the dried lavender inside the sachet with fresh dried lavender.
Are lavender sachets safe for pets and children?
While lavender is generally considered safe, it’s important to exercise caution when using lavender sachets around pets and children. Some pets may be sensitive to the scent of lavender, and ingesting large amounts of lavender can cause digestive upset. Keep lavender sachets out of reach of pets and children to prevent accidental ingestion. If you notice any adverse reactions in your pets or children, discontinue use immediately. As with any aromatic product, it’s always best to err on the side of caution.
Can I use lavender sachets to repel moths?
Yes, lavender sachets can be effective in repelling moths, especially when combined with cedar chips. The scent of lavender is naturally unappealing to moths, making it a great alternative to chemical mothballs. Place lavender sachets in your closets, drawers, and storage containers to protect your clothes and linens from moth damage. For added protection, consider adding cedar chips to your lavender mixture, as cedarwood is also a natural moth repellent.
Where are the best places to put lavender sachets?
Lavender sachets are incredibly versatile and can be placed in a variety of locations to enjoy their benefits. Some popular places to put lavender sachets include:
* Linen Closet: To infuse your sheets and towels with a calming scent.
* Under Your Pillow: To promote relaxation and improve sleep quality.
* Drawers: To keep your clothes smelling fresh and clean.
* Car: To create a more relaxing and pleasant driving experience.
* Suitcases: To keep your clothes smelling fresh during travel.
* Gym Bag: To help mask unpleasant odors.
* Gift Baskets: To add a thoughtful and fragrant touch.
* Near Your Desk: To help reduce stress and improve focus.
Can I use other herbs in my lavender sachets?
Absolutely! Combining lavender with other complementary herbs can create a more complex and nuanced fragrance. Some popular herbs to use in lavender sachets include chamomile, rose petals, lemon balm, rosemary, and mint. Experiment with different combinations to find the scents that you enjoy the most. Be sure to use dried herbs to prevent mold and mildew growth.
How do I make my own dried lavender?
Drying your own lavender is a simple and rewarding process. The easiest method is to harvest the lavender stems when the flowers are partially open. Bundle the stems together with twine and hang them upside down in a cool, dark, and well-ventilated area for several weeks, or until the stems are completely dry. You can also use a dehydrator to dry the lavender more quickly. Once the lavender is dry, gently remove the flowers from the stems and store them in an airtight container.

Leave a Comment