

DIY Coffee Table Upcycle: Breathe new life into your living room with a stunning, one-of-a-kind piece! Are you tired of that drab, outdated coffee table lurking in your living room? Does it feel like it’s lost its spark and no longer reflects your personality? Well, get ready to unleash your inner artist because this article is your ultimate guide to transforming that forgotten furniture into a conversation starter!
Upcycling, the art of transforming discarded materials into something beautiful and functional, has a rich history rooted in resourcefulness and sustainability. From the “make do and mend” ethos of wartime eras to the modern-day zero-waste movement, the desire to repurpose and reimagine has always been a part of human ingenuity. Think of the beautifully patched quilts of generations past, each stitch telling a story of resourcefulness and love. Now, it’s your turn to add your own chapter to this legacy!
Let’s face it, buying new furniture can be expensive and often lacks the unique character that truly makes a house a home. That’s where the magic of a DIY Coffee Table Upcycle comes in. Not only will you save money and reduce waste, but you’ll also create a piece that’s completely tailored to your style and needs. I’m going to show you some simple yet effective tricks and hacks that will turn your old coffee table into a stylish centerpiece. Whether you’re a seasoned DIY enthusiast or a complete beginner, I’ve got you covered with step-by-step instructions and inspiring ideas. So, grab your tools, unleash your creativity, and let’s get upcycling!
Transforming a Thrift Store Find: My DIY Coffee Table Upcycle Adventure
Okay, so you’ve stumbled upon a dusty, slightly sad-looking coffee table at a thrift store, or maybe you’ve got one lurking in your basement that’s seen better days. Don’t despair! With a little elbow grease and some creative vision, you can totally transform it into a stunning centerpiece for your living room. I’m going to walk you through my own coffee table upcycle project, sharing all the tips and tricks I learned along the way. Get ready to unleash your inner DIY guru!
Gathering Your Supplies: The Prep Work
Before we dive in, let’s make sure we have everything we need. This is crucial for a smooth and enjoyable project. Trust me, nothing’s worse than getting halfway through and realizing you’re missing a key ingredient!
Here’s a comprehensive list:
* The Coffee Table: Obviously! Make sure it’s structurally sound. Minor cosmetic issues are fine, we’re fixing those!
* Sandpaper: Various grits (80, 120, 220). We’ll start with the coarser grit to remove old finishes and work our way up to finer grits for a smooth surface.
* Sanding Block or Electric Sander: An electric sander will save you a ton of time and effort, especially on larger surfaces. But a sanding block works just fine for smaller projects or detail work.
* Tack Cloth: Essential for removing sanding dust before painting or staining.
* Primer: A good quality primer is key for proper paint adhesion and a professional-looking finish. Choose a primer appropriate for the material of your coffee table (wood, metal, etc.).
* Paint or Stain: This is where you get to express your creativity! Choose a color or stain that complements your decor. I used a beautiful teal paint for mine!
* Paintbrushes or Foam Rollers: Foam rollers are great for achieving a smooth, even finish on large surfaces. Paintbrushes are better for detail work and corners.
* Painter’s Tape: For masking off areas you don’t want to paint or stain.
* Drop Cloth or Old Newspaper: To protect your work surface.
* Screwdriver or Drill: You might need this to remove hardware like knobs or legs.
* Wood Filler (Optional): If your coffee table has any dents or scratches, wood filler will help you create a smooth, flawless surface.
* Polyurethane or Varnish (Optional): For added protection and durability, especially if you’re using paint.
* New Hardware (Optional): Replacing the existing hardware can give your coffee table a completely new look.
* Safety Glasses and Dust Mask: Protect your eyes and lungs from sanding dust.
* Gloves: To protect your hands from paint and stain.
* Cleaning Supplies: Soap, water, and a sponge or cloth for cleaning the coffee table before sanding.
Step-by-Step Guide: From Drab to Fab!
Alright, let’s get started! Follow these steps carefully, and you’ll be amazed at the transformation.
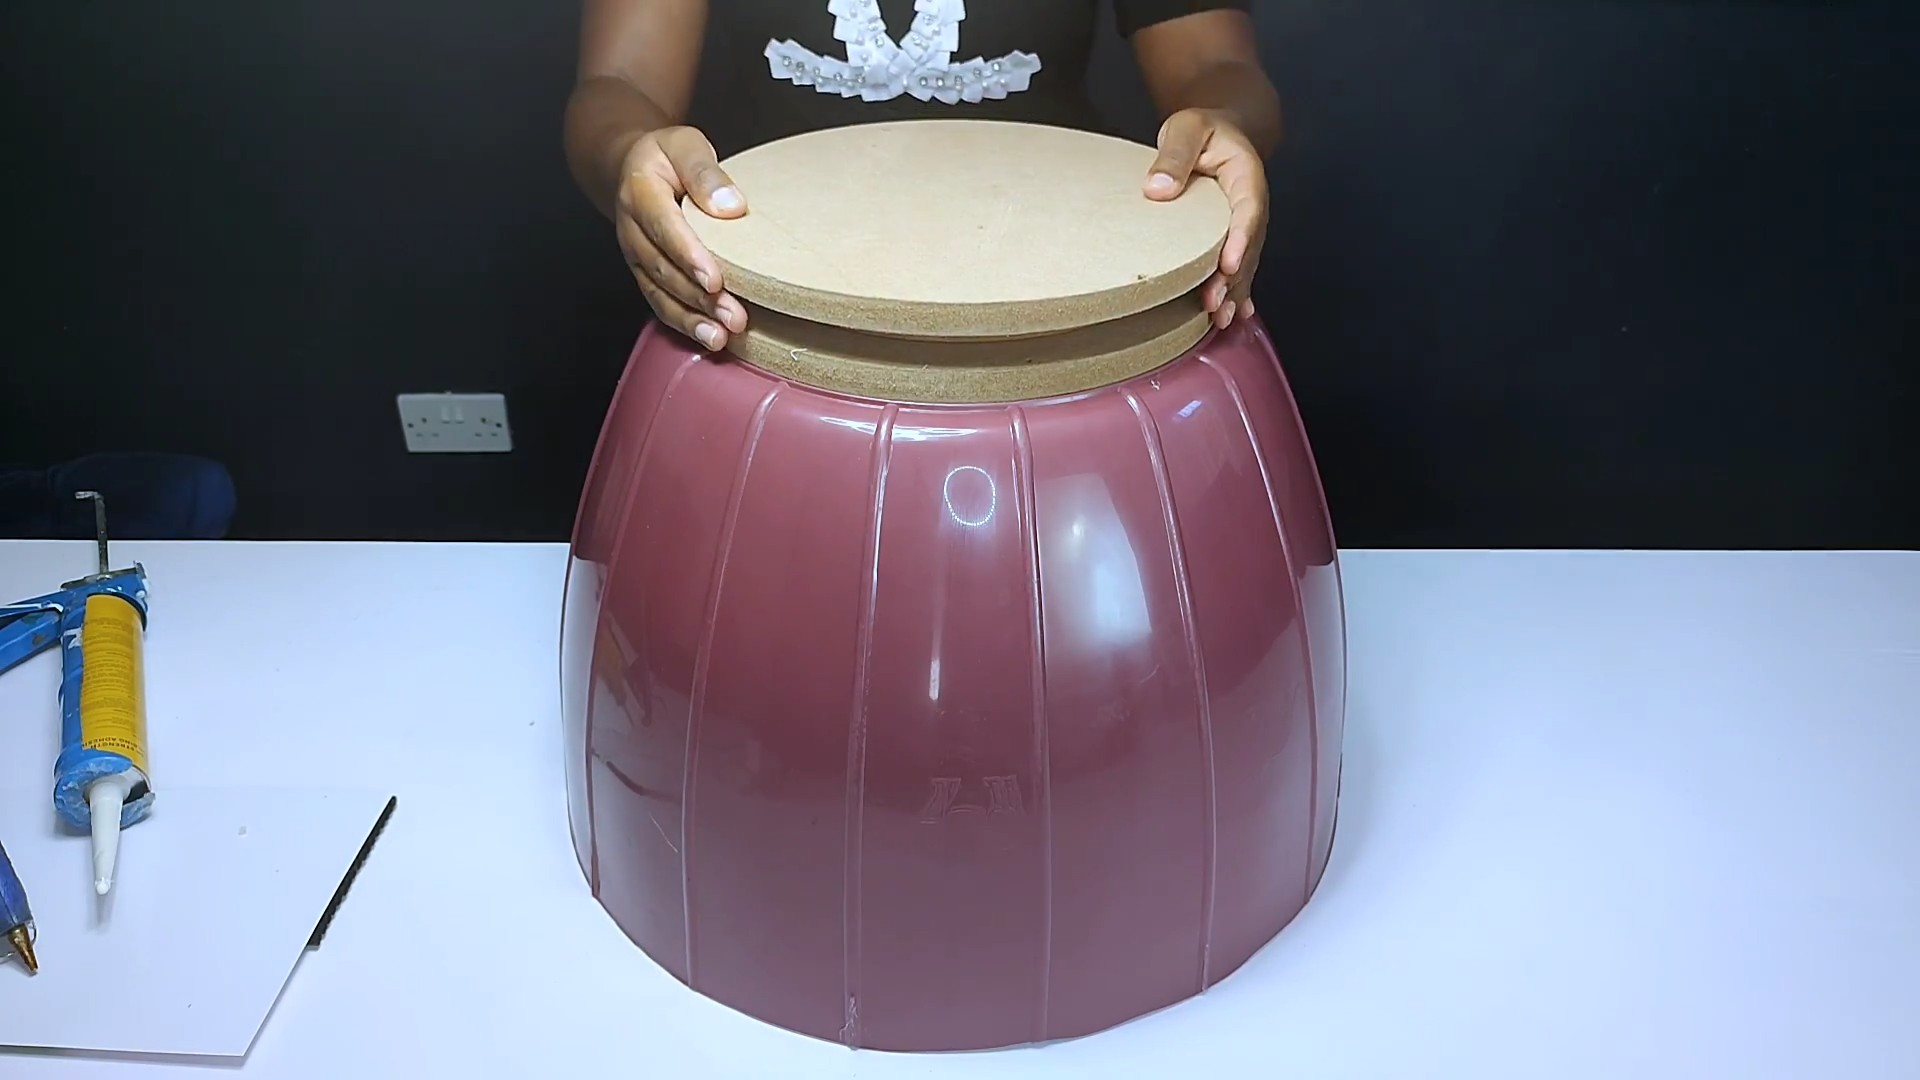
1. Cleaning and Preparation
This is a crucial first step! A clean surface is essential for proper adhesion of primer and paint.
1. Remove any hardware: Take off any knobs, legs, or other hardware that you don’t want to paint or stain. Store them in a safe place so you don’t lose them!
2. Clean the coffee table: Use soap and water to thoroughly clean the entire surface of the coffee table. Remove any dirt, grime, or grease. Let it dry completely.
3. Inspect for damage: Look for any dents, scratches, or other imperfections. If you find any, now’s the time to address them.
2. Repairing Imperfections (Optional)
If your coffee table has any imperfections, wood filler is your best friend.
1. Apply wood filler: Use a putty knife to apply wood filler to any dents, scratches, or holes. Overfill slightly, as the filler will shrink as it dries.
2. Let it dry completely: Follow the manufacturer’s instructions for drying time. This is important!
3. Sand smooth: Once the wood filler is completely dry, sand it smooth with 120-grit sandpaper. Blend it seamlessly with the surrounding surface.
3. Sanding: Creating a Smooth Canvas
Sanding is essential for removing old finishes and creating a smooth surface for paint or stain to adhere to.
1. Start with 80-grit sandpaper: If your coffee table has a thick, glossy finish, start with 80-grit sandpaper to remove it. Use a sanding block or electric sander.
2. Move to 120-grit sandpaper: Once you’ve removed the old finish, switch to 120-grit sandpaper to smooth out any scratches left by the coarser grit.
3. Finish with 220-grit sandpaper: Finally, use 220-grit sandpaper to create a super-smooth surface. This will ensure a professional-looking finish.
4. Sand with the grain: When sanding wood, always sand with the grain to avoid creating scratches.
5. Don’t forget the edges and corners: Pay attention to the edges and corners of the coffee table. These areas are often overlooked but are just as important.
6. Wipe away the dust: After sanding, use a tack cloth to thoroughly remove all sanding dust. This is crucial for proper paint adhesion.
4. Priming: The Foundation for a Flawless Finish
Primer is like the foundation for your makeup – it creates a smooth, even surface for the paint to adhere to and helps to prevent the paint from chipping or peeling.
1. Apply a thin, even coat of primer: Use a paintbrush or foam roller to apply a thin, even coat of primer to the entire surface of the coffee table.
2. Let it dry completely: Follow the manufacturer’s instructions for drying time.
3. Lightly sand (optional): Once the primer is dry, you can lightly sand it with 220-grit sandpaper to create an even smoother surface. This step is optional, but it can make a big difference in the final result.
4. Wipe away the dust: Again, use a tack cloth to remove any sanding dust.
5. Painting or Staining: Bringing Your Vision to Life
This is the fun part! Choose a color or stain that you love and that complements your decor.
1. Apply the first coat of paint or stain: Use a paintbrush or foam roller to apply a thin, even coat of paint or stain to the entire surface of the coffee table.
2. Let it dry completely: Follow the manufacturer’s instructions for drying time.
3. Lightly sand (optional): After the first coat is dry, you can lightly sand it with 220-grit sandpaper to remove any imperfections.
4. Apply a second coat of paint or stain: Apply a second thin, even coat of paint or stain. This will provide better coverage and a richer color.
5. Let it dry completely: Again, follow the manufacturer’s instructions for drying time.
6. Consider a third coat (optional): Depending on the color and coverage of your paint or stain, you may need to apply a third coat.
6. Sealing (Optional): Protecting Your Masterpiece
If you’re using paint, especially on a high-traffic surface like a coffee table, sealing it with polyurethane or varnish is a good idea. This will protect the paint from scratches, chips, and spills.
1. Apply a thin, even coat of polyurethane or varnish: Use a paintbrush or foam roller to apply a thin, even coat of polyurethane or varnish to the entire surface of the coffee table.
2. Let it dry completely: Follow the manufacturer’s instructions for drying time.
3. Lightly sand (optional): After the first coat is dry, you can lightly sand it with 320-grit sandpaper to remove any imperfections.
4. Apply a second coat of polyurethane or varnish: Apply a second thin, even coat of polyurethane or varnish.
5. Let it dry completely: Again, follow the manufacturer’s instructions for drying time.
7. Reassembling and Finishing Touches
Almost there! Now it’s time to put everything back together and add the finishing touches.
1. Reattach the hardware: Reattach any knobs, legs, or other hardware that you removed earlier.
2. Inspect your work: Take a close look at your coffee table and make sure you’re happy with the finished product.
3. Clean up your workspace: Dispose of any paint cans, brushes, and other materials properly.
4. Admire your handiwork! You did it!
Conclusion
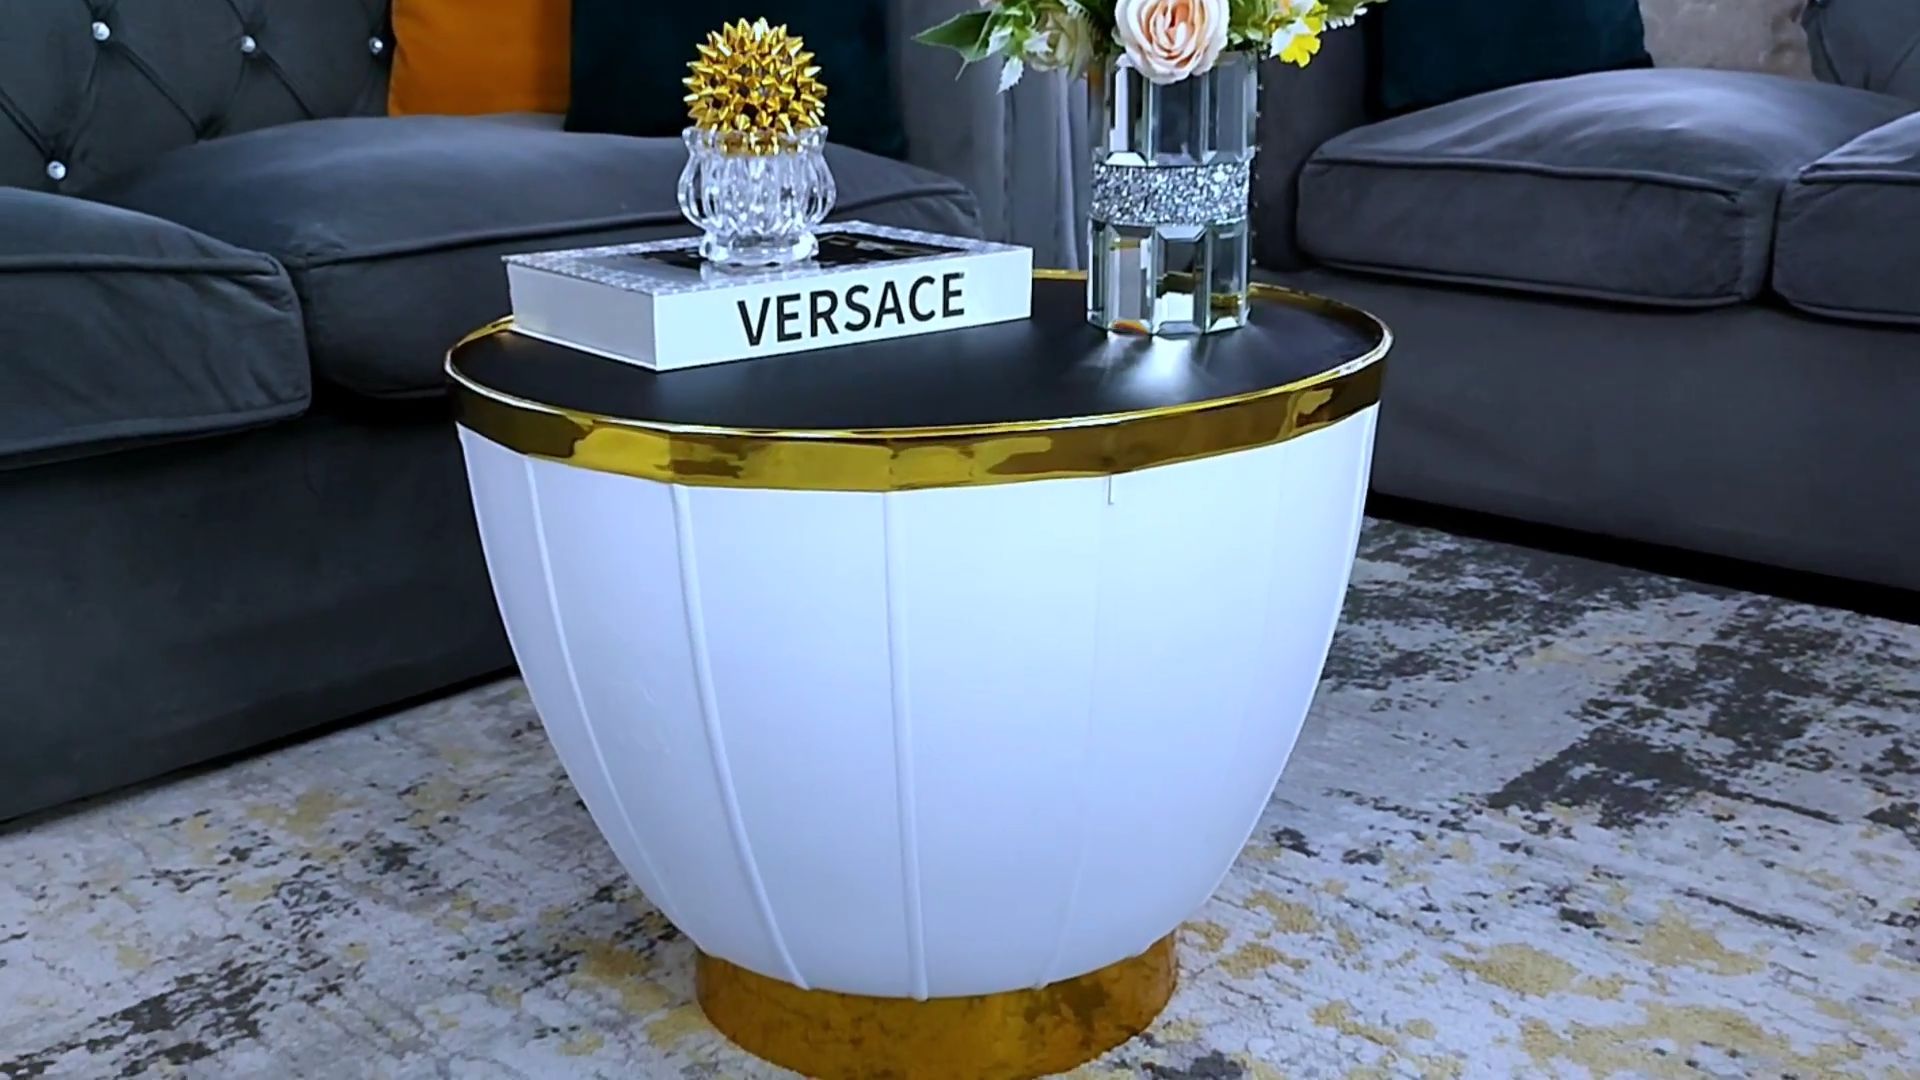
So, there you have it! Transforming a tired, old coffee table into a stunning, personalized centerpiece for your living room is not only achievable but surprisingly simple and incredibly rewarding. This DIY coffee table upcycle project isn’t just about saving money; it’s about breathing new life into something old, expressing your unique style, and creating a piece that tells a story.
Think about it: instead of settling for a mass-produced coffee table from a big box store, you can have a one-of-a-kind creation that perfectly complements your décor and reflects your personality. The possibilities are truly endless.
We’ve covered the basics, but don’t be afraid to get creative! Consider these variations to truly make it your own:
* Add a mosaic top: Break up colorful tiles or even old china to create a vibrant and eye-catching mosaic design.
* Incorporate storage: Add drawers, shelves, or even a hidden compartment to maximize functionality.
* Experiment with different paint techniques: Try distressing, stenciling, or ombre effects for a unique look.
* Use reclaimed wood: Give your coffee table a rustic, farmhouse feel by using reclaimed wood for the top or legs.
* Epoxy resin river table: For a more advanced project, create a stunning river table effect using epoxy resin and colorful pigments.
* Metal Legs: Replace the existing legs with sleek metal legs for a modern industrial look. You can find these at most hardware stores or online.
The beauty of this DIY coffee table upcycle is that it’s completely customizable. You can adapt the techniques and materials to suit your budget, skill level, and personal preferences. Don’t be intimidated if you’re a beginner; start with a simple design and gradually work your way up to more complex projects.
More than just a furniture makeover, this project is a chance to unleash your inner artist and create something truly special. It’s a sustainable way to furnish your home, reducing waste and giving new purpose to discarded items. Plus, it’s a fantastic conversation starter! Imagine the pride you’ll feel when guests admire your handiwork and ask where you got such a unique piece.
We wholeheartedly encourage you to give this DIY coffee table upcycle a try. Gather your materials, unleash your creativity, and transform that old coffee table into a stunning focal point for your living space.
And most importantly, we want to hear about your experience! Share your before-and-after photos, tips, and challenges in the comments below. Let’s inspire each other and create a community of DIY enthusiasts who are passionate about transforming the ordinary into the extraordinary. We can’t wait to see what you create!
Frequently Asked Questions (FAQ)
What kind of coffee table is best for upcycling?
Almost any coffee table can be upcycled, but some are better suited than others. Solid wood coffee tables are generally the easiest to work with because they can be sanded, stained, and painted. Tables with sturdy frames and minimal damage are also ideal. Avoid tables made of particleboard or MDF if they are heavily damaged, as these materials can be difficult to repair. Consider the style of the table and how it will fit into your existing décor. A simple, classic design will be easier to adapt to different styles.
What are the essential tools and materials I’ll need?
The specific tools and materials will depend on the type of upcycle you’re planning, but here’s a general list:
* Cleaning supplies: Soap, water, and a sponge or cloth for cleaning the table.
* Sandpaper: Various grits (e.g., 80, 120, 220) for sanding the surface.
* Primer: To prepare the surface for paint and ensure better adhesion.
* Paint: Choose a paint that is suitable for the material of your coffee table (e.g., latex paint for wood, metal paint for metal).
* Paintbrushes and rollers: For applying paint evenly.
* Drop cloth or newspaper: To protect your work area.
* Safety glasses and gloves: To protect yourself from dust and chemicals.
* Screwdriver or drill: For removing or tightening screws.
* Wood filler: For repairing any cracks or holes in the wood.
* Optional: Stencils, decorative hardware, new legs, epoxy resin, tiles, reclaimed wood.
How do I properly prepare the coffee table for upcycling?
Proper preparation is crucial for a successful upcycle. Start by cleaning the coffee table thoroughly with soap and water to remove any dirt, grease, or grime. Next, sand the surface to create a smooth, even base for the paint or stain. Use a coarser grit sandpaper (e.g., 80 grit) for removing old finishes or rough spots, and then move to a finer grit (e.g., 220 grit) for smoothing the surface. If there are any cracks or holes, fill them with wood filler and let it dry completely before sanding. Finally, apply a primer to the entire surface to ensure better paint adhesion and prevent the old finish from bleeding through.
What if my coffee table has a laminate or veneer top?
Upcycling a coffee table with a laminate or veneer top can be a bit more challenging, but it’s still possible. The key is to properly prepare the surface. Start by lightly sanding the laminate or veneer to create a slightly rough surface for the primer to adhere to. Use a fine-grit sandpaper (e.g., 220 grit) and avoid sanding too aggressively, as you could damage the veneer. Apply a bonding primer specifically designed for slick surfaces. This will help the paint adhere properly. You may need to apply multiple coats of primer for best results. Once the primer is dry, you can paint or decorate the table as desired.
How can I add storage to my upcycled coffee table?
Adding storage to your coffee table is a great way to maximize its functionality. Here are a few ideas:
* Add drawers: You can purchase pre-made drawers or build your own. Attach them to the underside of the table using drawer slides.
* Add shelves: Attach shelves to the legs of the table to create open storage space.
* Create a hidden compartment: Build a hinged top that lifts up to reveal a hidden storage area inside the table.
* Use baskets or crates: Place baskets or crates under the table to store blankets, books, or other items.
How do I choose the right paint color and finish?
The paint color and finish should complement your existing décor and reflect your personal style. Consider the color scheme of your living room and choose a paint color that harmonizes with it. For a modern look, consider using neutral colors like gray, white, or black. For a more vibrant look, choose bold colors like blue, green, or yellow. The finish of the paint can also affect the overall look of the table. Matte finishes are more forgiving and hide imperfections, while glossy finishes are more durable and easier to clean.
How do I protect my upcycled coffee table from wear and tear?
To protect your upcycled coffee table from wear and tear, apply a clear coat of sealant or varnish after painting or staining. This will create a protective layer that will resist scratches, stains, and water damage. Choose a sealant or varnish that is appropriate for the type of paint or stain you used. Apply multiple coats of sealant or varnish for best results, allowing each coat to dry completely before applying the next. You can also use coasters and placemats to protect the surface from spills and scratches.
What if I make a mistake during the upcycling process?
Don’t worry, mistakes happen! The beauty of DIY is that you can always fix them. If you make a mistake while painting, simply sand down the area and repaint it. If you damage the wood, use wood filler to repair it. If you’re not happy with the overall look of the table, you can always start over. The most important thing is to have fun and learn from your mistakes.
Where can I find inspiration for my DIY coffee table upcycle?
There are many sources of inspiration for your DIY coffee table upcycle. Browse online platforms like Pinterest, Instagram, and home décor blogs for ideas. Visit thrift stores, flea markets, and antique shops to find unique materials and inspiration. Look at magazines and books for design ideas. And don’t be afraid to experiment and come up with your own unique designs.
How can I share my upcycled coffee table with others?
We would love to see your finished project! Share your before-and-after photos on social media using relevant hashtags like #DIYcoffeetable #upcycledfurniture #furnituremakeover. You can also share your project in online DIY communities and forums. And of course, we encourage you to share your photos and tips in the comments section of this article. Let’s inspire each other and create a community of DIY enthusiasts!


Leave a Comment