

Aloe vera leaf cutting: Ever wondered if you could magically multiply your aloe vera plant with just a single leaf? Well, you’re in for a treat! For centuries, aloe vera has been revered for its medicinal properties, dating back to ancient Egypt where it was known as the “plant of immortality.” Its soothing gel has been used to treat burns, heal wounds, and even as a beauty elixir. But what if I told you that propagating this amazing plant is easier than you think, and you don’t even need seeds?
Many people shy away from propagating aloe vera, assuming it’s a complicated process. They end up buying new plants when their existing one gets too big or they simply want more. But the truth is, with a few simple tricks and a little patience, you can successfully grow new aloe vera plants from leaf cuttings. This DIY guide will walk you through the entire process, from selecting the right leaf to nurturing your new plantlets.
Imagine having an endless supply of aloe vera for all your skincare needs, or gifting these incredible plants to your friends and family. Learning the art of aloe vera leaf cutting not only saves you money but also connects you to a rich history of natural remedies. So, grab your gardening gloves, and let’s dive into the wonderful world of aloe vera propagation!
Propagating Aloe Vera from a Leaf Cutting: A DIY Guide
Hey plant lovers! Ever wondered if you could grow a whole new aloe vera plant from just a single leaf? Well, I’m here to tell you that while it’s not the *most* reliable method, it’s definitely worth a shot and a fun experiment! Let’s dive into how you can try propagating aloe vera from a leaf cutting.
Understanding the Challenge
Before we get started, it’s important to understand that aloe vera propagation from leaf cuttings is a bit trickier than propagating from pups (those little baby aloe plants that grow around the base of the mother plant). Aloe vera leaves don’t typically have nodes or meristematic tissue that readily produce roots. However, with the right technique and a little patience, you might just be successful! The key is to encourage callus formation and provide the optimal environment for root development.
Materials You’ll Need
* A healthy aloe vera leaf
* A clean, sharp knife or scissors
* Rooting hormone powder (optional, but highly recommended)
* A small pot (2-4 inches in diameter)
* Well-draining potting mix (cactus or succulent mix is ideal)
* Spray bottle with water
* A warm, bright location (but not direct sunlight)
Choosing the Right Leaf
Not all aloe vera leaves are created equal when it comes to propagation. Here’s what to look for:
* Maturity: Choose a mature, healthy leaf from the bottom of the plant. These leaves are usually thicker and have more stored energy.
* Health: Avoid leaves that are damaged, discolored, or show signs of disease.
* Size: A leaf that is at least 4-6 inches long is ideal.
Step-by-Step Instructions
Okay, let’s get our hands dirty! Here’s the process I follow when attempting to propagate aloe vera from a leaf cutting:
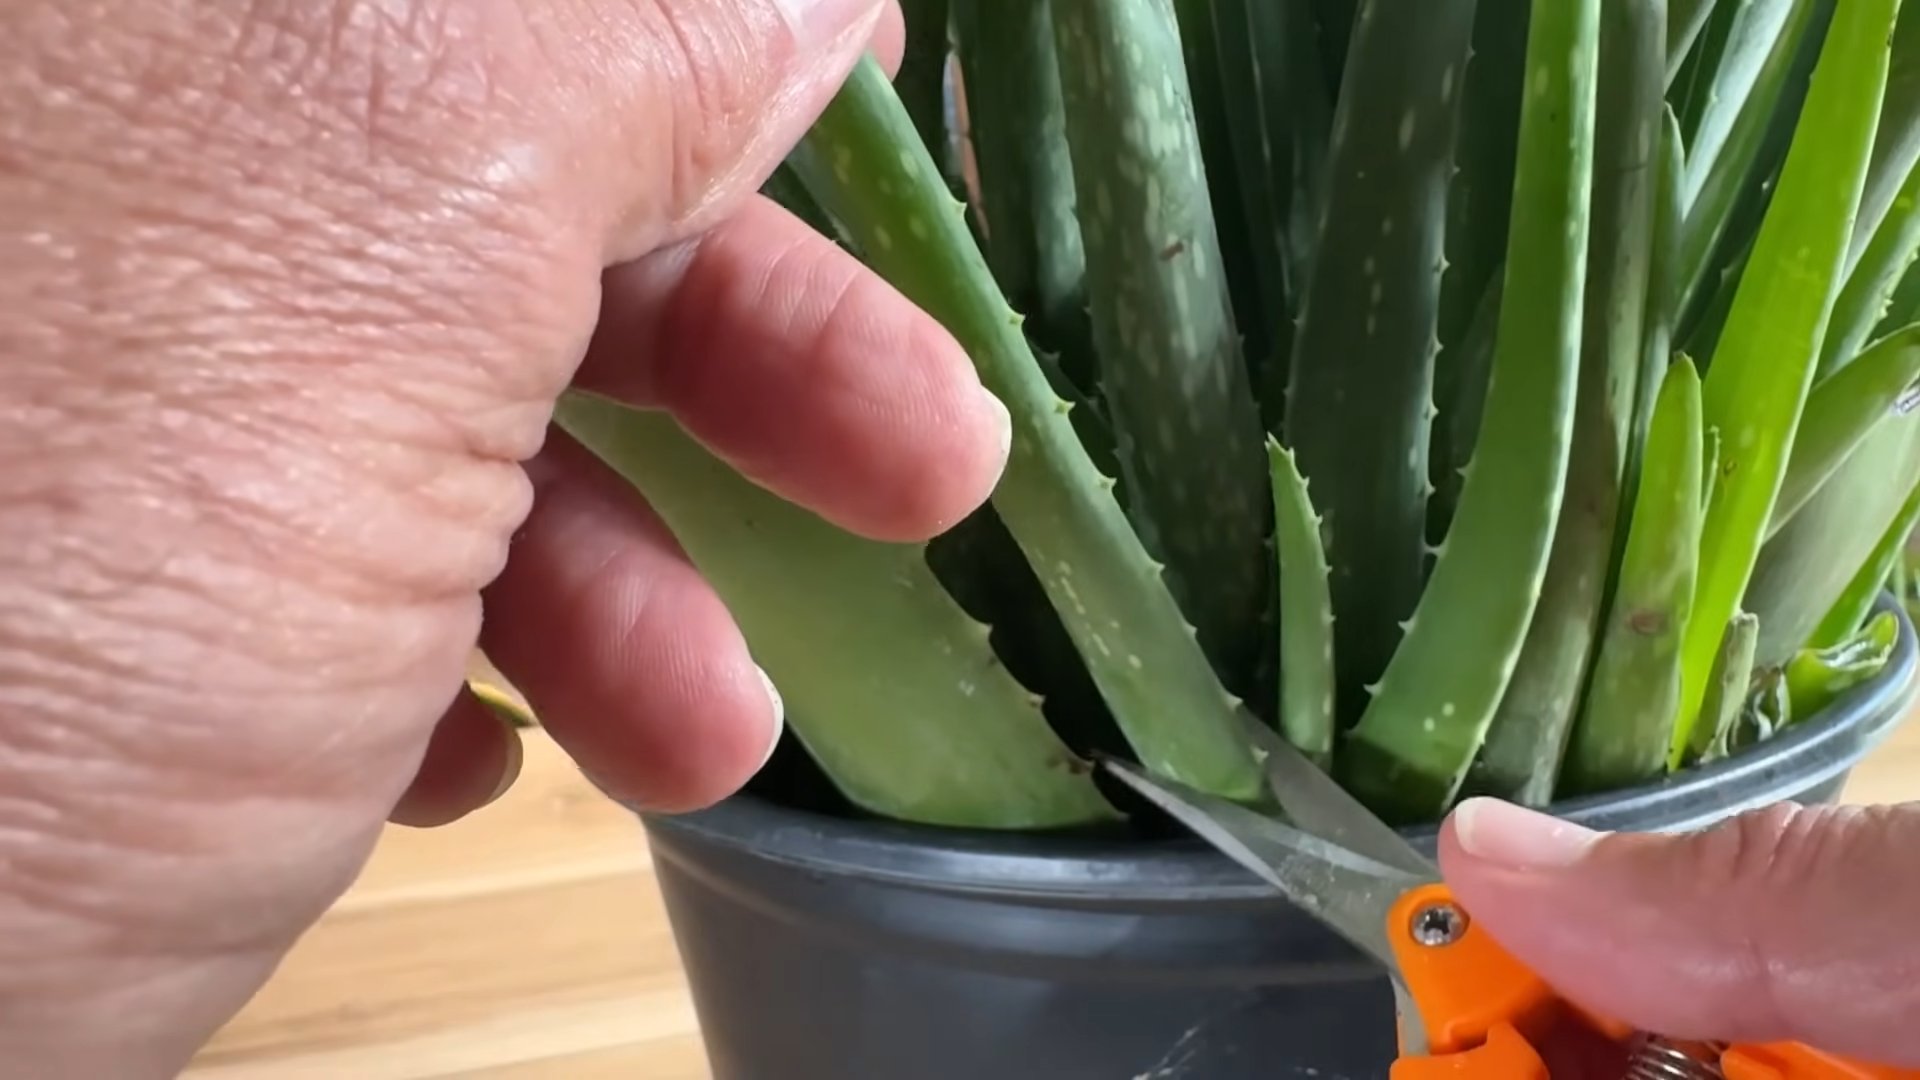
1. Prepare Your Cutting Tool: Sanitize your knife or scissors with rubbing alcohol to prevent the spread of disease. This is a crucial step!
2. Take the Cutting: Carefully cut the leaf from the aloe vera plant as close to the base as possible. Make a clean, straight cut.
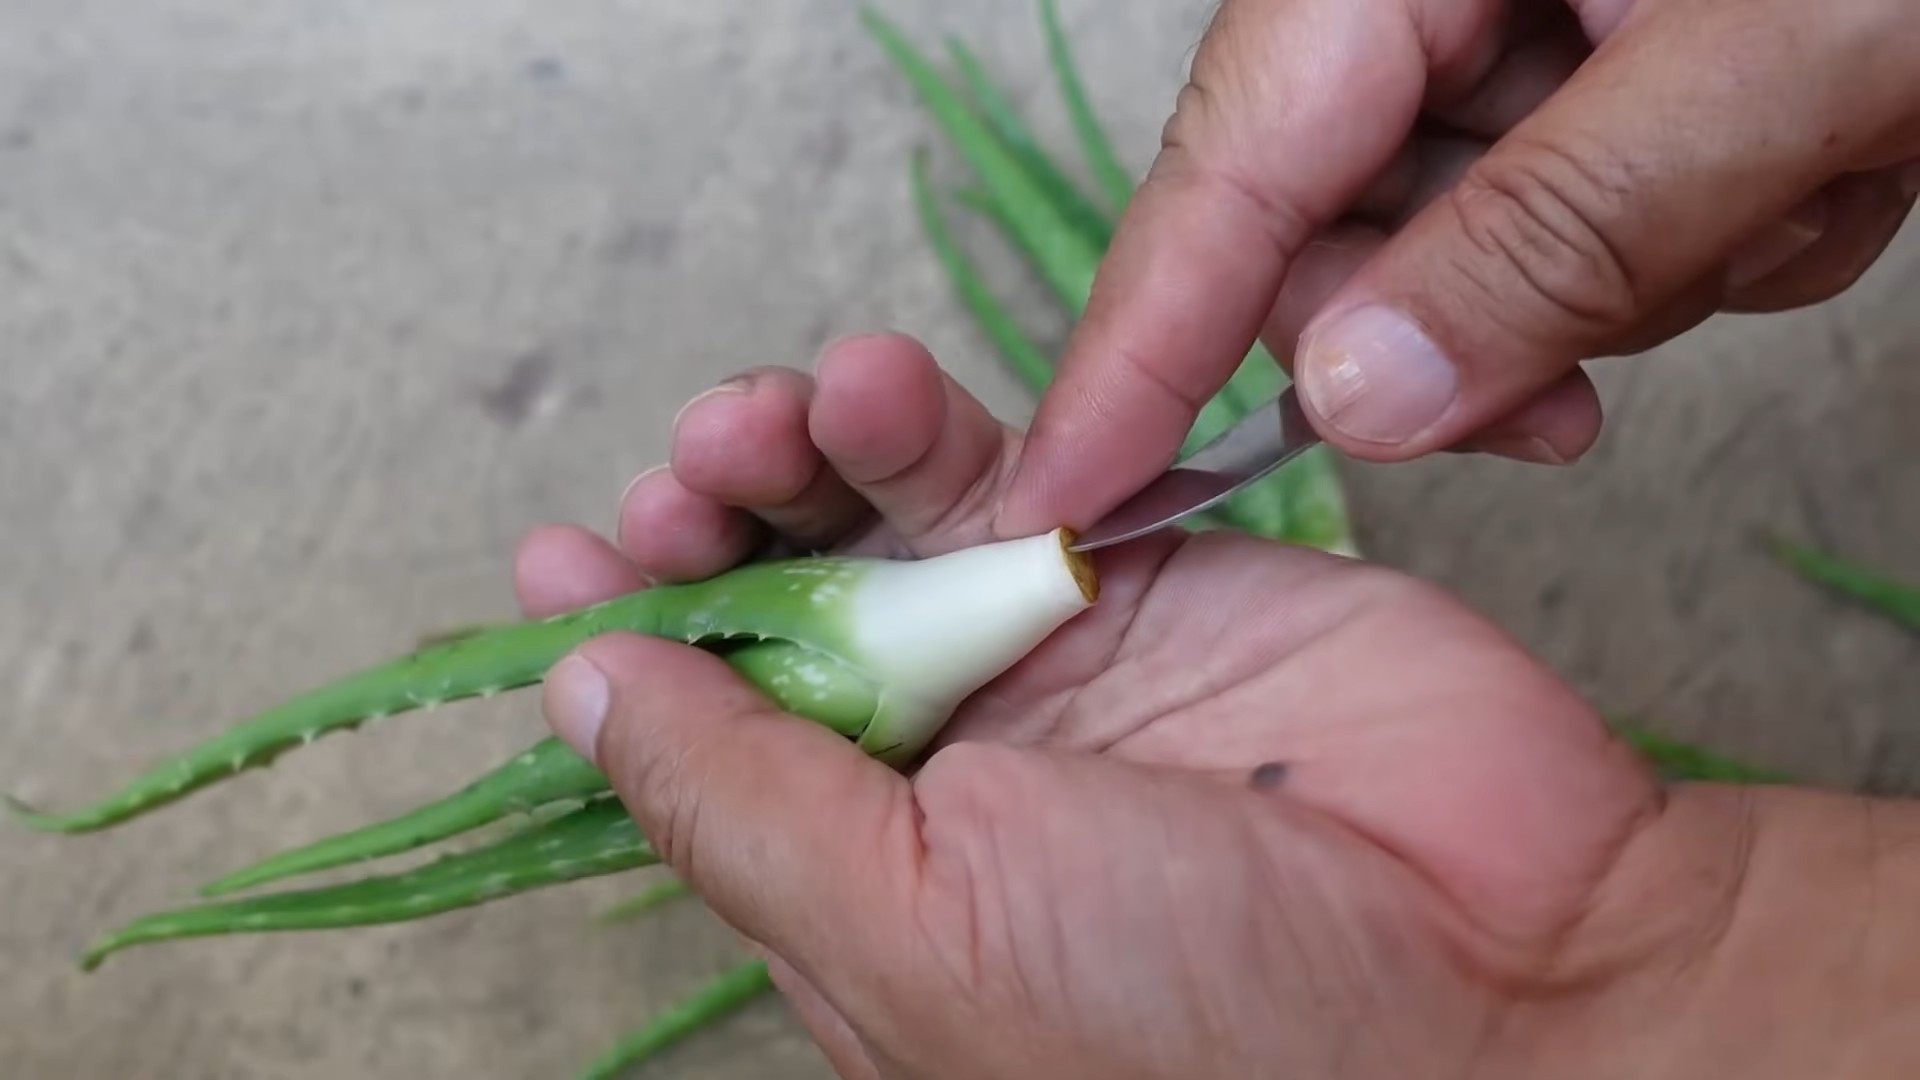
3. Allow the Cut End to Callus: This is perhaps the most important step. Place the cut end of the leaf in a dry, shaded location for 1-3 weeks. This allows the cut surface to dry out and form a callus, which will help prevent rot. You’ll know it’s ready when the cut end is dry and slightly hardened. I usually just lay the leaf on a paper towel in a cool, dark corner of my garage.
4. Apply Rooting Hormone (Optional): While not essential, rooting hormone can significantly increase your chances of success. Dip the calloused end of the leaf into rooting hormone powder, tapping off any excess.
5. Prepare Your Pot: Fill your small pot with well-draining potting mix. Moisten the soil slightly, but don’t soak it.
6. Plant the Cutting: Insert the calloused end of the leaf into the potting mix, burying it about 1-2 inches deep. Make sure the leaf is standing upright. You might need to use small pebbles or sticks to support the leaf until it develops roots.
7. Water Sparingly: Water the potting mix very lightly after planting. Overwatering is a common mistake that can lead to rot.
8. Provide Indirect Light: Place the pot in a warm, bright location, but avoid direct sunlight. Direct sunlight can scorch the leaf. An east-facing window is usually a good choice.
9. Be Patient: This is where the real test begins. It can take several weeks or even months for roots to develop. During this time, keep the potting mix slightly moist, but avoid overwatering. I usually check the soil moisture every few days and water only when the top inch feels dry.
10. Check for Root Development: After a few weeks, gently tug on the leaf. If you feel resistance, it means roots have started to develop. You can also gently dig around the base of the leaf to check for root growth.
11. Transplant (If Successful): Once the roots are well-established, you can transplant your new aloe vera plant into a larger pot.
Troubleshooting
Even with the best care, things can sometimes go wrong. Here are some common problems and how to address them:
* Rotting: If the leaf starts to rot, it’s usually due to overwatering. Remove the leaf from the pot immediately and let it dry out completely. If the rot is only at the cut end, you can try cutting off the affected area and allowing the remaining leaf to callus again.
* No Root Development: If you don’t see any root development after several months, it could be due to a number of factors, such as poor lighting, improper watering, or a lack of rooting hormone. Try adjusting these factors and see if it helps. Sometimes, it just doesn’t work, and that’s okay!
* Leaf Drying Out: If the leaf starts to dry out and shrivel, it could be due to underwatering or excessive sunlight. Move the pot to a shadier location and water more frequently.
Tips for Success
Here are a few extra tips that I’ve found helpful:
* Use a Well-Draining Potting Mix: This is crucial for preventing rot. Cactus or succulent mix is ideal because it allows excess water to drain away quickly.
* Don’t Overwater: Aloe vera plants are succulents and don’t need a lot of water. Overwatering is one of the most common mistakes that people make.
* Provide Adequate Light: Aloe vera plants need bright, indirect light to thrive.
* Be Patient: Propagating aloe vera from a leaf cutting can take time. Don’t get discouraged if you don’t see results immediately.
* Experiment: Try different techniques and see what works best for you. There’s no one-size-fits-all approach to plant propagation.
* Humidity: While aloe vera doesn’t need high humidity, a slightly humid environment can help encourage root development. You can increase humidity by placing a tray of water near the pot or by misting the leaf occasionally.
* Bottom Heat: Providing bottom heat can also help speed up root development. You can use a seedling heat mat or place the pot on top of a warm appliance, such as a refrigerator.
* Consider the Season: Spring and summer are generally the best times to propagate aloe vera, as the plants are actively growing during these seasons.
Alternative Propagation Methods
As I mentioned earlier, propagating aloe vera from leaf cuttings isn’t the most reliable method. If you’re looking for a more guaranteed way to propagate aloe vera, consider these alternatives:
* Pups (Offsets): This is the easiest and most common method. Simply separate the pups from the mother plant and pot them up individually.
* Seeds: You can also grow aloe vera from seeds, but this is a much slower process.
Why This Method is Worth Trying (Even if Tricky)
Even though propagating aloe vera from a leaf cutting can be challenging, I still think it’s worth trying. It’s a fun experiment that can teach you a lot about plant propagation. Plus, if you’re successful, you’ll have a brand new aloe vera plant to enjoy! And who doesn’t love free plants?
A Note on Callus Formation
I want to emphasize the importance of callus formation. This step is absolutely crucial for preventing rot. Don’t skip it! The callus acts as a barrier, protecting the cut end of the leaf from bacteria and fungi. I’ve found that allowing the leaf to callus for at least two weeks significantly increases my chances of success.
My Personal Experience
I’ve tried propagating aloe vera from leaf cuttings several times, and I’ve had mixed results. Sometimes it works, and sometimes it doesn’t. But even when it doesn’t work, I still learn something new. I’ve found that using rooting hormone and providing bottom heat can significantly improve my success rate.
Final Thoughts
So, there you have it! My guide to propagating aloe vera from a leaf cutting. Remember to be patient, persistent, and don’t be afraid to experiment. Good luck, and happy gardening! I hope you have success growing your own aloe vera plant from a single leaf. Remember, even if it doesn’t work out the first time, keep trying! The joy of gardening is in the process, not just the results.
Conclusion
So, there you have it! Transforming a simple aloe vera leaf cutting into a thriving new plant is not only incredibly rewarding but also surprisingly easy. We’ve walked you through the process, demystifying each step and providing you with the knowledge to confidently propagate your own aloe vera. Why is this a must-try? Because beyond the satisfaction of nurturing new life, you’re gaining access to a readily available source of natural healing and beauty benefits. Imagine having a constant supply of fresh aloe vera gel for soothing sunburns, moisturizing your skin, or even adding to your favorite smoothies.
This DIY trick is a game-changer for plant lovers of all levels. It’s a cost-effective way to expand your collection, share the gift of nature with friends and family, and reduce your reliance on commercially produced aloe vera products, which can often contain additives and preservatives. Plus, it’s a fantastic way to connect with the natural world and appreciate the resilience of these amazing plants.
Don’t be afraid to experiment with variations! While we’ve focused on water propagation, you can also try rooting your aloe vera leaf cutting directly in soil. Just ensure the soil is well-draining and avoid overwatering. Another variation involves using rooting hormone to encourage faster root development, although it’s not strictly necessary. You can also try different types of containers for rooting, from glass jars to plastic cups, as long as they allow you to monitor root growth. Consider using rainwater or distilled water for propagation, as tap water can sometimes contain chemicals that inhibit root development.
We encourage you to take the plunge and try this DIY aloe vera propagation method. It’s a simple, sustainable, and satisfying way to bring more greenery into your life. Once you’ve successfully rooted your aloe vera leaf cutting, remember to gradually acclimate it to brighter light conditions to prevent sunburn. And most importantly, be patient! Root development can take several weeks, so don’t be discouraged if you don’t see results immediately.
We’re confident that you’ll be amazed by the results. Now it’s your turn! Give this DIY trick a try and share your experience with us. We’d love to hear your tips, tricks, and success stories. Post photos of your growing aloe vera plants on social media and tag us! Let’s spread the love for these incredible plants and inspire others to discover the joy of propagation. Happy growing!
Frequently Asked Questions (FAQ)
1. What is the best time of year to propagate aloe vera from a leaf cutting?
The best time to propagate aloe vera is during the spring or summer months, when the plant is actively growing. Warmer temperatures and longer daylight hours promote faster root development. However, with proper care and a controlled environment, you can propagate aloe vera at other times of the year as well. Just be aware that root growth may be slower during the cooler months.
2. How long does it take for an aloe vera leaf cutting to root?
Rooting time can vary depending on several factors, including the temperature, humidity, and the health of the leaf cutting. Generally, you can expect to see roots developing within 3-8 weeks. Be patient and avoid disturbing the cutting too frequently. Check the water regularly and change it every few days to prevent bacterial growth.
3. What type of water should I use for propagating aloe vera?
It’s best to use filtered, distilled, or rainwater for propagating aloe vera. Tap water can sometimes contain chlorine and other chemicals that can inhibit root development. If you must use tap water, let it sit out for 24 hours to allow the chlorine to evaporate.
4. How much light does an aloe vera leaf cutting need while rooting?
Aloe vera leaf cuttings need bright, indirect light while rooting. Avoid placing them in direct sunlight, as this can scorch the leaves. A location near a window with filtered light is ideal. Once the roots have developed, you can gradually acclimate the plant to brighter light conditions.
5. What type of soil should I use when planting the rooted aloe vera cutting?
Use a well-draining potting mix specifically formulated for succulents or cacti. This type of soil typically contains a mix of perlite, sand, and peat moss, which allows for good drainage and prevents root rot. Avoid using regular potting soil, as it can retain too much moisture.
6. How often should I water my newly planted aloe vera plant?
Water your newly planted aloe vera plant sparingly. Allow the soil to dry out completely between waterings. Overwatering is a common cause of root rot in aloe vera plants. During the growing season (spring and summer), you may need to water more frequently than during the dormant season (fall and winter).
7. Can I use rooting hormone to propagate aloe vera?
Yes, you can use rooting hormone to encourage faster root development, but it’s not strictly necessary. Aloe vera is relatively easy to propagate without rooting hormone. If you choose to use rooting hormone, apply it to the cut end of the leaf cutting before placing it in water or soil.
8. What are some signs that my aloe vera leaf cutting is not rooting properly?
Signs that your aloe vera leaf cutting is not rooting properly include:
* The leaf cutting is turning brown or black.
* The leaf cutting is becoming mushy or soft.
* There is no root development after several weeks.
If you notice any of these signs, remove the affected leaf cutting and start with a fresh one. Ensure that you are using clean water and a well-draining potting mix.
9. Can I propagate aloe vera from a broken leaf?
Yes, you can propagate aloe vera from a broken leaf, as long as the leaf is healthy and not damaged by disease or pests. Follow the same steps as you would for propagating from a leaf cutting.
10. How do I care for my aloe vera plant after it has been successfully rooted and planted?
Once your aloe vera plant has been successfully rooted and planted, provide it with bright, indirect light, well-draining soil, and infrequent watering. Fertilize it sparingly with a balanced fertilizer during the growing season. Repot the plant as needed into a larger container. With proper care, your aloe vera plant will thrive for many years to come. Remember that proper drainage is key to preventing root rot, a common issue with aloe vera.
Leave a Comment