

Growing Yellow Habanero Peppers can seem daunting, but trust me, with a few simple tricks, you can transform your backyard into a vibrant pepper paradise! Imagine the satisfaction of harvesting your own fiery, sunshine-yellow habaneros, ready to add a kick to your favorite dishes. Forget those bland, store-bought peppers – we’re talking about homegrown flavor that explodes with every bite.
For centuries, peppers have been cultivated and cherished across cultures, from their origins in South America to their global popularity today. The habanero, in particular, boasts a rich history, prized for its intense heat and unique fruity notes. But let’s be honest, sometimes getting those peppers to thrive can feel like a battle. That’s where these DIY hacks come in!
Are you tired of struggling with stunted growth, blossom drop, or pest infestations? Do you dream of a bountiful harvest but feel overwhelmed by the complexities of pepper cultivation? I understand! That’s why I’ve compiled these easy-to-follow tips and tricks to help you succeed in growing Yellow Habanero Peppers, even if you’re a complete beginner. Get ready to unlock the secrets to pepper perfection and enjoy the fruits (or should I say, peppers!) of your labor.
Growing Yellow Habanero Peppers: A Fiery DIY Guide
Hey there, fellow chili enthusiasts! I’m so excited to share my experience and tips for growing those vibrant, scorching yellow habanero peppers right in your own backyard (or balcony!). These little suns pack a serious punch, and the satisfaction of harvesting your own homegrown heat is simply unmatched. Let’s dive in!
Choosing Your Seeds and Starting Indoors
The first step to habanero heaven is getting your hands on some quality seeds. You can find them online, at your local garden center, or even from a friend who’s already growing them. I personally prefer starting my seeds indoors, especially if you live in a region with a shorter growing season. This gives your peppers a head start and ensures a bountiful harvest.
What you’ll need:
* Yellow habanero pepper seeds
* Seed starting tray or small pots
* Seed starting mix (a light, well-draining soil)
* Spray bottle with water
* Heat mat (optional, but recommended)
* Grow light (optional, but recommended)
Step-by-step instructions:
1. Prepare your seed starting tray or pots: Fill your chosen containers with the seed starting mix. Gently tap the containers to settle the soil.
2. Sow the seeds: Make a small indentation (about ¼ inch deep) in the center of each cell or pot. Place 1-2 seeds in each indentation.
3. Cover the seeds: Lightly cover the seeds with more seed starting mix.
4. Water gently: Use a spray bottle to mist the soil until it’s evenly moist, but not soggy.
5. Provide warmth: Place the seed starting tray or pots on a heat mat. Habanero seeds germinate best in warm temperatures (around 80-85°F or 27-29°C).
6. Provide light: If you’re using a grow light, position it a few inches above the seed starting tray or pots. If you’re relying on natural light, place them in a sunny window.
7. Maintain moisture: Keep the soil consistently moist by misting it regularly. Avoid overwatering, as this can lead to damping off (a fungal disease that can kill seedlings).
8. Be patient: Habanero seeds can take anywhere from 7 to 21 days to germinate, so don’t get discouraged if you don’t see sprouts right away.
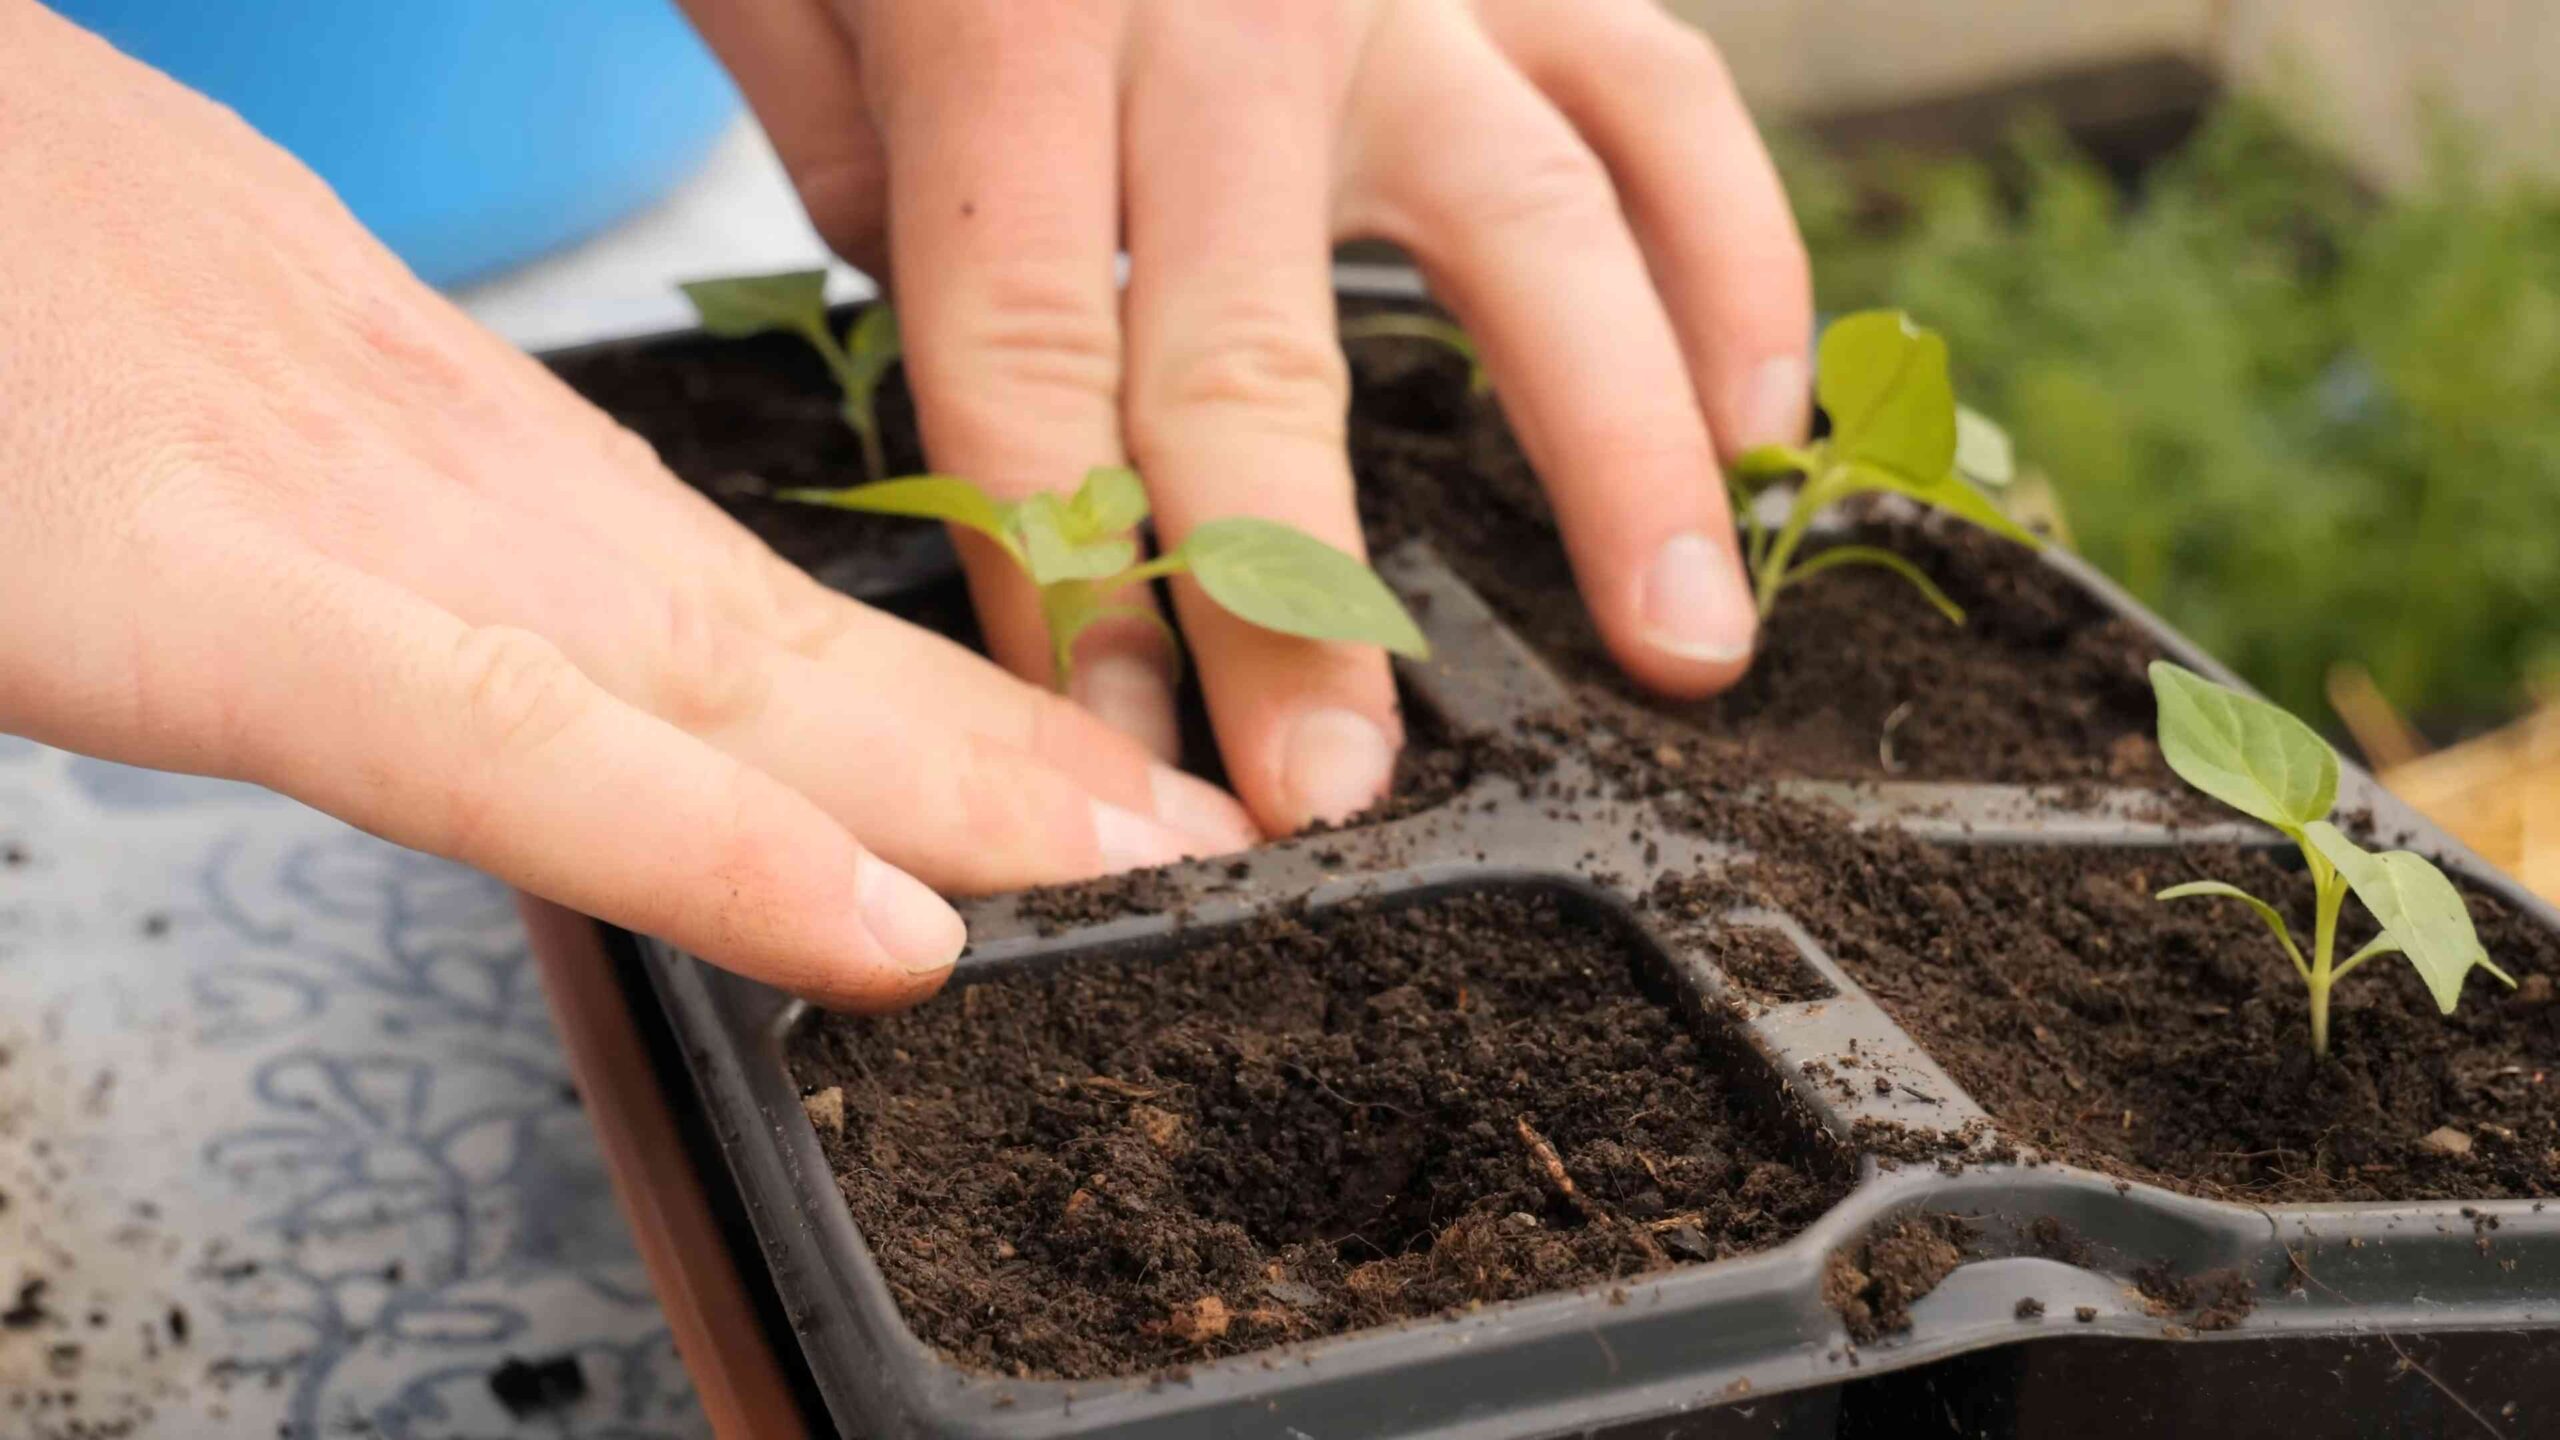
9. Thin the seedlings: Once the seedlings have developed their first true leaves (the second set of leaves that appear after the initial seed leaves), thin them out by snipping off the weaker seedling in each cell or pot. This will give the remaining seedling more room to grow.
Transplanting Your Seedlings
Once your seedlings are about 6-8 inches tall and have a few sets of true leaves, they’re ready to be transplanted into larger pots or directly into your garden.
What you’ll need:
* Your healthy habanero seedlings
* Larger pots (at least 1 gallon in size) or a prepared garden bed
* Potting mix or garden soil
* Trowel or small shovel
* Watering can or hose
Step-by-step instructions:
1. Harden off your seedlings: Before transplanting, you’ll need to “harden off” your seedlings. This means gradually exposing them to outdoor conditions over a period of 7-10 days. Start by placing them in a sheltered spot outdoors for an hour or two each day, gradually increasing the amount of time they spend outside. This will help them acclimate to the sun, wind, and temperature changes.
2. Prepare your pots or garden bed: If you’re using pots, fill them with a good quality potting mix. If you’re planting in a garden bed, make sure the soil is well-draining and amended with compost or other organic matter. Habaneros prefer slightly acidic soil with a pH of 6.0-6.8.
3. Dig a hole: Dig a hole in the pot or garden bed that’s slightly larger than the root ball of your seedling.
4. Gently remove the seedling: Carefully remove the seedling from its original container, being careful not to damage the roots.
5. Place the seedling in the hole: Place the seedling in the hole and gently backfill with soil.
6. Water thoroughly: Water the seedling thoroughly after transplanting.
7. Space your plants: If you’re planting multiple habanero plants, space them about 18-24 inches apart. This will give them enough room to grow and prevent overcrowding.
Caring for Your Habanero Plants
Now that your habanero plants are in their new homes, it’s time to provide them with the care they need to thrive.
Sunlight: Habaneros need at least 6-8 hours of sunlight per day. Choose a location that receives plenty of sun.
Watering: Water your habanero plants regularly, especially during hot, dry weather. Allow the soil to dry out slightly between waterings. Avoid overwatering, as this can lead to root rot. I usually check the soil moisture by sticking my finger about an inch deep. If it feels dry, it’s time to water.
Fertilizing: Fertilize your habanero plants every 2-3 weeks with a balanced fertilizer. You can also use a fertilizer specifically formulated for peppers and tomatoes. I like to use a liquid fertilizer diluted to half strength.
Pruning: Pruning isn’t strictly necessary, but it can help to improve air circulation and encourage bushier growth. You can prune away any dead or yellowing leaves, as well as any suckers (small shoots that grow from the base of the plant).
Pest and disease control: Keep an eye out for pests such as aphids, spider mites, and whiteflies. You can control these pests with insecticidal soap or neem oil. Habaneros are also susceptible to diseases such as blossom end rot and fungal infections. To prevent these problems, make sure your plants have good air circulation and avoid overwatering. I also like to add a layer of mulch around the base of the plants to help retain moisture and suppress weeds.
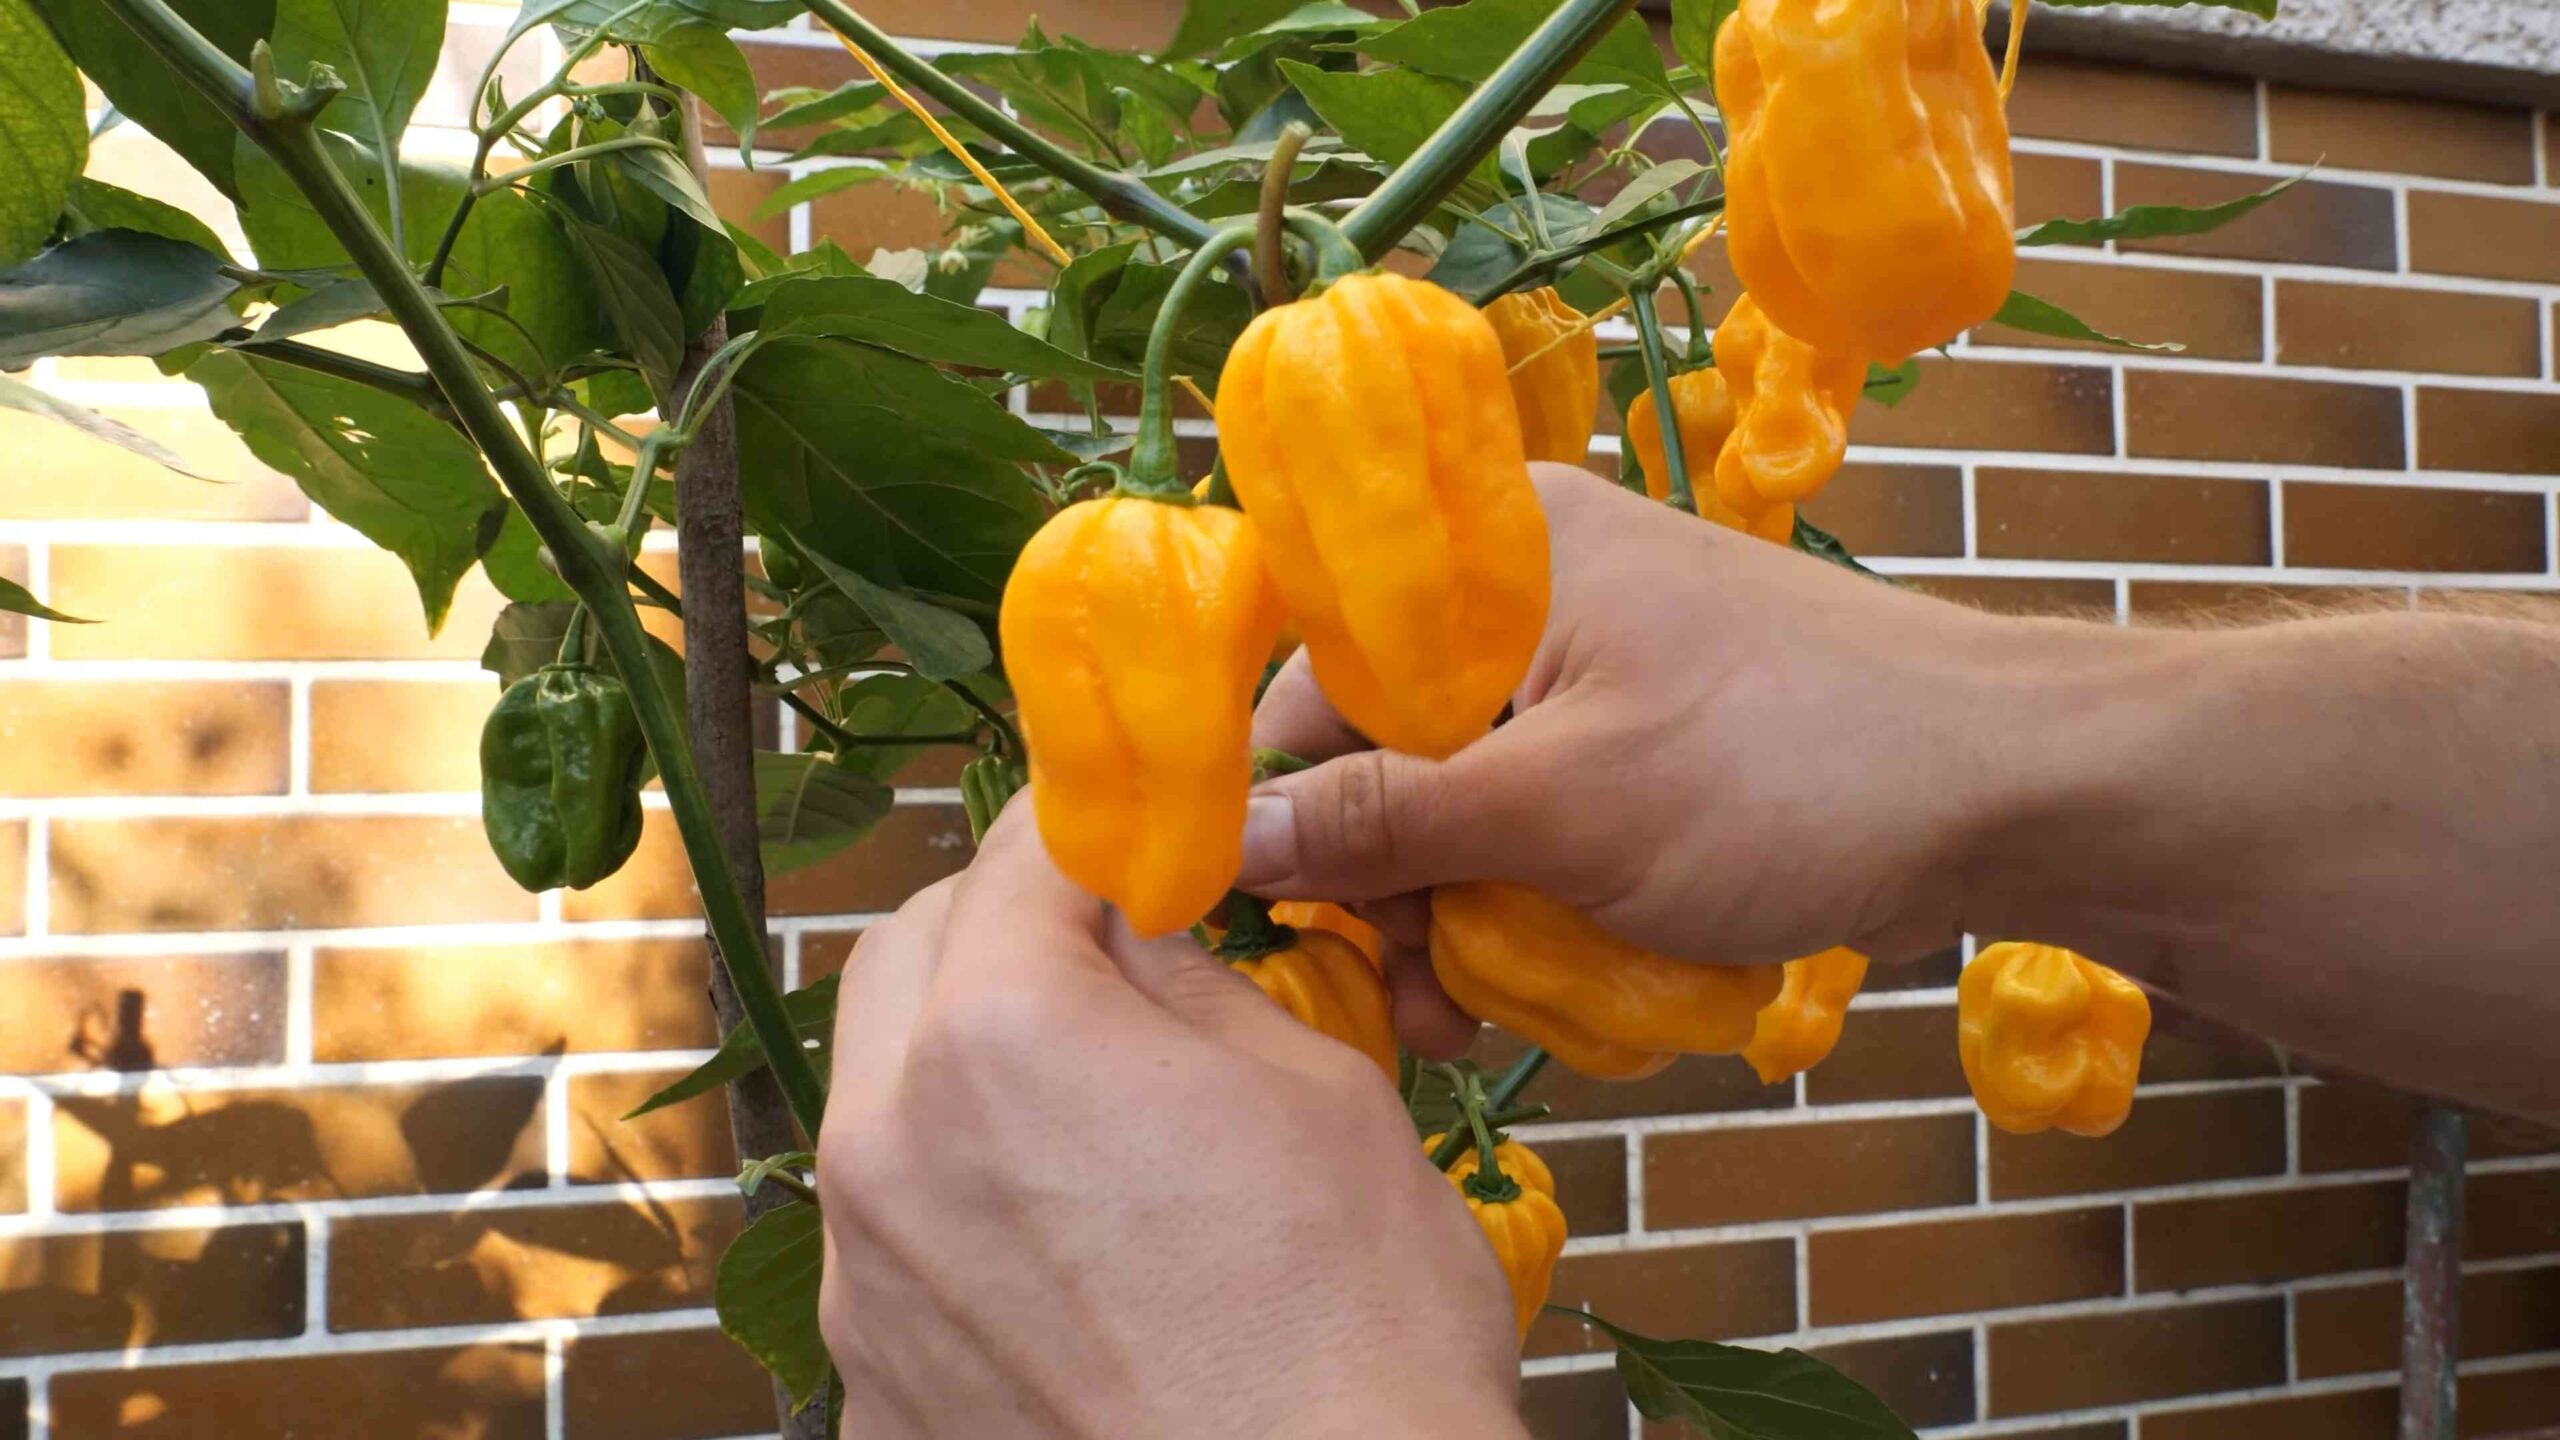
Harvesting Your Yellow Habaneros
The moment you’ve been waiting for! Yellow habaneros are typically ready to harvest about 80-90 days after transplanting. They’ll turn a vibrant yellow color and feel firm to the touch.
Step-by-step instructions:
1. Use gloves: Habaneros are extremely hot, so it’s important to wear gloves when harvesting them.
2. Cut the peppers from the plant: Use a pair of scissors or pruning shears to cut the peppers from the plant, leaving a small stem attached.
3. Handle with care: Be careful not to touch your eyes or face after handling habaneros.
4. Enjoy your harvest: Now you can enjoy the fruits (or rather, the peppers!) of your labor. Use your yellow habaneros to make hot sauce, salsa, or add a fiery kick to your favorite dishes.
Dealing with Common Problems
Even with the best care, you might encounter some problems while growing your habaneros. Here are a few common issues and how to address them:
* Blossom end rot: This is a condition where the blossom end of the pepper turns black and leathery. It’s usually caused by a calcium deficiency. To prevent blossom end rot, make sure your soil is rich in calcium and water your plants consistently. You can also add calcium to the soil by using bone meal or eggshells.
* Aphids: These small, sap-sucking insects can weaken your plants and spread diseases. You can control aphids with insecticidal soap or neem oil.
* Spider mites: These tiny pests can cause yellowing and stippling on the leaves. You can control spider mites with insecticidal soap or neem oil.
* Fungal diseases: Fungal diseases such as powdery mildew and leaf spot can cause spots and lesions on the leaves. To prevent fungal diseases, make sure your plants have good air circulation and avoid overwatering. You can also treat fungal diseases with a fungicide.
Tips for a Bountiful Harvest
Here are a few extra tips to help you maximize your habanero harvest:
* Use a trellis or stake: Habanero plants can get quite tall and heavy, so it’s a good idea to provide them with support. You can use a trellis or stake to keep them from falling over.
* Pinch off the first few flowers: This may seem counterintuitive, but pinching off the first few flowers will encourage the plant to focus its energy on vegetative growth, resulting in a stronger, more productive plant.
* Water deeply and less frequently: Deep watering encourages the roots to grow deeper, making the plant more drought-tolerant.
* Mulch around the plants:
Conclusion
So, there you have it! Growing your own yellow habanero peppers isn’t just a gardening project; it’s an adventure in flavor, a testament to your green thumb, and a guaranteed way to spice up your culinary creations. We’ve walked through the entire process, from selecting the perfect seeds to harvesting those fiery little gems. But why is this DIY trick a must-try?
Firstly, the flavor. Store-bought habaneros, while convenient, often lack the nuanced heat and fruity undertones that homegrown peppers possess. When you nurture your own plants, you control the environment, ensuring optimal conditions for flavor development. Imagine the vibrant, citrusy heat of a freshly picked yellow habanero, adding a kick to your salsas, sauces, and even cocktails. It’s an experience that simply can’t be replicated with commercially grown peppers.
Secondly, the satisfaction. There’s an undeniable sense of accomplishment that comes with nurturing a plant from seed to harvest. Watching those tiny seedlings emerge, patiently tending to them as they grow, and finally reaping the rewards of your labor is incredibly rewarding. It’s a connection to nature, a reminder of the power of patience, and a source of pride that you can share with friends and family.
Thirdly, the cost savings. While the initial investment in seeds, soil, and pots might seem daunting, consider the long-term benefits. A single healthy yellow habanero plant can produce dozens of peppers throughout the growing season, saving you money on expensive store-bought varieties. Plus, you’ll have a constant supply of fresh, flavorful peppers at your fingertips.
But the journey doesn’t end here! Feel free to experiment with different growing techniques. Try hydroponics for faster growth, or companion planting with basil or carrots to deter pests. Explore different soil mixes to find the perfect balance for your climate. Consider growing your yellow habanero peppers in containers, allowing you to move them indoors during colder months and extend your growing season.
And don’t be afraid to get creative with your harvest! Beyond the usual salsas and hot sauces, try pickling your habaneros for a tangy treat, or drying them to create your own chili powder. Infuse olive oil with their fiery flavor, or add them to your favorite soups and stews for an extra kick. The possibilities are endless!
We encourage you to embrace this DIY project and experience the joy of growing your own yellow habanero peppers. It’s a rewarding, flavorful, and cost-effective way to add some spice to your life. And most importantly, we want to hear about your experiences! Share your tips, tricks, and triumphs in the comments below. Let’s build a community of passionate pepper growers and learn from each other. What growing medium did you find most effective? What pests did you encounter, and how did you combat them? What are your favorite recipes using yellow habaneros? Your insights will help others on their pepper-growing journey. So, grab your seeds, get your hands dirty, and prepare to be amazed by the power of homegrown flavor!
FAQ
What is the best time to start growing yellow habanero peppers?
The ideal time to start growing yellow habanero peppers depends on your climate. In general, you should start seeds indoors 6-8 weeks before the last expected frost. This allows the seedlings to develop a strong root system before being transplanted outdoors. If you live in a warmer climate with a longer growing season, you can start seeds directly in the ground after the last frost. However, starting indoors is generally recommended for better control over the growing environment and a head start on the season.
How much sunlight do yellow habanero peppers need?
Yellow habanero peppers thrive in full sunlight, requiring at least 6-8 hours of direct sunlight per day. Insufficient sunlight can lead to leggy growth, reduced pepper production, and less intense flavor. If you’re growing your peppers indoors, use grow lights to supplement natural sunlight. When transplanting outdoors, choose a location that receives ample sunlight throughout the day.
What type of soil is best for growing yellow habanero peppers?
Yellow habanero peppers prefer well-draining, fertile soil with a slightly acidic pH (around 6.0-6.8). A good soil mix should contain a combination of organic matter, such as compost or aged manure, and materials that promote drainage, such as perlite or vermiculite. Avoid heavy clay soils, as they can retain too much moisture and lead to root rot. You can also amend your soil with a balanced fertilizer to provide essential nutrients for healthy growth.
How often should I water my yellow habanero pepper plants?
Water your yellow habanero pepper plants regularly, especially during hot and dry weather. The soil should be kept consistently moist but not waterlogged. Check the soil moisture by inserting your finger about an inch deep. If the soil feels dry, it’s time to water. Avoid overwatering, as this can lead to root rot and other fungal diseases. During cooler periods, you may need to water less frequently.
What are some common pests and diseases that affect yellow habanero peppers?
Common pests that can affect yellow habanero peppers include aphids, spider mites, whiteflies, and pepper weevils. These pests can damage leaves, stems, and fruits, reducing pepper production. To control pests, you can use insecticidal soap, neem oil, or introduce beneficial insects, such as ladybugs. Common diseases include fungal diseases like powdery mildew and blossom end rot. To prevent diseases, ensure good air circulation, avoid overwatering, and use a fungicide if necessary. Blossom end rot is often caused by calcium deficiency, so amend your soil with calcium if needed.
How do I know when my yellow habanero peppers are ready to harvest?
Yellow habanero peppers are typically ready to harvest when they turn a vibrant yellow color and are firm to the touch. The peppers should also be relatively smooth and free from blemishes. The time it takes for peppers to mature can vary depending on the variety and growing conditions, but it generally takes around 80-100 days from transplanting. Use pruning shears or scissors to cut the peppers from the plant, leaving a small stem attached.
Can I grow yellow habanero peppers in containers?
Yes, yellow habanero peppers can be successfully grown in containers. Choose a container that is at least 5 gallons in size to provide enough room for the roots to grow. Use a well-draining potting mix and ensure that the container has drainage holes. Container-grown peppers may require more frequent watering and fertilization than those grown in the ground. You can also move containers indoors during colder months to extend the growing season.
How can I increase the heat of my yellow habanero peppers?
Several factors can influence the heat level of your yellow habanero peppers. Stressing the plants slightly, such as by withholding water slightly before harvest, can increase capsaicin production, the compound responsible for the heat. Also, ensuring the plants receive plenty of sunlight and warm temperatures can contribute to hotter peppers. Some growers believe that adding Epsom salts to the soil can also increase heat levels, but this is not scientifically proven.
What can I do with my harvested yellow habanero peppers?
The possibilities are endless! You can use your harvested yellow habanero peppers to make salsas, hot sauces, chili powders, and infused oils. You can also pickle them, dry them, or add them to your favorite soups, stews, and stir-fries. Be sure to handle the peppers with care, wearing gloves to protect your skin from the capsaicin. You can also freeze the peppers for later use.
How do I save seeds from my yellow habanero peppers for next year?
To save seeds from your yellow habanero peppers, select the healthiest and most mature peppers from your harvest. Cut the peppers open and remove the seeds. Spread the seeds out on a paper towel and allow them to dry completely for several days. Once the seeds are dry, store them in an airtight container in a cool, dark, and dry place. Properly stored seeds can remain viable for several years. Remember that if you grew your peppers near other pepper varieties, there’s a chance of cross-pollination, which could result in variations in the next generation.
Leave a Comment