

Bathroom cleaning hacks – who doesn’t need a few of those up their sleeve? Let’s be honest, cleaning the bathroom is nobody’s favorite chore. It’s right up there with doing taxes and going to the dentist! But what if I told you there were simple, effective, and even *fun* ways to tackle that grime and get your bathroom sparkling?
For centuries, people have been searching for easier ways to keep their homes clean. From ancient Roman bathhouses meticulously maintained by slaves to the Victorian era’s obsession with hygiene, the desire for a clean and healthy living space is deeply ingrained in our history. While we may not have the same resources as those bygone eras, we *do* have something even better: clever DIY solutions!
That’s where these bathroom cleaning hacks come in. I know, I know, you’re probably thinking, “Another cleaning article? Yawn.” But trust me, this isn’t your grandma’s cleaning guide. We’re talking about quick, easy, and budget-friendly tricks that will save you time, money, and a whole lot of elbow grease. Think of it as unlocking secret levels in the game of bathroom cleaning. We’ll explore everything from banishing hard water stains with everyday ingredients to decluttering your countertops with ingenious storage solutions. So, grab your rubber gloves (or don’t – some of these are *that* easy!), and let’s get started on transforming your bathroom into a sparkling sanctuary!
DIY Bathroom Cleaning Power: The Baking Soda & Vinegar Volcano!
Okay, friends, let’s talk bathroom cleaning. I know, not the most glamorous topic, but a sparkling clean bathroom? Totally worth it! I’m going to share my absolute favorite, super effective, and surprisingly fun DIY cleaning hack: the baking soda and vinegar volcano. Yes, you read that right, volcano! It’s not just for science projects anymore. This method is fantastic for tackling grime, soap scum, and even those stubborn stains that just won’t budge. Plus, it’s eco-friendly and uses ingredients you probably already have in your pantry. Let’s get started!
What You’ll Need: Your Cleaning Arsenal
Before we dive in, let’s gather our supplies. This is a pretty simple list, which is one of the reasons I love this hack so much.
* Baking Soda: The star of the show! Baking soda is a mild abrasive and a natural deodorizer.
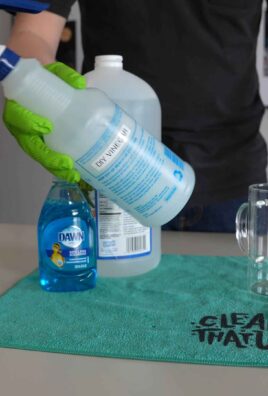
* White Vinegar: Our acidic powerhouse! Vinegar helps to dissolve mineral deposits and cut through grease.
* Spray Bottle: For easy application of the vinegar.
* Old Toothbrush or Scrub Brush: For scrubbing those hard-to-reach areas.
* Microfiber Cloths: These are my go-to for wiping surfaces clean without leaving streaks.
* Rubber Gloves: Protect those precious hands!
* Optional: Essential Oils: A few drops of your favorite essential oil (like lemon, tea tree, or lavender) can add a pleasant scent.
Tackling the Toilet: The Volcano Eruption
The toilet is often the dirtiest part of the bathroom, so let’s start there. This is where the “volcano” effect really shines.
1. Prepare the Toilet Bowl: Flush the toilet to wet the bowl. This helps the baking soda stick.
2. Apply Baking Soda: Generously sprinkle about one cup of baking soda around the inside of the toilet bowl, making sure to coat the sides as much as possible.
3. The Vinegar Flood: Slowly pour about one to two cups of white vinegar into the toilet bowl. Get ready for the fizz! This is the “volcano” reaction – the baking soda and vinegar are reacting to create carbon dioxide.
4. Let it Fizz: Allow the mixture to fizz and bubble for at least 30 minutes. For really tough stains, you can let it sit overnight. The longer it sits, the more time it has to break down the grime.
5. Scrub-a-dub-dub: After the soaking time, use your toilet brush to thoroughly scrub the inside of the bowl, paying special attention to any stains or rings.
6. Flush Away the Grime: Flush the toilet to rinse away the baking soda and vinegar mixture. You should see a noticeable difference!
7. Repeat if Necessary: If you still see some stubborn stains, repeat the process. Sometimes, it takes a couple of tries to get everything sparkling clean.
Cleaning the Sink and Countertop: A Gentle Approach
The sink and countertop require a slightly gentler approach, but the baking soda and vinegar combo still works wonders.
1. Create a Baking Soda Paste: In a small bowl, mix baking soda with a little bit of water to create a thick paste. The consistency should be similar to toothpaste.
2. Apply the Paste: Using your fingers or a damp cloth, apply the baking soda paste to the sink and countertop, focusing on areas with soap scum, water stains, or toothpaste splatters.
3. Vinegar Power: Fill your spray bottle with white vinegar. Lightly spray the baking soda paste with vinegar. You’ll see a slight fizzing reaction.
4. Gentle Scrubbing: Use a soft cloth or sponge to gently scrub the surfaces. Avoid using abrasive scrubbers, as they can scratch the sink and countertop.
5. Rinse Thoroughly: Rinse the sink and countertop thoroughly with water to remove all traces of baking soda and vinegar.
6. Dry and Shine: Use a clean, dry microfiber cloth to dry the surfaces and buff them to a shine.
Shower and Tub Cleaning: Banishing Soap Scum
Soap scum is the bane of every bathroom cleaner’s existence. But fear not! The baking soda and vinegar duo can tackle even the most stubborn soap scum.
1. Pre-Wet the Surfaces: Lightly wet the shower walls and tub with water. This helps the baking soda stick.
2. Baking Soda Coating: Sprinkle baking soda generously over the shower walls and tub, focusing on areas with heavy soap scum buildup.
3. Vinegar Spray: Fill your spray bottle with white vinegar and spray the baking soda-covered surfaces. Again, you’ll see that satisfying fizzing reaction.
4. Soak Time: Let the mixture sit for at least 15-20 minutes. For really tough soap scum, you can let it sit for up to an hour.
5. Scrubbing Action: Use a scrub brush or sponge to scrub the shower walls and tub. You may need to put in a little elbow grease, but the baking soda and vinegar will have loosened the soap scum, making it easier to remove.
6. Rinse and Repeat (If Needed): Rinse the shower walls and tub thoroughly with water. If you still see some soap scum, repeat the process.
7. Vinegar Rinse (Optional): For extra shine and to prevent future soap scum buildup, you can do a final rinse with a diluted vinegar solution (1 part vinegar to 1 part water).
8. Dry It Off: Use a squeegee or a clean, dry towel to dry the shower walls and tub. This will help prevent water spots and keep your shower looking cleaner for longer.
Cleaning Showerheads: Removing Mineral Deposits
Hard water can leave mineral deposits on your showerhead, reducing water pressure and making it look unsightly. Here’s how to clean it with vinegar:
1. Vinegar Bath: Fill a plastic bag with white vinegar.
2. Submerge the Showerhead: Attach the bag to the showerhead using a rubber band, ensuring that the showerhead is completely submerged in the vinegar.
3. Soak Overnight: Let the showerhead soak in the vinegar overnight. This will give the vinegar plenty of time to dissolve the mineral deposits.
4. Remove and Rinse: In the morning, remove the bag and rinse the showerhead thoroughly with water.
5. Scrub Away Remaining Deposits: Use an old toothbrush to scrub away any remaining mineral deposits.
6. Run the Shower: Run the shower for a few minutes to flush out any remaining vinegar and debris.
Cleaning Grout: Targeting Grime and Mildew
Grout can be a breeding ground for grime and mildew. Baking soda and vinegar can help to clean and brighten your grout lines.
1. Baking Soda Paste: Mix baking soda with a little bit of water to create a thick paste.
2. Apply to Grout Lines: Apply the baking soda paste to the grout lines using your fingers or an old toothbrush.
3. Vinegar Spray: Spray the baking soda-covered grout lines with white vinegar.
4. Scrubbing Time: Use an old toothbrush or grout brush to scrub the grout lines.
5. Rinse and Repeat: Rinse the grout lines thoroughly with water. If you still see some grime or mildew, repeat the process.
6. Ventilate: Make sure to ventilate the bathroom well to allow the grout to dry completely.
Mirror, Mirror: Streak-Free Shine
For a streak-free shine on your bathroom mirror, vinegar is your best friend.
1. Vinegar Solution: Mix equal parts white vinegar and water in a spray bottle.
2. Spray the Mirror: Lightly spray the mirror with the vinegar solution.
3. Wipe Clean: Use a clean, dry microfiber cloth to wipe the mirror clean.
4. Buff to a Shine: Buff the mirror with a dry microfiber cloth to remove any streaks and leave it sparkling clean.
A Few Extra Tips and Tricks:
* Essential Oils: As I mentioned earlier, adding a few drops of your favorite essential oil to the vinegar solution can add a pleasant scent to your bathroom. Lemon, tea tree, and lavender are all great choices.
* Preventative Measures: To keep your bathroom cleaner for longer, try to wipe down surfaces after each use. This will help prevent soap scum and water spots from building up.
* Ventilation is Key: Always make sure your bathroom is well-ventilated to prevent mold and mildew growth. Run the exhaust fan during and after showers.
* Test in an Inconspicuous Area: Before applying baking soda and vinegar to any surface, test it in an inconspicuous area to make sure it doesn’t damage the material.
* Safety First: Always wear rubber gloves when cleaning to

Conclusion
So, there you have it! This simple, yet incredibly effective bathroom cleaning hack is a game-changer for anyone looking to streamline their cleaning routine and achieve a sparkling clean bathroom without harsh chemicals or back-breaking scrubbing. We’ve shown you how to harness the power of readily available ingredients to create a potent cleaning solution that tackles soap scum, hard water stains, and grime with ease.
Why is this a must-try? Because it’s not just about cleaning; it’s about reclaiming your time and energy. Imagine spending less time scrubbing and more time enjoying your clean, fresh bathroom. This DIY method is also a fantastic way to reduce your reliance on commercial cleaning products, which often contain harmful chemicals that can irritate your skin and pollute the environment. Plus, it’s incredibly cost-effective! You’re likely to already have most of the ingredients in your pantry, making this a budget-friendly alternative to expensive store-bought cleaners.
But the beauty of this bathroom cleaning hack lies in its versatility. Feel free to experiment with variations to suit your specific needs and preferences. For instance, if you’re dealing with particularly stubborn stains, try adding a tablespoon of borax to the mixture for an extra boost of cleaning power. Or, if you prefer a more fragrant cleaning experience, add a few drops of your favorite essential oil, such as lavender, tea tree, or eucalyptus. Tea tree oil, in particular, is known for its antibacterial properties, making it a great addition to your bathroom cleaning arsenal.
Another variation you might consider is using a different type of vinegar. While white vinegar is the most common and readily available, apple cider vinegar can also be used and offers a slightly milder scent. Just be sure to test any new variation on a small, inconspicuous area first to ensure it doesn’t damage the surface.
Don’t be afraid to customize this bathroom cleaning hack to make it your own! The key is to find what works best for your bathroom surfaces and your personal preferences.
We are confident that once you try this DIY cleaning solution, you’ll be amazed by the results. It’s a simple, effective, and eco-friendly way to keep your bathroom sparkling clean and fresh.
Now, it’s your turn! We encourage you to give this bathroom cleaning hack a try and see the difference it can make in your cleaning routine. And most importantly, we want to hear about your experience! Share your tips, variations, and before-and-after photos in the comments below. Let’s create a community of clean bathroom enthusiasts and share our knowledge to make cleaning a little less of a chore for everyone. We are eager to hear how this bathroom cleaning hack has transformed your cleaning routine. Happy cleaning!
Frequently Asked Questions
What types of surfaces can I use this bathroom cleaning hack on?
This DIY cleaning solution is generally safe for most bathroom surfaces, including tile, porcelain, ceramic, glass, and stainless steel. However, it’s crucial to avoid using it on natural stone surfaces like marble or granite, as the acidity of the vinegar can etch and damage these materials. Always test the solution on a small, inconspicuous area first to ensure it doesn’t cause any discoloration or damage. For natural stone, use a pH-neutral cleaner specifically designed for those surfaces. Also, avoid using it on any surface that is known to be sensitive to acidic cleaners. When in doubt, consult the manufacturer’s instructions for your specific bathroom fixtures and surfaces.
How often should I use this bathroom cleaning hack?
The frequency of use depends on how often you clean your bathroom and how quickly grime and soap scum build up. For general cleaning, using this solution once a week should be sufficient. However, if you have a busy household or notice buildup more frequently, you may need to use it more often. You can also use it as a spot cleaner for tackling specific stains or spills as they occur. Regular use of this cleaning hack will help prevent the buildup of stubborn grime and make your overall cleaning routine easier.
Can I store the leftover cleaning solution?
Yes, you can store the leftover cleaning solution in a spray bottle for future use. Be sure to label the bottle clearly to avoid any confusion. Store it in a cool, dark place away from direct sunlight and heat. The solution should remain effective for several weeks. However, if you notice any changes in color, odor, or consistency, it’s best to discard it and make a fresh batch. It’s always a good idea to make only as much solution as you need for each cleaning session to ensure maximum effectiveness.
Is this cleaning solution safe for septic systems?
Yes, this DIY cleaning solution is generally safe for septic systems. The ingredients are biodegradable and won’t harm the beneficial bacteria that are essential for the proper functioning of your septic system. However, it’s always a good idea to use cleaning products sparingly, regardless of whether they are commercial or homemade. Avoid pouring large amounts of any cleaning solution down the drain at once. If you have any concerns about the impact of cleaning products on your septic system, consult with a septic system professional.
What if I don’t like the smell of vinegar?
The smell of vinegar can be off-putting to some people. Fortunately, there are several ways to minimize or mask the vinegar scent. As mentioned earlier, you can add a few drops of your favorite essential oil to the cleaning solution. Lavender, lemon, tea tree, and eucalyptus are all popular choices for bathroom cleaning. You can also try using apple cider vinegar instead of white vinegar, as it has a milder scent. Another tip is to open a window or turn on the exhaust fan while cleaning to help ventilate the bathroom and dissipate the vinegar smell. The vinegar scent will typically dissipate within a few hours after cleaning.
Can I use this cleaning solution on mold and mildew?
While this cleaning solution can help prevent the growth of mold and mildew, it may not be effective at removing existing mold and mildew stains. For tackling mold and mildew, you may need a stronger solution, such as a bleach-based cleaner or a specialized mold and mildew remover. Always follow the manufacturer’s instructions when using these types of cleaners and take precautions to protect yourself from exposure to harmful fumes. For minor mold and mildew growth, you can try using a solution of equal parts water and hydrogen peroxide.
What safety precautions should I take when using this cleaning solution?
Although this DIY cleaning solution is made with natural ingredients, it’s still important to take some basic safety precautions. Avoid getting the solution in your eyes. If contact occurs, rinse thoroughly with water. Wear gloves to protect your skin, especially if you have sensitive skin. Keep the cleaning solution out of reach of children and pets. Never mix this cleaning solution with other cleaning products, especially bleach, as this can create dangerous fumes. Always test the solution on a small, inconspicuous area first to ensure it doesn’t damage the surface.


Leave a Comment