

Aloe vera leaf cuttings: sounds intimidating, right? But trust me, propagating aloe vera from leaf cuttings is surprisingly simple and incredibly rewarding! Forget spending money on new plants – with a little patience and these DIY tricks, you can multiply your aloe vera collection and share the goodness with friends and family.
Aloe vera has been cherished for centuries, with evidence of its medicinal use dating back to ancient Egypt. Known as the “plant of immortality,” it was used for everything from healing wounds to embalming. Today, we still value aloe vera for its soothing gel, packed with vitamins and antioxidants. But did you know you can easily grow more aloe vera plants from just a single leaf?
Why bother with this DIY project? Well, for starters, it’s budget-friendly! Instead of buying new aloe vera plants, you can create them yourself. Plus, it’s a fantastic way to expand your indoor garden and enjoy the many benefits of this amazing succulent. Imagine having a constant supply of fresh aloe vera gel for sunburns, minor cuts, or even as a natural ingredient in your skincare routine. This guide will provide you with all the tips and tricks you need to successfully propagate aloe vera leaf cuttings, even if you’re a complete beginner. Let’s get started!
Propagating Aloe Vera from Leaf Cuttings: A Comprehensive Guide
Hey plant lovers! Ever wondered if you could multiply your aloe vera plant just from a single leaf? Well, I’m here to tell you that while it’s not the *most* common method, it *is* possible, and I’m going to walk you through exactly how to do it. It takes patience, and success isn’t guaranteed, but the potential reward of more aloe vera goodness is totally worth the effort!
Understanding the Challenge
Before we dive in, let’s be real: aloe vera is typically propagated from pups (those little baby plants that grow around the base of the mother plant). Leaf cuttings are a bit trickier because aloe leaves don’t naturally have nodes for root growth like some other succulents. We’re essentially trying to encourage the leaf to form a callus and *then* roots, which requires specific conditions and a little bit of luck. But don’t let that discourage you! I’ve had some success with this method, and I’m confident you can too.
What You’ll Need
* A healthy aloe vera plant (the mother plant!)
* A sharp, clean knife or pruning shears
* Rooting hormone powder (optional, but highly recommended)
* Well-draining potting mix (cactus or succulent mix is ideal)
* A small pot or container with drainage holes
* A spray bottle filled with water
* A warm, bright location (but not direct sunlight)
* Patience!
Taking the Leaf Cutting
This is a crucial step, so pay close attention!
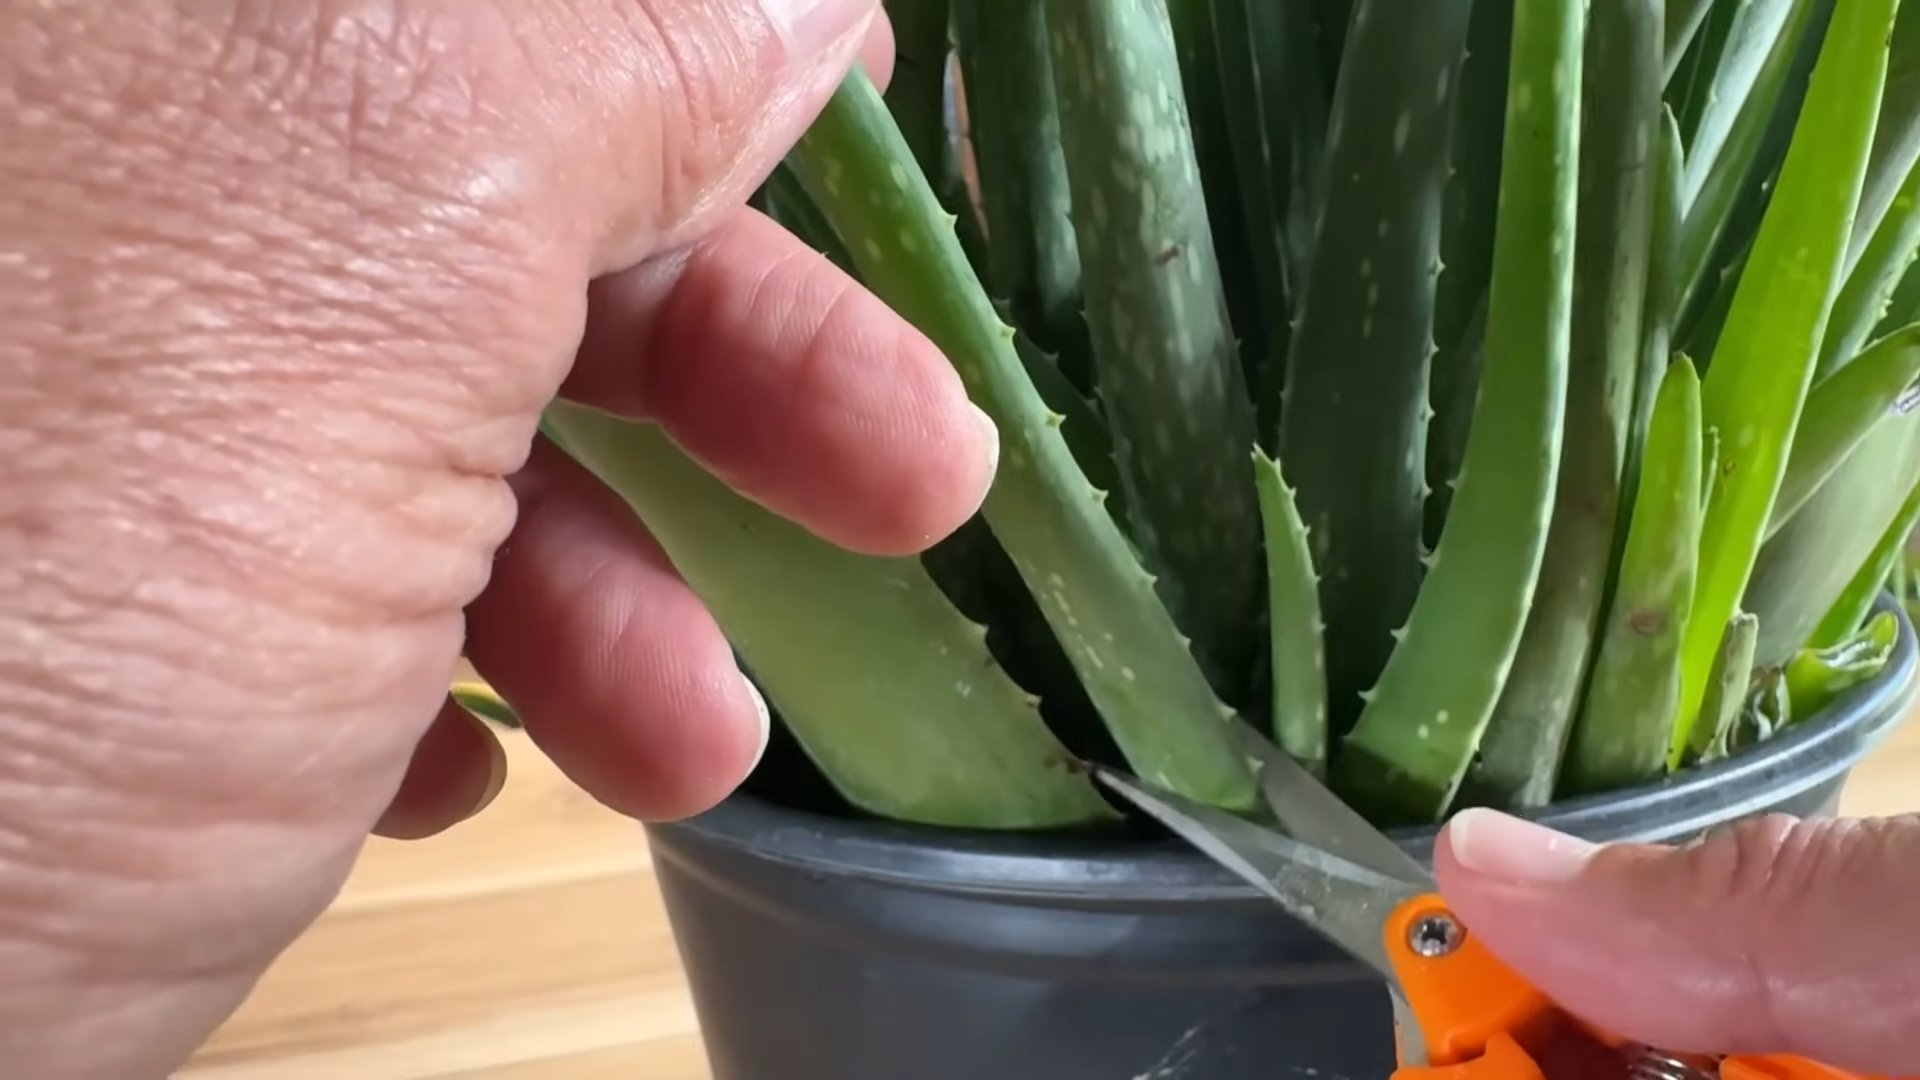
1. Choosing the Right Leaf: Select a mature, healthy leaf from your aloe vera plant. Look for leaves that are plump, green, and free from any blemishes or signs of disease. Avoid using very young or damaged leaves, as they are less likely to root successfully.
2. Making the Cut: Using your sharp, clean knife or pruning shears, carefully cut the leaf as close to the base of the plant as possible. Make a clean, straight cut to minimize damage to both the mother plant and the cutting. I like to angle the cut slightly so the bottom of the cutting has a larger surface area for root development.
3. Treating the Mother Plant: After removing the leaf, the mother plant will have an open wound. While aloe vera is pretty resilient, it’s a good idea to let the cut callous over to prevent infection. You can leave it as is, or you can sprinkle a little cinnamon powder on the cut surface. Cinnamon acts as a natural fungicide.
Callousing the Cutting
This is where the patience comes in!
1. Drying Time: Place the aloe vera leaf cutting in a dry, shaded area. The goal is to allow the cut end to callous over, forming a protective layer that will prevent rot when you plant it. This process typically takes 1-3 weeks, depending on the humidity and temperature.
2. Monitoring the Cutting: Check the cutting regularly for any signs of rot or mold. If you notice any, discard the cutting immediately. A healthy cutting will develop a dry, slightly hardened callus at the cut end. The callus should be firm to the touch.
Planting the Cutting
Almost there!
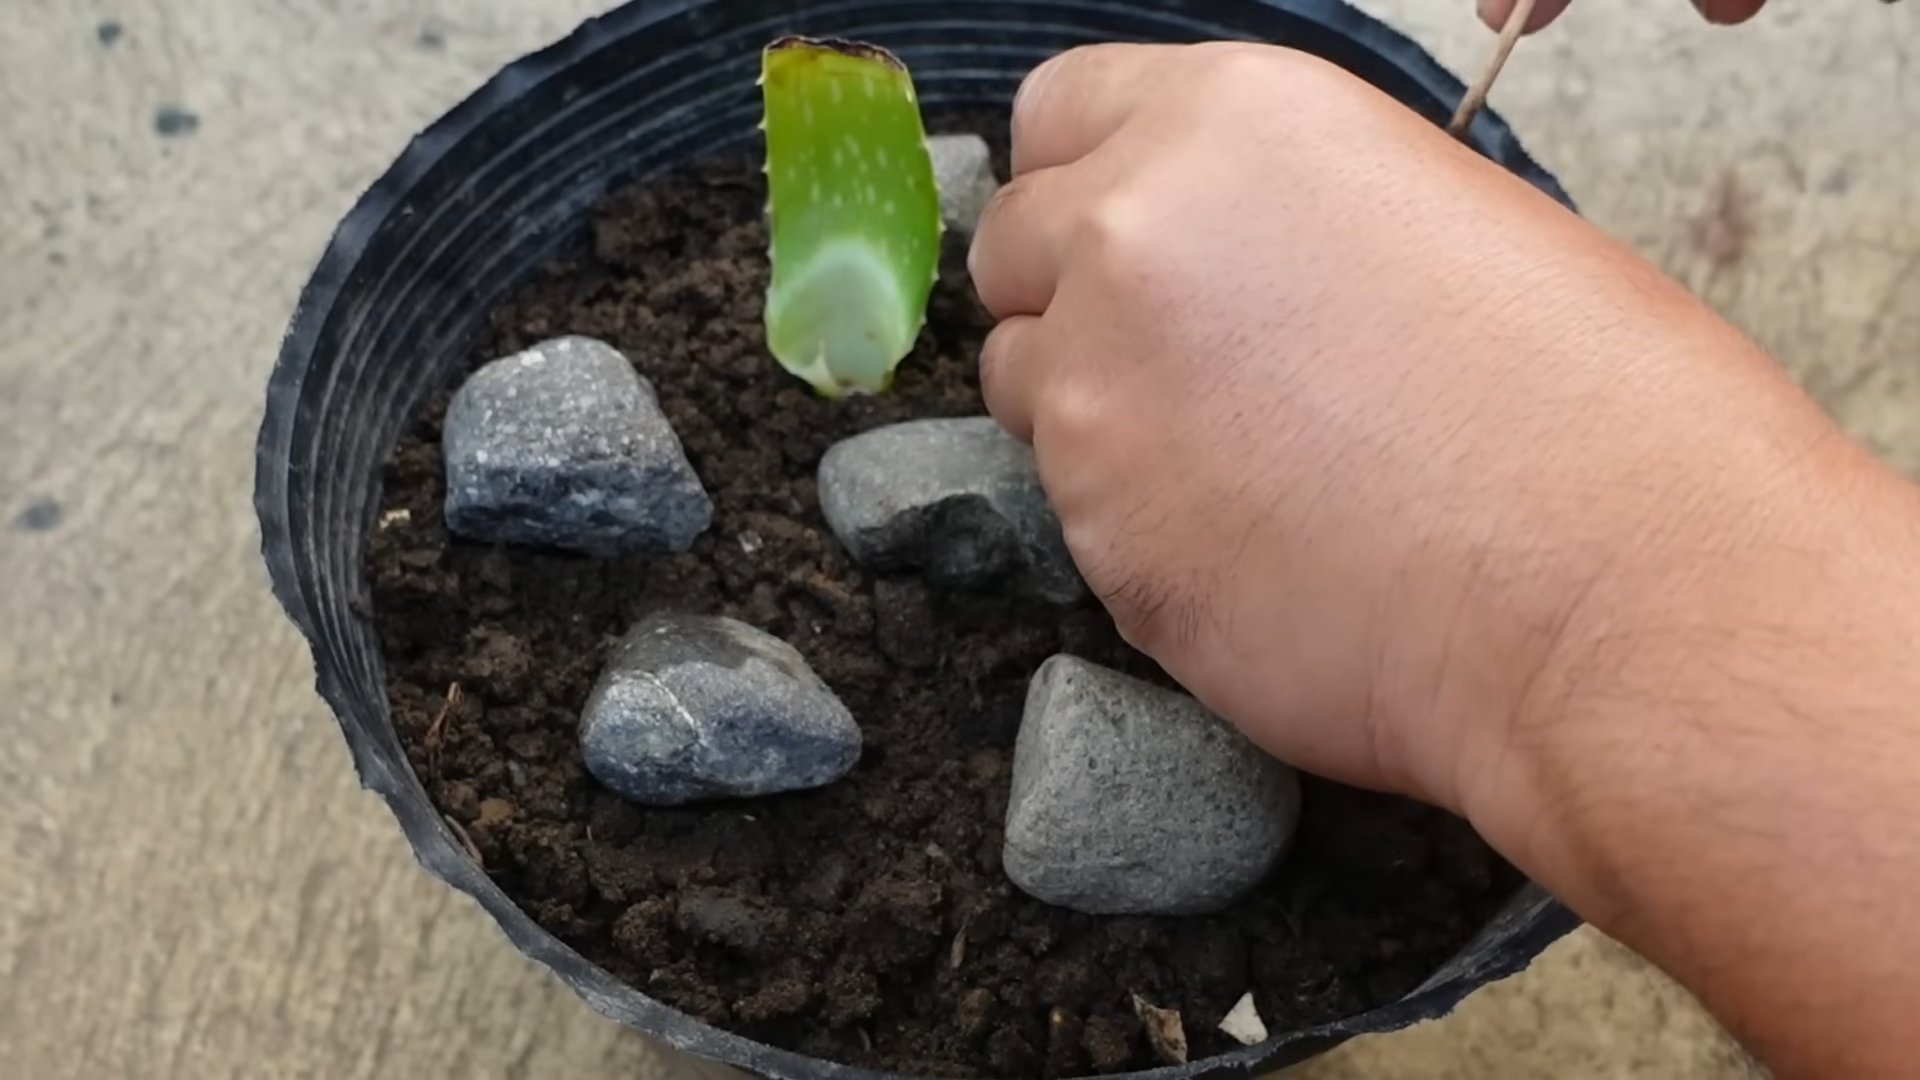
1. Preparing the Potting Mix: Fill your small pot or container with well-draining potting mix. Cactus or succulent mix is ideal because it allows excess water to drain away quickly, preventing root rot. Moisten the potting mix slightly before planting.
2. Applying Rooting Hormone (Optional but Recommended): Dip the calloused end of the aloe vera leaf cutting into rooting hormone powder. This will help stimulate root growth and increase your chances of success. Follow the instructions on the rooting hormone package. I find that using a small paintbrush to apply the hormone precisely to the calloused area works best.
3. Planting the Cutting: Insert the calloused end of the aloe vera leaf cutting into the potting mix, burying it about 1-2 inches deep. Make sure the cutting is stable and upright. You can use small pebbles or rocks to support the cutting if needed.
4. Watering: Lightly mist the potting mix with water. Avoid overwatering, as this can lead to rot. The soil should be slightly moist but not soggy.
Caring for the Cutting
The final stretch!
1. Location: Place the pot in a warm, bright location, but avoid direct sunlight. Direct sunlight can scorch the leaf cutting. An east-facing window is often a good choice.
2. Watering: Water sparingly, only when the potting mix is completely dry. Overwatering is the biggest enemy of aloe vera cuttings. I usually check the soil moisture by sticking my finger about an inch into the soil. If it feels dry, I’ll give it a light misting.
3. Humidity: Aloe vera cuttings prefer slightly higher humidity levels. You can increase humidity by placing a plastic bag over the pot (creating a mini-greenhouse effect) or by placing the pot on a tray filled with pebbles and water. Make sure the bottom of the pot isn’t sitting directly in the water, as this can lead to root rot.
4. Patience (Again!): Rooting can take several weeks or even months. Be patient and continue to provide the cutting with the proper care. You’ll know the cutting has rooted when you see new growth emerging from the base of the leaf. You can also gently tug on the cutting to see if it resists. If it feels firmly anchored in the soil, it has likely rooted.
Troubleshooting
Even with the best care, things can sometimes go wrong. Here are some common problems and how to address them:
* Rotting: If the cutting starts to rot, it’s usually due to overwatering or poor drainage. Remove the cutting from the pot immediately and discard it. Start again with a fresh cutting and make sure to use well-draining potting mix and water sparingly.
* Lack of Rooting: If the cutting doesn’t root after several months, it could be due to a number of factors, such as insufficient light, low humidity, or poor-quality potting mix. Try adjusting the growing conditions and see if that helps. You can also try using a stronger rooting hormone.
* Leaf Shriveling: If the leaf starts to shrivel, it could be due to underwatering or low humidity. Try misting the leaf regularly and increasing the humidity around the cutting.
Moving to a Larger Pot
Once your aloe vera cutting has established a strong root system and is showing signs of new growth, it’s time to transplant it to a larger pot.
1. Choosing the Right Pot: Select a pot that is slightly larger than the current pot. Make sure the pot has drainage holes to prevent waterlogging.
2. Preparing the Potting Mix: Fill the new pot with well-draining potting mix.
3. Removing the Plant: Carefully remove the aloe vera plant from its current pot. Gently loosen the soil around the roots and lift the plant out.
4. Transplanting: Place the aloe vera plant in the center of the new pot and fill in the surrounding space with potting mix. Gently pat down the soil to secure the plant.
5. Watering: Water the plant thoroughly after transplanting.
Ongoing Care
Now that your aloe vera plant is established, it’s important to provide it with the proper ongoing care to keep it healthy and thriving.
1. Light: Aloe vera plants prefer bright, indirect sunlight. Avoid placing them in direct sunlight, as this can scorch the leaves.
2. Watering: Water sparingly, only when the soil is completely dry. Overwatering is the most common cause of problems with aloe vera plants.
3. Fertilizing: Fertilize your aloe vera plant once or twice a year with a balanced fertilizer.
4. Repotting: Repot your aloe vera plant every 1-2 years, or when it becomes root-bound.
Final Thoughts
Propagating aloe vera from leaf cuttings is definitely a bit of an experiment, but it’s a fun and rewarding way to expand your collection. Remember to be patient, provide the right conditions, and don’t be afraid to experiment. Good luck, and happy growing! I hope this guide helps you on your aloe vera propagation journey. Let me know in the comments if you have any questions or tips to share!
Conclusion
So, there you have it! Transforming humble aloe vera leaf cuttings into thriving new plants is not only incredibly rewarding but also surprisingly simple. This DIY propagation method unlocks a world of possibilities, allowing you to expand your aloe vera collection, share the gift of natural healing with friends and family, and even create a small business from your green thumb endeavors.
Why is this DIY trick a must-try? Because it’s cost-effective, sustainable, and deeply satisfying. Instead of purchasing new aloe vera plants, you can multiply your existing one, reducing waste and saving money. Plus, nurturing new life from a single leaf cutting is an experience that connects you to the natural world in a profound way. It’s a tangible demonstration of nature’s resilience and the power of propagation.
But the benefits don’t stop there. Aloe vera, as you know, is a powerhouse of natural goodness. Having a readily available supply of aloe vera plants means you always have access to its soothing gel, perfect for treating sunburns, minor cuts, and skin irritations. It’s a natural remedy right at your fingertips!
Ready to take your aloe vera propagation to the next level? Consider these variations:
* Rooting Hormone Boost: While not strictly necessary, dipping the cut end of your aloe vera leaf cutting in rooting hormone powder can significantly speed up the rooting process. This is especially helpful if you live in a cooler climate or are propagating during the off-season.
* Terrarium Propagation: Create a mini-terrarium environment for your cuttings to increase humidity and promote faster root development. Simply place the cuttings in a clear container with a lid, ensuring adequate ventilation to prevent mold growth.
* Water Propagation: While soil propagation is generally recommended for aloe vera, some gardeners have success with water propagation. Place the cut end of the leaf cutting in a glass of water, ensuring that only the very tip is submerged. Change the water every few days to prevent bacterial growth. Once roots develop, transplant the cutting into well-draining soil.
* Experiment with Different Soil Mixes: While the recommended mix of cactus potting mix and perlite works well, feel free to experiment with other well-draining soil mixes. Consider adding a small amount of horticultural charcoal to improve drainage and prevent fungal growth.
Don’t be afraid to experiment and find what works best for you and your specific environment. The key is to provide your aloe vera leaf cuttings with the right conditions – well-draining soil, bright indirect light, and consistent moisture – and patience.
We are confident that you’ll find this DIY aloe vera propagation trick to be a rewarding and fulfilling experience. So, grab your aloe vera leaf, gather your supplies, and get ready to witness the magic of propagation firsthand.
We encourage you to try this method and share your experiences with us! Let us know in the comments below how your aloe vera leaf cuttings are doing. Share your tips, tricks, and any challenges you encounter along the way. Together, we can create a community of passionate aloe vera enthusiasts! Happy propagating!
Frequently Asked Questions (FAQ)
How long does it take for aloe vera leaf cuttings to root?
The rooting time for aloe vera leaf cuttings can vary depending on several factors, including the size of the cutting, the environmental conditions, and the specific aloe vera variety. Generally, you can expect to see roots developing within 4-8 weeks. However, some cuttings may take longer, while others may root more quickly. Patience is key! Ensure the soil stays consistently moist but not waterlogged, and provide bright, indirect light. Avoid direct sunlight, which can scorch the cuttings.
What is the best time of year to propagate aloe vera from leaf cuttings?
The best time to propagate aloe vera from leaf cuttings is during the spring or summer months, when the plant is actively growing. Warmer temperatures and longer daylight hours promote faster root development. However, you can propagate aloe vera at other times of the year, provided you can maintain suitable environmental conditions, such as adequate warmth and light. If propagating during the fall or winter, consider using a grow light to supplement natural light and maintain a consistent temperature.
Can I use any aloe vera leaf for propagation?
While you can technically use any aloe vera leaf for propagation, it’s best to select healthy, mature leaves from a well-established plant. Avoid using leaves that are damaged, diseased, or overly thin. The ideal leaf should be plump, firm, and free from any signs of discoloration or rot. Larger leaves tend to have more stored energy, which can increase the chances of successful rooting.
What type of soil is best for rooting aloe vera leaf cuttings?
Aloe vera requires well-draining soil to prevent root rot. A mixture of cactus potting mix and perlite is an excellent choice. The cactus potting mix provides essential nutrients, while the perlite improves drainage and aeration. You can also add a small amount of horticultural charcoal to further enhance drainage and prevent fungal growth. Avoid using heavy, clay-based soils, as they retain too much moisture and can lead to root rot.
How often should I water aloe vera leaf cuttings?
Water aloe vera leaf cuttings sparingly, allowing the soil to dry out slightly between waterings. Overwatering is a common cause of root rot, so it’s important to err on the side of caution. When you do water, make sure to thoroughly moisten the soil, but avoid getting water on the leaves. The frequency of watering will depend on the environmental conditions, such as temperature and humidity. In general, you may need to water more frequently during warmer months and less frequently during cooler months.
What kind of light do aloe vera leaf cuttings need?
Aloe vera leaf cuttings thrive in bright, indirect light. Avoid placing them in direct sunlight, which can scorch the leaves. A location near an east-facing or west-facing window is ideal. If you don’t have access to natural light, you can use a grow light to supplement the light. Ensure the grow light is positioned at a safe distance from the cuttings to prevent overheating.
How do I know if my aloe vera leaf cutting has rooted?
The easiest way to tell if your aloe vera leaf cutting has rooted is to gently tug on the cutting. If you feel resistance, it means that roots have developed and are anchoring the cutting in the soil. You can also carefully remove the cutting from the soil and inspect the roots. Look for small, white roots emerging from the cut end of the leaf. Once the cutting has developed a healthy root system, you can transplant it into a larger pot.
My aloe vera leaf cutting is turning brown. What should I do?
If your aloe vera leaf cutting is turning brown, it could be a sign of several issues, including overwatering, underwatering, or sunburn. Check the soil moisture to ensure it’s not too wet or too dry. If the soil is waterlogged, allow it to dry out completely before watering again. If the soil is bone dry, water thoroughly. Also, make sure the cutting is not exposed to direct sunlight. If the browning is limited to the cut end of the leaf, it may simply be a natural part of the healing process.
Can I propagate aloe vera from a broken leaf?
Yes, you can propagate aloe vera from a broken leaf, as long as the leaf is healthy and mature. Follow the same steps as you would for a regular leaf cutting. Allow the cut end to callous over for a few days before planting it in well-draining soil.
Is it possible to propagate aloe vera from a very small leaf cutting?
While it’s possible to propagate aloe vera from a very small leaf cutting, the chances of success are lower compared to using larger cuttings. Smaller cuttings have less stored energy, which can make it more difficult for them to develop roots. If you’re using a small cutting, make sure to provide it with optimal conditions, such as bright, indirect light, consistent moisture, and a well-draining soil mix.


Leave a Comment