

Baking Soda Peroxide Teeth Whitening: Are you ready to unlock a brighter, more confident smile without breaking the bank? I know I am! We’ve all seen those dazzling smiles on TV and wondered how to achieve the same effect. While professional teeth whitening treatments can be effective, they can also be quite expensive. But what if I told you there’s a simple, affordable, and surprisingly effective DIY solution using ingredients you probably already have in your kitchen?
The use of baking soda for oral hygiene dates back centuries, with historical records showing its use as a teeth cleaner and breath freshener in ancient civilizations. Combining it with peroxide, a known bleaching agent, creates a powerful yet gentle whitening effect. This isn’t just some modern fad; it’s a time-tested approach with a scientific basis!
In today’s world, a bright smile can significantly impact your self-esteem and how others perceive you. Stained or discolored teeth can make you feel self-conscious, affecting your confidence in social and professional settings. That’s why I’m so excited to share this baking soda peroxide teeth whitening trick with you. It’s a game-changer for anyone looking to enhance their smile naturally and affordably. Get ready to say hello to a brighter, more radiant you!
DIY Teeth Whitening with Baking Soda and Peroxide: A Comprehensive Guide
Hey there! Are you dreaming of a brighter, whiter smile without breaking the bank? Well, you’re in the right place! I’m going to walk you through a simple, effective, and budget-friendly DIY teeth whitening method using baking soda and hydrogen peroxide. This is something I’ve tried myself, and with a little patience and consistency, you can definitely see noticeable results.
Important Note: Before we dive in, I need to emphasize that this method isn’t a substitute for professional dental care. It’s crucial to maintain good oral hygiene and consult your dentist regularly. Also, baking soda and peroxide can be abrasive, so moderation is key. If you have sensitive teeth or gums, proceed with extra caution or consult your dentist before trying this.
What You’ll Need
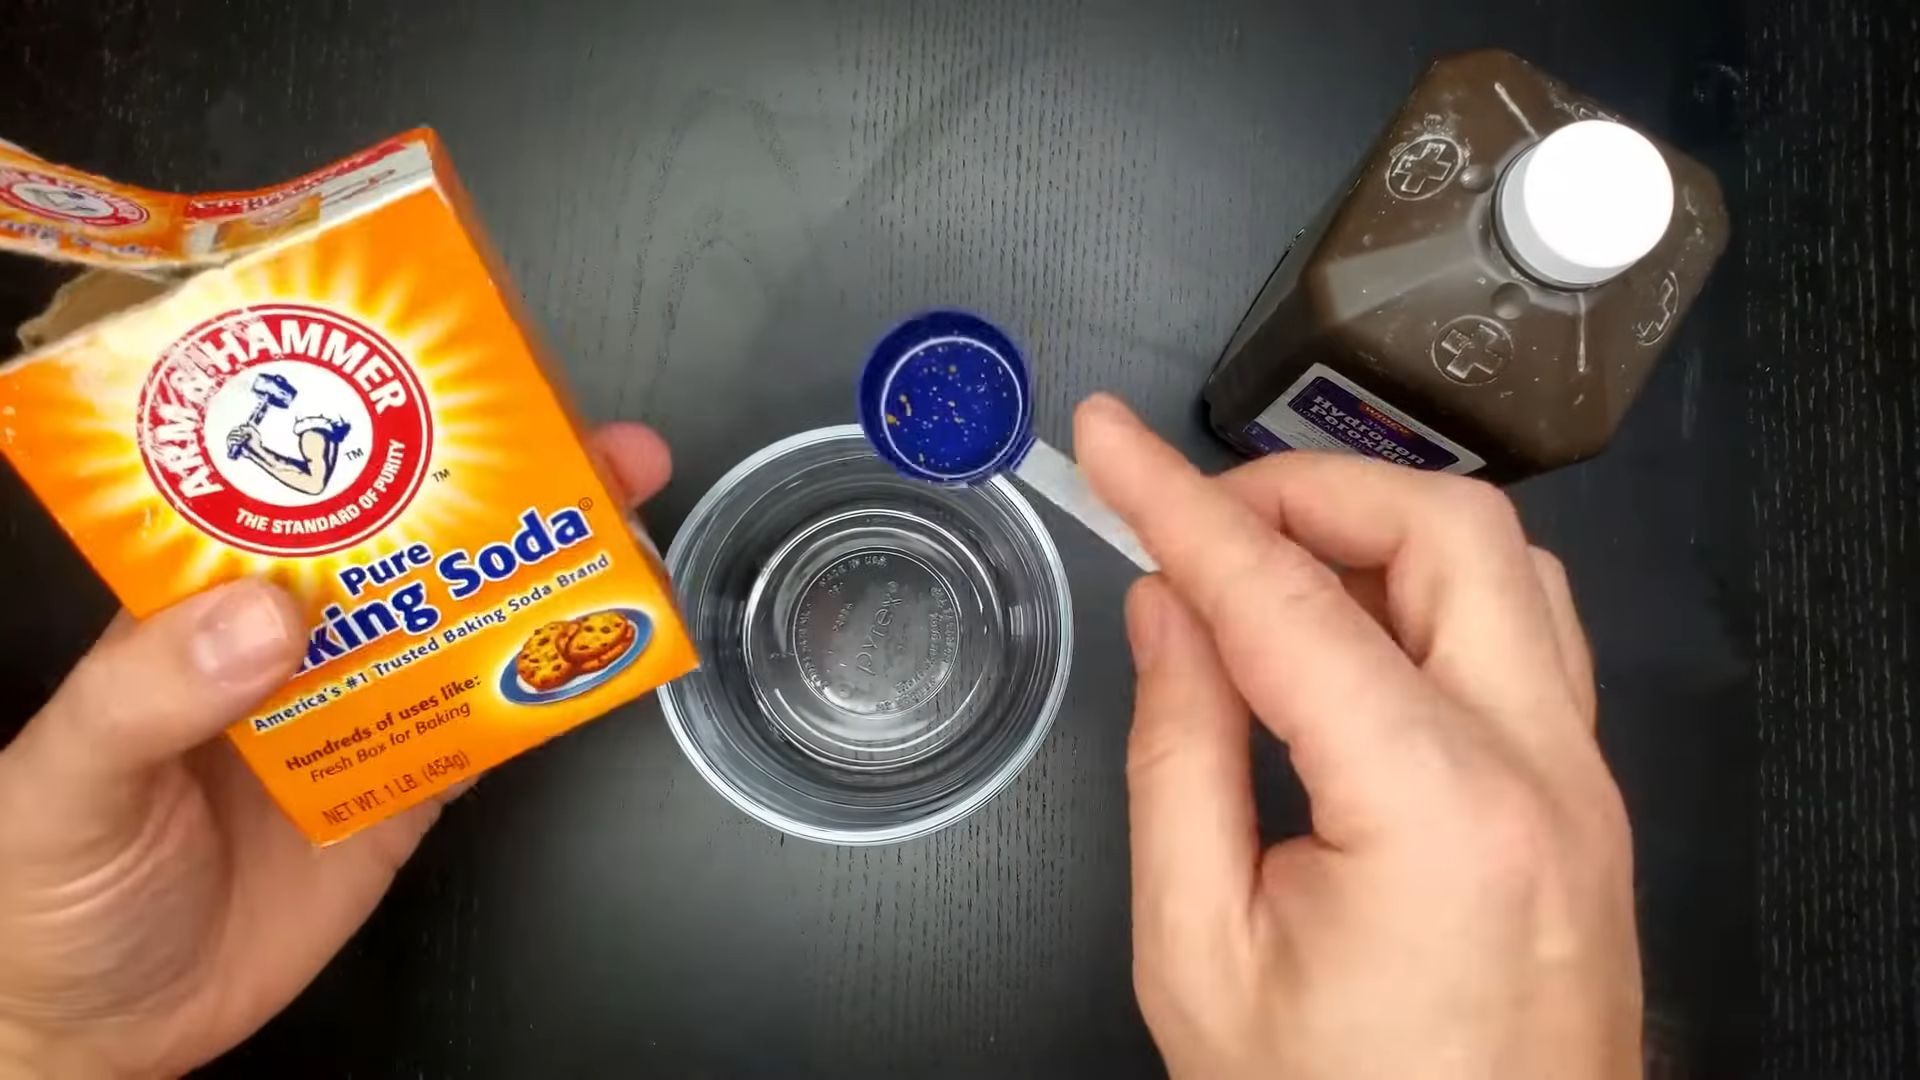
Before we get started, let’s gather our supplies. You probably already have most of these in your kitchen or bathroom!
* Baking Soda (Sodium Bicarbonate): This is our gentle abrasive that helps scrub away surface stains.
* Hydrogen Peroxide (3% solution): This acts as a mild bleaching agent and disinfectant. Make sure you’re using the standard 3% solution you find at the drugstore.
* Water (Optional): For adjusting the consistency of the paste.
* Toothbrush: A soft-bristled toothbrush is best to avoid irritating your gums.
* Small Bowl or Dish: For mixing the paste.
* Mirror: To make sure you’re applying the paste evenly.
* Timer: To keep track of the brushing time.
* Optional: Floss, Tongue Scraper
Understanding the Science (A Little Bit!)
Okay, I won’t bore you with a super-detailed chemistry lesson, but it’s helpful to understand *why* this works. Baking soda is a mild abrasive, meaning it gently scrubs away surface stains like those from coffee, tea, or red wine. Hydrogen peroxide is a mild bleaching agent that can help lighten the color of your teeth. When combined, they create a powerful (but still gentle!) stain-fighting duo.
Mixing the Perfect Paste
This is where the magic happens! Getting the right consistency is important for effective whitening and to avoid irritating your gums.
1. Start with Baking Soda: Place about 1-2 teaspoons of baking soda into your small bowl or dish. I usually start with 1 teaspoon and add more if needed.
2. Add Hydrogen Peroxide Gradually: Slowly add hydrogen peroxide to the baking soda, a few drops at a time. Mix with a spoon or your toothbrush until you form a paste.
3. Achieve the Right Consistency: You’re aiming for a paste that’s thick enough to stay on your toothbrush but not so thick that it’s difficult to spread. It should be similar to the consistency of regular toothpaste. If it’s too thick, add a tiny bit of water to thin it out. If it’s too runny, add a little more baking soda.
4. Check for Bubbles: As you mix, you’ll notice some bubbling. This is the hydrogen peroxide reacting with the baking soda. It’s perfectly normal!
The Whitening Process: Step-by-Step
Now for the main event! Follow these steps carefully for the best results.
1. Prepare Your Mouth: Before you start, rinse your mouth thoroughly with water. This helps remove any loose food particles and prepares your teeth for the whitening treatment. Flossing is also a great idea to remove plaque between your teeth.
2. Apply the Paste: Dip your toothbrush into the baking soda and peroxide paste, making sure to coat the bristles evenly.
3. Brush Gently: Brush your teeth with the paste for about 2 minutes. Use gentle, circular motions, just like you would with regular toothpaste. Avoid brushing too hard, as this can damage your enamel and irritate your gums. Pay special attention to areas with noticeable staining.
4. Don’t Swallow: This is important! Try your best not to swallow any of the paste. It’s not harmful in small amounts, but it’s best to avoid it.
5. Rinse Thoroughly: After brushing for 2 minutes, rinse your mouth thoroughly with water. Make sure to remove all traces of the baking soda and peroxide paste. I usually rinse several times to be sure.
6. Follow Up with Regular Toothpaste (Optional): If you want, you can brush your teeth again with your regular toothpaste after rinsing. This helps remove any remaining baking soda taste and provides additional fluoride protection.
7. Clean Your Toothbrush: Rinse your toothbrush thoroughly with water to remove any remaining paste.
Frequency and Maintenance
Consistency is key, but so is moderation! Overdoing this can lead to sensitivity.
* How Often? I recommend using this method no more than 1-2 times per week. Overusing it can erode your enamel and make your teeth more sensitive.
* Listen to Your Body: If you experience any sensitivity, reduce the frequency or stop using the method altogether.
* Maintain Good Oral Hygiene: This DIY method is a great boost, but it’s not a replacement for regular brushing, flossing, and dental checkups. Brush your teeth at least twice a day with fluoride toothpaste, floss daily, and visit your dentist for regular cleanings and checkups.
* Avoid Staining Foods and Drinks: To maintain your whiter smile, try to limit your consumption of staining foods and drinks like coffee, tea, red wine, and berries. If you do indulge, rinse your mouth with water afterward.
Troubleshooting and Tips
Here are a few tips and solutions to common problems you might encounter:
* Sensitivity: If you experience sensitivity, try using a toothpaste designed for sensitive teeth. You can also reduce the frequency of the baking soda and peroxide treatment.
* Paste Too Runny: Add a little more baking soda to thicken the paste.
* Paste Too Thick: Add a tiny bit of water to thin the paste.
* Uneven Whitening: Make sure you’re brushing all areas of your teeth evenly.
* No Results: Be patient! It may take several weeks to see noticeable results. Also, remember that this method primarily targets surface stains. Deeper stains may require professional whitening treatments.
* Taste: The taste of baking soda and peroxide isn’t the most pleasant. You can add a drop of peppermint essential oil to the paste to improve the taste, but be sure to use a food-grade essential oil and only add a very small amount.
Alternative Methods and Considerations
While baking soda and peroxide is a popular DIY method, there are other options you might want to consider:
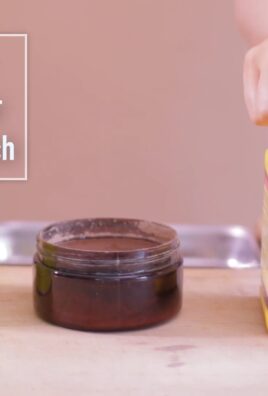
* Activated Charcoal: This is another popular natural teeth whitener. It’s very abrasive, so use it sparingly.
* Oil Pulling: Swishing coconut oil in your mouth for 15-20 minutes can help remove bacteria and improve oral health. Some people believe it can also help whiten teeth.
* Over-the-Counter Whitening Products: There are many whitening toothpastes, strips, and gels available at drugstores. These products typically contain hydrogen peroxide or carbamide peroxide.
* Professional Teeth Whitening: For the most dramatic and long-lasting results, consider professional teeth whitening treatments at your dentist’s office.
Potential Risks and Side Effects
It’s important to be aware of the potential risks and side effects of using baking soda and peroxide for teeth whitening:
* Enamel Erosion: Baking soda is abrasive and can erode your enamel if used too frequently or aggressively.
* Gum Irritation: Hydrogen peroxide can irritate your gums, especially if you have sensitive gums.
* Tooth Sensitivity: Both baking soda and peroxide can cause tooth sensitivity.
* Allergic Reactions: Although rare, some people may be allergic to baking soda or hydrogen peroxide.
Disclaimer: I am not a dentist, and this information is not intended to be a substitute for professional dental advice. Always consult with your dentist before trying any new teeth whitening method.
My Personal Experience
I’ve been using this baking soda and peroxide method on and off for a few years, and I’ve definitely noticed a difference in the brightness of my smile. I’m a big coffee drinker, so my teeth tend to get stained easily. This method helps me keep them looking their best without spending a fortune on professional whitening treatments. I always make sure to use it in moderation and listen to my body. If I start to experience any sensitivity, I take a break for a while.
Conclusion (Sort Of!)
So there you have it! A comprehensive guide to DIY teeth whitening with baking soda and peroxide. Remember to be patient, consistent, and listen to your body. With a little effort, you can achieve a brighter, whiter smile without breaking the bank. Good luck, and happy whitening! And don’t forget to smile!
Conclusion
So, there you have it! Baking Soda Peroxide Teeth Whitening – a simple, cost-effective, and surprisingly effective way to brighten your smile right in your own kitchen. We’ve explored the science behind why this dynamic duo works, walked you through the easy-to-follow steps, and addressed some common concerns. But why is this DIY trick a must-try?
Firstly, consider the cost. Professional teeth whitening treatments can be incredibly expensive, often requiring multiple visits to the dentist and costing hundreds, even thousands, of dollars. This method offers a significantly more budget-friendly alternative, utilizing ingredients you likely already have in your pantry. Secondly, it’s convenient. No need to schedule appointments or disrupt your daily routine. You can incorporate this whitening regimen into your existing oral hygiene routine with minimal effort.
But the real magic lies in the results. While it’s crucial to manage your expectations – this isn’t a one-time miracle cure – consistent and careful application of this baking soda and peroxide paste can noticeably lighten surface stains and brighten your teeth over time. Think of it as a gradual, natural way to enhance your smile’s radiance.
Now, let’s talk variations and suggestions. For those with sensitive teeth, consider reducing the amount of peroxide used or limiting the frequency of application to once or twice a week. You can also try using a sensitive toothpaste in between treatments to help remineralize your enamel. Another variation involves adding a drop of peppermint essential oil to the paste for a refreshing flavor and breath-freshening boost. Just be sure to use a food-grade essential oil and only add a tiny amount.
Important Note: Always listen to your body. If you experience any significant sensitivity, gum irritation, or other adverse reactions, discontinue use immediately and consult with your dentist. This method is not a substitute for professional dental care and regular checkups.
We truly believe that this DIY Baking Soda Peroxide Teeth Whitening method is worth a try. It’s a simple, affordable, and potentially effective way to achieve a brighter, more confident smile. But the real test is in the trying!
So, go ahead, give it a shot! We’re confident that you’ll be pleasantly surprised by the results. And most importantly, we want to hear about your experience! Share your before-and-after photos, tips, and tricks in the comments below. Let’s create a community of radiant smiles and shared knowledge. What worked for you? What challenges did you face? Your feedback will help others on their journey to a brighter smile. Don’t be shy – let your smile shine and share your story!
Frequently Asked Questions (FAQ)
Is Baking Soda and Peroxide Teeth Whitening Safe?
Generally, yes, when used correctly and in moderation. Baking soda is a mild abrasive that helps remove surface stains, while hydrogen peroxide acts as a bleaching agent. However, overuse can erode enamel and irritate gums. It’s crucial to use the correct ratio (as outlined in the recipe), avoid excessive scrubbing, and limit the frequency of application. If you have sensitive teeth or gums, consult your dentist before trying this method. Discontinue use immediately if you experience any adverse reactions. Remember, this is not a substitute for professional dental care.
How Often Can I Use Baking Soda and Peroxide to Whiten My Teeth?
For most people, using this method once or twice a week is sufficient. Overdoing it can lead to enamel erosion and increased sensitivity. If you have sensitive teeth, start with once a week or even less frequently. Pay close attention to how your teeth and gums react, and adjust the frequency accordingly. Remember, consistency is key, but moderation is essential for protecting your dental health.
Will Baking Soda and Peroxide Teeth Whitening Damage My Enamel?
Excessive or improper use can potentially damage enamel. Baking soda is abrasive, and while it’s generally considered mild, vigorous scrubbing or frequent use can wear down the enamel over time. Similarly, high concentrations of hydrogen peroxide can also contribute to enamel erosion. That’s why it’s crucial to use the recommended ratio, avoid harsh scrubbing, and limit the frequency of application. Using a soft-bristled toothbrush and gentle circular motions can also help minimize the risk of enamel damage.
How Long Does It Take to See Results with Baking Soda and Peroxide Teeth Whitening?
Results vary depending on the individual and the severity of the staining. Some people may notice a difference after just a few uses, while others may need to use it consistently for several weeks to see noticeable results. It’s important to be patient and realistic. This method is not a quick fix, but rather a gradual process. Consistent and careful application, combined with good oral hygiene practices, will yield the best results over time.
Can I Use Baking Soda and Peroxide Teeth Whitening If I Have Fillings or Crowns?
Generally, yes, you can use this method if you have fillings or crowns. However, it’s important to be aware that the whitening effect may not be uniform. Fillings and crowns are typically made of materials that do not respond to whitening agents in the same way as natural teeth. As a result, you may notice a slight difference in color between your natural teeth and your dental restorations. If you have concerns about this, consult with your dentist before trying this method.
What If I Swallow Some of the Baking Soda and Peroxide Paste?
Swallowing a small amount of the baking soda and peroxide paste is generally not harmful. However, it’s best to avoid swallowing it if possible. If you accidentally swallow a significant amount, you may experience mild stomach upset. Rinse your mouth thoroughly with water to remove any remaining paste. If you experience any persistent symptoms, such as nausea, vomiting, or abdominal pain, consult with a doctor.
Can I Use Baking Soda and Peroxide Teeth Whitening If I’m Pregnant or Breastfeeding?
It’s always best to consult with your doctor or dentist before using any teeth whitening products, including baking soda and peroxide, during pregnancy or breastfeeding. While the ingredients are generally considered safe in small amounts, there is limited research on their effects during these periods. Your doctor or dentist can assess your individual situation and provide personalized recommendations.
What Are Some Other Ways to Whiten My Teeth Naturally?
Besides baking soda and peroxide, there are other natural ways to whiten your teeth. These include oil pulling with coconut oil, using activated charcoal, and eating certain fruits and vegetables that can help remove surface stains. Maintaining good oral hygiene, such as brushing and flossing regularly, is also essential for preventing stains and keeping your teeth bright. However, it’s important to note that these methods may not be as effective as professional teeth whitening treatments or baking soda and peroxide.
How Does Baking Soda Peroxide Teeth Whitening Compare to Professional Teeth Whitening?
Professional teeth whitening treatments, such as those offered by dentists, typically use higher concentrations of whitening agents and can achieve more dramatic results in a shorter amount of time. However, they are also more expensive and may cause more sensitivity. Baking Soda Peroxide Teeth Whitening is a more gradual and affordable option, but it may not be as effective for severe staining. The best option for you depends on your individual needs, budget, and desired results. Consulting with your dentist is always a good idea to determine the most appropriate whitening method for you.
Leave a Comment