

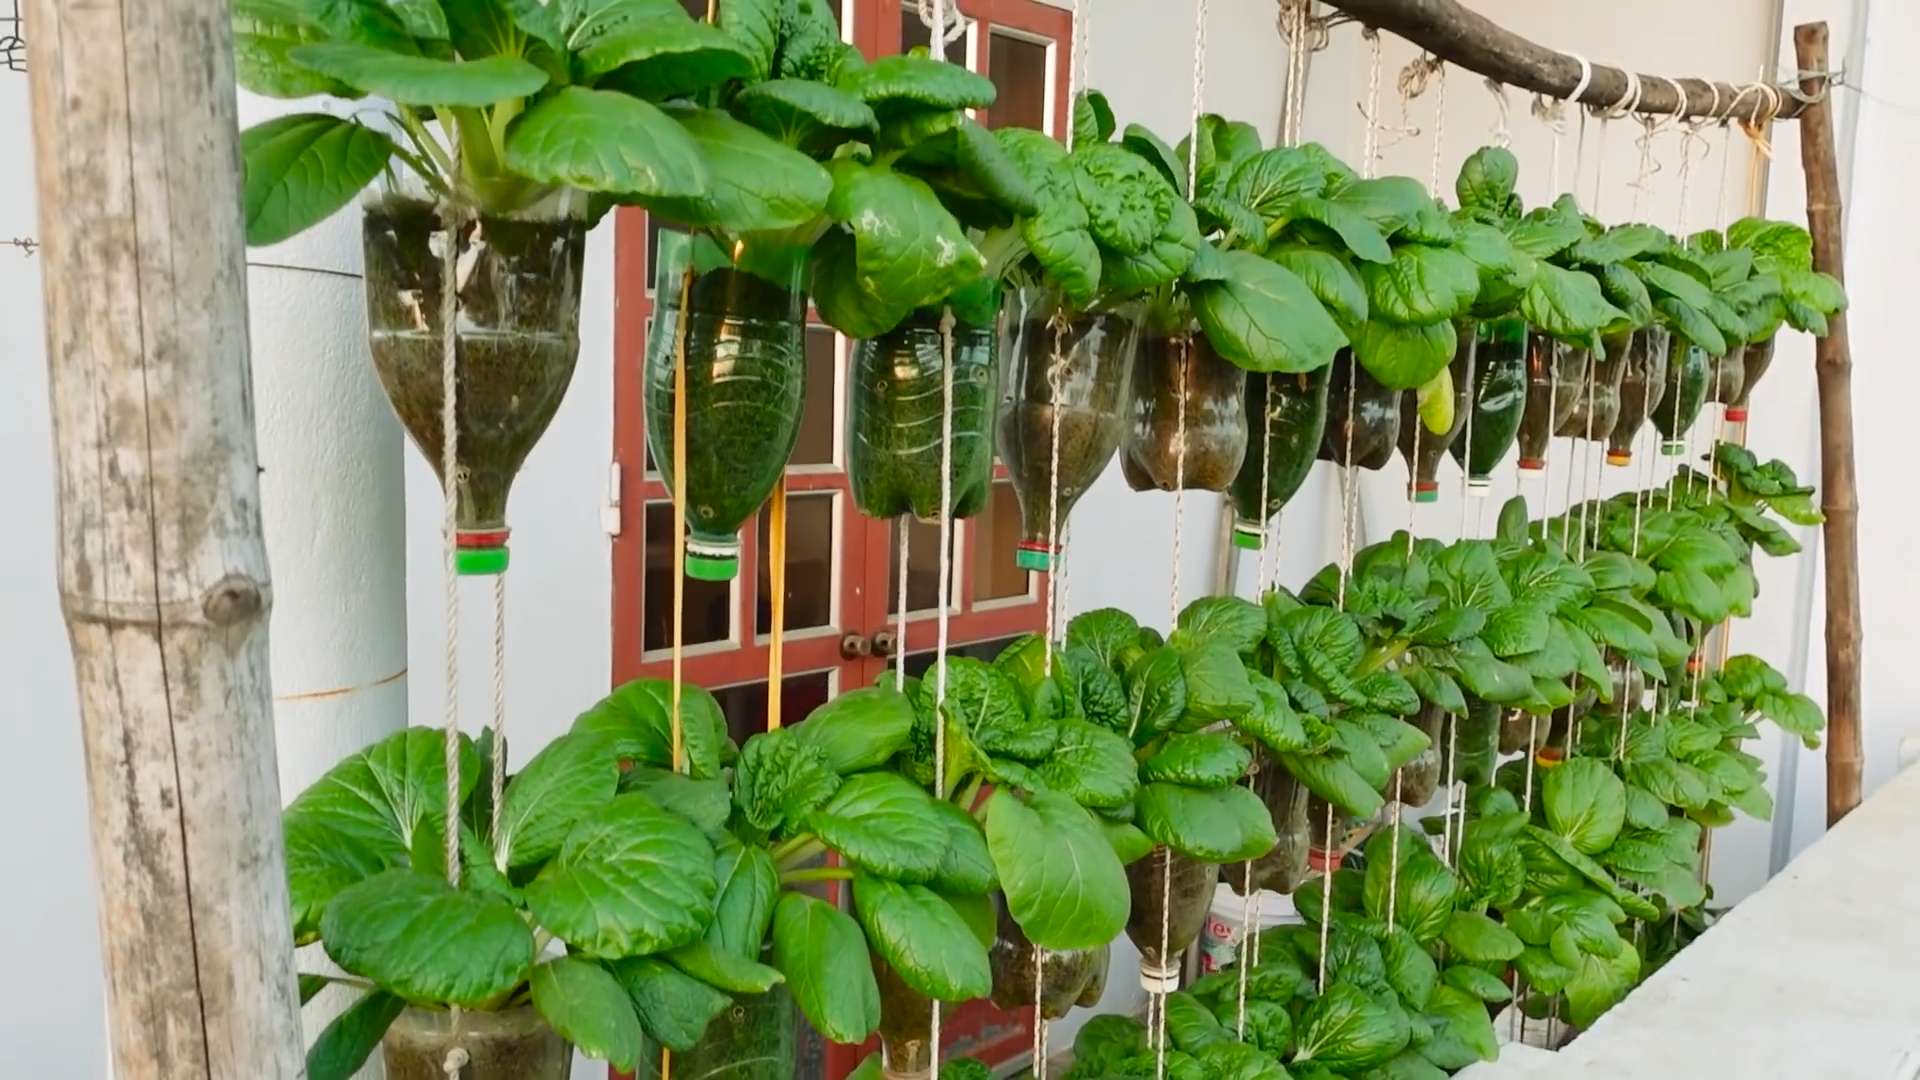
Balcony vegetable garden hanging – sounds dreamy, right? Imagine stepping onto your balcony and being greeted by a lush, vibrant tapestry of edible greens, all thriving in hanging containers. Forget those sad, lonely petunias! We’re talking about fresh tomatoes, crisp lettuce, and fragrant herbs, all within arm’s reach.
For centuries, humans have cultivated gardens in limited spaces, adapting to urban environments with ingenious solutions. From the ancient hanging gardens of Babylon (though their existence is debated, the *idea* is inspiring!) to the modern-day apartment dweller, the desire to connect with nature and grow our own food persists. But let’s be honest, sometimes space is a real issue. That’s where the magic of hanging gardens comes in!
I know what you’re thinking: “I don’t have a green thumb!” or “My balcony is tiny!” Fear not, my friend! This DIY guide is designed for everyone, regardless of experience or balcony size. We’ll walk you through simple, effective techniques for creating a thriving balcony vegetable garden hanging system. Why do you need this? Because fresh, homegrown produce tastes infinitely better, it’s incredibly rewarding, and it’s a fantastic way to add beauty and life to your outdoor space. Plus, you’ll be the envy of all your neighbors! Let’s get started and transform your balcony into a verdant oasis!
Creating Your Dream Balcony Vegetable Garden: A Hanging Delight!
Okay, let’s get our hands dirty! I’m so excited to guide you through creating a beautiful and productive hanging vegetable garden right on your balcony. Even if you have limited space, you can still enjoy fresh, homegrown veggies. This project is totally doable, even for beginners, and I promise the reward of harvesting your own food is absolutely worth it.
Choosing the Right Location and Plants
Before we dive into the building process, let’s think about the most important factors for a successful garden: sunlight and plant selection.
* **Sunlight is Key:** Most vegetables need at least 6 hours of direct sunlight per day. Observe your balcony throughout the day to see where the sun shines the brightest and longest. South-facing balconies are generally ideal, but east or west-facing can work too, depending on obstructions.
* **Plant Selection:** Not all vegetables thrive in hanging baskets. Choose compact, bush-type varieties that won’t get too large and heavy. Here are some excellent options:
* **Tomatoes:** Cherry tomatoes, grape tomatoes, and other small varieties are perfect. Look for “tumbling” or “bush” types.
* **Peppers:** Bell peppers (smaller varieties), chili peppers, and sweet peppers all do well.
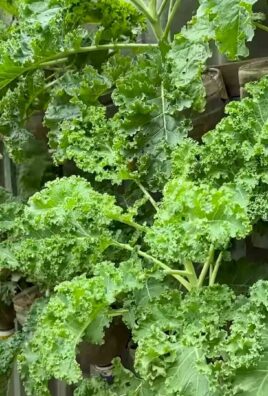
* **Lettuce and Salad Greens:** Loose-leaf lettuce, spinach, arugula, and other salad greens are easy to grow and harvest.
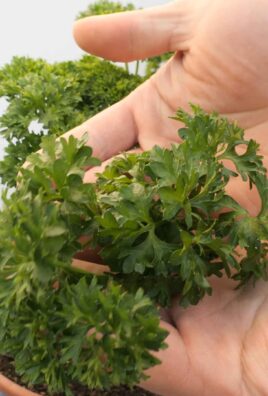
* **Herbs:** Basil, mint, oregano, thyme, parsley, and chives are all fantastic choices.
* **Strawberries:** Who doesn’t love fresh strawberries? They thrive in hanging baskets.
* **Radishes:** These grow quickly and are perfect for adding a little spice to your salads.
* **Bush Beans:** Choose bush bean varieties over pole beans, as they stay more compact.
* **Consider the Weight:** Remember that soil and water add significant weight to hanging baskets. Make sure your balcony railing or hanging structure is strong enough to support the weight.
* **Watering Needs:** Hanging baskets tend to dry out faster than ground-level gardens, so choose plants with similar watering needs to make maintenance easier.
Gathering Your Supplies
Now, let’s gather everything we need to build our hanging vegetable garden. Here’s a comprehensive list:
* **Hanging Baskets or Planters:** You can use pre-made hanging baskets (wire, plastic, or coco coir lined) or repurpose containers like buckets or plastic tubs. Make sure they have drainage holes. I personally love using coco coir lined baskets because they look beautiful and provide good drainage.
* **Potting Mix:** Use a high-quality potting mix specifically designed for containers. Don’t use garden soil, as it can compact and doesn’t drain well in containers.
* **Coco Coir or Sphagnum Moss (if using wire baskets):** This is used to line the baskets and help retain moisture.
* **Hanging Hardware:** Choose sturdy hooks, chains, or rope to hang your baskets. Make sure they are rated to hold the weight of the filled baskets. Consider S-hooks for easy removal and adjustment.
* **Watering Can or Hose:** Essential for watering your plants. A watering can with a long spout is helpful for reaching hanging baskets.
* **Fertilizer:** Use a slow-release fertilizer or a liquid fertilizer to provide nutrients to your plants.
* **Trowel or Small Shovel:** For planting and transplanting.
* **Gloves:** To protect your hands.
* **Measuring Tape:** To ensure even spacing of your hanging baskets.
* **Drill (if needed):** For creating drainage holes in repurposed containers or attaching hanging hardware.
* **Optional: Landscape Fabric:** To line the bottom of the baskets and prevent soil from washing out.
Step-by-Step Instructions: Building Your Hanging Vegetable Garden
Alright, let’s get building! Follow these steps to create your own hanging vegetable garden:
1. Preparing the Baskets
1. **Inspect the Baskets:** Check your hanging baskets for any damage or weaknesses. Make sure the hanging hardware is securely attached.
2. **Line the Baskets (if needed):** If you’re using wire baskets, line them with coco coir or sphagnum moss. This will help retain moisture and prevent soil from washing out. Press the liner firmly against the sides of the basket. You can also use landscape fabric as an alternative. Cut it to size and secure it with staples or glue.
3. **Add Drainage:** If your containers don’t have drainage holes, drill some in the bottom. This is crucial to prevent waterlogging and root rot.
2. Planting Your Vegetables
1. **Fill with Potting Mix:** Fill the lined baskets with potting mix, leaving about an inch or two of space at the top.
2. **Add Slow-Release Fertilizer:** Mix in a slow-release fertilizer according to the package instructions. This will provide a steady supply of nutrients to your plants.
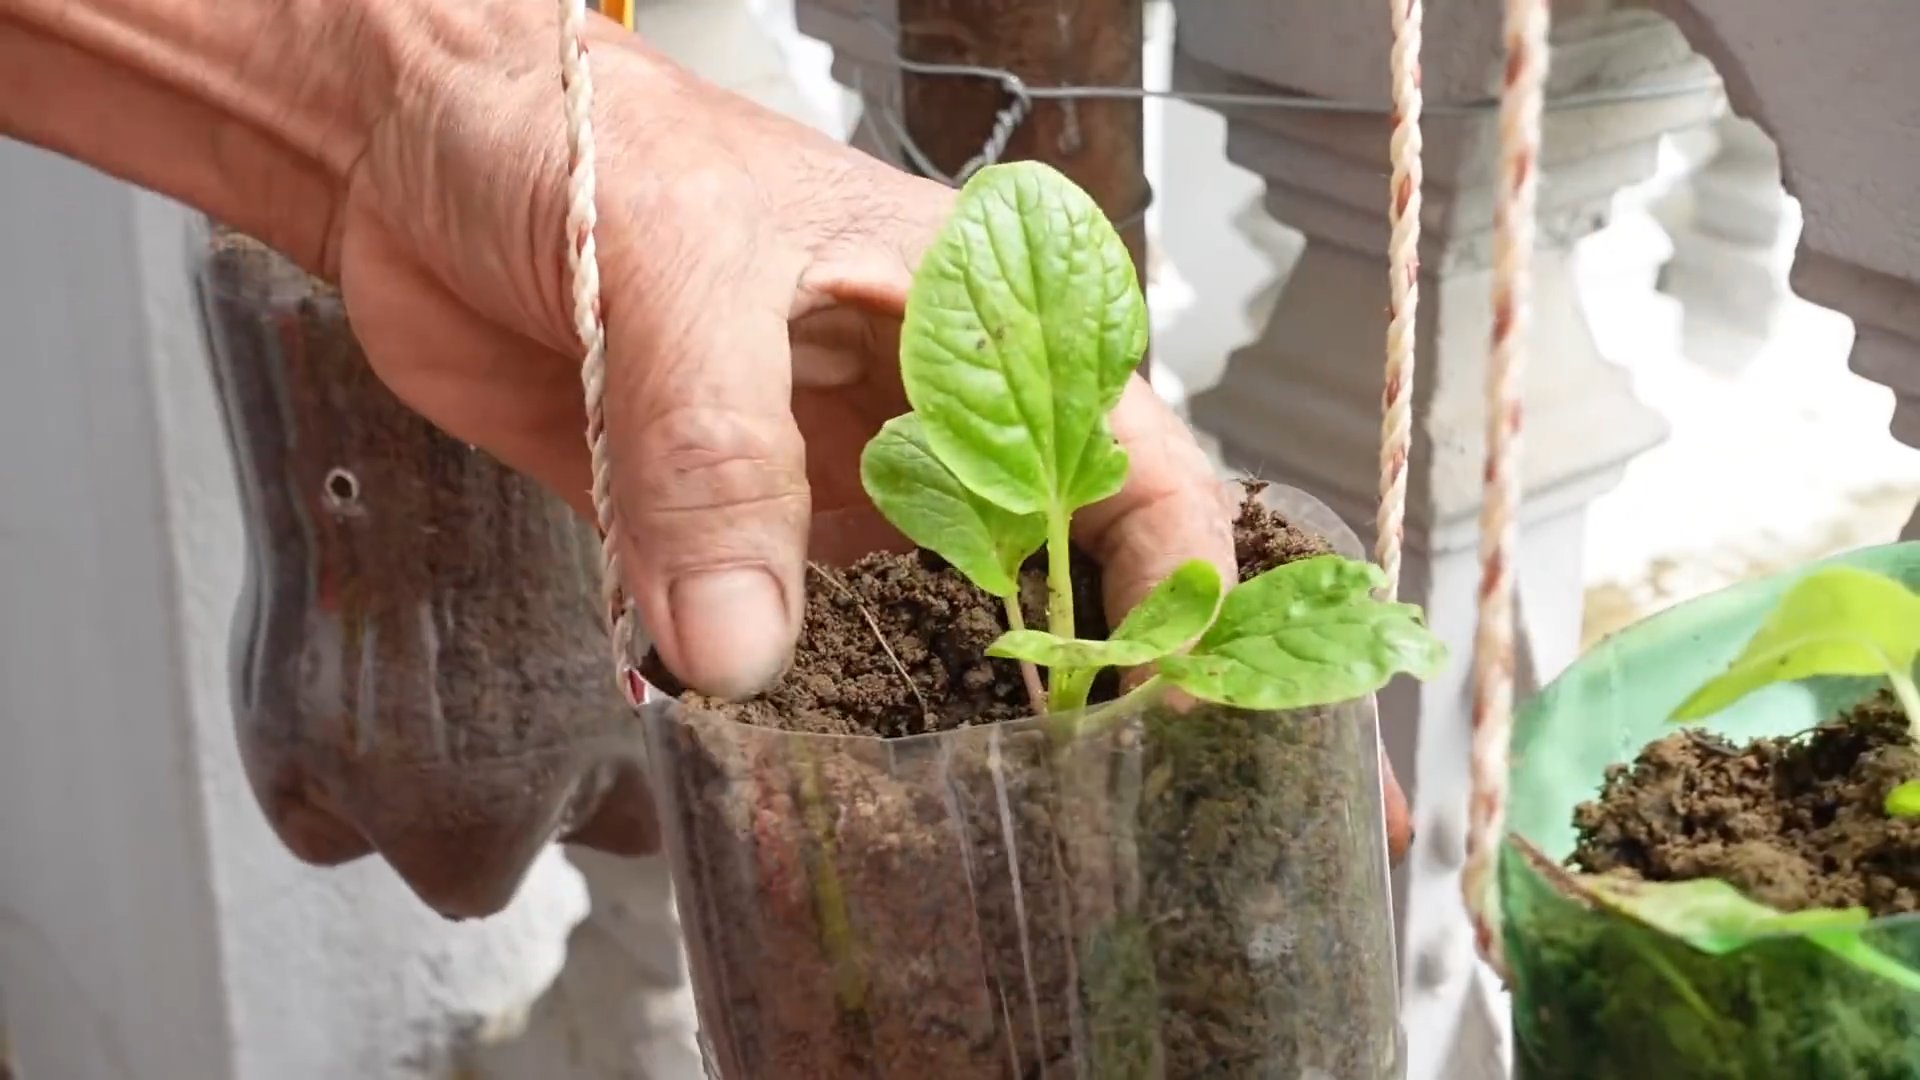
3. **Plant Your Seedlings or Seeds:** Gently remove your seedlings from their containers and loosen the roots slightly. Dig a small hole in the potting mix and place the seedling in the hole. Cover the roots with potting mix and gently firm the soil around the plant. If you’re planting seeds, follow the instructions on the seed packet.
4. **Space Your Plants:** Don’t overcrowd your baskets. Give your plants enough space to grow and thrive. Refer to the plant labels for spacing recommendations.
5. **Water Thoroughly:** Water the newly planted seedlings thoroughly until water drains out of the bottom of the basket. This will help settle the soil and encourage root growth.
3. Hanging Your Baskets
1. **Choose Your Hanging Location:** Select a location on your balcony that receives adequate sunlight and is protected from strong winds.
2. **Install Hanging Hardware:** Install hooks, chains, or rope to hang your baskets. Make sure the hardware is securely attached to your balcony railing or ceiling. Use appropriate anchors if necessary.
3. **Hang Your Baskets:** Carefully lift the filled baskets and hang them on the installed hardware. Ensure the baskets are hanging securely and evenly.
4. **Adjust the Height (if needed):** Adjust the height of the baskets to ensure they receive adequate sunlight and are easy to water.
4. Caring for Your Hanging Vegetable Garden
1. **Water Regularly:** Hanging baskets dry out quickly, so water them regularly, especially during hot weather. Check the soil moisture daily and water when the top inch of soil feels dry to the touch. Water deeply until water drains out of the bottom of the basket.
2. **Fertilize Regularly:** Feed your plants with a liquid fertilizer every two weeks or as needed. Follow the package instructions for dilution rates.
3. **Prune and Pinch:** Prune and pinch your plants regularly to encourage bushier growth and more fruit production. Remove any dead or yellowing leaves.
4. **Pest Control:** Inspect your plants regularly for pests and diseases. Treat any problems promptly with organic pest control methods.
5. **Harvest Regularly:** Harvest your vegetables when they are ripe and ready to eat. Regular harvesting encourages continued production.
6. **Rotate Your Crops:** If you’re growing vegetables in the same baskets year after year, rotate your crops to prevent soil depletion and disease buildup.
Choosing the Right Hanging System
The way you hang your baskets is just as important as the baskets themselves! Here are a few options to consider:
* **Railing Hooks:** These are designed to hook over your balcony railing. They’re easy to install and remove, making them a great option for renters. Make sure the hooks are sturdy enough to support the weight of your filled baskets.
* **Ceiling Hooks:** If you have a covered balcony, you can install hooks in the ceiling to hang your baskets. This allows you to create a cascading effect and maximize your vertical space. Use heavy-duty hooks and anchors to ensure they can support the weight.
* **Chains and S-Hooks:** Chains and S-hooks are a versatile option for hanging baskets. You can adjust the length of the chains to customize the height of your baskets. S-hooks make it easy to remove and reposition the baskets.
* **Rope and Pulleys:** For heavier baskets, consider using rope and pulleys. This allows you to easily raise and lower the baskets for watering and maintenance.
* **Tiered Plant Stands:** While not strictly “hanging,” tiered plant stands can create a similar effect and provide a stable base for your containers.
Troubleshooting Common Problems
Even with the best planning, you might encounter some challenges along the way. Here are some common problems and how to address them:
* **Yellowing Leaves:** This can be caused by overwatering, underwatering, nutrient deficiencies, or pests. Check the soil moisture and adjust your watering schedule accordingly. Fertilize your plants regularly and inspect them for pests.
* **Leggy Growth:** This is often caused by insufficient sunlight. Move your baskets to a sunnier location or supplement with artificial light.
* **Lack of Fruit Production:** This can be caused by insufficient pollination, nutrient deficiencies, or stress. Hand-pollinate
Conclusion
Transforming your balcony into a vibrant, productive vegetable garden is more achievable than you might think, especially with this simple yet effective hanging solution. We’ve explored how to maximize your limited space by utilizing vertical gardening techniques, and this DIY hanging method is the key to unlocking that potential. Forget expensive, bulky planters that clutter your precious outdoor area. This method is not only cost-effective but also incredibly customizable, allowing you to tailor your balcony vegetable garden hanging setup to perfectly suit your aesthetic and the specific needs of your plants.
Why is this DIY trick a must-try? Because it empowers you to grow fresh, healthy vegetables right outside your door, regardless of how small your balcony is. Imagine stepping onto your balcony and harvesting ripe tomatoes, crisp lettuce, or fragrant herbs – all grown with your own hands. This isn’t just about gardening; it’s about connecting with nature, reducing your carbon footprint, and enjoying the unparalleled flavor of homegrown produce. Plus, the visual appeal of cascading greenery adds a touch of serenity and beauty to your urban oasis.
But the benefits don’t stop there. Hanging your vegetable garden improves air circulation around the plants, reducing the risk of fungal diseases. It also makes it easier to water and tend to your crops, as you can access them without bending or straining. And let’s not forget the satisfaction of knowing you’ve created something beautiful and functional with your own ingenuity.
Ready to take your balcony garden to the next level? Consider these variations to personalize your hanging setup:
* Upcycled Materials: Get creative with your containers! Use old plastic bottles, tin cans, or even repurposed fabric bags to create unique and eco-friendly planters. Just be sure to drill drainage holes in the bottom.
* Tiered Hanging System: Create a multi-tiered hanging garden by staggering the heights of your planters. This maximizes space and adds visual interest. You can use different lengths of rope or chain to achieve this effect.
* Herb Spiral: Adapt the hanging concept to create a miniature herb spiral. Use a series of small, interconnected planters to grow a variety of herbs in a compact space.
* Color Coordination: Choose planters and hanging materials that complement your balcony’s existing decor. This will create a cohesive and visually appealing space.
* Self-Watering System: Incorporate a simple self-watering system to reduce the frequency of watering. This is especially helpful if you live in a hot or dry climate. You can achieve this by using a wicking system with a reservoir at the bottom of the planter.
This DIY balcony vegetable garden hanging solution is more than just a gardening technique; it’s an invitation to embrace a more sustainable and fulfilling lifestyle. It’s a chance to connect with nature, nurture your creativity, and enjoy the delicious rewards of homegrown produce.
So, what are you waiting for? Gather your materials, unleash your inner gardener, and transform your balcony into a thriving vegetable paradise. We’re confident that you’ll be amazed by the results. Don’t forget to share your creations with us! We’d love to see your unique hanging garden setups and hear about your experiences. Share your photos and tips on social media using #BalconyGardenHanging and inspire others to join the movement. Happy gardening!
Frequently Asked Questions (FAQ)
What vegetables are best suited for hanging planters?
Many vegetables thrive in hanging planters, but some are particularly well-suited due to their size, growth habit, and water requirements. Excellent choices include:
* Tomatoes (especially cherry or grape varieties): These are prolific producers and their trailing vines look beautiful in hanging baskets. Choose determinate varieties for more compact growth.
* Lettuce and other leafy greens: These are easy to grow and provide a continuous harvest. Opt for loose-leaf varieties that can be harvested as needed.
* Herbs (such as basil, mint, oregano, thyme, and rosemary): Herbs are generally low-maintenance and add fragrance and flavor to your balcony garden.
* Strawberries: These are a classic choice for hanging baskets and produce delicious, juicy fruit.
* Peppers (especially smaller varieties like chili peppers): Peppers add color and spice to your garden.
* Radishes: These are quick-growing and can be harvested in just a few weeks.
* Spinach: Similar to lettuce, spinach is easy to grow and provides a continuous harvest.
* Dwarf Beans: Bush bean varieties are more suitable for hanging planters than pole beans.
When selecting vegetables, consider the size of your hanging planters and the amount of sunlight your balcony receives.
How much sunlight do my hanging vegetables need?
Most vegetables require at least 6-8 hours of direct sunlight per day to thrive. However, some leafy greens and herbs can tolerate partial shade (4-6 hours of sunlight). Observe your balcony throughout the day to determine how much sunlight it receives and choose vegetables accordingly. If your balcony doesn’t get enough sunlight, you may need to supplement with grow lights.
What type of soil should I use for my hanging vegetable garden?
Use a high-quality potting mix specifically formulated for containers. Avoid using garden soil, as it can be too heavy and compact for hanging planters. A good potting mix will provide adequate drainage and aeration, which are essential for healthy root growth. You can also amend your potting mix with compost or other organic matter to improve its fertility.
How often should I water my hanging vegetable garden?
Hanging planters tend to dry out more quickly than in-ground gardens, so it’s important to water them regularly. Check the soil moisture daily and water when the top inch feels dry to the touch. The frequency of watering will depend on the weather, the type of plants you’re growing, and the size of your planters. During hot, dry weather, you may need to water your hanging garden twice a day.
How do I fertilize my hanging vegetable garden?
Vegetables grown in hanging planters need regular fertilization to provide them with the nutrients they need to grow and produce. Use a balanced, water-soluble fertilizer every 2-4 weeks, following the instructions on the package. You can also use organic fertilizers, such as compost tea or fish emulsion.
How do I prevent pests and diseases in my hanging vegetable garden?
Regularly inspect your plants for signs of pests or diseases. If you find any problems, take action immediately to prevent them from spreading. Common pests that affect vegetable gardens include aphids, spider mites, and whiteflies. You can control these pests with insecticidal soap, neem oil, or by handpicking them off the plants. To prevent fungal diseases, ensure good air circulation around your plants and avoid overwatering.
How do I choose the right size hanging planter?
The size of your hanging planter will depend on the type of vegetables you’re growing. Smaller vegetables, such as herbs and lettuce, can be grown in smaller planters (8-10 inches in diameter). Larger vegetables, such as tomatoes and peppers, will need larger planters (12-14 inches in diameter). Make sure the planter is sturdy enough to support the weight of the soil and plants.
What are the best materials for making a DIY hanging system?
Strong rope, chain, or even sturdy wire can be used to create a hanging system. Ensure the material is weather-resistant and can support the weight of the filled planter. Consider the aesthetic you’re aiming for when choosing your materials.
How high should I hang my vegetable garden?
Hang your vegetable garden at a height that is comfortable for you to water and harvest. You should be able to easily reach the plants without straining. Also, consider the amount of sunlight the plants will receive at different heights.
Can I grow vegetables in hanging planters indoors?
Yes, you can grow vegetables in hanging planters indoors, but you’ll need to provide them with adequate light. Place the planters near a sunny window or supplement with grow lights. Also, be sure to choose vegetables that are well-suited for indoor growing, such as herbs, lettuce, and spinach.
Leave a Comment