

Bathroom smell wonderful, doesn’t that sound divine? Let’s be honest, our bathrooms, while essential, aren’t always the most fragrant spaces. We’ve all been there – a lingering odor that just won’t quit, no matter how much you clean. But what if I told you that you could transform your bathroom into an aromatic oasis with just a few simple DIY tricks?
For centuries, cultures around the world have used natural scents to purify and enhance their living spaces. From ancient Egyptians burning incense to the Victorian era’s potpourri bowls, the desire to create a pleasant-smelling environment is deeply ingrained in us. But you don’t need to be an expert perfumer to achieve a bathroom that smells amazing.
In today’s busy world, who has time for complicated cleaning routines or expensive air fresheners filled with harsh chemicals? That’s where these DIY hacks come in! I’m going to share some easy, affordable, and all-natural ways to make your bathroom smell wonderful, using ingredients you probably already have in your home. Say goodbye to embarrassing odors and hello to a fresh, inviting space that you’ll actually enjoy spending time in. Get ready to unlock the secrets to a bathroom that smells like a spa, not a locker room!
DIY Bathroom Air Freshener: Natural Scents for a Spa-Like Experience
Hey there! Tired of those artificial bathroom air fresheners that smell, well, artificial? I totally get it. I’ve been on a mission to create a bathroom that smells amazing using only natural ingredients, and I’m excited to share my favorite DIY air freshener methods with you. These are not only budget-friendly but also much healthier for you and the environment. Let’s dive in!
Method 1: The Simmer Pot Powerhouse
This is probably the easiest and most effective way to instantly freshen up your bathroom. It fills the entire space with a warm, inviting aroma.
What You’ll Need:
* A small saucepan or pot
* Water
* Your choice of aromatic ingredients (see suggestions below)
* A stovetop or hot plate (if you don’t want to use your main stove)
Aromatic Ingredient Suggestions:
* Citrus Power: Lemon, orange, grapefruit peels (fresh or dried)
* Spice It Up: Cinnamon sticks, cloves, star anise
* Herbal Harmony: Rosemary sprigs, thyme, lavender buds
* Fruity Fun: Apple slices, cranberries
* Woodsy Wonder: Pine needles, cedar chips
Step-by-Step Instructions:
1. Gather Your Ingredients: First, decide on your scent profile. I personally love a combination of orange peels, cinnamon sticks, and cloves for a warm, festive aroma. But feel free to experiment!
2. Combine in the Pot: Place your chosen ingredients in the saucepan. Don’t be afraid to be generous! A handful of citrus peels, a few cinnamon sticks, and a teaspoon of cloves should do the trick.
3. Add Water: Cover the ingredients with water. You want enough water so that it doesn’t evaporate too quickly.
4. Simmer Gently: Place the pot on your stovetop or hot plate and bring the water to a gentle simmer. Reduce the heat to low and let it simmer for as long as you want the scent to last. I usually simmer mine for a few hours, adding more water as needed.
5. Monitor and Enjoy: Keep an eye on the water level and add more as it evaporates. The scent will gradually fill your bathroom, creating a wonderfully fragrant atmosphere.
Important Safety Tip: Never leave a simmering pot unattended. Always make sure there’s enough water to prevent the pot from burning dry.
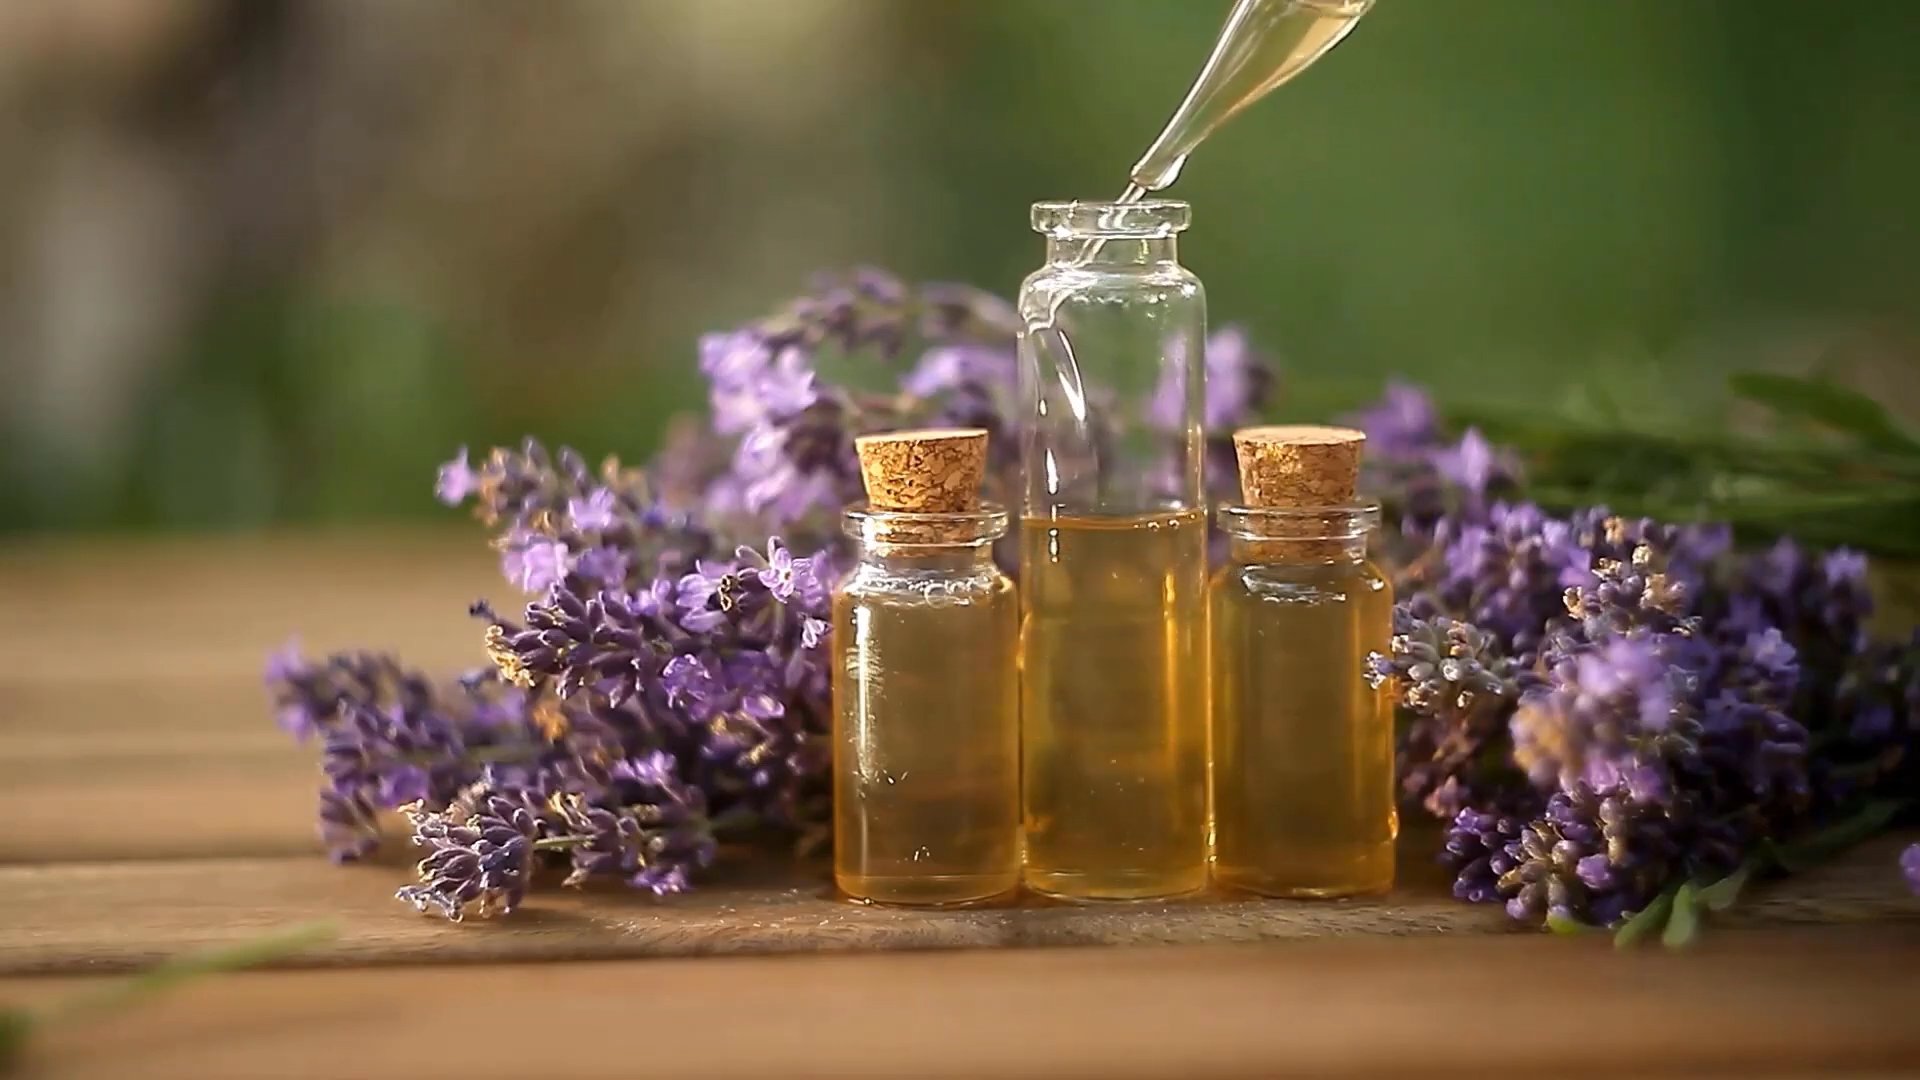
Method 2: The Essential Oil Diffuser Blend Masterpiece
Essential oils are a fantastic way to create a customized and long-lasting scent in your bathroom. Plus, many essential oils have antibacterial and antifungal properties, which is a bonus!
What You’ll Need:
* An essential oil diffuser (reed diffuser, ultrasonic diffuser, or nebulizing diffuser)
* Your choice of essential oils (see suggestions below)
* Water (for ultrasonic diffusers)
* Carrier oil (for reed diffusers, like fractionated coconut oil or sweet almond oil)
Essential Oil Blend Suggestions:
* Clean & Fresh: Lemon, tea tree, eucalyptus
* Relaxing Spa: Lavender, chamomile, sandalwood
* Uplifting Citrus: Orange, grapefruit, lime
* Woodsy & Grounding: Cedarwood, pine, frankincense
* Floral Delight: Rose, jasmine, ylang-ylang
Step-by-Step Instructions (Ultrasonic Diffuser):
1. Fill with Water: Fill the diffuser with water according to the manufacturer’s instructions. Usually, there’s a fill line inside the reservoir.
2. Add Essential Oils: Add your chosen essential oils. I typically use 5-10 drops, depending on the size of the diffuser and the strength of the oils. Start with fewer drops and add more if needed.
3. Turn It On: Turn on the diffuser and let it work its magic! The diffuser will release a fine mist of water and essential oils into the air, creating a fragrant and therapeutic atmosphere.
4. Adjust as Needed: Experiment with different essential oil blends to find your perfect scent. You can also adjust the intensity of the scent by adding more or fewer drops of essential oil.
Step-by-Step Instructions (Reed Diffuser):
1. Choose Your Container: Select a small glass bottle or jar with a narrow opening. This will help prevent the fragrance from dissipating too quickly.
2. Mix Carrier Oil and Essential Oils: In a separate container, mix your carrier oil (like fractionated coconut oil) with your chosen essential oils. A good ratio is about 75% carrier oil and 25% essential oils. For example, if you’re using 1/4 cup of carrier oil, add about 2 tablespoons of essential oils.
3. Pour into the Container: Carefully pour the mixture into your chosen container.
4. Insert the Reeds: Insert several reeds into the container. The reeds will absorb the oil and release the fragrance into the air.
5. Flip the Reeds: After a few hours, flip the reeds to saturate the other end. This will help to boost the fragrance.
6. Refresh as Needed: Flip the reeds every few days to refresh the scent. You may also need to add more oil to the container as it evaporates.
Method 3: The DIY Scented Gel Air Freshener
This is a fun and creative way to make your own air fresheners that you can customize with your favorite colors and scents.
What You’ll Need:
* 1 cup water
* 1 packet (1 ounce) unflavored gelatin
* 1/2 cup cold water
* 1 tablespoon salt
* 10-20 drops essential oil (your choice of scent)
* Food coloring (optional)
* Small jars or containers
Step-by-Step Instructions:
1. Prepare the Gelatin: In a saucepan, bring 1 cup of water to a boil.
2. Dissolve the Gelatin: While the water is heating, dissolve the gelatin in 1/2 cup of cold water. Stir until completely dissolved.
3. Combine and Heat: Once the water is boiling, remove it from the heat and stir in the dissolved gelatin mixture. Add the salt and stir until dissolved. The salt helps prevent mold growth.
4. Add Essential Oils and Food Coloring: Add your chosen essential oils and food coloring (if using). Stir well to combine.
5. Pour into Containers: Pour the mixture into your small jars or containers.
6. Let It Set: Let the gel air fresheners set for several hours, or preferably overnight, until they are firm.
7. Enjoy the Freshness: Once the gel is set, place the air fresheners in your bathroom and enjoy the fresh scent! These will last for several weeks.
Method 4: The Baking Soda Odor Absorber with a Scented Twist
Baking soda is a natural odor absorber, making it perfect for neutralizing unpleasant smells in the bathroom. Adding essential oils gives it a refreshing scent boost.
What You’ll Need:
* A small jar or container
* Baking soda
* Essential oils (your choice of scent)
* A piece of fabric or paper (optional)
* Rubber band or ribbon (optional)
Step-by-Step Instructions:
1. Fill the Jar: Fill the jar or container with baking soda, leaving about an inch of space at the top.
2. Add Essential Oils: Add 10-20 drops of your chosen essential oils to the baking soda.
3. Stir Well: Stir the baking soda and essential oils together until well combined.
4. Cover the Jar (Optional): If you want to prevent the baking soda from spilling, you can cover the jar with a piece of fabric or paper. Secure it with a rubber band or ribbon. You can also poke holes in the fabric or paper to allow the scent to escape.
5. Place in the Bathroom: Place the jar in your bathroom and let the baking soda absorb odors and release the refreshing scent of the essential oils.
6. Refresh as Needed: Replace the baking soda every month or two, or when you notice the scent fading.
Method 5: The DIY Scented Toilet Paper Roll
This is a super simple and clever way to subtly scent your bathroom every time you use the toilet paper.
What You’ll Need:
* A roll of toilet paper
* Essential oils (your choice of scent)
Step-by-Step Instructions:
1. Apply Essential Oils: Carefully apply a few drops of your chosen essential oil to the inside of the toilet paper roll. Be careful not to saturate the cardboard too much, as it could weaken it.
2. Let It Absorb: Allow the

Conclusion
So, there you have it! Transforming your bathroom into a fragrant oasis doesn’t require expensive air fresheners or harsh chemicals. This simple, effective, and budget-friendly DIY trick to make your bathroom smell wonderful is a game-changer for creating a welcoming and refreshing atmosphere in your home. We’ve shown you how easy it is to banish unpleasant odors and replace them with a subtle, long-lasting fragrance that will delight your senses every time you step into the room.
But why is this DIY method a must-try? Firstly, it’s incredibly cost-effective. You likely already have most of the ingredients in your pantry or can easily purchase them at your local grocery store for a fraction of the price of commercial air fresheners. Secondly, it’s a healthier alternative. You’re avoiding the potentially harmful chemicals and artificial fragrances found in many store-bought products, creating a safer environment for you and your family. Finally, it’s completely customizable! You have the freedom to choose your favorite essential oils or fragrance combinations to create a scent that perfectly matches your personal preferences and the overall ambiance of your bathroom.
Looking for variations? Consider adding a few drops of tea tree oil to your mixture for its natural antibacterial properties, helping to further eliminate odors at their source. You could also experiment with different citrus peels, such as grapefruit or lime, for a brighter, more invigorating scent. For a more subtle fragrance, try using dried herbs like lavender or rosemary instead of essential oils. And if you’re feeling creative, why not combine different elements to create your own signature bathroom scent? A blend of vanilla extract, cinnamon sticks, and orange peels can create a warm and inviting aroma, perfect for the colder months.
This DIY method is not just about masking odors; it’s about creating a truly pleasant and inviting space. Imagine stepping into your bathroom and being greeted by the soothing scent of lavender, the refreshing aroma of citrus, or the warm and comforting fragrance of vanilla. It’s a small change that can make a big difference in your overall well-being and create a more enjoyable experience every time you use the bathroom.
We are confident that once you try this simple DIY trick, you’ll never go back to using commercial air fresheners again. It’s a sustainable, healthy, and cost-effective way to keep your bathroom smelling fresh and clean. So, gather your ingredients, follow the simple steps outlined in this article, and prepare to transform your bathroom into a fragrant sanctuary.
Don’t just take our word for it – try it out for yourself! We encourage you to experiment with different scents and variations to find the perfect combination for your bathroom. And most importantly, we want to hear about your experience! Share your results, tips, and favorite scent combinations in the comments section below. Let’s create a community of fragrance enthusiasts and help each other discover new and innovative ways to make your bathroom smell wonderful naturally. We can’t wait to see what you come up with!
Frequently Asked Questions (FAQ)
How long will the scent last?
The longevity of the scent depends on several factors, including the type of fragrance you use, the humidity in your bathroom, and the ventilation. Generally, you can expect the scent to last for several days to a week. Essential oils tend to dissipate faster than fragrance oils, so you may need to refresh them more frequently. To prolong the scent, consider placing the mixture in a location with good airflow, but away from direct sunlight or heat, which can cause the fragrance to evaporate more quickly. You can also add a few drops of essential oil or fragrance oil every few days to boost the scent.
Can I use any type of essential oil?
While you can technically use any essential oil you prefer, some are better suited for bathroom use than others. Lavender, eucalyptus, tea tree, lemon, and peppermint are popular choices due to their refreshing and cleansing properties. Avoid using essential oils that are too strong or overpowering, as they can be overwhelming in a small space. Always dilute essential oils properly before using them, as undiluted oils can be irritating to the skin and respiratory system. If you have any allergies or sensitivities, be sure to choose essential oils that are safe for you to use.
What if I don’t have essential oils? Can I use something else?
Absolutely! If you don’t have essential oils, you can use fragrance oils, extracts (like vanilla or almond), or even dried herbs and spices. Fragrance oils are synthetic scents that are designed to mimic the aroma of natural ingredients. They tend to be more affordable and longer-lasting than essential oils. Extracts, such as vanilla or almond, can add a warm and comforting scent to your bathroom. Dried herbs and spices, like lavender, rosemary, cinnamon, and cloves, can also be used to create a natural and fragrant atmosphere. Experiment with different options to find what works best for you.
Is this safe for pets and children?
While this DIY trick is generally safe, it’s important to take precautions if you have pets or children. Some essential oils can be toxic to pets, so it’s crucial to research the safety of any essential oils you plan to use. Keep the mixture out of reach of children and pets to prevent accidental ingestion. If you’re concerned about potential allergies or sensitivities, start with a small amount of fragrance and monitor for any adverse reactions. As an alternative, you can use milder scents like vanilla extract or dried lavender, which are generally considered safe for both pets and children.
How often should I replace the mixture?
The frequency with which you need to replace the mixture depends on how quickly the scent fades and how much moisture accumulates in the container. As a general rule, you should replace the mixture every one to two weeks. If you notice that the scent is no longer noticeable or that the mixture has become discolored or moldy, it’s time to replace it. To extend the lifespan of the mixture, be sure to use clean water and a clean container. You can also add a few drops of vinegar to the mixture to help prevent mold growth.
Can I use this in other rooms of my house?
Yes, absolutely! This DIY trick can be used in any room of your house that you want to freshen up. Simply adjust the scent to match the ambiance of the room. For example, you might use a more invigorating scent like citrus or peppermint in your kitchen or a more relaxing scent like lavender or chamomile in your bedroom. You can also experiment with different containers to match the decor of each room.
What kind of container should I use?
The best type of container to use is one that is non-reactive and has a wide opening to allow the fragrance to diffuse easily. Glass jars, ceramic bowls, and even decorative dishes can be used. Avoid using metal containers, as they can react with the ingredients and alter the scent. Be sure to choose a container that is stable and won’t easily tip over, especially if you have pets or children. You can also decorate the container to match the decor of your bathroom.
What if I don’t have time to make this DIY air freshener?
If you’re short on time, there are still ways to make your bathroom smell wonderful without spending hours on a DIY project. A quick and easy option is to place a few drops of essential oil on a cotton ball and tuck it behind the toilet or in a decorative dish. You can also purchase pre-made essential oil diffusers or reed diffusers, which are a convenient and low-maintenance way to freshen up your bathroom. Another option is to simply open a window for a few minutes each day to air out the room and eliminate odors.


Leave a Comment