

Bean Sprout DIY Gardening: Ever dreamt of having fresh, crunchy bean sprouts at your fingertips, ready to add a burst of flavor to your salads, stir-fries, or sandwiches? Forget those bland, store-bought sprouts – I’m going to show you how incredibly easy it is to grow your own, right in your kitchen! This isn’t just about saving money; it’s about connecting with your food and experiencing the simple joy of nurturing life from a tiny seed.
Sprouting beans has a rich history, dating back thousands of years in Asian cultures, where they were valued for their nutritional benefits and ease of cultivation. In times of scarcity, bean sprouts provided a vital source of vitamins and minerals. Today, while we may not face the same challenges, the appeal of fresh, homegrown sprouts remains strong.
Let’s be honest, who wants to run to the grocery store every time they crave bean sprouts? Plus, there’s the added bonus of knowing exactly where your food comes from and avoiding any unwanted additives or preservatives. With this simple Bean Sprout DIY Gardening guide, you’ll be amazed at how quickly and effortlessly you can cultivate a thriving sprout garden. Get ready to ditch the store-bought stuff and embrace the deliciousness of homegrown!
Grow Your Own Bean Sprouts: A Beginner’s Guide
Hey there, fellow gardening enthusiasts! Ever thought about growing your own bean sprouts? It’s surprisingly easy, incredibly rewarding, and a fantastic way to add fresh, crunchy goodness to your meals. Plus, it’s a project you can do indoors, any time of year! I’m going to walk you through the whole process, step-by-step, so you can enjoy your own homegrown sprouts in just a few days.
Choosing Your Beans
First things first, let’s talk beans. Not all beans are created equal when it comes to sprouting. You’ll want to use beans specifically intended for sprouting, as some dried beans sold for cooking might be treated with chemicals that aren’t safe to eat raw.
Here are some great options:
* Mung Beans: These are the classic bean sprouts you find in most grocery stores. They’re easy to sprout and have a mild, slightly sweet flavor.
* Adzuki Beans: These have a slightly nuttier flavor than mung beans and are also very easy to sprout.
* Lentils: While technically legumes, lentils sprout beautifully and add a lovely earthy flavor to salads and sandwiches.
* Garbanzo Beans (Chickpeas): These take a bit longer to sprout and can be a little trickier, but they’re worth the effort for their unique flavor and texture.
* Soybeans: These are used to make soy sprouts, but be aware that they can have a stronger flavor that some people find less appealing.
Important Note: Avoid sprouting kidney beans, as they contain toxins that need to be cooked out.
Gathering Your Supplies
Okay, now that we’ve got our beans sorted, let’s gather our supplies. The beauty of this project is that you probably already have most of what you need!
Here’s what you’ll need:
* Sprouting Beans: About 1/4 to 1/2 cup of your chosen beans.
* A Wide-Mouth Jar: A quart-sized mason jar works perfectly.
* Sprouting Lid or Cheesecloth: A sprouting lid is ideal, but you can also use a piece of cheesecloth secured with a rubber band.
* Water: Filtered water is best, but tap water is usually fine.
* A Bowl: To soak the beans.
* A Dark Place: A cupboard or drawer works great.
* A Tray or Plate: To angle the jar for drainage.
The Sprouting Process: Step-by-Step
Alright, let’s get sprouting! This process takes about 3-5 days, depending on the type of bean and the temperature.
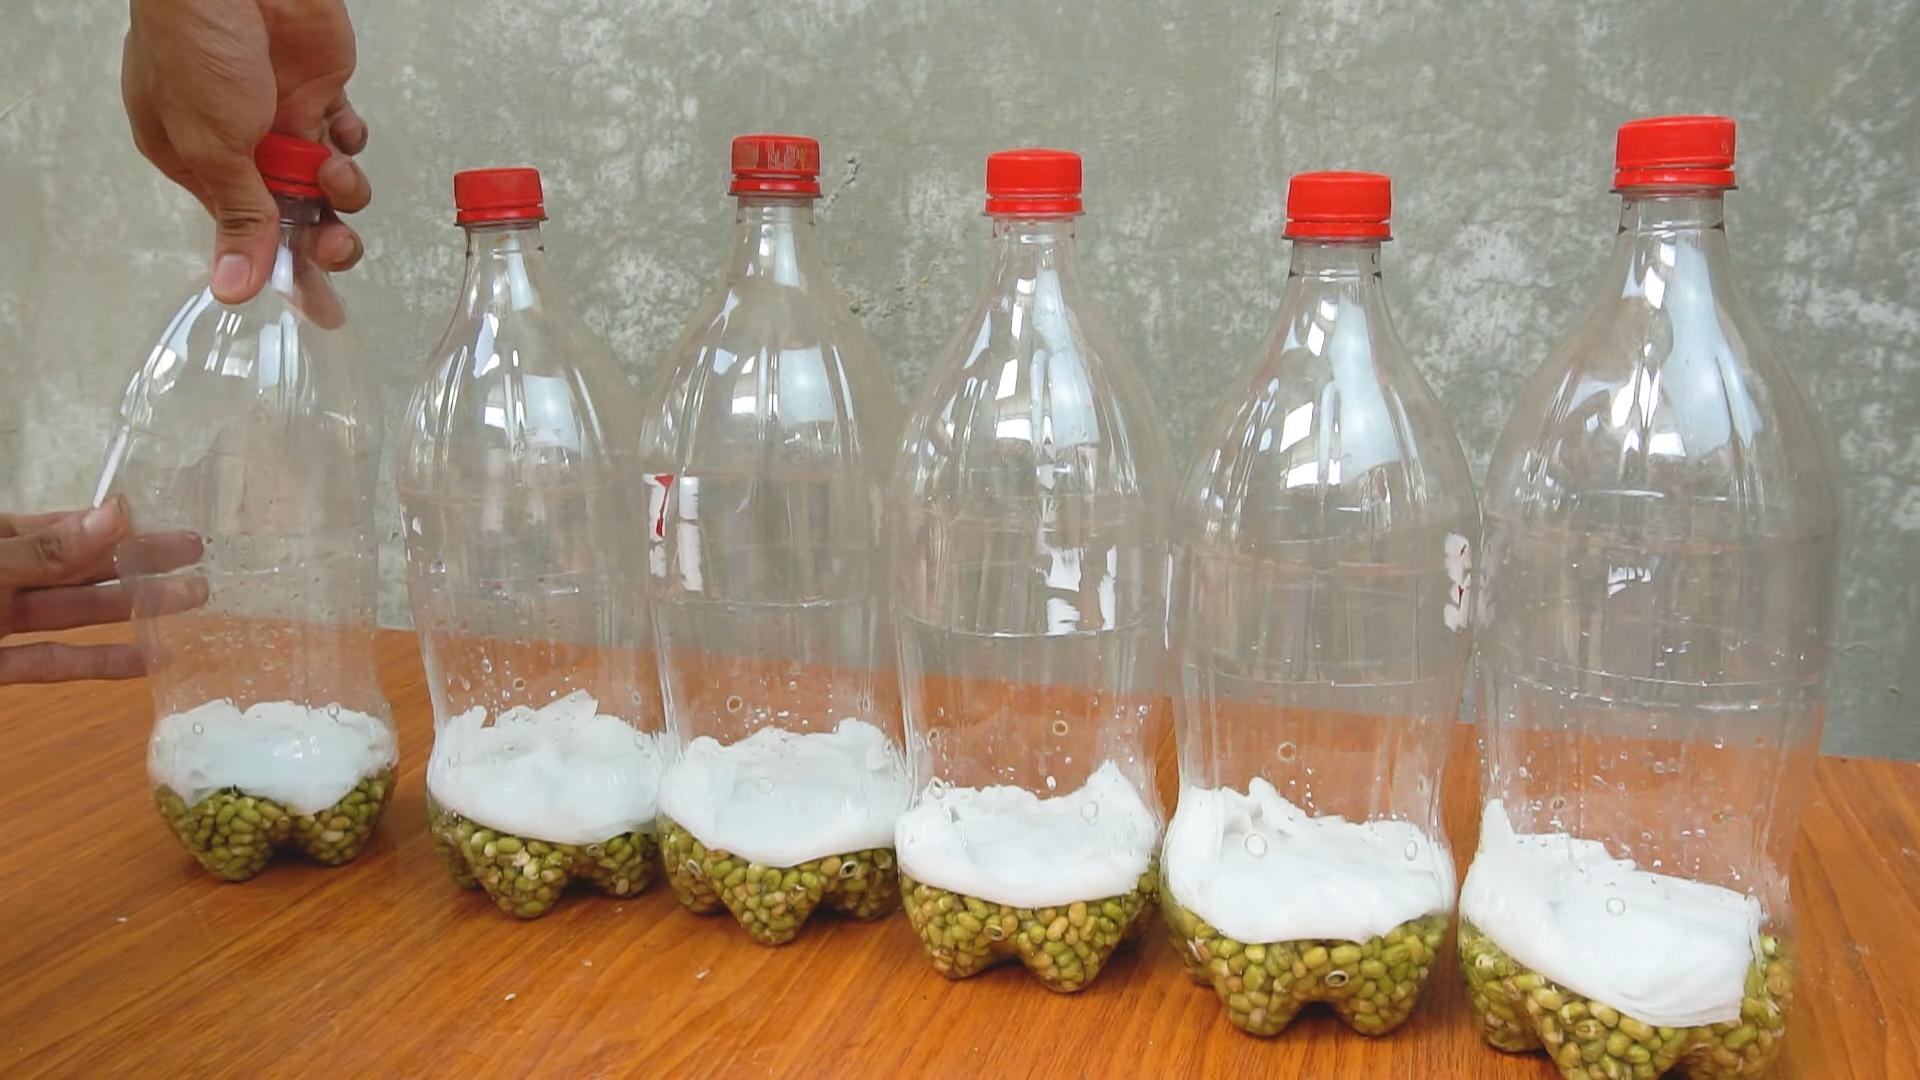
Day 1: Soaking the Beans
1. Rinse the Beans: Place your beans in a bowl and rinse them thoroughly with cool water. Remove any broken or discolored beans.
2. Soak the Beans: Cover the beans with plenty of cool water (about 3 times the volume of the beans). They’ll expand as they soak.
3. Soak for 8-12 Hours: Let the beans soak in a cool, dark place for 8-12 hours. I usually soak them overnight.
Days 2-5: Rinsing and Draining
This is the most crucial part of the process. You need to rinse and drain the beans regularly to keep them moist and prevent mold growth.
1. Drain the Beans: After the soaking period, drain the beans thoroughly using your sprouting lid or cheesecloth.
2. Rinse the Beans: Rinse the beans with cool water, making sure to get all the beans wet.
3. Drain Again: Drain the beans thoroughly again. This is really important! Excess water can lead to mold.
4. Invert the Jar: Place the jar upside down at an angle in a bowl or on a plate. This allows any remaining water to drain out.
5. Dark Place: Return the jar to a dark, cool place.
6. Repeat 2-3 Times a Day: Repeat the rinsing and draining process 2-3 times a day for the next 3-5 days, or until the sprouts are the desired length.
Troubleshooting Tip: If you notice any mold growth (it will look fuzzy and smell unpleasant), discard the entire batch. Make sure you are rinsing and draining thoroughly enough.
Harvesting and Storing Your Bean Sprouts
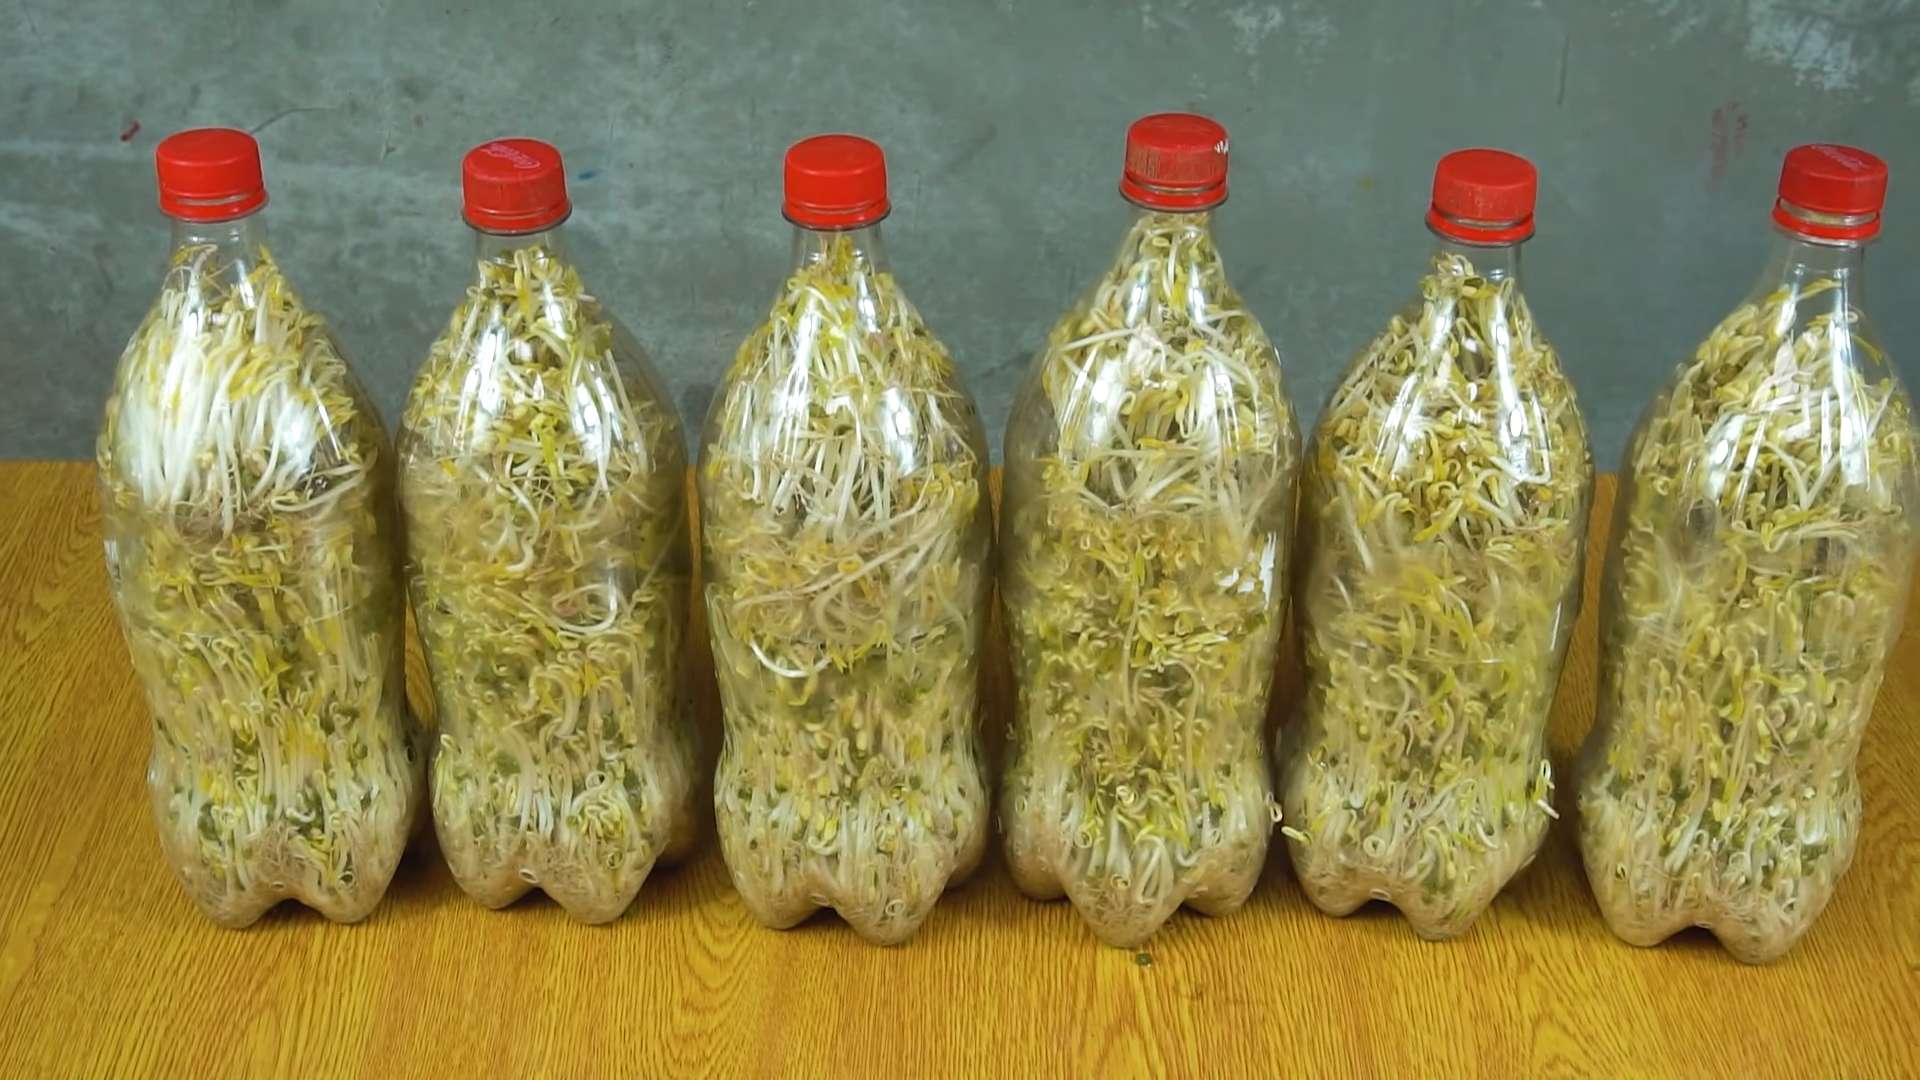
Once your bean sprouts have reached the desired length (usually about 1-2 inches), it’s time to harvest them!
1. Final Rinse: Give your bean sprouts one final rinse with cool water.
2. Remove Hulls (Optional): You can remove the hulls (the outer skins of the beans) if you like, but it’s not necessary. Some people find them a bit bitter. To remove them, gently rub the sprouts between your hands under running water. The hulls should float to the surface.
3. Dry Thoroughly: This is key to preventing spoilage. Spread the sprouts out on a clean kitchen towel or paper towels and gently pat them dry. You can also use a salad spinner to remove excess water.
4. Store in the Refrigerator: Store your bean sprouts in a clean, airtight container in the refrigerator. They should last for about 5-7 days.
Storage Tip: Line the container with a paper towel to absorb any excess moisture.
Using Your Homegrown Bean Sprouts
Now for the fun part: eating your delicious, homegrown bean sprouts!
Here are some ideas:
* Salads: Add them to salads for a crunchy, refreshing boost.
* Sandwiches and Wraps: They’re a great addition to sandwiches and wraps.
* Stir-Fries: Toss them into stir-fries for a quick and easy vegetable.
* Soups: Add them to soups just before serving for a bit of crunch.
* Spring Rolls: They’re a classic ingredient in spring rolls.
* Juicing: Add them to your favorite juice recipes for an extra nutritional boost.
Important Note: While bean sprouts are generally safe to eat raw, it’s always a good idea to wash them thoroughly before consuming them.
Troubleshooting Common Problems
Even with the best intentions, sometimes things don’t go exactly as planned. Here are some common problems you might encounter and how to fix them:
* Mold Growth: As mentioned earlier, mold is usually caused by insufficient rinsing and draining. Make sure you’re rinsing and draining your sprouts thoroughly 2-3 times a day.
* Slow Sprouting: If your sprouts are taking longer than expected to grow, it could be due to the temperature. Bean sprouts prefer a cool environment (around 65-75°F). If your house is too warm, try moving the jar to a cooler location.
* Dry Sprouts: If your sprouts are drying out, you’re probably not rinsing them often enough. Increase the frequency of rinsing.
* Bitter Taste: Some people find the hulls of bean sprouts to be bitter. Try removing the hulls before eating them.
* Uneven Sprouting: This can happen if the beans aren’t evenly distributed in the jar. Try to spread them out as much as possible.
Advanced Sprouting Techniques
Once you’ve mastered the basics, you can experiment with some more advanced techniques:
* Sprouting Different Types of Beans Together: Try sprouting a mix of mung beans, adzuki beans, and lentils for a variety of flavors and textures.
* Adding Nutrients to the Water: Some people add a small amount of seaweed extract or other nutrients to the rinsing water to boost the nutritional value of the sprouts.
* Sprouting in Different Containers: You can also sprout beans in trays or specialized sprouting containers.
Why Grow Your Own Bean Sprouts?
Besides being incredibly easy and rewarding, there are many reasons to grow your own bean sprouts:
* Freshness: You can’t beat the taste of freshly sprouted beans.
* Cost-Effective: Growing your own sprouts is much cheaper than buying them at the store.
* Nutritional Value: Bean sprouts are packed with vitamins, minerals, and enzymes.
* Sustainability: Growing your own sprouts reduces your carbon footprint.
* Fun and Educational: It’s a great project for kids and adults alike.
So, there you have it! Everything you need to know to grow your own delicious bean sprouts. Give it a try, and I’m sure you’ll be hooked! Happy sprouting!
Conclusion
So, there you have it! Growing your own bean sprouts at home is not only incredibly easy and cost-effective, but it’s also a fantastic way to add a burst of fresh, nutritious flavor to your meals. Forget those limp, pre-packaged sprouts from the grocery store. With this simple DIY trick, you can cultivate crisp, vibrant bean sprouts whenever you need them, ensuring peak freshness and flavor.
Why is this a must-try? Because it empowers you to control the quality and origin of your food. You know exactly what’s going into your sprouts – just water and beans! Plus, it’s a surprisingly rewarding experience to watch those tiny seeds transform into a crunchy, edible delight. It’s a mini-gardening project that even the most novice gardener can conquer.
But the fun doesn’t stop there! Feel free to experiment with different types of beans. Mung beans are the classic choice, but you can also try adzuki beans, lentils, or even chickpeas for a unique twist. Each variety will offer a slightly different flavor and texture, allowing you to customize your bean sprouts to your liking. Consider adding a small amount of kelp powder to the soaking water for an extra boost of minerals.
Another variation to consider is the sprouting container itself. While a mason jar with a sprouting lid is a popular and effective option, you can also use a plastic container with drainage holes or even a specialized sprouting tray. The key is to ensure proper drainage and ventilation to prevent mold growth.
Don’t be intimidated by the process. It’s far simpler than it sounds, and the results are well worth the minimal effort. Imagine adding a handful of your freshly grown bean sprouts to salads, stir-fries, sandwiches, or even as a crunchy topping for soups. The possibilities are endless!
We wholeheartedly encourage you to give this DIY bean sprout gardening trick a try. It’s a sustainable, healthy, and delicious way to enhance your culinary creations. And most importantly, it’s a fun and engaging activity that connects you to the food you eat.
Once you’ve mastered the art of growing your own bean sprouts, we’d love to hear about your experience! Share your tips, tricks, and variations in the comments below. Let’s build a community of home sprouters and inspire others to embrace the joys of DIY gardening. Happy sprouting!
Frequently Asked Questions (FAQ)
What kind of beans can I use for sprouting?
The most common and readily available bean for sprouting is the mung bean. However, you can also experiment with other types of beans and legumes, such as adzuki beans, lentils, chickpeas, and even soybeans. Keep in mind that different beans will have different sprouting times and flavor profiles. Some beans, like kidney beans, should not be sprouted as they contain toxins that are reduced by cooking but not by sprouting. Always research the specific bean you plan to use to ensure it’s safe for sprouting.
How long does it take for bean sprouts to grow?
Generally, bean sprouts will be ready to harvest in 3-5 days. The exact time will depend on the type of bean, the temperature, and the humidity. Mung beans typically sprout the fastest. You’ll know they’re ready when the sprouts are about 2-3 inches long and have a small root.
How often should I rinse the bean sprouts?
Rinsing is crucial for preventing mold and ensuring healthy growth. You should rinse your bean sprouts at least twice a day, preferably three times, with cool, clean water. Make sure to drain the water thoroughly after each rinse.
What if I see mold growing on my bean sprouts?
Mold is a sign that the sprouts are not getting enough ventilation or are not being rinsed frequently enough. If you see mold, discard the entire batch of sprouts. To prevent mold, ensure proper drainage and ventilation, and rinse the sprouts more frequently. Using a clean sprouting container is also essential.
How do I store bean sprouts?
Once your bean sprouts are ready, rinse them thoroughly and drain them well. Store them in an airtight container lined with a paper towel in the refrigerator. They should last for about 3-5 days. Check them regularly for any signs of spoilage.
Why are my bean sprouts not sprouting?
There could be several reasons why your bean sprouts are not sprouting. First, make sure your beans are fresh and viable. Old beans may have a lower germination rate. Second, ensure the beans are getting enough moisture. They should be soaked initially and rinsed regularly. Third, the temperature may be too cold. Bean sprouts prefer a warm environment. Finally, make sure the beans are not exposed to direct sunlight, which can inhibit sprouting.
Can I eat the bean sprout roots?
Yes, the roots of bean sprouts are perfectly edible. They are part of the sprout and contribute to the overall texture and flavor.
Are bean sprouts healthy?
Yes, bean sprouts are a nutritious addition to your diet. They are low in calories and fat and are a good source of vitamins, minerals, and fiber. They also contain enzymes that aid in digestion.
What are some ways to use bean sprouts?
Bean sprouts are incredibly versatile and can be used in a variety of dishes. They are commonly used in stir-fries, salads, sandwiches, spring rolls, and soups. They can also be eaten raw or lightly cooked.
Can I grow bean sprouts without a sprouting jar?
Yes, you can grow bean sprouts without a sprouting jar. You can use a plastic container with drainage holes, a colander lined with cheesecloth, or even a specialized sprouting tray. The key is to ensure proper drainage and ventilation.
Is it safe to eat raw bean sprouts?
While bean sprouts are generally safe to eat raw, there is a small risk of foodborne illness, as they are grown in a warm, moist environment that can harbor bacteria. To minimize this risk, purchase fresh, high-quality beans, rinse the sprouts thoroughly before eating, and store them properly in the refrigerator. Some people prefer to lightly cook bean sprouts to further reduce the risk of bacterial contamination.
What is the best temperature for sprouting bean sprouts?
The ideal temperature for sprouting bean sprouts is between 70-80°F (21-27°C). Avoid temperatures that are too cold or too hot, as this can inhibit sprouting or promote mold growth.
Can I use tap water for sprouting?
It’s generally safe to use tap water for sprouting, as long as it’s potable. However, if your tap water is heavily chlorinated or contains other chemicals, you may want to use filtered water to avoid inhibiting the sprouting process.
How do I know when my bean sprouts are ready to harvest?
Your bean sprouts are ready to harvest when they are about 2-3 inches long and have a small root. The sprouts should be crisp and firm, not mushy or slimy. Taste a few sprouts to ensure they have a fresh, clean flavor.

Leave a Comment