

Bucket basket weaving: Ever looked at a humble bucket and thought, “There’s got to be more to you than just holding water?” I have! For centuries, basket weaving has been a cherished craft, providing practical and beautiful containers from natural materials. Think about it – cultures around the world, from ancient Egypt to indigenous tribes, have relied on woven baskets for everything from storing food to carrying precious belongings.
But what if you could combine the durability of a bucket with the rustic charm of a woven basket? That’s where this DIY project comes in! In today’s world, where sustainability and personalization are highly valued, learning bucket basket weaving is a fantastic way to upcycle, add a unique touch to your home, and even create personalized gifts. Imagine transforming a plain, plastic bucket into a stunning planter, a stylish storage container, or a one-of-a-kind laundry hamper.
This guide will walk you through the simple steps of transforming ordinary buckets into beautiful, functional woven baskets. Not only will you learn a new skill, but you’ll also be contributing to a more sustainable lifestyle by repurposing materials. So, grab your buckets, gather your weaving materials, and let’s get started on this fun and rewarding DIY adventure!
Transform a Humble Bucket into a Stylish Basket: A DIY Weaving Project
Hey there, fellow crafters! Ever looked at a plain, boring bucket and thought, “There has to be a better use for this?” Well, I have! Today, I’m going to walk you through a fun and surprisingly easy DIY project: turning an ordinary bucket into a beautiful, woven basket. This is a fantastic way to upcycle, add a touch of rustic charm to your home, and impress your friends with your crafting skills. Plus, it’s a great way to personalize storage solutions!
Materials You’ll Need
Before we dive in, let’s gather our supplies. Don’t worry, most of these are readily available at craft stores or even your local hardware store.
* A plastic bucket (any size will do, but I recommend starting with a smaller one for your first attempt).
* Natural fiber rope (jute, sisal, or cotton rope work great – I personally love the look of jute). The amount you need will depend on the size of your bucket, so err on the side of caution and get more than you think you’ll need.
* Hot glue gun and glue sticks (lots of them!).
* Scissors or a utility knife.
* Measuring tape or ruler.
* Clothespins or binder clips (these are super helpful for holding things in place).
* Optional: Spray paint (if you want to change the color of your bucket before weaving).
* Optional: Leather scraps or fabric for handles.
* Optional: Embellishments like beads, buttons, or charms to personalize your basket.
Preparing Your Bucket
This step is crucial for ensuring a smooth and professional-looking finish. We want a clean slate to work with!
1. Clean the Bucket: Start by thoroughly cleaning your bucket with soap and water. Remove any dirt, grime, or stickers. Make sure it’s completely dry before moving on.
2. (Optional) Painting the Bucket: If you want to change the color of your bucket, now’s the time to do it. I recommend using spray paint specifically designed for plastic. Apply thin, even coats, allowing each coat to dry completely before applying the next. This will prevent drips and ensure a smooth, durable finish. Let the paint cure fully according to the manufacturer’s instructions.
3. Marking the Base: This step helps with even spacing. Using your measuring tape or ruler, measure the circumference of the bottom of your bucket. Divide that number by the number of vertical rope pieces you want to have (I usually go for an even number like 12 or 16 for a balanced look). Mark these points evenly around the bottom edge of the bucket. These marks will be your guides for attaching the vertical rope pieces.
Creating the Vertical Supports
These vertical pieces are the foundation of our woven basket. They provide the structure and create the framework for the weaving process.
1. Cut the Vertical Ropes: Measure the height of your bucket. Now, add about 6-8 inches to that measurement. This extra length will allow you to secure the ropes at the bottom and top of the bucket. Cut the number of rope pieces you decided on in the previous step, all to the same length.
2. Attaching the Vertical Ropes at the Bottom: This is where the hot glue gun comes in handy. Apply a generous dab of hot glue to one of the marked points on the bottom of the bucket. Quickly press one end of a rope piece into the glue, making sure it’s securely attached. Hold it in place for a few seconds until the glue sets. Repeat this process for all the rope pieces, attaching them to each of the marked points around the bottom of the bucket.
3. Securing the Bottom (Extra Strength): For added security, especially if you plan on using the basket for heavier items, you can wrap a small piece of rope around the base of each vertical rope where it meets the bucket. Secure this wrapping with hot glue. This will reinforce the connection and prevent the ropes from pulling away from the bucket.
4. Folding and Securing the Top (Temporary): Now, fold the excess rope at the top of the bucket *inward*, towards the inside of the bucket. Use clothespins or binder clips to temporarily secure them in place. This will keep them out of the way while you’re weaving and help create a neat, finished edge later on.
The Weaving Process
This is where the magic happens! We’ll be weaving the horizontal rope around the vertical supports to create the basket’s walls.
1. Preparing the Weaving Rope: Cut a long length of your weaving rope. I recommend starting with a piece that’s at least 10-15 feet long. It’s better to have too much than too little, as you can always trim off the excess.
2. Starting the Weave: Apply a dab of hot glue to the inside of the bucket, near the bottom, right next to one of the vertical rope pieces. Attach the end of your weaving rope to this spot. This will be your starting point.
3. The Over-Under Technique: This is the basic weaving technique we’ll be using. Take your weaving rope and pass it *over* the first vertical rope, then *under* the second, *over* the third, and so on, all the way around the bucket.
4. Maintaining Tension: As you weave, make sure to keep the rope taut but not too tight. You want the weave to be snug against the bucket, but you don’t want to distort the shape of the bucket or pull the vertical ropes out of place.
5. Securing Each Round: After completing a full round of weaving, gently push the rope down to ensure it’s snug against the previous round. You can add a small dab of hot glue to the inside of the bucket every few inches to secure the rope in place. This will prevent the weave from unraveling and add to the basket’s durability.
6. Joining New Ropes: When you run out of weaving rope, don’t worry! Simply overlap the end of the old rope with the beginning of the new rope for a few inches, and secure them together with hot glue on the inside of the basket. Try to position these joins on the inside of the basket where they’ll be less visible.
7. Continuing the Weave: Continue weaving, round after round, until you reach the desired height. I usually leave about an inch or two of the bucket showing at the top for a decorative edge.
Finishing the Top Edge
Now, let’s give our basket a polished and professional-looking finish.
1. Removing the Clips: Carefully remove the clothespins or binder clips that are holding the vertical ropes in place.
2. Folding and Gluing the Vertical Ropes: Apply a line of hot glue along the inside edge of the top of the bucket. Fold each vertical rope piece over the edge of the bucket and press it firmly into the glue. Hold it in place for a few seconds until the glue sets. This will create a neat, finished edge and prevent the rope ends from fraying.
3. (Optional) Creating a Braided Edge: For a more decorative finish, you can braid the ends of the vertical ropes together before gluing them down. Divide the ropes into groups of three and braid each group. Secure the ends of the braids with hot glue before attaching them to the inside of the bucket.
4. Trimming Excess Rope: If any of the vertical rope ends are too long, trim them with scissors or a utility knife. Be careful not to cut them too short, as you want them to be securely glued to the inside of the bucket.
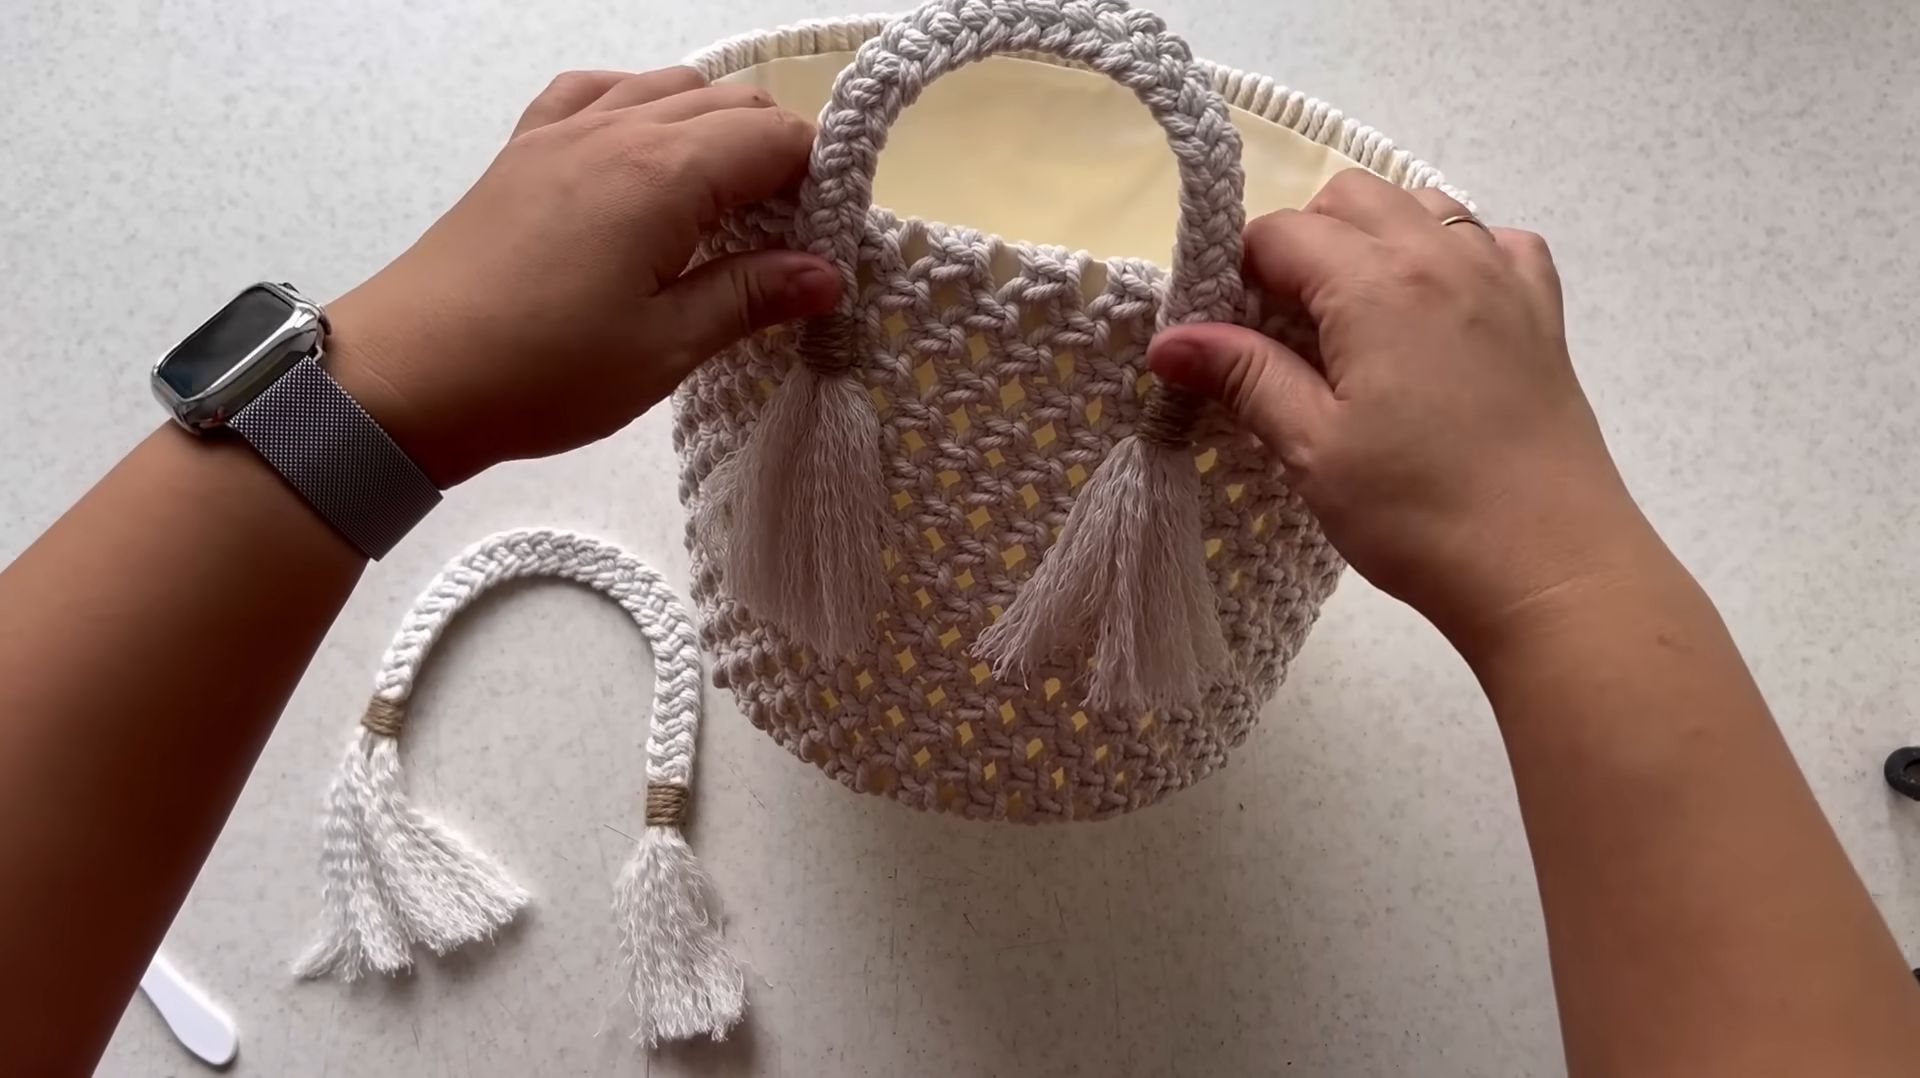
Adding Handles (Optional)
Handles make your basket more functional and easier to carry. Here’s how to add them:
1. Choosing Your Handle Material: You can use leather scraps, fabric strips, or even more of the same rope you used for weaving. I personally love the look of leather handles, as they add a touch of sophistication.
2. Measuring and Cutting the Handles: Decide on the length of your handles. I usually go for handles that are about 12-18 inches long. Cut two pieces of your chosen material to the desired length.
3. Attaching the Handles: Position the handles on opposite sides of the basket. Apply a generous amount of hot glue to the inside of the basket where you want to attach the handles. Press the ends of the handles firmly into the glue. For added security, you can also use rivets or sew the handles onto the basket.
4. Reinforcing the Handles: If you’re using rope handles, you can wrap a small piece of rope around the base of each handle where it meets the basket. Secure this wrapping with hot glue. This will reinforce the connection and prevent the handles from pulling away from the basket.
Personalizing Your Basket (Optional)
Now for the fun part – adding your own personal touch!
1. Embellishments: Add beads, buttons, charms, or other embellishments to your basket. You can glue them onto the
Conclusion
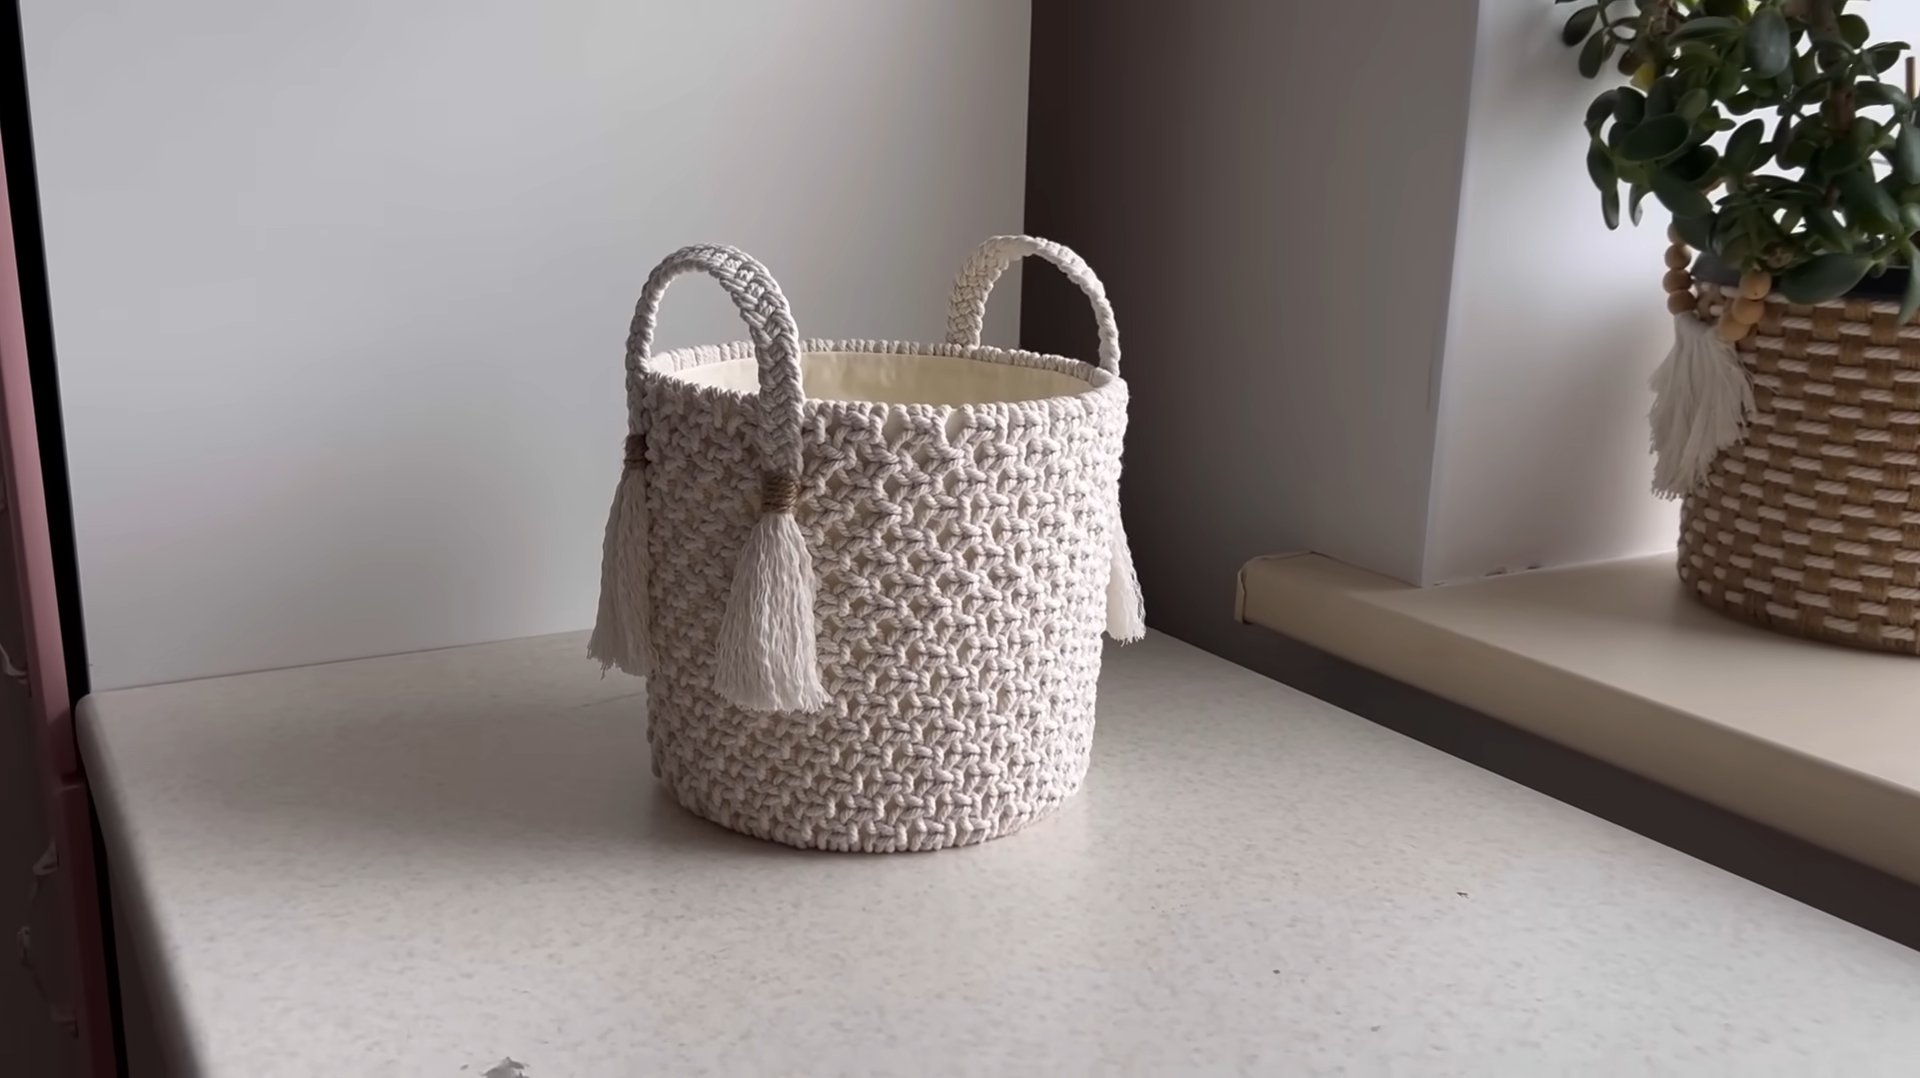
So, there you have it! Transforming an ordinary bucket into a beautiful and functional basket through the art of weaving is not just a craft project; it’s a statement. It’s a statement about resourcefulness, creativity, and a commitment to sustainable living. In a world saturated with mass-produced items, creating something unique and handmade offers a profound sense of accomplishment. This DIY bucket basket weaving project is more than just a way to repurpose an old bucket; it’s an opportunity to infuse your home with personality and charm.
Why is this a must-try? Because it’s incredibly versatile. Imagine using your woven bucket basket as a stylish planter for your favorite herbs or flowers, adding a touch of rustic elegance to your kitchen. Picture it as a chic storage solution for blankets, toys, or even laundry, decluttering your space while enhancing its aesthetic appeal. The possibilities are truly endless.
But the benefits extend beyond mere functionality and aesthetics. This project is also surprisingly therapeutic. The rhythmic motion of weaving can be incredibly calming and meditative, providing a welcome escape from the stresses of daily life. It’s a chance to disconnect from screens and reconnect with your hands, engaging in a creative process that is both rewarding and fulfilling.
Looking for variations? Absolutely! Don’t be afraid to experiment with different materials. While we’ve focused on natural fibers like jute or cotton rope, you could also use recycled fabrics, leather strips, or even plastic bags to create a truly unique and eco-friendly basket. Consider incorporating different weaving patterns to add texture and visual interest. You could try a simple over-under weave, a more intricate herringbone pattern, or even add embellishments like beads or shells for a touch of bohemian flair.
Another exciting variation is to play with color. Dye your weaving materials to create a vibrant and eye-catching basket that complements your existing décor. Or, use a combination of different colored materials to create a striped or patterned effect. The only limit is your imagination!
Furthermore, think about the size and shape of your bucket. Smaller buckets are perfect for creating desk organizers or small planters, while larger buckets can be transformed into laundry baskets or storage bins. You can even cut down a bucket to create a shorter, wider basket.
We are confident that you will enjoy the process of transforming a simple bucket into a stunning woven basket. It’s a project that is accessible to crafters of all skill levels, and the results are guaranteed to impress.
So, what are you waiting for? Gather your materials, unleash your creativity, and give this DIY bucket basket weaving project a try! We are eager to see what you create. Share your finished baskets with us on social media using #BucketBasketDIY. We can’t wait to be inspired by your unique creations and hear about your experiences. Let’s start a community of bucket basket weavers!
Frequently Asked Questions (FAQs)
What kind of bucket is best for this project?
The best type of bucket for this project is a sturdy plastic bucket with a smooth surface. Avoid buckets with excessive ridges or textures, as these can make weaving more difficult. Food-grade buckets are a great option, as they are typically durable and easy to clean. The size of the bucket will depend on the intended use of the finished basket. Smaller buckets are ideal for desk organizers or planters, while larger buckets are better suited for storage bins or laundry baskets. Make sure the bucket is clean and dry before you begin weaving.
What materials can I use for weaving?
The possibilities are endless! Natural fibers like jute, cotton rope, and hemp cord are popular choices for their rustic aesthetic and durability. You can also use recycled materials like fabric strips, old t-shirts, or even plastic bags to create a more sustainable basket. Leather strips can add a touch of sophistication, while yarn can create a softer, more textured look. Experiment with different materials to find what works best for you and your desired aesthetic. Consider the thickness and texture of the material, as this will affect the overall look and feel of the finished basket.
How do I secure the weaving material to the bucket?
There are several ways to secure the weaving material to the bucket. One common method is to use hot glue to attach the first row of weaving to the bottom of the bucket. You can also use strong tape or even drill small holes around the bottom of the bucket and thread the weaving material through them. As you weave, make sure to keep the tension consistent to create a tight and even weave. For the top edge, you can either weave the material back into itself to create a finished edge, or you can use hot glue or fabric glue to secure the ends.
What if my weaving material keeps slipping?
If your weaving material is slipping, there are a few things you can try. First, make sure you are using a strong adhesive to secure the material to the bucket. Hot glue is generally a good option, but you may need to use a stronger adhesive for certain materials. Second, try increasing the tension of your weaving. A tighter weave will help to prevent the material from slipping. Finally, you can use clips or clothespins to hold the weaving in place as you work. This is especially helpful when working with slippery materials like yarn or fabric strips.
How do I create different weaving patterns?
The most basic weaving pattern is a simple over-under weave, where you alternate weaving the material over and under each vertical strand. You can create more complex patterns by varying the number of strands you weave over and under. For example, you could try a two-over, two-under weave, or a three-over, three-under weave. Another popular pattern is the herringbone weave, which creates a diagonal pattern. You can find tutorials for different weaving patterns online or in crafting books. Experiment with different patterns to find what you like best.
How do I finish the top edge of the basket?
There are several ways to finish the top edge of the basket. One option is to simply weave the material back into itself to create a finished edge. This is a clean and simple option that works well for most materials. Another option is to use hot glue or fabric glue to secure the ends of the weaving material to the inside of the bucket. This is a good option for materials that are difficult to weave back into themselves. You can also add a decorative trim to the top edge of the basket, such as ribbon, lace, or pom-poms.
Can I paint or decorate the finished basket?
Absolutely! Once you have finished weaving your bucket basket, you can paint it, stain it, or decorate it in any way you like. Acrylic paints work well on most weaving materials, and you can use stencils or freehand designs to create unique patterns. You can also add embellishments like beads, shells, or buttons to personalize your basket. If you are using a natural fiber like jute or cotton rope, you can stain the basket to give it a richer, more rustic look. Be sure to use a sealant to protect the paint or stain and make the basket more durable.
How do I clean my woven bucket basket?
The best way to clean your woven bucket basket will depend on the materials you used to create it. For baskets made with natural fibers like jute or cotton rope, you can usually spot clean them with a damp cloth and mild soap. Avoid getting the basket too wet, as this can cause the fibers to shrink or warp. For baskets made with recycled materials like fabric strips or plastic bags, you can often wash them in the washing machine on a gentle cycle. Be sure to air dry the basket completely before using it.
Where can I find inspiration for my bucket basket weaving project?
There are many places to find inspiration for your bucket basket weaving project. Online platforms like Pinterest and Instagram are great resources for finding photos of finished baskets and different weaving patterns. You can also find tutorials and instructions on YouTube and other video-sharing websites. Crafting books and magazines are another great source of inspiration. Don’t be afraid to experiment and try new things. The best way to find your own unique style is to simply start creating!
Leave a Comment