

Clean Coffee Grinder: Is your morning cup tasting a little…off? You’re not alone! We’ve all been there, that lingering stale coffee flavor tainting what should be a blissful start to the day. But before you resign yourself to subpar coffee, let’s talk about a simple, often overlooked solution: cleaning your coffee grinder.
For centuries, coffee has been a ritual, a social connector, and a source of energy across cultures. From the bustling coffee houses of 17th-century Europe to the traditional Ethiopian coffee ceremonies, the quality of the brew has always been paramount. And a key component of that quality? Freshly ground beans, of course! But even the best beans can’t shine if your grinder is harboring old grounds and oils.
Think of your coffee grinder as a hardworking kitchen appliance. It tirelessly pulverizes those beans, but over time, residue builds up, impacting the flavor and even potentially damaging the grinder itself. That’s where our DIY cleaning trick comes in! I’m going to show you a super easy and effective way to clean coffee grinder using items you probably already have in your pantry. This simple hack will not only improve the taste of your coffee but also extend the life of your grinder. So, ditch the stale taste and let’s get grinding – towards a cleaner, tastier cup!
DIY: Breathe New Life into Your Coffee Grinder
Okay, coffee lovers, let’s talk about something crucial to that perfect morning brew: your coffee grinder! We often overlook it, but a clean grinder is essential for consistent grind size and, most importantly, delicious coffee. Over time, coffee oils and grounds build up, leading to stale flavors and even clogging. Don’t worry, though! I’m going to walk you through a super easy DIY method to clean your grinder using just a few simple ingredients you probably already have in your pantry.
What You’ll Need
Before we dive in, let’s gather our supplies. This is a quick and painless process, I promise!
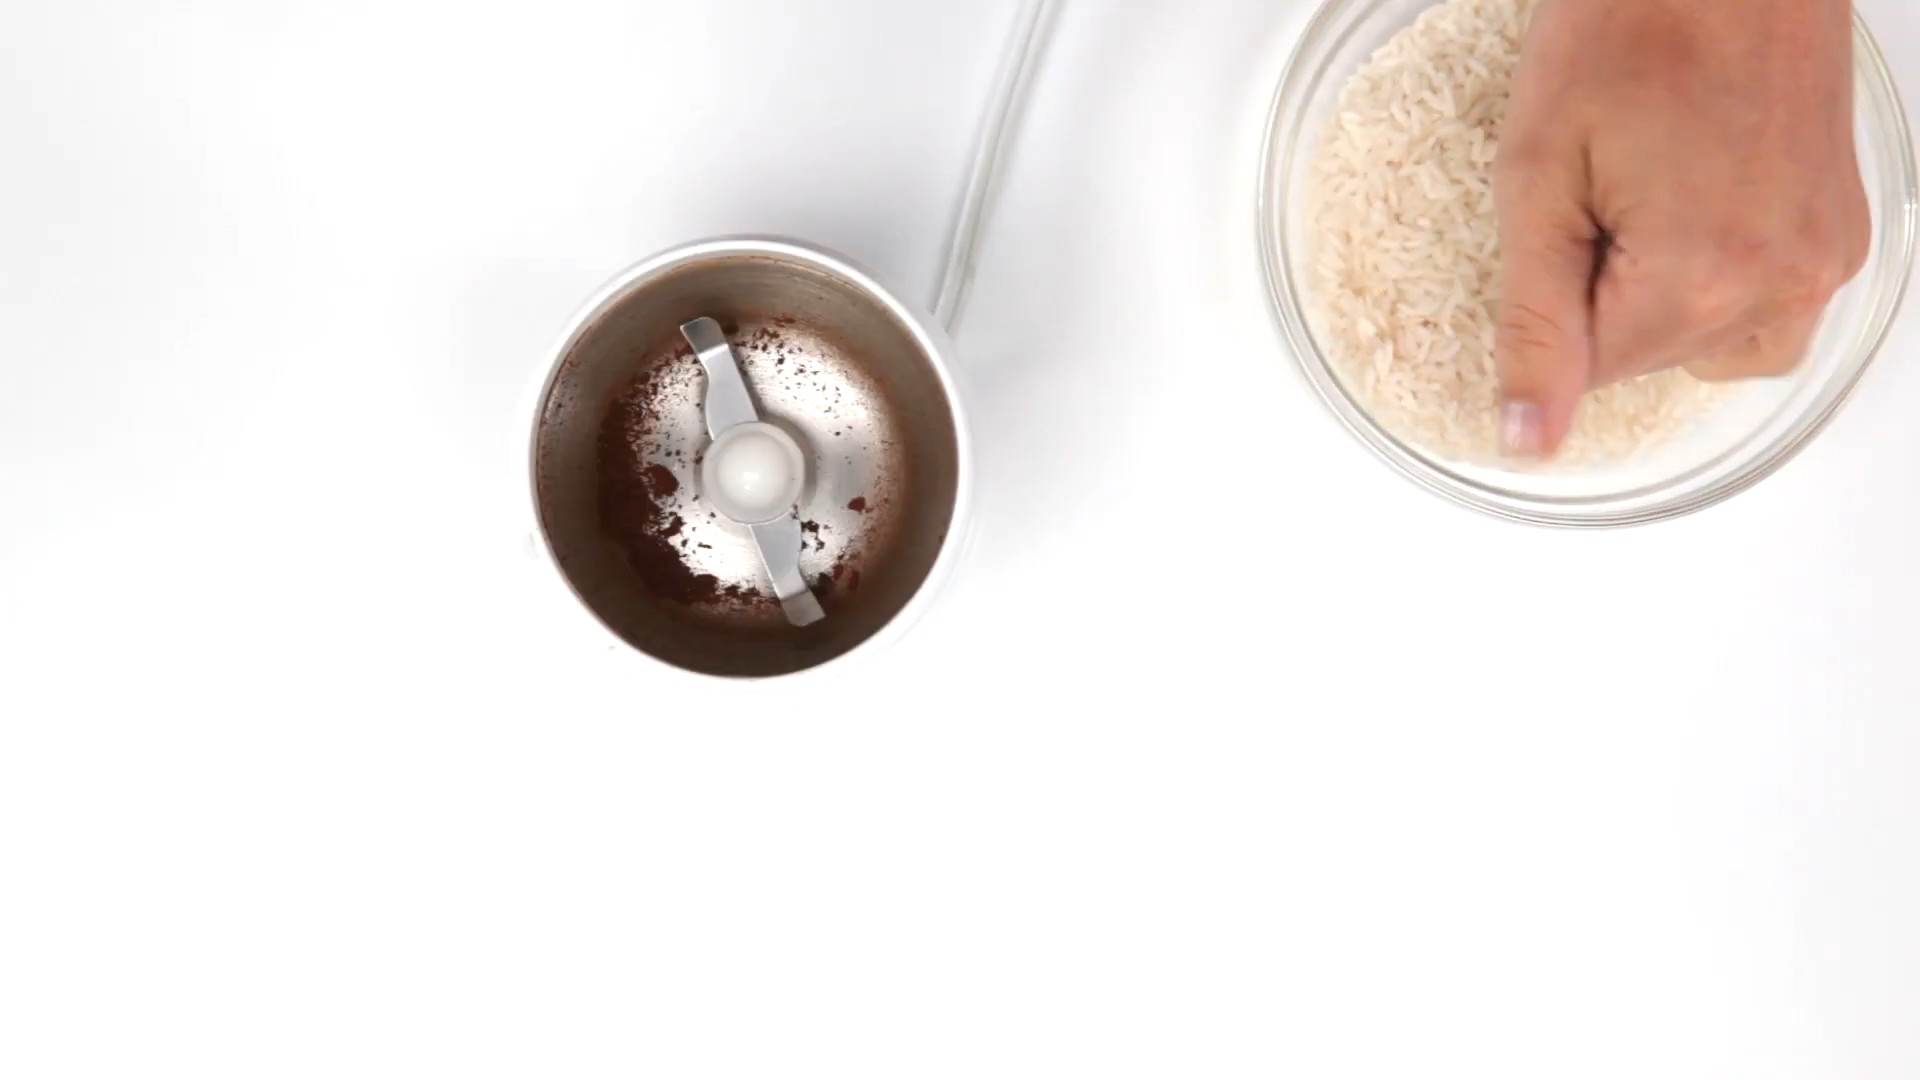
* Uncooked White Rice: This is our secret weapon! The rice acts as a gentle abrasive to scrub away those stubborn coffee residues.
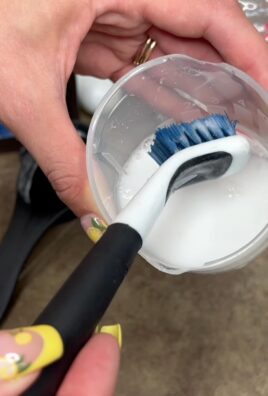
* Small Brush: A toothbrush, pastry brush, or even a small paint brush will work wonders for getting into those nooks and crannies.
* Microfiber Cloth: For wiping down surfaces and removing any lingering dust or rice particles.
* Vacuum Cleaner (Optional): A handheld vacuum or the hose attachment of your regular vacuum can be helpful for removing loose grounds.
* Screwdriver (If Needed): Some grinders require a screwdriver to disassemble certain parts. Check your grinder’s manual.
* Dish Soap (Mild): For washing removable parts.
* Water: For rinsing.
Step-by-Step Cleaning Guide
Alright, let’s get down to business! Follow these steps, and your grinder will be sparkling clean in no time.
1. Unplug Your Grinder: Safety first! Always unplug your grinder before you start cleaning it. This prevents any accidental starts while you’re working.
2. Empty the Grinder: Remove any remaining coffee beans or grounds from the hopper and the grinding chamber. I usually give it a good shake to dislodge any loose particles.
3. Disassemble Removable Parts (If Possible): Many grinders have removable hoppers, burrs, and collection containers. Consult your grinder’s manual to see which parts can be safely removed. If you can remove them, great! This will make cleaning much easier. If not, don’t worry, we can still clean it effectively.
4. Wash Removable Parts: If you removed any parts, wash them with warm, soapy water. Use a mild dish soap and a soft sponge or cloth. Rinse them thoroughly and let them air dry completely before reassembling. Make sure everything is completely dry before putting it back together! Moisture can damage your grinder and lead to mold growth.
5. The Rice Cleaning Method: This is where the magic happens!
* Pour Rice into the Hopper: Pour about 1/4 to 1/2 cup of uncooked white rice into the hopper. The amount will depend on the size of your grinder. You want enough rice to fill the grinding chamber.
* Grind the Rice: Grind the rice just like you would coffee beans. I usually grind it on a medium setting. You’ll notice that the rice turns into a fine powder.
* Inspect the Rice Powder: After grinding, examine the rice powder. You’ll likely see that it’s discolored with coffee oils and residue. This is a good sign! It means the rice is doing its job.
* Repeat if Necessary: If the rice powder is still heavily discolored, repeat the grinding process with another 1/4 cup of rice. I usually do this twice just to be sure.
6. Remove Rice Powder: Now, let’s get rid of that rice powder.
* Empty the Grinder: Empty the grinding chamber and the collection container.
* Brush Away Residue: Use your small brush to gently brush away any remaining rice powder from the burrs, the grinding chamber, and the hopper. Pay close attention to the crevices and hard-to-reach areas.
* Vacuum (Optional): If you have a vacuum cleaner with a hose attachment, use it to vacuum out any remaining rice powder. This is especially helpful for removing powder from the burrs.
7. Wipe Down Surfaces: Use a clean, damp microfiber cloth to wipe down all the exterior surfaces of the grinder. This will remove any dust or rice particles.
8. Reassemble the Grinder: Once all the parts are completely dry, reassemble your grinder according to the manufacturer’s instructions.
9. Run a Test Batch (Optional): To ensure that all the rice powder is gone, you can run a small batch of coffee beans through the grinder and discard the grounds. This is optional, but it can give you peace of mind.
Deep Cleaning the Burrs (If Possible)
If your grinder allows for it, a deeper clean of the burrs can significantly improve performance. Always consult your grinder’s manual before attempting to remove the burrs. Some grinders have burrs that are not designed to be removed by the user.
1. Remove the Burrs: Carefully remove the burrs according to your grinder’s instructions. Usually, this involves unscrewing a few screws or releasing a locking mechanism.
2. Brush the Burrs: Use your small brush to thoroughly clean the burrs. Pay close attention to the teeth and grooves, where coffee grounds tend to accumulate.
3. Soak (Optional): For a deeper clean, you can soak the burrs in a solution of warm water and a mild coffee cleaning solution (like Cafiza) for about 15-20 minutes. Be sure to rinse them thoroughly afterwards!
4. Dry the Burrs: Allow the burrs to air dry completely before reassembling them.
5. Reassemble the Burrs: Carefully reassemble the burrs according to your grinder’s instructions. Make sure they are properly aligned and secured.
Tips and Tricks for Maintaining a Clean Grinder
Here are a few extra tips to keep your grinder in tip-top shape:
* Clean Regularly: I recommend cleaning your grinder at least once a month, or more often if you use it frequently.
* Use High-Quality Beans: Using high-quality coffee beans can help reduce the amount of oil and residue that builds up in your grinder.
* Store Beans Properly: Store your coffee beans in an airtight container in a cool, dark place. This will help prevent them from becoming stale and oily.
* Don’t Grind Flavored Coffee: Avoid grinding flavored coffee beans in your grinder, as the oils and flavorings can be difficult to remove. If you do grind flavored coffee, be sure to clean your grinder thoroughly afterwards.
* Consider Coffee Grinder Cleaning Tablets: There are also coffee grinder cleaning tablets available that can help remove coffee oils and residue. Follow the manufacturer’s instructions for use.
Troubleshooting
* Grinder Still Smells Like Coffee: If your grinder still smells like coffee after cleaning, try grinding another batch of rice. You can also try using a coffee grinder cleaning tablet.
* Grinder is Clogged: If your grinder is clogged, try using a small brush or toothpick to dislodge the blockage. You can also try running a small batch of rice through the grinder.
* Burrs are Difficult to Remove: If you’re having trouble removing the burrs, consult your grinder’s manual or contact the manufacturer for assistance. Don’t force anything!
Why Cleaning Your Grinder Matters
You might be thinking, “Is all this really necessary?” And the answer is a resounding YES! Here’s why:
* Improved Coffee Flavor: A clean grinder ensures that your coffee tastes fresh and flavorful, without any stale or bitter notes.
* Consistent Grind Size: Coffee oils and residue can clog the burrs, leading to inconsistent grind size. This can affect the extraction of your coffee and result in a less-than-perfect brew.
* Extended Grinder Lifespan: Regular cleaning can help prevent damage to your grinder and extend its lifespan.
* Prevents Mold Growth: Coffee oils and residue can create a breeding ground for mold and bacteria. Regular cleaning helps prevent this.
So there you have it! A simple and effective way to clean your coffee grinder using rice. I hope this guide helps you keep your grinder in tip-top shape and enjoy delicious, flavorful coffee for years to come! Happy brewing!

Conclusion
So, there you have it! Mastering the art of cleaning your coffee grinder at home is not just about maintaining a pristine kitchen appliance; it’s about unlocking the full potential of your daily brew. We’ve explored a simple, effective, and surprisingly satisfying method that bypasses harsh chemicals and expensive cleaning solutions. This DIY approach, focusing on using readily available ingredients like rice, ensures that your grinder remains free from stale coffee oils and grounds, which can significantly impact the flavor profile of your coffee.
Why is this a must-try? Because the difference is palpable. Imagine consistently enjoying a cup of coffee that is brighter, cleaner, and more flavorful, all thanks to a simple cleaning routine. No more bitter aftertastes or muddy flavors masking the subtle nuances of your favorite beans. This method is also incredibly cost-effective and environmentally friendly. You’re reducing waste by avoiding single-use cleaning products and utilizing a natural abrasive that’s gentle on your grinder’s components.
But the benefits extend beyond just taste and cost. A clean grinder operates more efficiently, reducing strain on the motor and potentially prolonging its lifespan. Think of it as preventative maintenance that pays dividends in the long run. Plus, the process itself is surprisingly therapeutic. There’s a certain satisfaction in knowing you’re taking care of your equipment and ensuring the quality of your coffee.
Now, let’s talk variations. While rice is our go-to choice for its effectiveness and accessibility, you can experiment with other dry grains like quinoa or even coarse salt. However, be mindful of the abrasiveness of these alternatives. Always start with small amounts and monitor the process closely. For a deeper clean, consider disassembling your grinder (if possible and safe) and wiping down individual components with a damp cloth. Remember to consult your grinder’s manual for specific cleaning instructions and safety precautions.
Don’t be afraid to experiment and find what works best for you and your grinder. The key is to establish a regular cleaning routine, ideally every few weeks, depending on your usage. A quick cleaning after each use can also help prevent the buildup of oils and grounds.
We wholeheartedly encourage you to try this DIY trick for cleaning your coffee grinder. It’s a small investment of time that yields significant returns in terms of coffee quality and grinder longevity. Once you’ve experienced the difference a clean grinder makes, you’ll never go back.
And most importantly, we want to hear about your experience! Share your results, tips, and variations in the comments below. Did you notice a significant improvement in your coffee’s flavor? Did you try a different grain or cleaning method? Your feedback will help other coffee enthusiasts discover the joys of a clean coffee grinder and elevate their coffee experience. Let’s build a community of clean-grinder aficionados!
Frequently Asked Questions (FAQ)
Q: How often should I clean my coffee grinder?
A: The frequency of cleaning depends on how often you use your coffee grinder. As a general guideline, aim to clean it every 2-4 weeks. If you grind coffee daily, cleaning it every two weeks is recommended. If you only grind coffee occasionally, you can extend the cleaning interval to once a month. However, if you notice a change in the flavor of your coffee, such as a bitter or stale taste, it’s a sign that your grinder needs cleaning, regardless of the time elapsed since the last cleaning. Regular cleaning prevents the buildup of coffee oils and grounds, which can negatively impact the taste of your brew.
Q: Can I use water to clean my coffee grinder?
A: While you can use a damp cloth to wipe down certain parts of your coffee grinder, avoid using excessive water, especially on the internal components. Water can damage the motor and other electrical parts. It can also cause rust and corrosion. If you disassemble your grinder for cleaning, ensure all parts are completely dry before reassembling it. The rice cleaning method is a dry cleaning technique that effectively removes coffee oils and grounds without the risk of water damage.
Q: What type of rice is best for cleaning a coffee grinder?
A: Plain, uncooked white rice is the most commonly recommended type of rice for cleaning a coffee grinder. It’s readily available, inexpensive, and has a good abrasive texture for removing coffee oils and grounds. Avoid using flavored rice or rice that has been pre-cooked, as these may leave residue in your grinder. Brown rice can also be used, but it’s slightly harder than white rice, so use it with caution, especially if you have a grinder with delicate burrs.
Q: Will cleaning my coffee grinder with rice damage it?
A: When done correctly, cleaning your coffee grinder with rice should not damage it. However, it’s essential to use the right amount of rice and avoid over-grinding. Start with a small amount of rice (about 1/4 cup) and grind it in short bursts. If you hear any unusual noises or feel resistance, stop immediately. Over-grinding the rice can put unnecessary strain on the motor and potentially damage the burrs. Always consult your grinder’s manual for specific cleaning instructions and safety precautions.
Q: My coffee grinder has a lot of built-up residue. Will the rice method be effective?
A: The rice method is generally effective for removing moderate amounts of coffee residue. However, if your grinder has a significant buildup of oils and grounds, you may need to repeat the process several times. You can also try disassembling your grinder (if possible and safe) and wiping down individual components with a damp cloth or a brush. For stubborn residue, consider using a specialized coffee grinder cleaning product, but always follow the manufacturer’s instructions carefully.
Q: Can I use this method for all types of coffee grinders?
A: The rice cleaning method is generally safe for most blade and burr coffee grinders. However, it’s always best to consult your grinder’s manual for specific cleaning recommendations. Some grinders may have delicate components that are not suitable for abrasive cleaning methods. If you’re unsure, contact the manufacturer or a qualified appliance repair technician.
Q: What do I do with the rice after cleaning my coffee grinder?
A: Do not consume the rice after using it to clean your coffee grinder. The rice will have absorbed coffee oils and grounds, making it unpalatable and potentially harmful. Dispose of the rice properly in the trash or compost bin.
Q: I tried the rice method, and my coffee still tastes bitter. What could be the problem?
A: If your coffee still tastes bitter after cleaning your grinder with rice, there could be other factors contributing to the bitterness. Consider the following:
* **Coffee Bean Quality:** Stale or low-quality coffee beans can produce a bitter taste.
* **Grind Size:** An overly fine grind can lead to over-extraction and bitterness.
* **Water Temperature:** Water that is too hot can also cause bitterness.
* **Brewing Method:** Certain brewing methods, such as French press, are more prone to bitterness if not done correctly.
* **Water Quality:** Hard water or water with impurities can affect the taste of your coffee.
Ensure you are using fresh, high-quality coffee beans, grinding them to the appropriate size for your brewing method, and using water at the correct temperature. If the bitterness persists, try adjusting your brewing technique or using a different water source.
Q: Are there any alternatives to using rice for cleaning my coffee grinder?
A: Yes, there are several alternatives to using rice for cleaning your coffee grinder:
* **Grinder Cleaning Tablets/Pellets:** These are specifically designed for cleaning coffee grinders and are available at most coffee supply stores.
* **Dry Bread:** Some people use dry bread to absorb coffee oils and grounds. However, this method may not be as effective as rice.
* **Specialized Cleaning Brushes:** These brushes are designed to reach into the crevices of your grinder and remove loose grounds.
* **Compressed Air:** Compressed air can be used to blow out loose grounds from the grinder. However, this method may not remove coffee oils.
Choose the method that best suits your needs and the type of coffee grinder you have. Always follow the manufacturer’s instructions carefully.


Leave a Comment