

Clean Cutting Board Naturally – that’s the secret weapon every home cook needs in their arsenal! Let’s face it, our cutting boards are the unsung heroes of the kitchen, silently enduring countless chopping sessions. But with all that action, they can quickly become breeding grounds for bacteria and stained with remnants of past meals. Yuck!
For generations, resourceful cooks have sought natural ways to keep their cutting boards pristine. Think back to your grandmother’s kitchen – she probably had a trick or two up her sleeve, passed down through generations, for keeping things sparkling without harsh chemicals. These methods weren’t just about cleanliness; they were about respecting the food we prepare and the tools we use.
In today’s world, where we’re all striving for healthier and more sustainable lifestyles, the need to clean cutting board naturally is more important than ever. Who wants to risk contaminating their food with harmful chemicals from commercial cleaners? Plus, let’s be honest, those cleaners can be expensive! That’s why I’m so excited to share some simple, effective, and budget-friendly DIY tricks that will leave your cutting boards looking and smelling fresh, naturally. Get ready to ditch the chemicals and embrace the power of natural cleaning!
DIY: Revive Your Cutting Board with Natural Cleaning Power!
Hey everyone! I’m so excited to share my favorite method for cleaning and revitalizing wooden cutting boards. I’ve tried so many different things over the years, and this combination of natural ingredients is by far the most effective and gentle. Plus, it’s super satisfying to see your board go from dull and stained to looking almost brand new! Let’s get started!
What You’ll Need:
* Coarse Sea Salt: This acts as a gentle abrasive to scrub away food particles and stains.
* Lemon: The citric acid in lemon juice is a natural disinfectant and deodorizer. It also helps to brighten the wood.
* White Vinegar: Another powerful disinfectant and cleaner.
* Baking Soda: Helps to lift stains and neutralize odors.
* Food-Grade Mineral Oil or Beeswax: This is crucial for rehydrating and protecting the wood after cleaning. I prefer mineral oil because it’s readily available and doesn’t impart any flavor.
* Clean Cloths or Paper Towels: For wiping and drying.
* Scrub Brush or Scraper: For stubborn stains.
* Small Bowl: For mixing the baking soda paste.
* Optional: A plastic scraper or old credit card for scraping off excess salt.
Step-by-Step Cleaning Process
Okay, let’s dive into the cleaning process. I promise it’s easier than it sounds!
1. Initial Rinse: Start by rinsing your cutting board under warm water to remove any loose food particles. Don’t soak it! We want to avoid excessive water absorption.
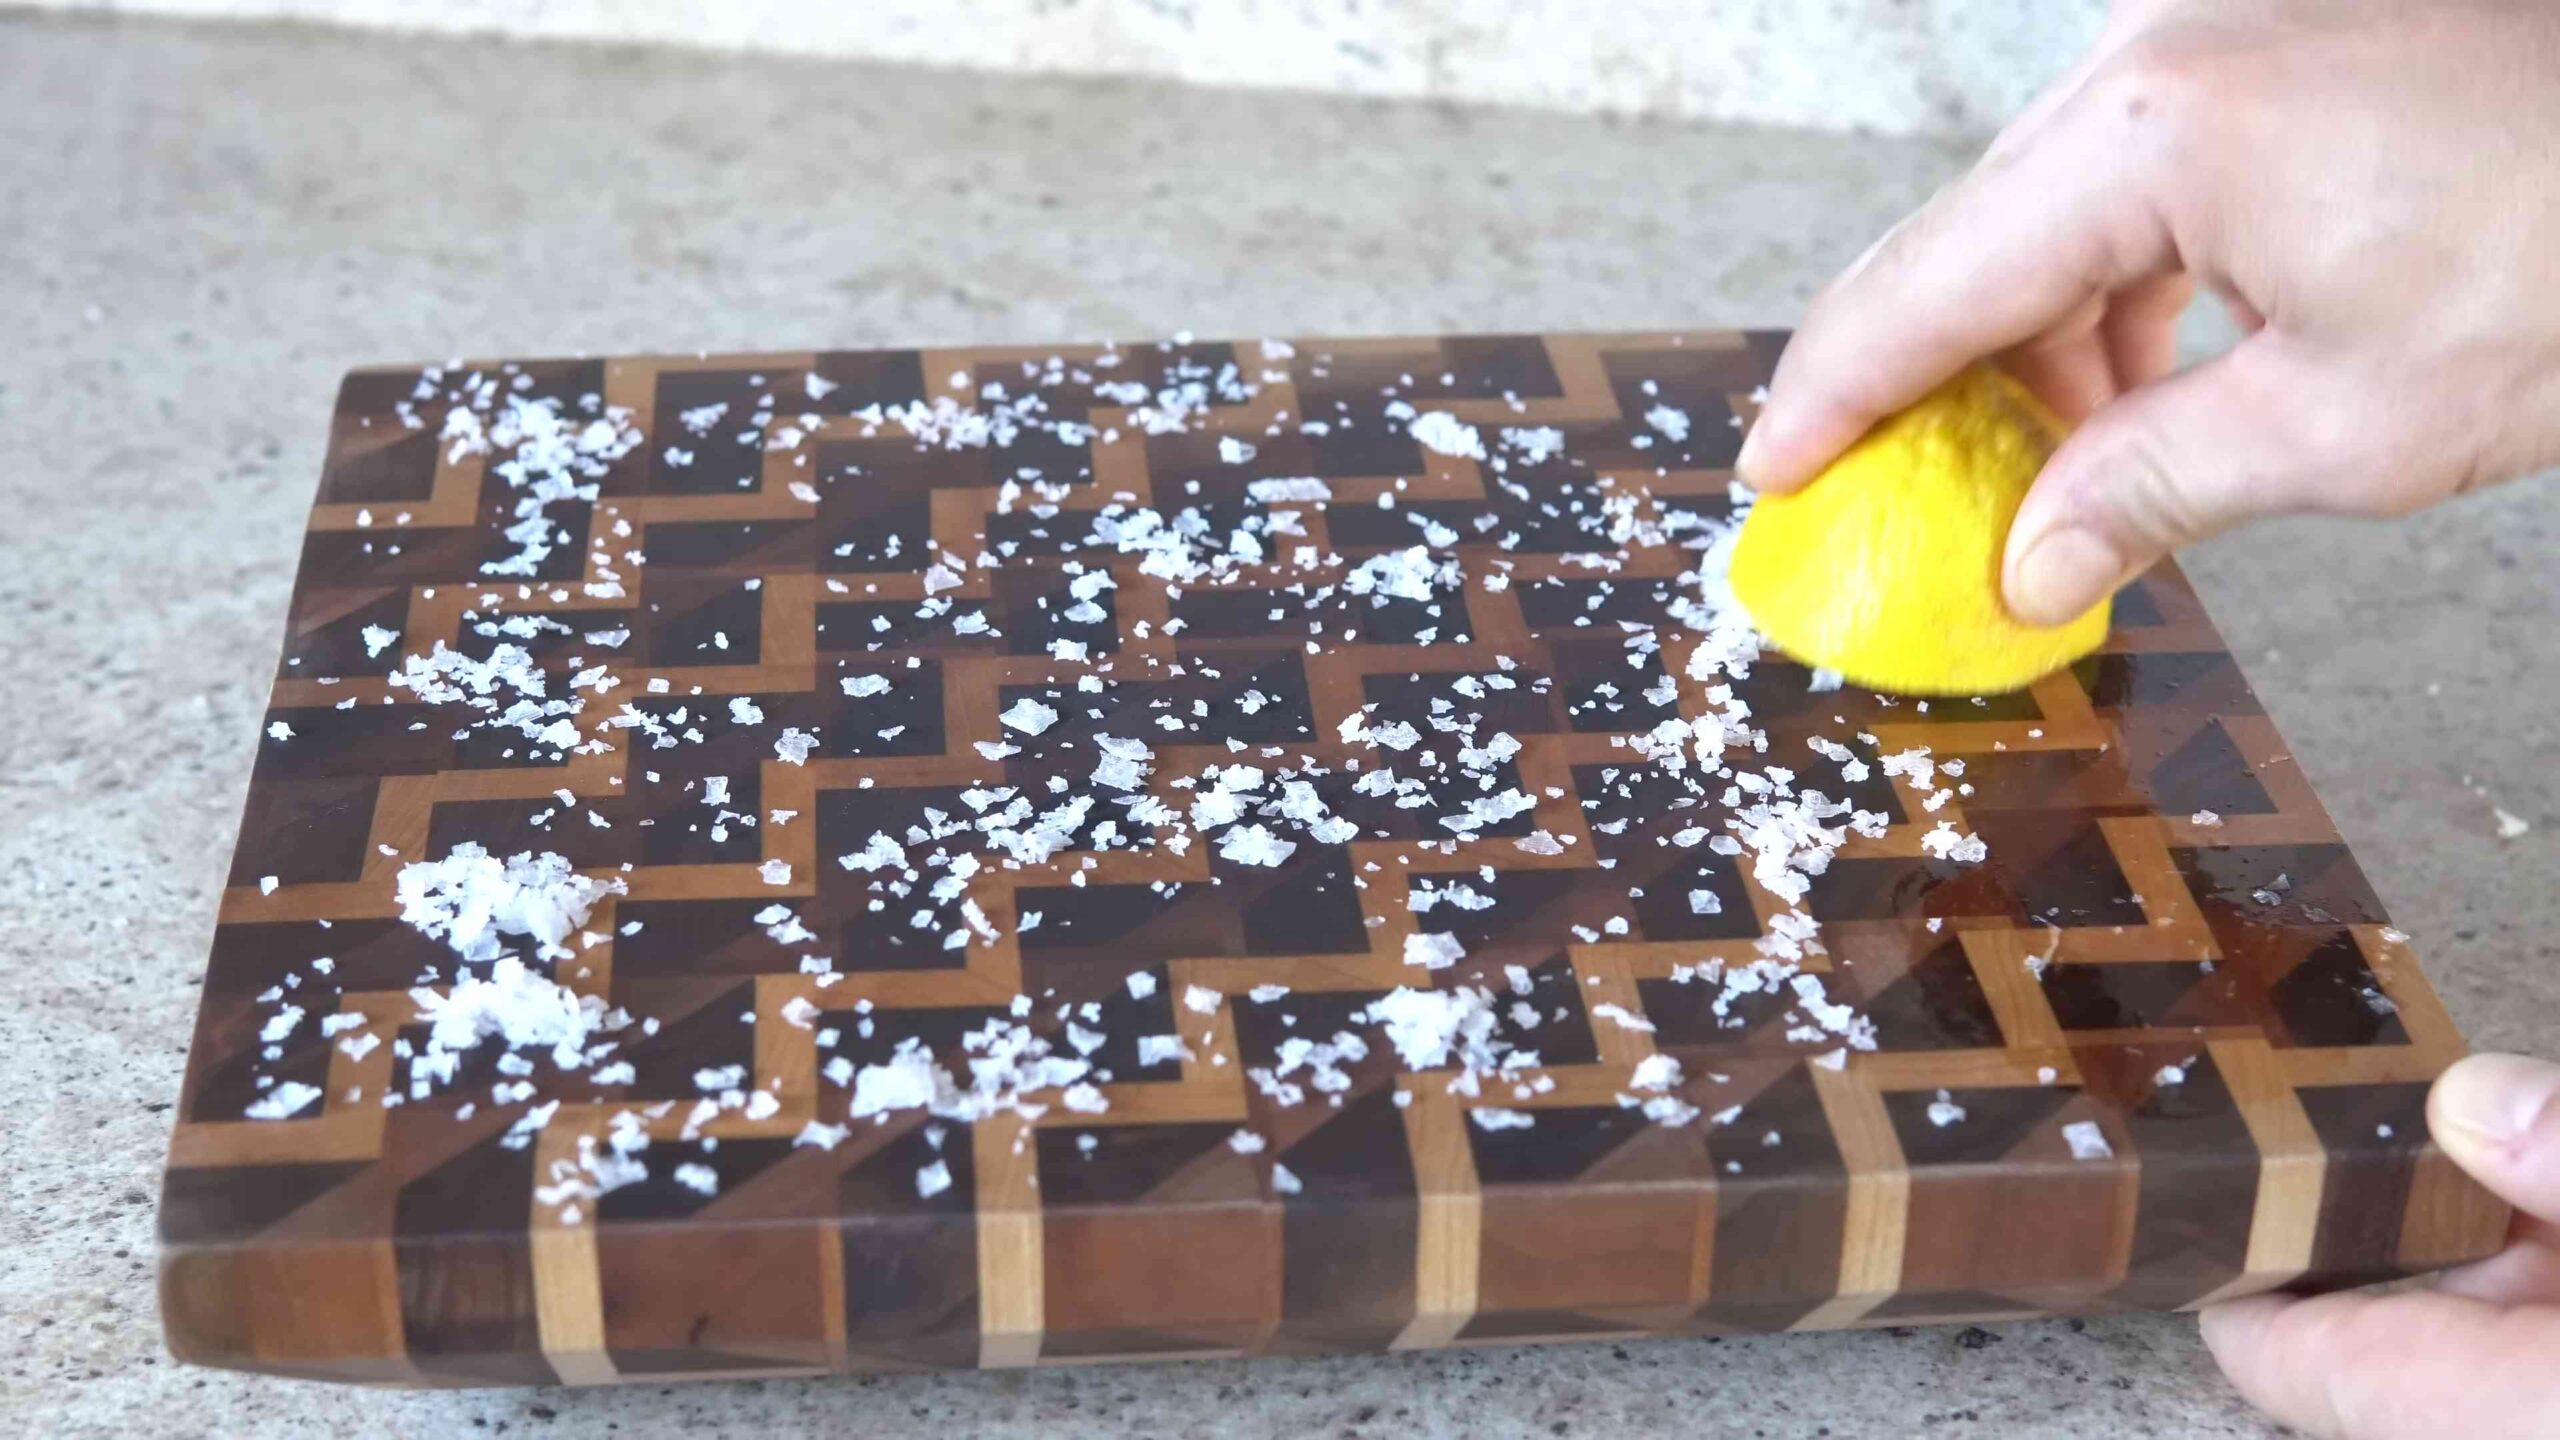
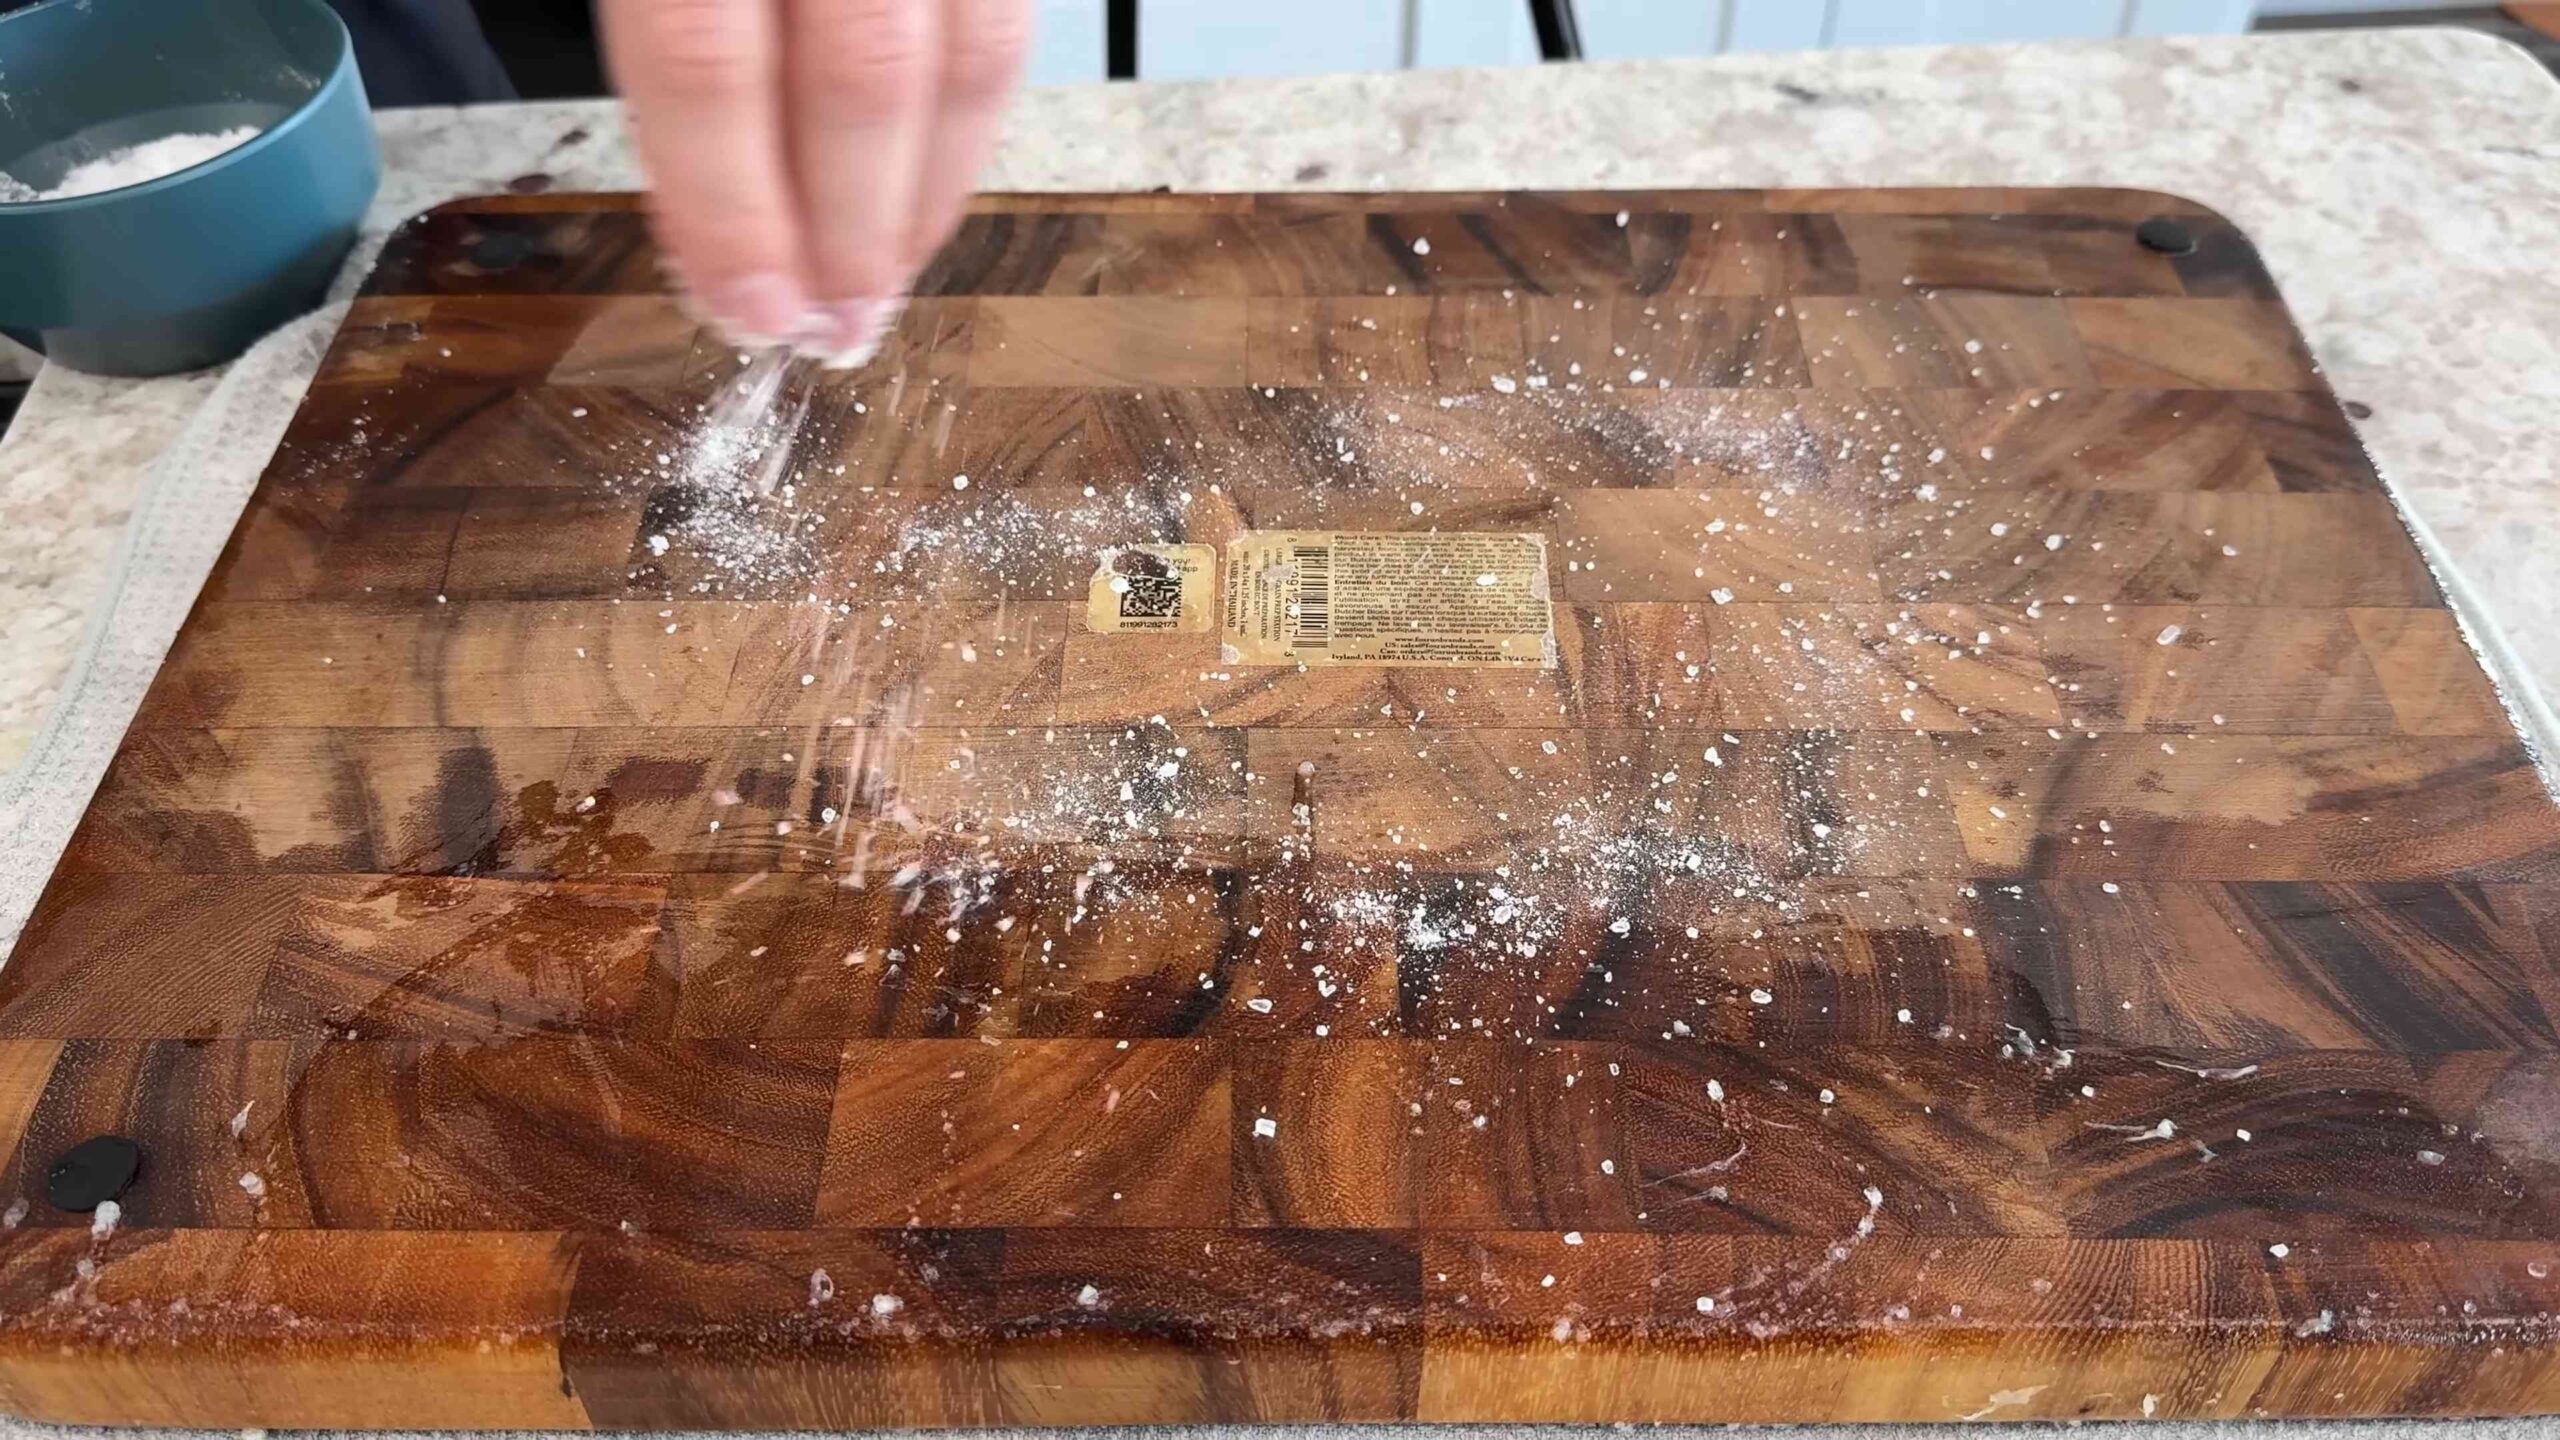
2. Salt Scrub: Generously sprinkle coarse sea salt all over the surface of the cutting board. Don’t be shy! You want a good layer covering the entire area.
3. Lemon Power: Cut a lemon in half. Using one half, squeeze some juice over the salt-covered board. Then, use the cut side of the lemon to scrub the salt into the wood in a circular motion. Apply firm pressure, focusing on any stained or heavily used areas. This is where the magic happens! The salt acts as an abrasive, while the lemon juice disinfects and brightens.
4. Vinegar Boost (Optional): For extra cleaning power, especially if your board has lingering odors, you can lightly spray the salted and lemon-juiced board with white vinegar. Let it sit for a few minutes (no more than 5) before proceeding to the next step. The vinegar will react with the salt and lemon, creating a fizzing action that helps to lift grime.
5. Scrubbing Time: Continue scrubbing with the lemon for a few more minutes, ensuring you cover the entire surface. Pay special attention to any grooves or knife marks, as these areas tend to harbor bacteria.
6. Rinse Thoroughly: Rinse the cutting board thoroughly with warm water, making sure to remove all traces of salt and lemon.
7. Baking Soda Paste (For Stubborn Stains): If you still have stubborn stains after the salt and lemon scrub, it’s time to bring in the baking soda. In a small bowl, mix baking soda with a little water to form a thick paste.
8. Apply Baking Soda Paste: Apply the baking soda paste to the stained areas and let it sit for about 15-20 minutes. The baking soda will help to lift the stains and neutralize any remaining odors.
9. Scrub Again: After the baking soda paste has sat for a while, use a scrub brush or the lemon half to scrub the stained areas again.
10. Final Rinse: Rinse the cutting board thoroughly with warm water to remove all traces of baking soda.
11. Dry Completely: This is super important! Use a clean cloth or paper towels to dry the cutting board thoroughly. Make sure to get into all the grooves and edges. You can even let it air dry for a few hours to ensure it’s completely dry before oiling.
Oiling and Protecting Your Cutting Board
Now that your cutting board is clean and dry, it’s time to rehydrate and protect the wood with oil. This is essential for preventing cracking and warping, and it will also help to keep your board looking its best.
1. Apply Mineral Oil (or Beeswax): Pour a generous amount of food-grade mineral oil onto the cutting board. Alternatively, if you’re using beeswax, follow the manufacturer’s instructions for application.
2. Spread Evenly: Use a clean cloth or paper towel to spread the oil evenly over the entire surface of the cutting board, including the edges and the bottom.
3. Let it Soak: Allow the oil to soak into the wood for at least a few hours, or even overnight. The longer it soaks, the better. You’ll notice the wood absorbing the oil, becoming richer and more vibrant in color.
4. Wipe Off Excess: After the oil has soaked in, use a clean cloth or paper towel to wipe off any excess oil. You want the board to be well-oiled, but not greasy.
5. Repeat (If Necessary): If your cutting board is particularly dry or has been neglected for a while, you may need to repeat the oiling process a few times.
6. Regular Maintenance: To keep your cutting board in good condition, I recommend oiling it regularly, especially after washing. How often you need to oil it will depend on how frequently you use it and how dry your environment is. I usually oil mine about once a month, or whenever it starts to look dry.
Tips and Tricks for Cutting Board Care
Here are a few extra tips to help you keep your cutting board clean and in tip-top shape:
* Don’t Soak: Never soak your wooden cutting board in water, as this can cause it to warp and crack.
* Avoid the Dishwasher: Wooden cutting boards are not dishwasher safe. The high heat and harsh detergents can damage the wood.
* Dry Thoroughly: Always dry your cutting board thoroughly after washing to prevent mold and mildew growth.
* Use Separate Boards: Consider using separate cutting boards for raw meats and vegetables to prevent cross-contamination.
* Sanitize Regularly: Even with regular cleaning, it’s a good idea to sanitize your cutting board periodically. You can do this by wiping it down with a solution of white vinegar and water.
* Address Knife Marks: Over time, knife marks can accumulate on your cutting board, creating a breeding ground for bacteria. You can remove these marks by sanding the board lightly with fine-grit sandpaper. Be sure to re-oil the board after sanding.
* Store Properly: Store your cutting board in a dry, well-ventilated area. Avoid storing it in a damp or humid environment.
* Dealing with Odors: If your cutting board has absorbed strong odors, such as garlic or onions, you can try rubbing it with a paste of baking soda and water, or soaking it in a solution of white vinegar and water.
* Choosing the Right Oil: Always use food-grade mineral oil or beeswax for oiling your cutting board. Avoid using vegetable oils, as they can go rancid and impart an unpleasant odor.
* Consider Board Feet: If you’re serious about woodworking and want to maintain several boards, consider investing in board feet of hardwood for future projects. Knowing how to calculate board feet can help you estimate material costs.
* Don’t Forget the Sides and Bottom: When cleaning and oiling, remember to treat all surfaces of the cutting board, including the sides and bottom. This will help to prevent warping and cracking.
* Regular Inspection: Periodically inspect your cutting board for any signs of damage, such as cracks or warping. If you notice any damage, it’s important to address it promptly to prevent further deterioration.
* Be Patient: Cleaning and maintaining a wooden cutting board takes time and effort, but it’s worth it to keep your board in good condition and prevent the spread of bacteria.
I hope you found this guide helpful! With a little bit of care and attention, you can keep your wooden cutting board clean, healthy, and looking its best for years to come. Happy cleaning!
Conclusion
So, there you have it! A simple, effective, and completely natural way to clean cutting boards naturally. We’ve walked you through the process, highlighting the power of readily available ingredients like lemon, salt, and baking soda to banish lingering odors, stubborn stains, and harmful bacteria from your beloved cutting boards.
Why is this DIY trick a must-try? Because it’s not just about cleanliness; it’s about health, sustainability, and preserving the life of your kitchen essentials. Harsh chemical cleaners can leave behind residues that leach into your food, while also contributing to environmental pollution. This natural method avoids all of that, offering a safe and eco-friendly alternative that’s just as, if not more, effective. Plus, it’s incredibly cost-effective! You likely already have these ingredients in your pantry.
But don’t stop there! Feel free to experiment and adapt this method to suit your specific needs and preferences. For particularly stubborn stains, try creating a paste of baking soda and water and letting it sit on the affected area for a longer period before scrubbing. If you’re dealing with a wooden cutting board, consider finishing with a coat of food-grade mineral oil to help protect the wood and prevent it from drying out and cracking. Another variation involves using white vinegar instead of lemon juice for its potent disinfecting properties. Just be sure to rinse thoroughly afterward. You can also add a few drops of tea tree oil to your cleaning solution for an extra boost of antibacterial power, but remember to use it sparingly and rinse well, as it has a strong scent.
This natural cleaning method is a game-changer for anyone who values a clean and healthy kitchen. It’s a simple yet powerful way to keep your cutting boards in top condition, ensuring they’re always ready for your next culinary adventure.
We’re confident that once you try this DIY trick, you’ll be amazed by the results. The satisfaction of knowing you’re using a safe, natural, and effective method to clean your cutting boards is truly rewarding.
So, what are you waiting for? Gather your ingredients, grab your cutting board, and give this natural cleaning method a try! We’re eager to hear about your experience. Share your before-and-after photos, your favorite variations, and any tips or tricks you discover along the way in the comments below. Let’s build a community of clean-cutting-board enthusiasts! Your feedback will not only help others but also inspire us to continue sharing valuable and sustainable kitchen hacks. Let us know if you have any questions, and happy cleaning!
Frequently Asked Questions (FAQ)
1. How often should I clean my cutting board using this natural method?
The frequency of cleaning depends on how often you use your cutting board and what you’re cutting on it. For daily use, a quick rinse with soap and water after each use is sufficient. However, for a more thorough cleaning using the lemon, salt, and baking soda method, we recommend doing it at least once a week, or more often if you’ve been cutting raw meat, poultry, or fish. These items can harbor bacteria that require a more intensive cleaning process. If you notice any lingering odors or stains, that’s another sign that it’s time for a deep clean. Remember, prevention is key! Cleaning your cutting board promptly after each use will help prevent the buildup of bacteria and stains, making the cleaning process easier in the long run.
2. Can I use this method on all types of cutting boards?
This natural cleaning method is generally safe for most types of cutting boards, including wooden, plastic, and bamboo. However, it’s always a good idea to test a small, inconspicuous area first, especially if you’re using it on a more delicate material. For wooden cutting boards, be mindful of excessive moisture, as it can cause warping or cracking. Always dry your wooden cutting board thoroughly after cleaning and consider applying a food-grade mineral oil to help protect the wood. For plastic cutting boards, this method is particularly effective at removing stains and odors. Bamboo cutting boards are naturally antimicrobial, but they still benefit from regular cleaning to maintain their hygiene. Avoid using this method on glass cutting boards, as the abrasive nature of salt and baking soda can scratch the surface.
3. What if I don’t have lemons? Can I use something else?
If you don’t have lemons on hand, you can substitute them with white vinegar or lime juice. White vinegar is a powerful disinfectant and can effectively kill bacteria and remove odors. Lime juice has similar properties to lemon juice and can also help to brighten stains. If using vinegar, dilute it with water (1:1 ratio) to avoid damaging the cutting board. You can also use a combination of baking soda and hydrogen peroxide for a powerful cleaning effect. Simply sprinkle baking soda on the cutting board, then spray with hydrogen peroxide. Let it fizz for a few minutes, then scrub and rinse thoroughly.
4. How do I get rid of stubborn odors from my cutting board?
Stubborn odors, especially those from garlic, onions, or fish, can be challenging to remove. In addition to the lemon, salt, and baking soda method, you can try the following:
* Baking Soda Paste: Make a thick paste of baking soda and water and apply it to the affected area. Let it sit for several hours or even overnight before scrubbing and rinsing.
* Vinegar Soak: Soak the cutting board in a solution of equal parts white vinegar and water for 30 minutes. This can help to neutralize odors.
* Sunlight: Place the cutting board in direct sunlight for a few hours. Sunlight has natural disinfecting and deodorizing properties.
5. Is it safe to use baking soda on my cutting board?
Yes, baking soda is generally safe to use on cutting boards. It’s a mild abrasive that can help to scrub away stains and debris without damaging the surface. However, avoid using excessive force when scrubbing, as it can scratch more delicate materials. Always rinse the cutting board thoroughly after using baking soda to remove any residue.
6. How do I prevent my cutting board from getting stained in the first place?
Prevention is always better than cure! Here are some tips to prevent your cutting board from getting stained:
* Use separate cutting boards: Use one cutting board for raw meat, poultry, and fish, and another for fruits, vegetables, and cooked foods. This will help to prevent cross-contamination and reduce the risk of staining.
* Wash immediately after use: Don’t let food residue sit on the cutting board for too long. Wash it immediately after use to prevent stains from setting in.
* Pre-treat with oil: For wooden cutting boards, regularly apply a food-grade mineral oil to help protect the wood and prevent it from absorbing stains.
* Avoid cutting highly staining foods directly on the board: When cutting beets, turmeric, or other highly staining foods, consider placing a piece of parchment paper or plastic wrap on the cutting board first.
7. Can I put my cutting board in the dishwasher?
Whether or not you can put your cutting board in the dishwasher depends on the material. Plastic cutting boards are generally dishwasher-safe, but wooden cutting boards should never be put in the dishwasher, as the high heat and moisture can cause them to warp, crack, or split. Bamboo cutting boards may be dishwasher-safe on the top rack, but it’s best to check the manufacturer’s instructions. Always hand-wash wooden and bamboo cutting boards to prolong their lifespan.
8. What are the best practices for maintaining a wooden cutting board?
Maintaining a wooden cutting board requires a bit more care than plastic or bamboo. Here are some best practices:
* Oil regularly: Apply a food-grade mineral oil to the cutting board every few weeks, or more often if it looks dry. This will help to protect the wood and prevent it from cracking.
* Avoid soaking: Never soak a wooden cutting board in water, as this can cause it to warp or crack.
* Dry thoroughly: Always dry the cutting board thoroughly after washing it.
* Store properly: Store the cutting board in a dry place, away from direct sunlight or heat.
* Sanitize regularly: In addition to cleaning, sanitize your wooden cutting board regularly with a solution of white vinegar and water.
9. Where can I find food-grade mineral oil for my wooden cutting board?
Food-grade mineral oil is readily available at most kitchen supply stores, hardware stores, and online retailers. Look for a product that is specifically labeled as “food-grade” or “cutting board oil.” Avoid using other types of oil, such as vegetable oil or olive oil, as they can go rancid and leave a bad odor.
10. What if my cutting board has deep scratches or grooves?
Deep scratches or grooves in a cutting board can harbor bacteria and make it difficult to clean properly. If your cutting board has significant damage, it may be time to replace it. However, if the scratches are not too deep, you can try sanding the surface of the cutting board to smooth it out. Use a fine-grit sandpaper and sand in the direction of the wood grain. After sanding, be sure to apply a food-grade mineral oil to protect the wood.

Leave a Comment