

Deep Clean Your Kitchen: Is your kitchen feeling less like a culinary haven and more like a chaotic battleground? Don’t worry, you’re not alone! We’ve all been there, staring at the overflowing sink and sticky countertops, wondering where to even begin. But fear not, because this isn’t just another cleaning article; it’s your personalized guide to reclaiming your kitchen and transforming it into a sparkling, hygienic space you’ll actually *enjoy* spending time in.
For generations, a clean kitchen has been the heart of the home. From ancient hearths to modern marvels, the kitchen has always been a place of nourishment, connection, and family. But let’s be honest, maintaining that pristine image can feel like a Herculean task. That’s why I’m sharing my favorite DIY tricks and hacks to help you deep clean your kitchen efficiently and effectively.
Why is this so important? Beyond the obvious aesthetic appeal, a deep clean eliminates harmful bacteria, prevents foodborne illnesses, and creates a healthier environment for you and your loved ones. Plus, a clean kitchen is simply more inviting and conducive to creating delicious meals and lasting memories. So, grab your gloves, gather your supplies, and let’s dive into these simple yet powerful DIY solutions that will leave your kitchen looking and feeling brand new!
Deep Clean Your Kitchen: A DIY Guide to Sparkling Surfaces
Okay, let’s face it, the kitchen is the heart of the home, but it’s also a magnet for grime, spills, and general chaos. A quick wipe-down here and there just doesn’t cut it sometimes. That’s where a deep clean comes in! I’m going to walk you through my tried-and-true method for transforming your kitchen from a sticky, dusty mess to a sparkling, inviting space. Get ready to roll up your sleeves – it’s time to get cleaning!
What You’ll Need: Your Cleaning Arsenal
Before we dive in, let’s gather our supplies. Having everything on hand will make the process much smoother. Here’s my go-to list:
* Cleaning cloths: Microfiber cloths are my absolute favorite. They’re super absorbent and great for lifting dirt. Stock up on a bunch!
* Sponges: A good scrubbing sponge is essential for tackling tough messes.
* Spray bottles: You’ll need these for your cleaning solutions.
* Dish soap: A classic for a reason.
* White vinegar: My secret weapon for natural cleaning. It’s amazing for cutting grease and disinfecting.
* Baking soda: Another natural powerhouse. It’s great for scrubbing and deodorizing.
* All-purpose cleaner: For general cleaning tasks. Choose one you like the scent of!
* Glass cleaner: For sparkling windows and mirrors.
* Oven cleaner: If your oven needs some serious TLC.
* Floor cleaner: Appropriate for your type of flooring (tile, hardwood, etc.).
* Toothbrush: An old toothbrush is perfect for getting into those hard-to-reach crevices.
* Rubber gloves: Protect your hands!
* Trash bags: For all the discarded gunk.
* Screwdriver: You might need this to remove vent covers or appliance parts for cleaning.
* Vacuum cleaner: For initial dust and crumb removal.
* Step stool: To reach high places.
Phase 1: Declutter and Prep
Before we start scrubbing, we need to clear the decks. This will make the actual cleaning process much more efficient.
1. Clear the countertops: Remove everything from your countertops – appliances, utensils, decorations, everything! This will give you a clear surface to work with.
2. Empty the sink: Wash any dishes that are in the sink and clear the drain.
3. Take out the trash: Replace the trash bag and take out any full bags.
4. Remove rugs and mats: Roll up any rugs or mats and set them aside to be cleaned later.
5. Open windows: Ventilation is key, especially when using cleaning products. Open windows to let in fresh air.
6. Load the dishwasher: Load up the dishwasher with any dirty dishes. If you don’t have a dishwasher, fill the sink with hot, soapy water.
Phase 2: Tackling the Appliances
Appliances are often the dirtiest part of the kitchen, so let’s tackle them first.
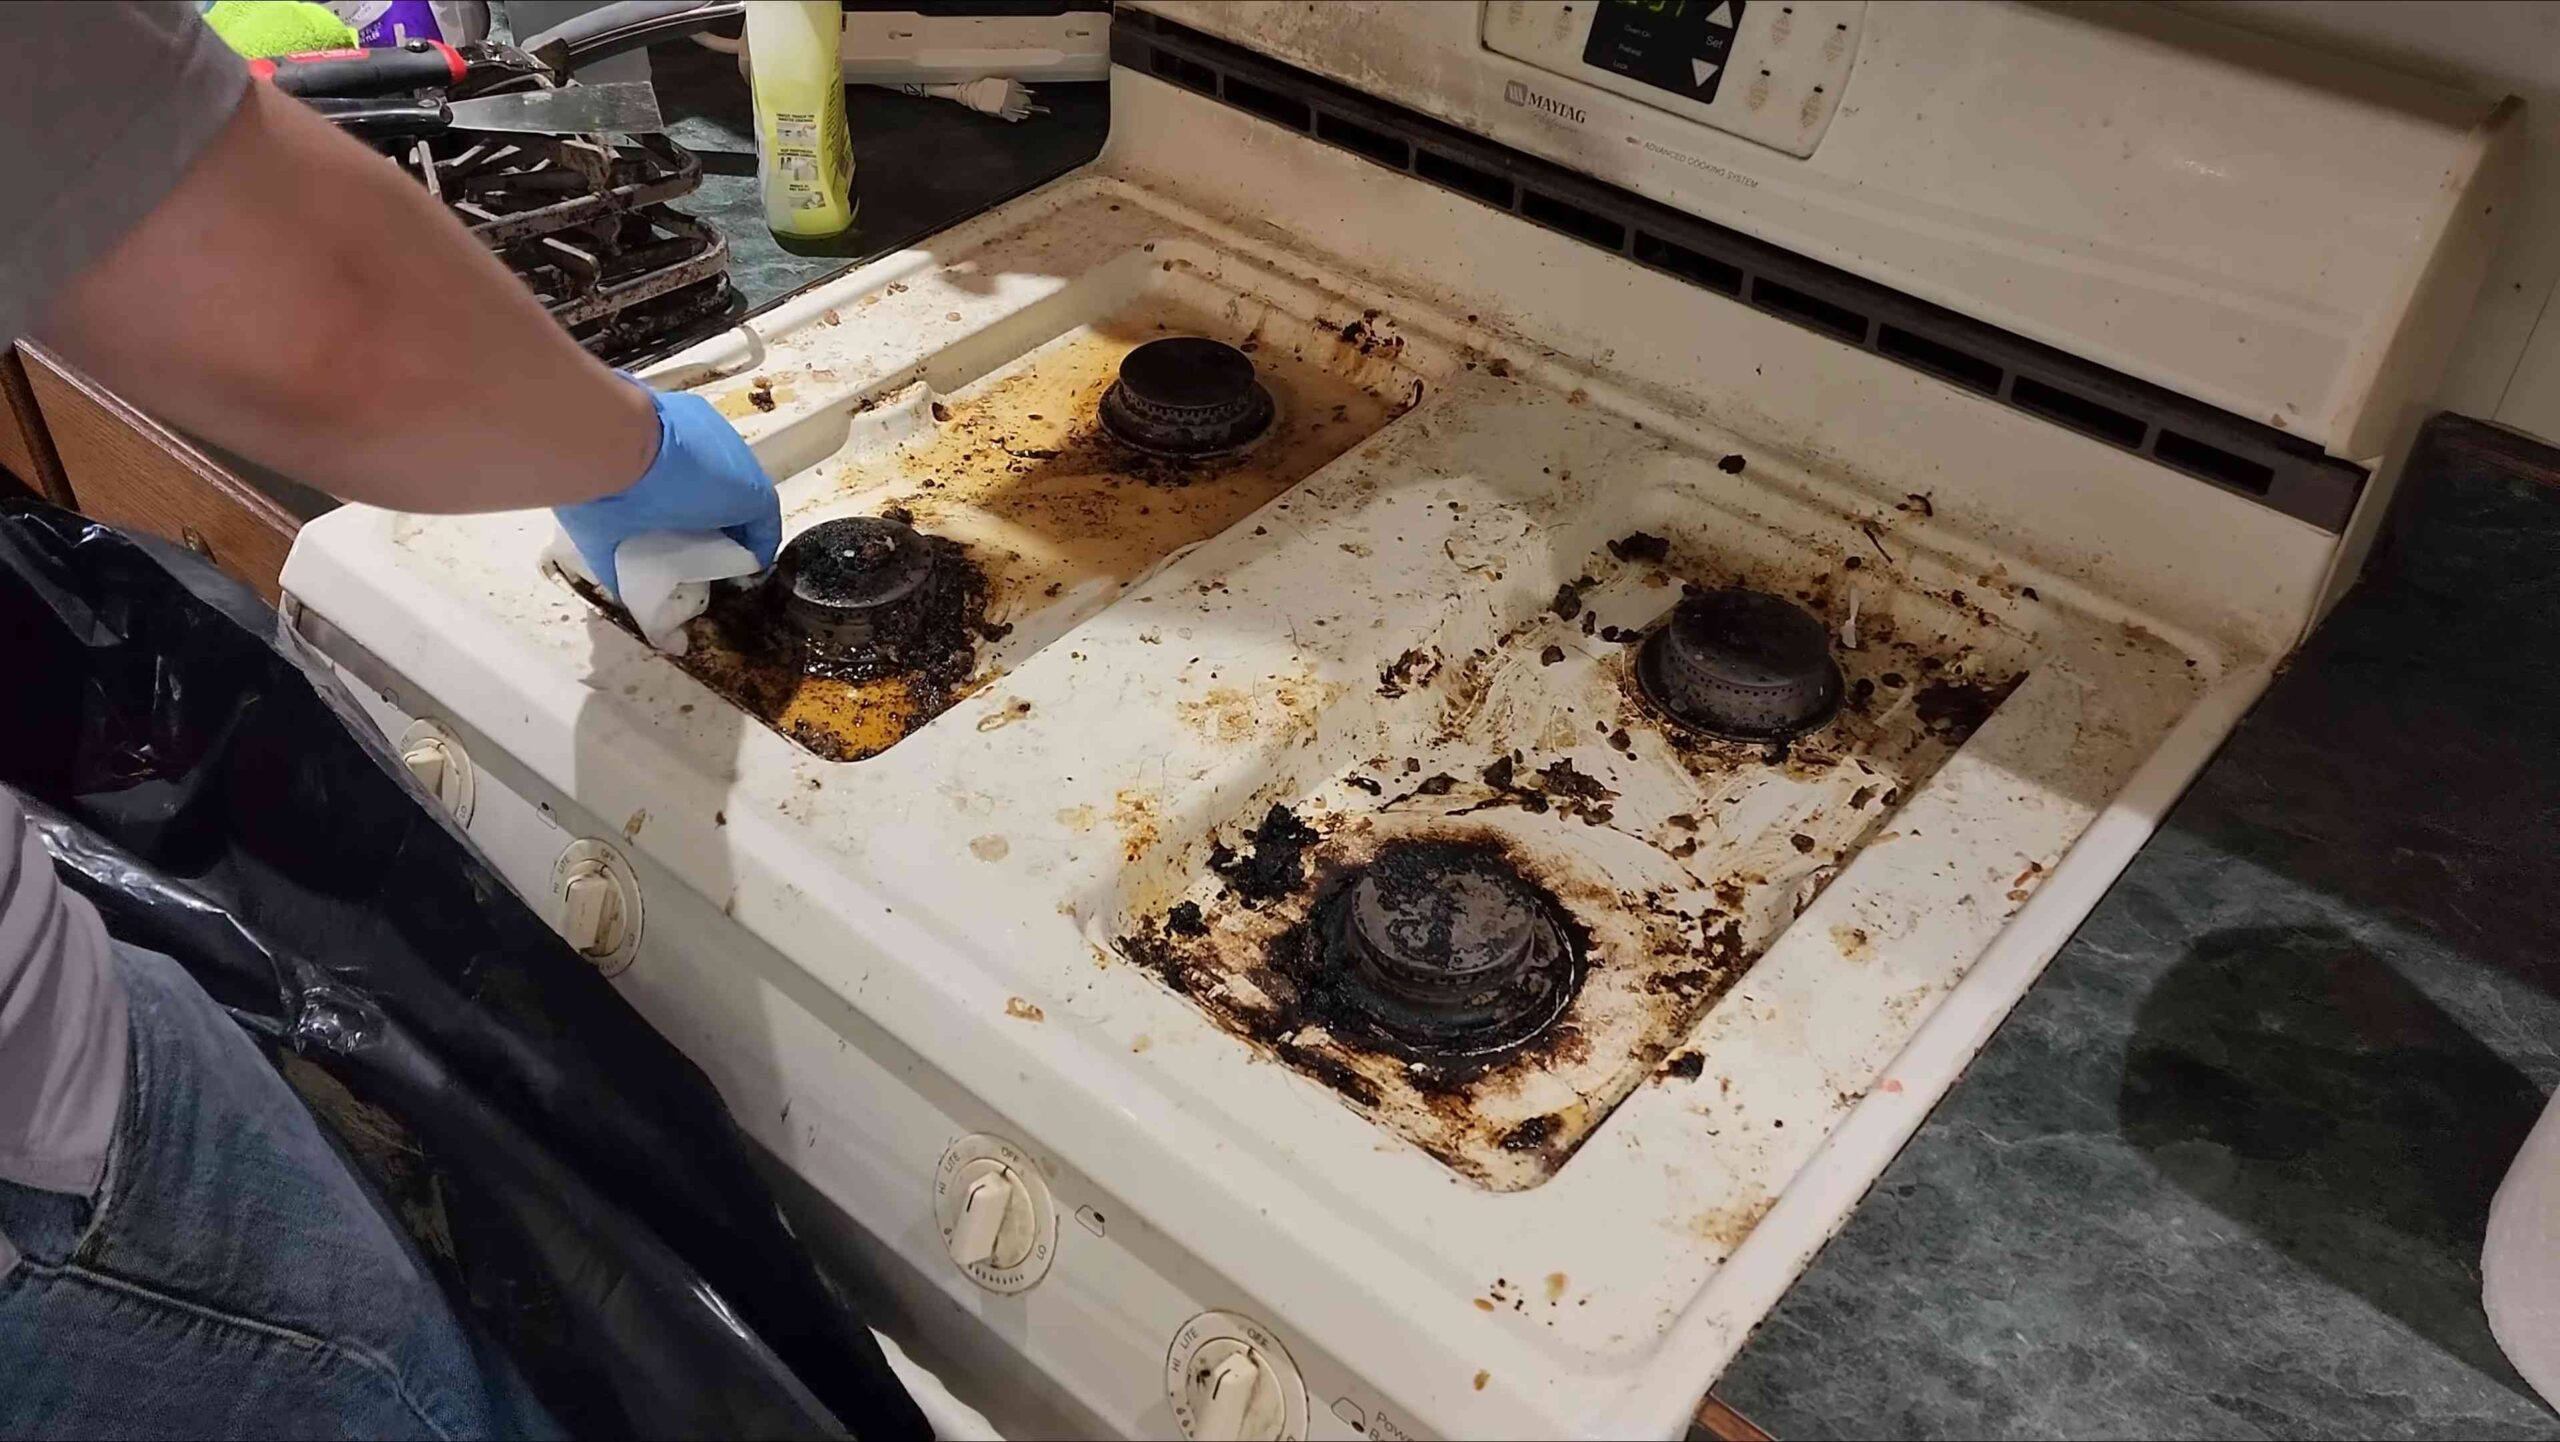
Cleaning the Oven
This is often the most dreaded task, but it doesn’t have to be so bad!
1. Remove oven racks: Take out the oven racks and soak them in hot, soapy water in the sink or bathtub.
2. Apply oven cleaner: Follow the instructions on your oven cleaner. I usually spray the entire inside of the oven, avoiding the heating elements. Close the oven door and let the cleaner sit for the recommended time (usually several hours or overnight). Always wear gloves and eye protection when using oven cleaner!
3. Scrub the oven: After the cleaner has sat, use a sponge or scrub brush to scrub away the loosened grime. This might take some elbow grease!
4. Wipe clean: Use a damp cloth to wipe away all traces of the oven cleaner and grime. Rinse the cloth frequently.
5. Clean the oven racks: Scrub the oven racks with a sponge or scrub brush to remove any remaining grime. Rinse them thoroughly and let them dry.
6. Replace the oven racks: Once the oven and racks are dry, replace the racks in the oven.
Cleaning the Microwave
This is a quick and easy task that makes a big difference.
1. Microwave a bowl of water: Fill a microwave-safe bowl with 1 cup of water and add a few tablespoons of white vinegar or lemon juice. Microwave on high for 5 minutes.
2. Let it sit: Leave the bowl in the microwave for another 5 minutes. The steam will loosen any splatters and grime.
3. Wipe clean: Carefully remove the bowl (it will be hot!) and wipe down the inside of the microwave with a damp cloth. The grime should come off easily.
4. Clean the turntable: Remove the turntable and wash it with hot, soapy water. Rinse and dry.
5. Replace the turntable: Put the turntable back in the microwave.
Cleaning the Refrigerator
A clean fridge is a happy fridge!
1. Empty the refrigerator: Remove all food items from the refrigerator. Check expiration dates and discard anything that’s spoiled.
2. Remove shelves and drawers: Take out the shelves and drawers and wash them with hot, soapy water. Rinse and dry.
3. Wipe down the interior: Use a solution of warm water and baking soda to wipe down the interior of the refrigerator. This will help to remove odors and stains.
4. Clean the door seals: Use a damp cloth to clean the door seals. This will help to prevent mold and mildew growth.
5. Replace shelves and drawers: Once the interior is dry, replace the shelves and drawers.
6. Restock the refrigerator: Put the food items back in the refrigerator, organizing them as you go.
Cleaning the Dishwasher
Even the dishwasher needs a good cleaning every now and then!
1. Remove food debris: Check the drain and remove any food debris that may be trapped there.
2. Clean the spray arms: Remove the spray arms and clean them under running water. Use a toothpick or small brush to clear any clogs.
3. Run a cleaning cycle: Place a dishwasher-safe cup filled with white vinegar on the top rack of the dishwasher. Run a normal cycle with hot water.
4. Clean the exterior: Wipe down the exterior of the dishwasher with a damp cloth.
Phase 3: Countertops, Sink, and Backsplash
Now that the appliances are sparkling, let’s move on to the countertops, sink, and backsplash.
Cleaning Countertops
The cleaning method will depend on your countertop material.
1. Wipe down with all-purpose cleaner: Spray your countertops with all-purpose cleaner and wipe them down with a clean cloth.
2. For granite or marble: Use a cleaner specifically designed for granite or marble. Avoid using acidic cleaners like vinegar or lemon juice, as they can damage the stone.
3. For laminate: Laminate countertops are more durable and can be cleaned with a variety of cleaners. However, avoid using abrasive cleaners, as they can scratch the surface.
4. Pay attention to seams: Use a toothbrush to scrub any dirt or grime that may be trapped in the seams.
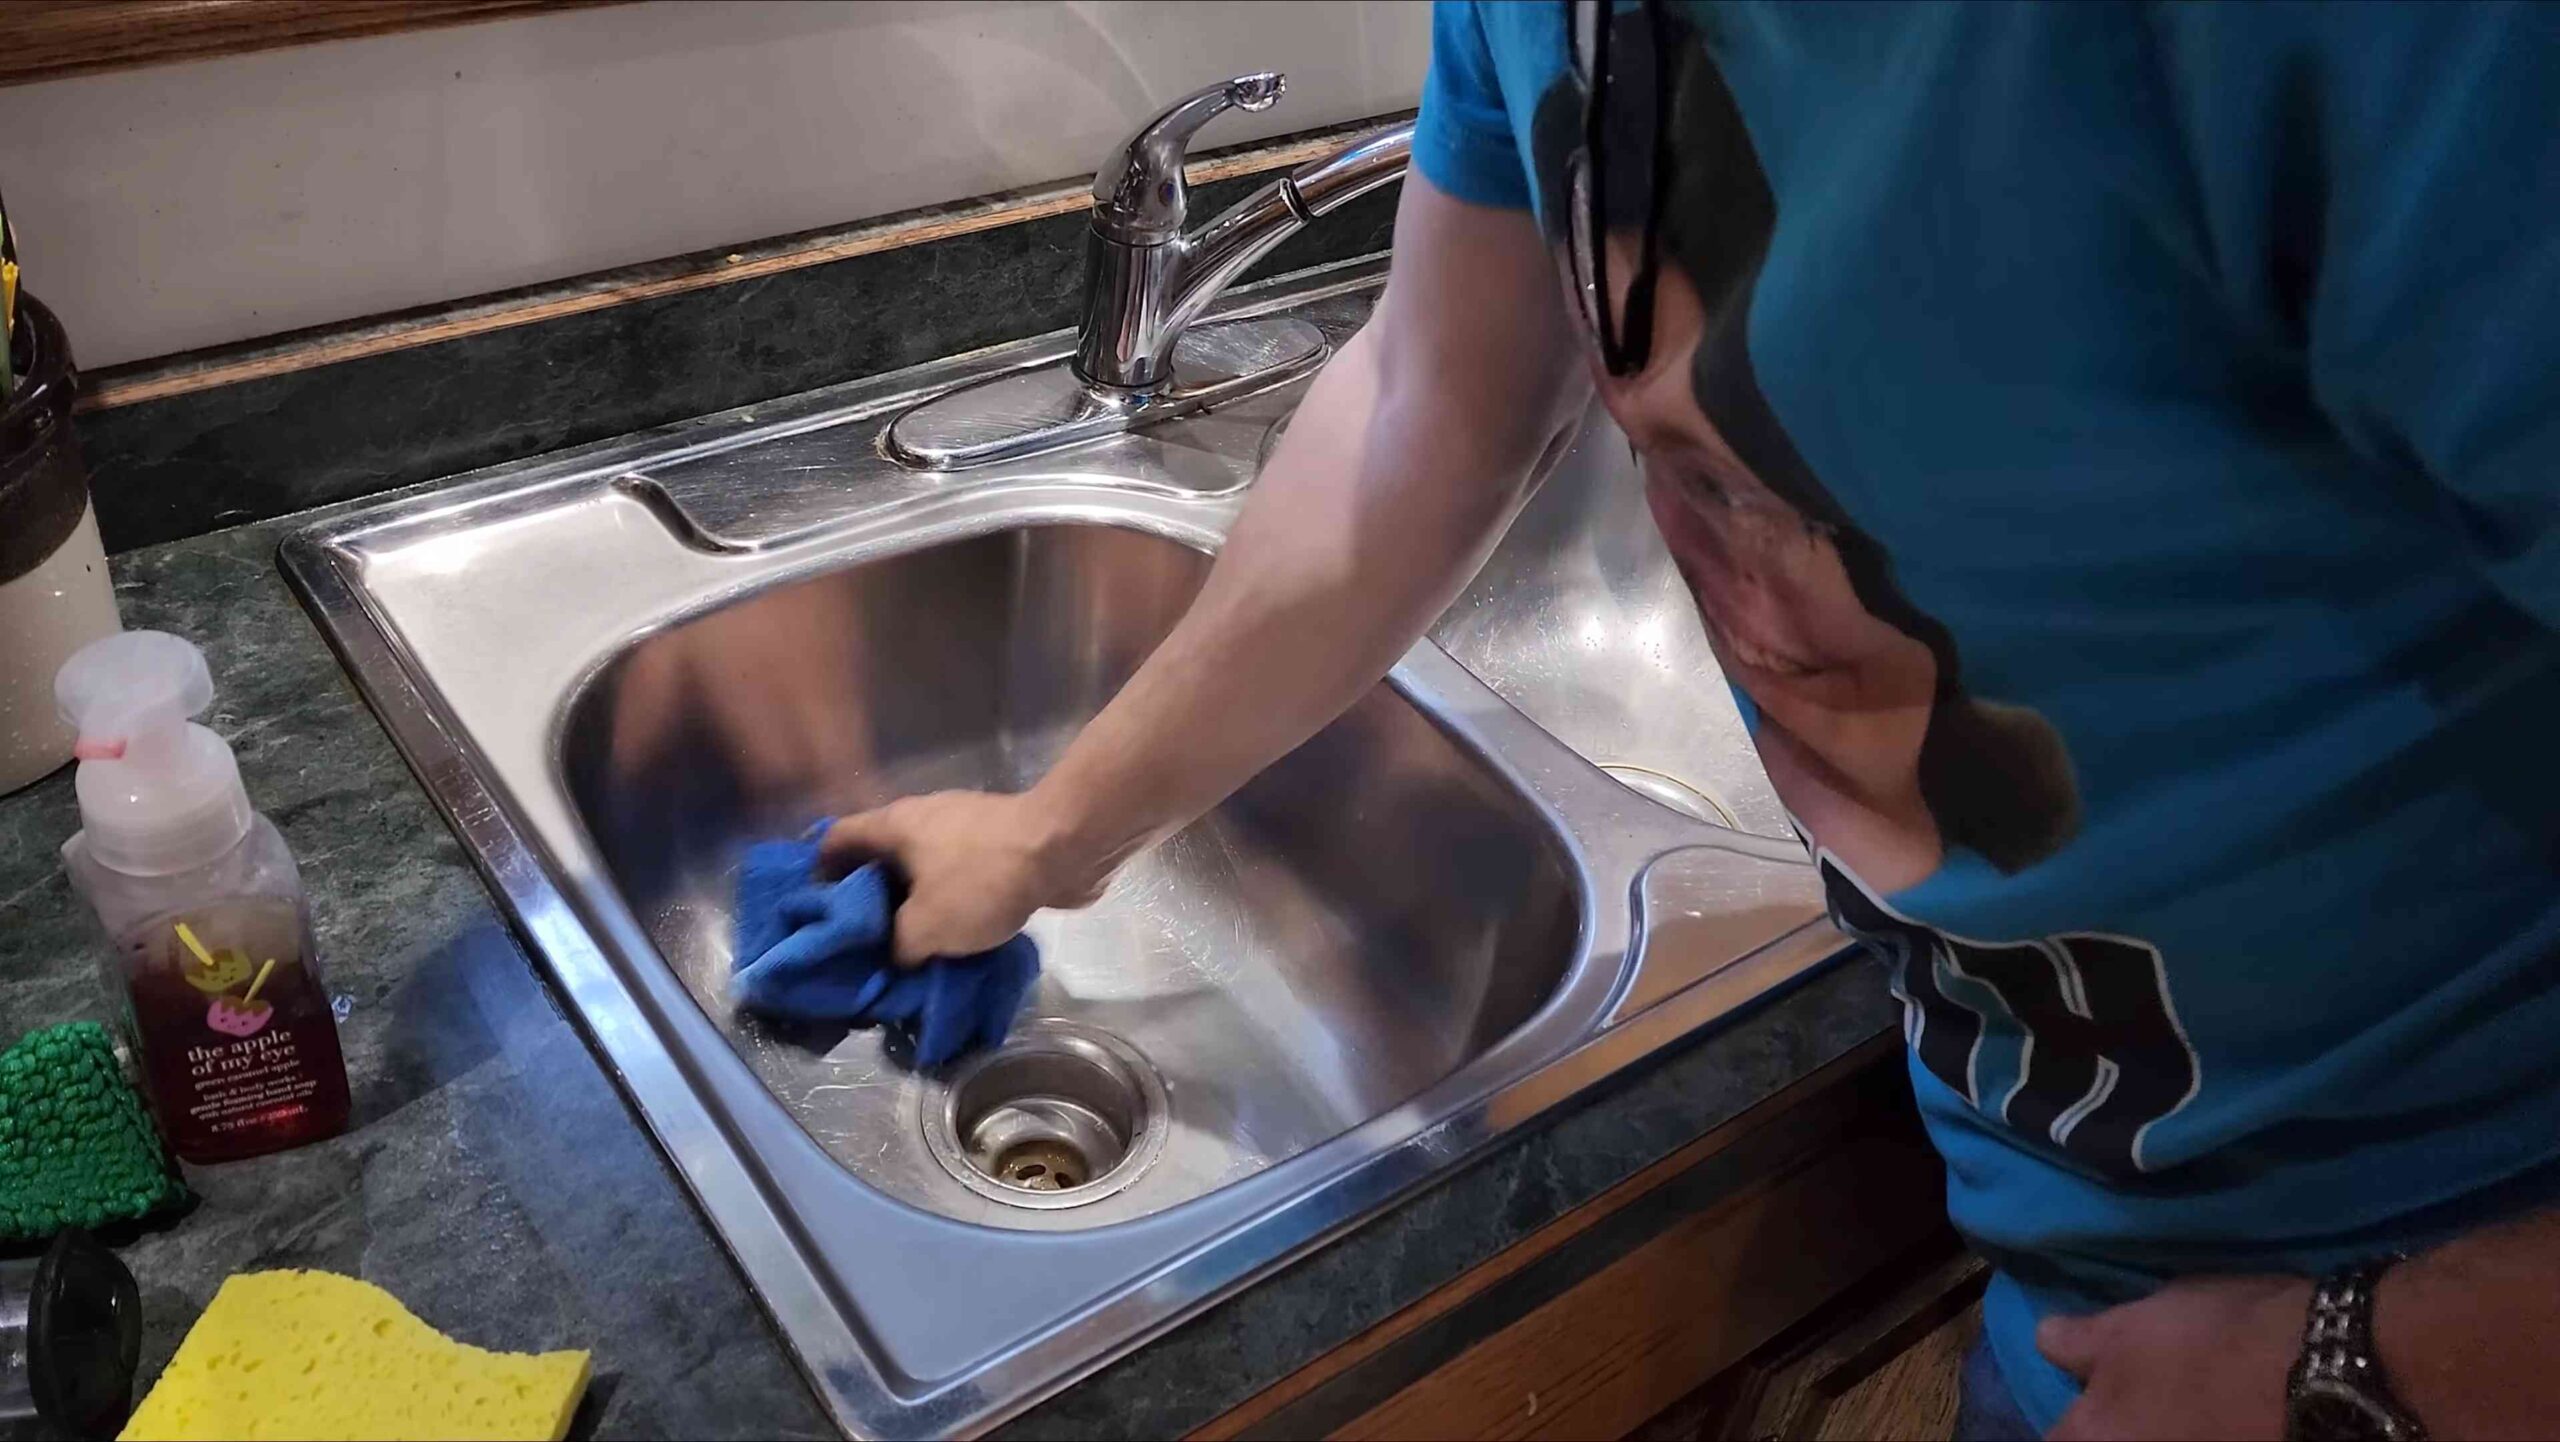
Cleaning the Sink
A clean sink is a happy sink!
1. Rinse the sink: Rinse the sink with hot water to remove any loose debris.
2. Sprinkle with baking soda: Sprinkle the sink with baking soda.
3. Scrub with a sponge: Use a damp sponge to scrub the sink. The baking soda will act as a gentle abrasive to remove stains and grime.
4. Rinse thoroughly: Rinse the sink thoroughly with hot water.
5. Polish with vinegar: For stainless steel sinks, pour a small amount of white vinegar onto a clean cloth and polish the sink to remove water spots and leave it sparkling.
Cleaning the Backsplash
Don’t forget the backsplash!
1. Wipe down with all-purpose cleaner: Spray the backsplash with all-purpose cleaner and wipe it down with a clean cloth.
2. For tile: Use a toothbrush to scrub the grout lines. You can also use a grout cleaner for stubborn stains.
3. For glass: Use a glass cleaner to clean the backsplash.
Phase 4: Floors, Cabinets, and Finishing Touches
Almost there! Let’s finish up with the floors, cabinets, and some final touches.
Cleaning the Floors
The cleaning method will depend on your flooring type.
1. Sweep or vacuum: Sweep or vacuum the floors to remove any loose dirt and debris.
2. Mop the floors: Mop
Conclusion
So, there you have it! Deep cleaning your kitchen might seem like a daunting task, but with these simple, effective DIY tricks, you can transform your space into a sparkling, hygienic haven. We’ve armed you with the knowledge to tackle grease, grime, and stubborn stains using ingredients you likely already have in your pantry. This isn’t just about aesthetics; it’s about creating a healthier environment for you and your family. A clean kitchen is a happy kitchen, and a happy kitchen leads to delicious meals and cherished memories.
Why is this DIY approach a must-try? Because it’s cost-effective, environmentally friendly, and incredibly satisfying. Commercial cleaners often contain harsh chemicals that can be harmful to your health and the planet. By using natural alternatives like vinegar, baking soda, and lemon juice, you’re not only saving money but also reducing your exposure to potentially toxic substances. Plus, there’s a certain sense of accomplishment that comes with knowing you’ve cleaned your kitchen thoroughly using your own ingenuity.
Looking for variations? Absolutely! For stainless steel appliances, try using a microfiber cloth dampened with olive oil after cleaning to add a brilliant shine. If you’re dealing with particularly stubborn grease buildup on your stovetop, create a paste of baking soda and water, apply it to the affected area, let it sit for a few hours, and then scrub it away. For a refreshing scent boost, add a few drops of your favorite essential oil (like lemon, lavender, or tea tree) to your cleaning solutions. You can even infuse your vinegar with citrus peels for a more pleasant aroma and added cleaning power. Remember to always test any cleaning solution on a small, inconspicuous area first to ensure it doesn’t damage the surface.
Don’t be intimidated by the prospect of deep cleaning. Break it down into manageable tasks, and tackle one area at a time. Put on some music, enlist the help of your family, and make it a fun and rewarding experience. The results will be well worth the effort.
We’re confident that these DIY tricks will revolutionize your kitchen cleaning routine. But the real test is in the doing! We wholeheartedly encourage you to try these methods and see the difference for yourself. And most importantly, we want to hear about your experience! Share your tips, tricks, and before-and-after photos in the comments below. Let’s create a community of clean kitchen enthusiasts and inspire each other to maintain sparkling, healthy homes. So, grab your supplies, roll up your sleeves, and get ready to experience the joy of a truly deep cleaned kitchen. Let’s make **deep clean your kitchen** a regular and rewarding part of your home care routine!
Frequently Asked Questions (FAQ)
1. Are these DIY cleaning solutions safe for all kitchen surfaces?
While the DIY cleaning solutions mentioned (vinegar, baking soda, lemon juice, etc.) are generally safe and effective, it’s crucial to exercise caution and test them on a small, inconspicuous area before applying them to the entire surface. Certain materials, such as marble, granite, and some types of wood, can be sensitive to acidic substances like vinegar and lemon juice. Always dilute these solutions with water and avoid prolonged contact. For delicate surfaces, consider using milder alternatives like dish soap and warm water. If you’re unsure about the suitability of a particular cleaning solution for a specific surface, consult the manufacturer’s instructions or a professional cleaning service.
2. How often should I deep clean my kitchen?
The frequency of deep cleaning depends on several factors, including how often you cook, the size of your kitchen, and your personal standards of cleanliness. As a general guideline, aim to deep clean your kitchen at least once every three to six months. This includes tasks such as cleaning inside the oven, refrigerator, and dishwasher, scrubbing grout, degreasing the stovetop, and organizing cabinets and drawers. However, if you cook frequently or have pets, you may need to deep clean more often. Regular maintenance, such as wiping down countertops and sweeping floors daily, can help prevent buildup and reduce the need for frequent deep cleanings.
3. What’s the best way to remove stubborn grease stains from my stovetop?
Stubborn grease stains on your stovetop can be a challenge, but with the right approach, they can be effectively removed. Start by applying a paste of baking soda and water to the affected area. Let it sit for several hours, or even overnight, to allow the baking soda to penetrate and loosen the grease. Then, scrub the area with a non-abrasive sponge or cloth. For particularly stubborn stains, you can add a few drops of dish soap to the paste. Alternatively, you can try using a mixture of vinegar and water. Spray the mixture onto the stovetop, let it sit for a few minutes, and then wipe it clean. Remember to always unplug your stovetop before cleaning and avoid getting water into the electrical components.
4. How can I eliminate odors from my refrigerator?
A smelly refrigerator can be unpleasant, but there are several simple ways to eliminate odors. Start by removing all the food items from your refrigerator and discarding any expired or spoiled items. Then, wipe down the interior surfaces with a solution of baking soda and water. Baking soda is a natural odor absorber and will help neutralize any lingering smells. You can also place an open box of baking soda in the refrigerator to continuously absorb odors. Other effective odor absorbers include activated charcoal, coffee grounds, and lemon halves. Regularly clean up spills and wipe down shelves to prevent odors from developing in the first place.
5. What’s the best way to clean my dishwasher?
Cleaning your dishwasher regularly is essential for maintaining its performance and preventing the buildup of food particles and mineral deposits. Start by removing any large debris from the bottom of the dishwasher. Then, place a cup of vinegar in a dishwasher-safe bowl on the top rack and run the dishwasher on a hot cycle. The vinegar will help dissolve mineral deposits and remove odors. Alternatively, you can sprinkle a cup of baking soda on the bottom of the dishwasher and run it on a short cycle. For a more thorough cleaning, you can also clean the dishwasher filter and spray arms. Refer to your dishwasher’s manual for specific cleaning instructions.
6. How can I prevent mold and mildew from growing in my kitchen?
Mold and mildew thrive in damp environments, so it’s important to keep your kitchen well-ventilated and dry. Regularly wipe down countertops, sinks, and other surfaces to remove moisture. Pay particular attention to areas around the sink and dishwasher, where water can accumulate. Use a dehumidifier in your kitchen if necessary. Ensure that your kitchen is properly ventilated by opening windows or using a range hood while cooking. Clean up spills promptly and repair any leaks or water damage. You can also use mold-resistant paint in areas that are prone to moisture.
7. What are some eco-friendly alternatives to traditional kitchen cleaning products?
There are many eco-friendly alternatives to traditional kitchen cleaning products that are just as effective and much better for the environment. As mentioned earlier, vinegar, baking soda, and lemon juice are excellent natural cleaners. You can also find a wide range of commercially available eco-friendly cleaning products that are made with plant-based ingredients and biodegradable formulas. Look for products that are labeled as “non-toxic,” “biodegradable,” and “phosphate-free.” Avoid products that contain harsh chemicals like chlorine bleach, ammonia, and phthalates. Consider using reusable cleaning cloths and sponges instead of disposable paper towels.
8. How do I clean grout effectively?
Grout can be a breeding ground for dirt and grime, making it difficult to clean. To effectively clean grout, start by applying a paste of baking soda and water to the affected area. Let it sit for several minutes to loosen the dirt. Then, scrub the grout with a grout brush or an old toothbrush. For stubborn stains, you can add a few drops of hydrogen peroxide to the paste. Alternatively, you can try using a grout cleaner specifically designed for this purpose. Be sure to wear gloves and eye protection when using grout cleaners. After cleaning, rinse the grout thoroughly with water.
9. What is the best way to clean wooden cutting boards?
Wooden cutting boards require special care to prevent the growth of bacteria. After each use, wash the cutting board with hot, soapy water. Avoid soaking the cutting board in water, as this can cause it to warp or crack. To disinfect the cutting board, you can wipe it down with a solution of vinegar and water. You can also sprinkle salt on the cutting board and rub it with a lemon half. This will help remove odors and disinfect the surface. To prevent the cutting board from drying out, you can occasionally oil it with mineral oil or beeswax.
10. How can I organize my kitchen cabinets and drawers?
Organizing your kitchen cabinets and drawers can make your kitchen more functional and efficient. Start by decluttering and getting rid of any items you no longer need or use. Then, group similar items together and store them in designated areas. Use shelf organizers, drawer dividers, and other storage solutions to maximize space and keep things organized. Store frequently used items within easy reach and less frequently used items on higher shelves or in the back of cabinets. Label shelves and drawers to make it easier to find what you’re looking for.


Leave a Comment