

DIY Beeswax Wood Polish: Ever looked at your furniture and wished it had that warm, inviting glow again? I know I have! We all love the beauty of natural wood, but keeping it looking its best can sometimes feel like a chore. That’s where this simple, yet incredibly effective, DIY beeswax wood polish comes in. Forget those expensive, chemical-laden products – you can create a natural, nourishing polish right in your own kitchen!
Beeswax has been used for centuries to protect and beautify wood. From ancient Egyptians using it to seal sarcophagi to Renaissance artisans polishing their masterpieces, beeswax has a rich history as a natural preservative. It’s not just about aesthetics, though. Using a DIY beeswax wood polish helps protect your furniture from drying out, cracking, and everyday wear and tear.
In today’s world, we’re all looking for ways to be more sustainable and reduce our exposure to harsh chemicals. This DIY project ticks both boxes! Plus, it’s incredibly satisfying to create something yourself that not only saves you money but also enhances the beauty and longevity of your cherished wooden pieces. So, let’s dive in and discover how easy it is to make your own beeswax wood polish and give your furniture the love it deserves!
DIY Beeswax Wood Polish: Revive Your Furniture with Natural Shine
Okay, let’s get started! I’m going to show you how to make your own beeswax wood polish. It’s surprisingly easy, smells amazing, and is so much better for your furniture (and the environment!) than those chemical-laden commercial polishes. Plus, it’s a really satisfying project.
What You’ll Need
Before we dive in, let’s gather our supplies. This is a pretty simple recipe, so you probably already have some of these things on hand.
* Beeswax: This is the star of the show! You can find beeswax in block form, pellets, or even grated. Pellets are the easiest to work with, in my opinion, but any form will do. Look for pure beeswax, preferably from a local beekeeper if possible.
* Carrier Oil: This helps to thin the beeswax and makes it easier to apply. My go-to is mineral oil because it’s inexpensive, readily available, and doesn’t go rancid easily. However, you can also use other oils like olive oil, jojoba oil, coconut oil (fractionated, so it stays liquid), or even walnut oil if you want a richer scent. Just be aware that some oils, like olive oil, can darken over time.
* Essential Oils (Optional): This is where you can get creative and add your own personal touch! I love using lemon essential oil for its fresh, clean scent and its natural cleaning properties. Orange, cedarwood, and pine are also great choices for wood polish. Just be sure to use pure essential oils, not fragrance oils.
* Double Boiler or Heat-Safe Bowl and Saucepan: We’ll be melting the beeswax using a double boiler method. If you don’t have a double boiler, you can easily create one by placing a heat-safe bowl (glass or stainless steel) over a saucepan of simmering water.
* Wooden Spoon or Chopstick: For stirring the mixture.
* Measuring Cups and Spoons: For accurate measurements.
* Containers: To store your finished polish. Small glass jars or tins work perfectly. I like to recycle old jam jars or small cosmetic containers.
* Cheesecloth or Fine-Mesh Strainer (Optional): To strain out any impurities from the beeswax.
* Gloves (Optional): To protect your hands.
* Old Rags or Cloths: For applying and buffing the polish.
The Recipe
This recipe is a good starting point, but feel free to adjust the ratios to your liking. I usually aim for a consistency that’s soft but not too runny.
* Beeswax: 1 part (e.g., 1/4 cup)
* Carrier Oil: 3 parts (e.g., 3/4 cup)
* Essential Oils (Optional): 10-20 drops per cup of finished polish
Step-by-Step Instructions
Alright, let’s get to the fun part! Here’s how to make your own beeswax wood polish:
1. Prepare Your Double Boiler: Fill your saucepan with about an inch or two of water and bring it to a simmer over medium heat. Make sure the water doesn’t touch the bottom of the bowl you’ll be using.
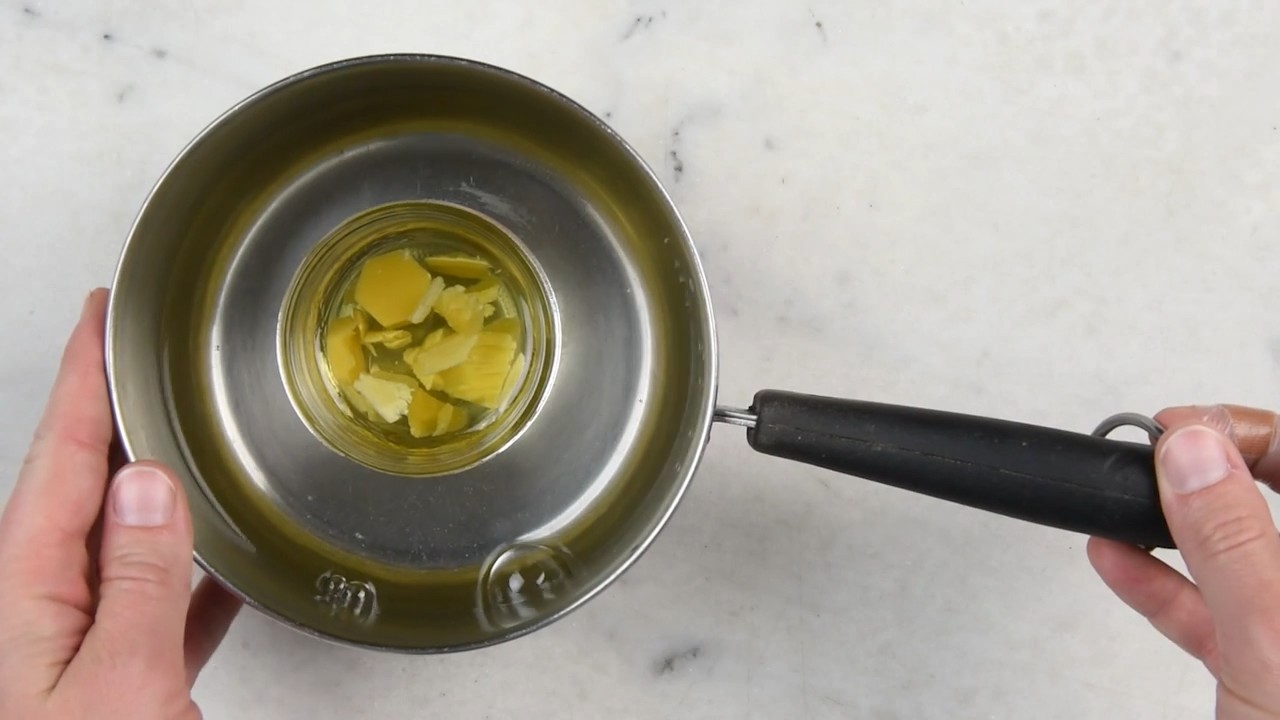
2. Melt the Beeswax: Place the beeswax in the heat-safe bowl and set it over the simmering water. Stir occasionally with your wooden spoon or chopstick until the beeswax is completely melted. This might take a few minutes, so be patient.
3. Add the Carrier Oil: Once the beeswax is melted, slowly pour in the carrier oil. Stir continuously until the beeswax and oil are fully combined and the mixture is smooth and homogenous.
4. Add Essential Oils (Optional): If you’re using essential oils, now’s the time to add them. Remove the bowl from the heat and let the mixture cool slightly for a minute or two before adding the oils. This will help preserve their fragrance and therapeutic properties. Stir well to incorporate the essential oils evenly.
5. Strain the Mixture (Optional): If you want to ensure a perfectly smooth polish, you can strain the mixture through a cheesecloth or fine-mesh strainer into a clean bowl. This will remove any impurities that might be present in the beeswax.
6. Pour into Containers: Carefully pour the melted polish into your prepared containers. Be careful, as the mixture will be hot.
7. Let it Cool and Harden: Allow the polish to cool completely at room temperature. This may take several hours. As it cools, the polish will solidify and become opaque.
8. Label Your Containers: Don’t forget to label your containers with the date and ingredients! This will help you keep track of when you made the polish and what’s in it.
Using Your Beeswax Wood Polish
Now that you’ve made your own beeswax wood polish, let’s talk about how to use it!
1. Test in an Inconspicuous Area: Before applying the polish to the entire piece of furniture, it’s always a good idea to test it in a small, hidden area to make sure it doesn’t discolor or damage the finish.
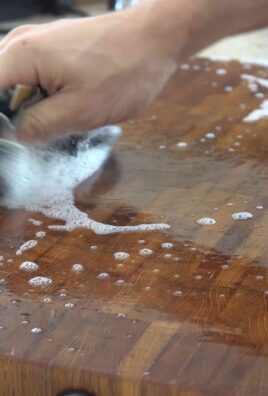
2. Clean the Surface: Make sure the surface you’re polishing is clean and free of dust and debris. You can use a damp cloth or a mild cleaner to remove any dirt. Allow the surface to dry completely before applying the polish.
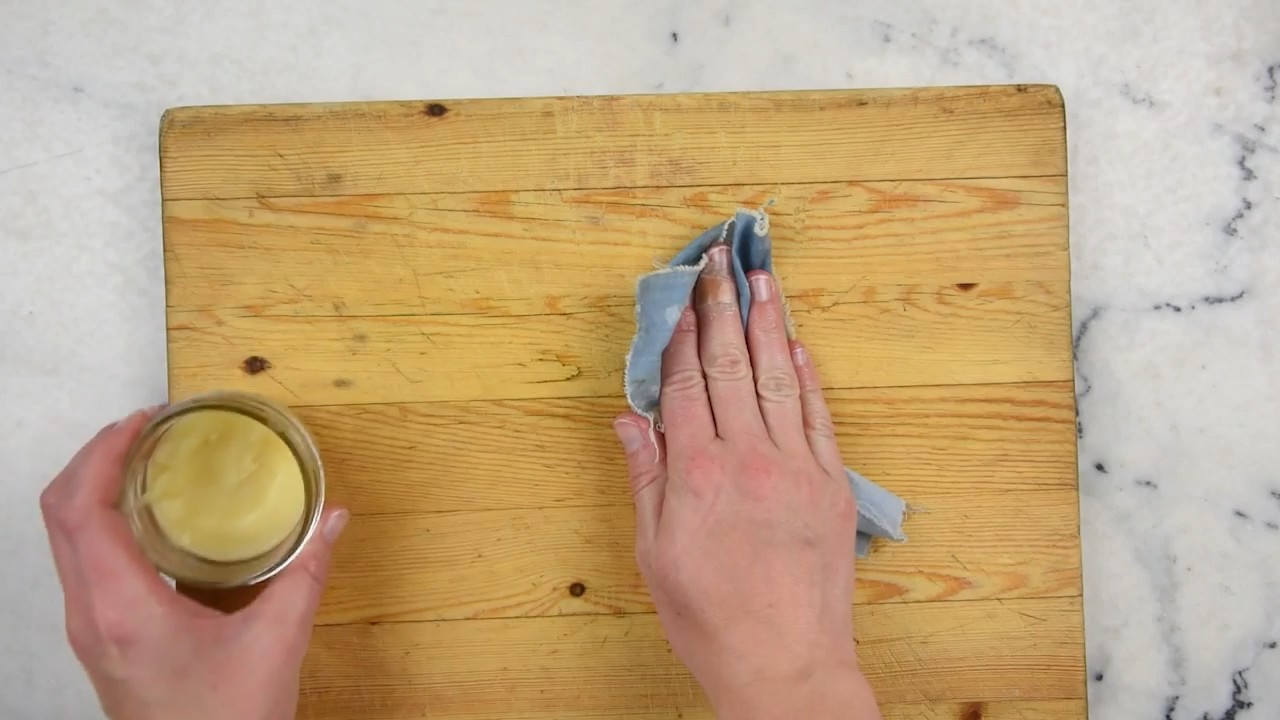
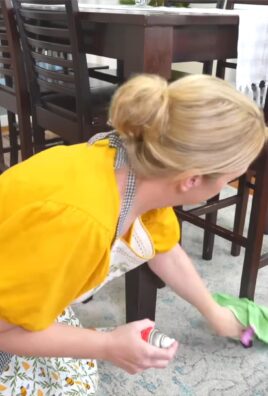
3. Apply the Polish: Using a clean, soft cloth, apply a small amount of polish to the surface in a circular motion. Work in small sections at a time. You don’t need to use a lot of polish – a little goes a long way.
4. Let it Sit: Allow the polish to sit on the surface for a few minutes to allow the beeswax and oils to penetrate the wood.
5. Buff to a Shine: Using a clean, dry cloth, buff the surface in a circular motion until you achieve a beautiful shine. This will remove any excess polish and bring out the natural luster of the wood.
6. Repeat as Needed: You can repeat the process as needed to achieve the desired level of shine and protection.
Tips and Tricks
Here are a few extra tips and tricks to help you get the most out of your homemade beeswax wood polish:
* For Deeper Scratches: If you have deeper scratches or imperfections in your wood, you can try using a wood filler before applying the polish.
* For Antique Furniture: Be extra careful when polishing antique furniture. Test the polish in an inconspicuous area first and use a very light touch.
* For Leather: Beeswax polish can also be used on leather! It helps to condition and protect the leather, keeping it soft and supple.
* Adjust the Consistency: If you find that your polish is too hard, you can add more carrier oil. If it’s too soft, you can add more beeswax.
* Experiment with Scents: Don’t be afraid to experiment with different essential oil combinations to create your own unique scent.
* Storage: Store your beeswax wood polish in a cool, dark place. It should last for several months.
Troubleshooting
Sometimes things don’t go exactly as planned. Here are a few common problems you might encounter and how to fix them:
* Polish is Too Hard: If your polish is too hard to apply easily, it means there’s too much beeswax in the mixture. You can remelt the polish in a double boiler and add more carrier oil until you achieve the desired consistency.
* Polish is Too Soft/Runny: If your polish is too soft or runny, it means there’s not enough beeswax in the mixture. You can remelt the polish and add more beeswax until you achieve the desired consistency.
* Polish Leaves a Sticky Residue: If your polish leaves a sticky residue, it means you’re using too much polish. Try using less polish and buffing more thoroughly.
* Polish Discolors the Wood: If your polish discolors the wood, it could be due to the carrier oil you’re using. Some oils, like olive oil, can darken over time. Try using a different carrier oil, like mineral oil or jojoba oil. Also, always test in an inconspicuous area first!
* Essential Oil Scent Fades Quickly: Essential oils can evaporate over time, especially if the polish is exposed to heat or sunlight. To help preserve the scent, store your polish in a cool, dark place and add a few extra drops of essential oil.
Safety Precautions
While beeswax wood polish is generally safe to use, it’s always a good idea to take a few safety precautions:
* Use in a Well-Ventilated Area: When melting the beeswax and applying the polish, work in a well-ventilated area to avoid inhaling fumes.
* Avoid Contact with Eyes: Avoid getting the polish in your eyes. If contact occurs, rinse thoroughly with water.
* Keep Out
Conclusion
So, there you have it! Crafting your own DIY beeswax wood polish is not just a cost-effective alternative to store-bought products; it’s a gateway to understanding and appreciating the natural beauty of your wooden furniture and surfaces. It’s about taking control of the ingredients, ensuring they are safe for your family and the environment, and ultimately, creating a polish that nourishes and protects your wood for years to come.
Why is this DIY trick a must-try? Because it’s simple, effective, and customizable. You’re not just buying a product; you’re creating a solution tailored to your specific needs. The gentle blend of beeswax and oil penetrates the wood, providing a protective barrier against moisture, scratches, and everyday wear and tear. It revives dull finishes, bringing out the natural grain and luster of the wood, leaving it looking refreshed and revitalized. Plus, the subtle, natural scent is a welcome change from the often overpowering chemical fragrances found in commercial polishes.
But the benefits extend beyond the immediate results. By making your own polish, you’re reducing your reliance on plastic packaging and potentially harmful chemicals. You’re contributing to a more sustainable lifestyle and making a conscious choice to protect your home and the planet.
Looking for variations? Consider adding a few drops of essential oils to your beeswax wood polish for a subtle fragrance and added benefits. Lavender oil can provide a calming scent, while lemon oil can enhance the cleaning power and leave a fresh, citrusy aroma. For darker woods, a touch of walnut oil can deepen the color and enhance the richness of the finish. Experiment with different ratios of beeswax to oil to achieve your desired consistency – a higher beeswax content will result in a harder polish, while more oil will create a softer, more easily spreadable product. You can also infuse the oil with herbs like rosemary or thyme for added antibacterial properties and a unique scent. Remember to always test your polish on an inconspicuous area first to ensure compatibility and desired results.
We’re confident that once you try this DIY beeswax wood polish, you’ll be amazed by the results. It’s a rewarding and satisfying experience that will leave your wooden furniture looking its best. So, gather your ingredients, follow the simple steps, and prepare to be impressed.
We encourage you to try this DIY project and share your experiences with us! Let us know what variations you tried, what essential oils you used, and how your wood responded to the polish. Share your before-and-after photos and inspire others to embrace the power of DIY and natural wood care. Your feedback is invaluable and helps us refine and improve our recipes for the benefit of the entire community. We can’t wait to hear your success stories!
Frequently Asked Questions (FAQ)
What type of beeswax should I use?
We recommend using pure, cosmetic-grade beeswax for your DIY wood polish. You can find beeswax in various forms, such as pellets, blocks, or bars. Pellets are generally easier to measure and melt. Avoid beeswax that has been bleached or chemically processed, as these may contain harmful residues that could damage your wood. Organic beeswax is an excellent choice if you’re looking for a sustainable and environmentally friendly option. The color of the beeswax can vary from light yellow to dark brown, but this will not significantly affect the final color of your polish.
What kind of oil is best for beeswax wood polish?
Several types of oil work well in DIY beeswax wood polish. Mineral oil is a popular choice because it’s readily available, inexpensive, and doesn’t go rancid easily. However, it’s a petroleum-based product, so if you prefer a more natural option, consider using olive oil, coconut oil, jojoba oil, or walnut oil. Olive oil is a good all-around choice, while coconut oil adds a subtle sheen and pleasant scent. Jojoba oil is known for its moisturizing properties and is excellent for dry or damaged wood. Walnut oil can enhance the color of darker woods. Experiment with different oils to find the one that best suits your needs and preferences. Remember to use refined oils, as unrefined oils may have a stronger odor and can potentially go rancid over time.
How often should I apply beeswax wood polish?
The frequency of application depends on the type of wood, its condition, and how often it’s used. Generally, you should apply beeswax wood polish every 3-6 months to maintain the wood’s luster and protection. For high-traffic areas or furniture that is frequently exposed to moisture, you may need to apply it more often. Always observe the wood and reapply when it starts to look dull or dry. Avoid over-polishing, as this can lead to a buildup of wax and a sticky residue.
Can I use this polish on all types of wood?
While beeswax wood polish is generally safe for most types of wood, it’s always a good idea to test it on an inconspicuous area first, especially if you’re working with antique or delicate furniture. Avoid using it on unfinished wood, as the oil can penetrate too deeply and cause staining. For painted or varnished surfaces, ensure that the polish is compatible with the existing finish. If you’re unsure, consult with a professional furniture restorer.
How should I store my DIY beeswax wood polish?
Store your DIY beeswax wood polish in an airtight container in a cool, dark place. This will help prevent the oil from going rancid and the beeswax from melting. A glass jar or tin container is ideal. Properly stored, your polish should last for several months. If you notice any changes in color, odor, or consistency, it’s best to discard it and make a fresh batch.
What if my polish is too hard or too soft?
The consistency of your polish can be adjusted by altering the ratio of beeswax to oil. If your polish is too hard, melt it down and add more oil. If it’s too soft, melt it down and add more beeswax. Start with small adjustments and test the consistency after each addition until you achieve your desired result.
Can I add essential oils to my beeswax wood polish?
Yes, adding essential oils can enhance the scent and provide additional benefits. Lavender, lemon, orange, and cedarwood essential oils are popular choices. Add a few drops of your favorite essential oil to the melted beeswax and oil mixture before it cools. Be sure to use pure, therapeutic-grade essential oils and avoid synthetic fragrances. Start with a small amount and adjust to your preference. Keep in mind that some essential oils can be photosensitive, so avoid using them on furniture that is exposed to direct sunlight.
How do I clean my wood furniture before applying the polish?
Before applying beeswax wood polish, it’s important to clean your furniture to remove any dirt, dust, or grime. You can use a soft cloth dampened with a mild soap and water solution. Be sure to wring out the cloth thoroughly to avoid getting the wood too wet. After cleaning, allow the wood to dry completely before applying the polish. For stubborn stains or buildup, you may need to use a specialized wood cleaner.
What if I get a cloudy or streaky finish after applying the polish?
A cloudy or streaky finish can occur if you apply too much polish or if the polish is not properly buffed. To fix this, use a clean, soft cloth to buff the wood thoroughly. Apply gentle pressure and work in circular motions until the streaks disappear and the wood has a smooth, even sheen. If the problem persists, you may need to remove the excess polish with a clean cloth dampened with mineral spirits or a similar solvent. Always test the solvent on an inconspicuous area first.
Is DIY beeswax wood polish safe for children and pets?
DIY beeswax wood polish made with natural ingredients is generally safe for children and pets. However, it’s always a good idea to keep the polish out of reach of children and pets to prevent accidental ingestion. If you’re using essential oils, be sure to choose oils that are safe for children and pets. Some essential oils can be toxic if ingested or applied topically. Consult with a veterinarian or aromatherapist if you have any concerns.
Leave a Comment