

DIY Blind Cleaner: Are your blinds looking a little dusty and neglected? Don’t worry, you’re not alone! We’ve all been there, staring at those dusty slats, dreading the tedious task of cleaning them. But what if I told you there’s a super easy, cost-effective way to get your blinds sparkling clean without spending hours or breaking the bank on fancy cleaning gadgets?
For generations, keeping homes clean and dust-free has been a sign of pride and care. While modern cleaning products offer convenience, sometimes the simplest, most resourceful solutions are the best. Think about it – our grandparents didn’t have a plethora of specialized cleaners, yet their homes often gleamed! They relied on ingenuity and readily available materials, a tradition we can easily revive.
That’s where this DIY blind cleaner trick comes in. Let’s face it, store-bought blind cleaners can be expensive and often contain harsh chemicals. This DIY method is not only gentler on your blinds but also on your wallet and the environment. Plus, it’s incredibly satisfying to create something useful with your own hands. With this DIY blind cleaner, you’ll be amazed at how quickly and easily you can transform your dusty blinds into a bright and welcoming feature of your home. Get ready to say goodbye to dust and hello to sparkling clean blinds!
DIY Blind Cleaning: A Sparkling Solution for Dusty Blinds
Okay, let’s face it, cleaning blinds is nobody’s favorite chore. It’s fiddly, time-consuming, and those little slats seem to attract dust like magnets. But fear not! I’m going to show you a super easy and effective way to clean your blinds using things you probably already have around the house. Get ready to say goodbye to dust bunnies and hello to sparkling clean blinds!
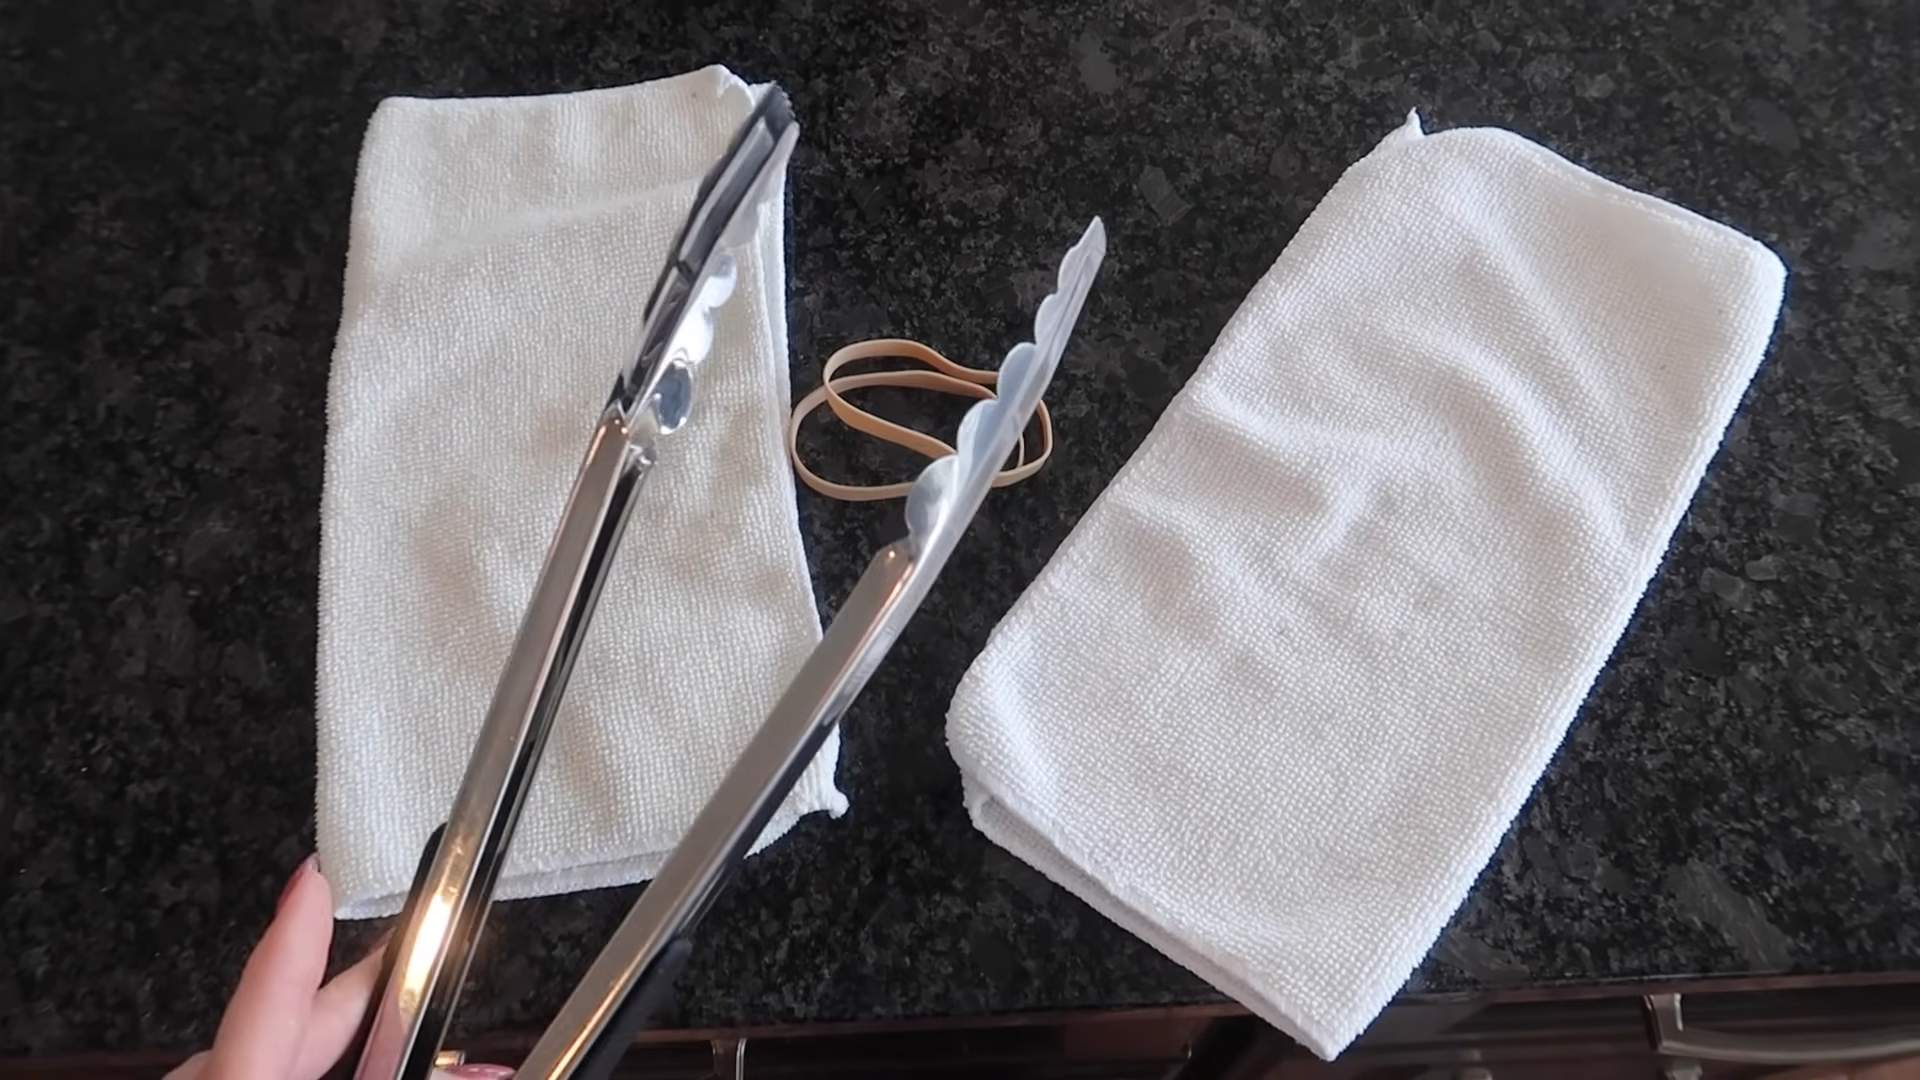
What You’ll Need: The Arsenal of Clean
Before we dive in, let’s gather our supplies. This is a pretty low-key operation, so you won’t need anything fancy.
* **Microfiber Cloths:** These are your best friends for dusting. They grab onto dust and dirt without scratching. I recommend having at least two or three on hand.
* **White Vinegar:** This is a natural cleaning powerhouse! It cuts through grime and grease like a champ.
* **Water:** Plain old water will do the trick.
* **Spray Bottle:** For mixing our cleaning solution.
* **Old Socks (Optional):** Yes, you read that right! Old socks can be transformed into amazing blind-cleaning tools.
* **Dish Soap (Optional):** For extra grimy blinds, a little dish soap can help.
* **Bowl or Bucket:** For mixing the cleaning solution.
* **Ladder or Step Stool (If needed):** For reaching those high blinds.
* **Vacuum with Brush Attachment (Optional):** For a quick pre-cleaning.
Pre-Cleaning Prep: Setting the Stage for Success
Before we get down and dirty (or rather, clean and shiny), let’s do a little prep work. This will make the whole process much smoother.
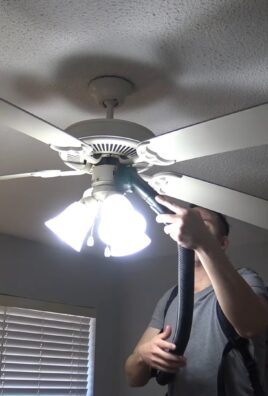
1. **Dust Removal (Optional but Recommended):** If your blinds are super dusty, give them a quick once-over with a vacuum cleaner using the brush attachment. This will remove a lot of the loose dust and debris, preventing it from just smearing around when you start cleaning with the solution. Alternatively, you can use a dry microfiber cloth to dust them.
2. **Prepare the Cleaning Solution:** In your spray bottle, mix equal parts white vinegar and water. For example, you could use 1 cup of white vinegar and 1 cup of water. If your blinds are particularly dirty, you can add a squirt of dish soap to the mixture. Just be careful not to use too much, or you’ll end up with suds everywhere.
3. **Protect the Area:** Place a towel or sheet underneath the blinds to catch any drips. This will prevent water damage to your floors or furniture.
The Cleaning Process: Getting Down to Business
Alright, now for the main event! Here’s how to clean your blinds using our simple DIY method.
1. **Test the Solution:** Before you start cleaning all your blinds, test the solution on a small, inconspicuous area to make sure it doesn’t damage the material. This is especially important for delicate blinds like fabric or wood.
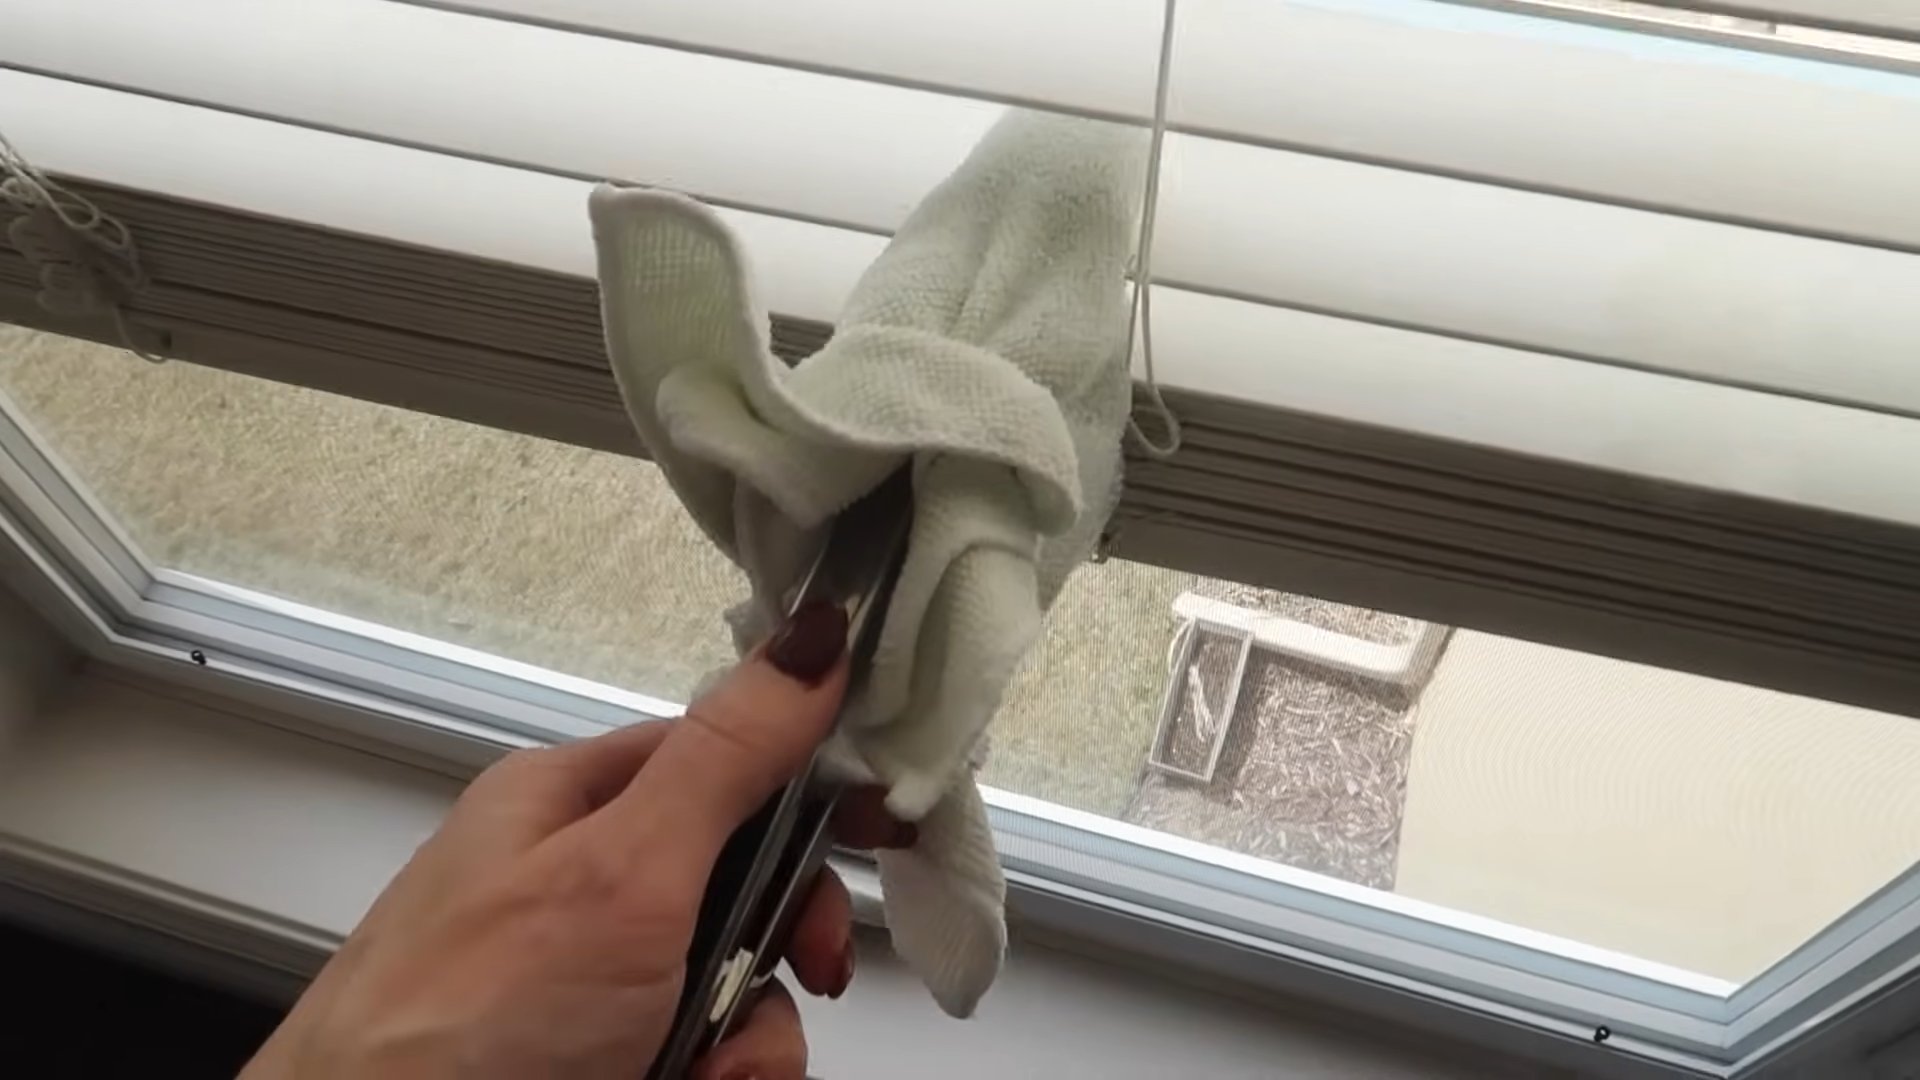
2. **Spray and Wipe (Microfiber Cloth Method):** Lightly spray the cleaning solution onto a section of the blinds. Don’t saturate them! Then, using a clean microfiber cloth, wipe each slat individually. Start at the top and work your way down. Make sure to wipe both sides of each slat.
3. **The Sock Trick (Optional but Awesome):** This is my personal favorite method! Take an old sock and slip it over your hand. Spray the sock lightly with the cleaning solution. Then, use your sock-covered hand to wipe each slat. The sock will conform to the shape of the slat, making it easy to clean both sides at once. You can even use two socks, one on each hand, for super-speedy cleaning!
4. **Rinse and Repeat (If Necessary):** If your blinds are really dirty, you may need to rinse your microfiber cloth or sock frequently. You may also need to repeat the cleaning process a few times to get them completely clean.
5. **Dry the Blinds:** Once you’ve cleaned all the slats, use a dry microfiber cloth to wipe them down and remove any excess moisture. This will help prevent water spots. You can also leave the blinds open to air dry.
Tackling Different Types of Blinds: A Guide to Specific Materials
The cleaning process is generally the same for most types of blinds, but there are a few things to keep in mind depending on the material.
* **Vinyl Blinds:** These are the easiest to clean! They’re durable and can withstand a good scrubbing. You can even use a slightly stronger cleaning solution if needed.
* **Aluminum Blinds:** These are also relatively easy to clean, but be careful not to scratch them. Use a soft microfiber cloth and avoid abrasive cleaners.
* **Wood Blinds:** Wood blinds require a little more care. Avoid using too much water, as it can damage the wood. Use a slightly damp microfiber cloth and dry them thoroughly after cleaning. You can also use a wood cleaner specifically designed for blinds.
* **Fabric Blinds:** Fabric blinds are the most delicate. Test the cleaning solution on an inconspicuous area before cleaning the entire blind. You may need to use a special fabric cleaner or take them to a professional cleaner.
Troubleshooting: When Things Don’t Go According to Plan
Sometimes, even with the best intentions, things can go wrong. Here are a few common problems and how to fix them.
* **Streaks:** If you’re getting streaks on your blinds, it could be because you’re using too much cleaning solution or not drying them properly. Try using less solution and make sure to wipe them down with a dry microfiber cloth after cleaning.
* **Water Spots:** Water spots can occur if you’re using hard water. Try using distilled water for your cleaning solution.
* **Sticky Residue:** If you’re getting a sticky residue on your blinds, it could be because you’re using too much dish soap. Try rinsing the blinds with clean water after cleaning them with the soapy solution.
* **Damage to Blinds:** If you accidentally damage your blinds while cleaning them, don’t panic! Depending on the type of damage, you may be able to repair them yourself. There are many DIY tutorials online that can help you fix broken slats or cords.
Maintaining Your Clean Blinds: Keeping the Dust at Bay
Now that your blinds are sparkling clean, let’s talk about how to keep them that way!
* **Regular Dusting:** The best way to prevent dust buildup is to dust your blinds regularly. Aim to dust them at least once a week. You can use a dry microfiber cloth, a feather duster, or a vacuum cleaner with a brush attachment.
* **Spot Cleaning:** If you notice any spots or stains on your blinds, clean them immediately. The longer you wait, the harder they will be to remove.
* **Professional Cleaning:** For a deep clean, consider having your blinds professionally cleaned every year or two. This is especially important for delicate blinds like fabric or wood.
The Sock Cleaning Method: A Deeper Dive
Let’s revisit the sock cleaning method, because honestly, it’s a game-changer. Here’s a more detailed breakdown:
1. **Sock Selection:** Choose old socks that are clean and free of holes. Cotton or microfiber socks work best.
2. **Preparation:** Turn the sock inside out. This will ensure that the softest part of the sock is against the blinds.
3. **Application:** Lightly spray the sock with your cleaning solution. Remember, less is more! You don’t want the sock to be soaking wet.
4. **Cleaning Technique:** Slip the sock over your hand and use your fingers to gently grip each slat. Wipe the slat from left to right, or top to bottom, depending on the orientation of your blinds. The sock will conform to the shape of the slat, cleaning both sides simultaneously.
5. **Sock Rotation:** As the sock gets dirty, rotate it to a clean section. You may need to use multiple socks if your blinds are particularly dirty.
6. **Drying:** After cleaning, use a clean, dry sock to wipe down the blinds and remove any excess moisture.
Beyond the Basics: Advanced Cleaning Tips
Want to take your blind cleaning game to the next level? Here are a few advanced tips:
* **Use a Magic Eraser:** For stubborn stains, try using a Magic Eraser. Just be careful not to scrub too hard, as it can damage the blinds.
* **Add Essential Oils:** For a fresh scent, add a few drops of your favorite essential oil to your cleaning solution. Lavender, lemon, and eucalyptus are all great choices.
* **Clean the Cords:** Don’t forget to clean the cords! Use a damp microfiber cloth to wipe them down.
* **Clean the Headrail:** The headrail is the top part of the blinds that holds everything together. Use a damp microfiber cloth to wipe it down.
Safety First: Important Precautions
Before you start cleaning your blinds, keep these safety precautions in mind:
* **Use a Stable Ladder:** If you need to use a ladder or step stool to reach your blinds, make sure it’s stable and
Conclusion
So, there you have it! This simple, effective, and budget-friendly DIY blind cleaner is a game-changer for anyone tired of dusty, grimy blinds. We’ve walked you through the process, highlighting how easy it is to gather the necessary materials – most of which you probably already have at home. Forget spending a fortune on specialized cleaning products or expensive professional services. This method delivers sparkling clean blinds with minimal effort and maximum impact.
Why is this DIY blind cleaner a must-try? Because it saves you time, money, and frustration. It’s a sustainable solution, reducing your reliance on harsh chemicals and disposable cleaning wipes. Plus, the satisfaction of seeing your blinds transform from dull to dazzling is incredibly rewarding. Imagine the sunlight streaming through your windows, unobstructed by layers of dust and grime. Picture the compliments you’ll receive on your impeccably clean home. All thanks to this simple, yet powerful, cleaning hack.
But the best part? This DIY blind cleaner is incredibly versatile. Feel free to experiment with different essential oils in your cleaning solution to add a pleasant fragrance to your home. Lavender, lemon, or eucalyptus are all excellent choices. For particularly stubborn grime, consider adding a tablespoon of white vinegar to the mixture for extra cleaning power. If you have delicate blinds, such as fabric or wooden blinds, be sure to test the solution on an inconspicuous area first to ensure it doesn’t cause any damage or discoloration. You can also adjust the dampness of your cleaning cloth to suit the material of your blinds. For wooden blinds, a slightly drier cloth is recommended to prevent water damage.
We’re confident that once you try this DIY blind cleaner, you’ll never go back to your old methods. It’s a truly transformative experience that will leave your blinds looking their best and your home feeling fresher and brighter.
Don’t just take our word for it, though. We encourage you to give this DIY blind cleaner a try and see the results for yourself. We’re eager to hear about your experiences! Share your before-and-after photos and tips in the comments section below. Let us know if you’ve discovered any variations that work particularly well for you. Together, we can create a community of clean-blind enthusiasts! So, grab your supplies, roll up your sleeves, and get ready to experience the joy of sparkling clean blinds. You won’t regret it!
Frequently Asked Questions (FAQs)
What kind of cloth is best to use for this DIY blind cleaner?
Microfiber cloths are generally considered the best option for cleaning blinds. They are highly absorbent, effectively trapping dust and grime, and they are gentle enough to avoid scratching or damaging the blind material. You can also use soft cotton cloths, but be sure to choose a lint-free option to prevent leaving behind any unwanted residue. Avoid using abrasive cloths or scrub brushes, as these can damage the surface of your blinds.
How often should I clean my blinds using this DIY method?
The frequency of cleaning depends on several factors, including the location of your home, the amount of dust and pollen in the air, and whether you have pets. As a general guideline, cleaning your blinds every 2-4 weeks is a good starting point. However, if you live in a dusty area or have pets that shed a lot, you may need to clean them more frequently. Regularly dusting your blinds with a dry cloth or duster between cleanings can also help to keep them looking their best.
Can I use this DIY blind cleaner on all types of blinds?
While this DIY blind cleaner is generally safe for most types of blinds, it’s always a good idea to test it on an inconspicuous area first, especially if you have delicate blinds such as fabric or wooden blinds. For wooden blinds, be sure to use a slightly drier cloth to prevent water damage. For fabric blinds, you may want to use a gentler cleaning solution and avoid excessive rubbing. If you’re unsure about the best way to clean your specific type of blinds, consult the manufacturer’s instructions or contact a professional cleaning service.
What if my blinds have stubborn stains or grime that this DIY cleaner can’t remove?
For stubborn stains or grime, you can try adding a tablespoon of white vinegar to your cleaning solution. Vinegar is a natural disinfectant and degreaser that can help to break down tough stains. You can also try using a soft-bristled brush, such as an old toothbrush, to gently scrub the affected areas. Be careful not to apply too much pressure, as this could damage the blind material. If the stains persist, you may need to consider using a specialized cleaning product or contacting a professional cleaning service.
Is it safe to use essential oils in the cleaning solution?
Yes, essential oils are generally safe to use in the cleaning solution, as long as you use them in moderation and choose oils that are safe for your family and pets. Some popular essential oils for cleaning include lavender, lemon, eucalyptus, and tea tree oil. These oils have antibacterial and antifungal properties, and they can also add a pleasant fragrance to your home. However, it’s important to note that some essential oils can be toxic to pets, so be sure to do your research before using them around animals. Always dilute essential oils properly before using them, and avoid using them on delicate surfaces that could be damaged by the oil.
Can I use this DIY blind cleaner on vertical blinds?
Yes, this DIY blind cleaner can be used on vertical blinds as well. The process is essentially the same, but you may find it easier to clean vertical blinds by starting at the top and working your way down. You can also use a slightly larger cloth or sponge to cover more surface area at once. Be sure to pay attention to the slats and the cords or chains that hold the blinds together, as these areas can often accumulate dust and grime.
What are some other tips for keeping my blinds clean?
In addition to regular cleaning, there are several other things you can do to keep your blinds clean and looking their best. Dusting your blinds regularly with a dry cloth or duster can help to prevent dust and grime from building up. You can also use a vacuum cleaner with a brush attachment to remove dust and debris. Avoid exposing your blinds to excessive moisture or humidity, as this can lead to mold and mildew growth. If you have pets, consider using a pet-friendly cleaning solution to remove pet hair and dander. Finally, be sure to follow the manufacturer’s instructions for cleaning and maintaining your specific type of blinds.
Leave a Comment