

DIY Cabinet Cleaner: Are your kitchen cabinets looking a little worse for wear? Tired of greasy fingerprints, splatters, and general grime dulling their shine? You’re not alone! We’ve all been there. But before you reach for those harsh, chemical-laden cleaners, let me tell you about a fantastic, all-natural solution you can whip up right in your own kitchen.
For generations, resourceful homemakers have relied on simple, homemade remedies to keep their homes sparkling. Think about it – before the age of mass-produced cleaning products, people used readily available ingredients like vinegar, baking soda, and lemon to tackle even the toughest cleaning challenges. This tradition of resourcefulness and sustainability is something I truly admire, and it’s what inspired me to create this easy and effective DIY cabinet cleaner recipe.
Why is this DIY trick so essential? Well, store-bought cleaners can be expensive and often contain harsh chemicals that can damage your cabinets’ finish and even pose health risks to your family and pets. Plus, who wants to breathe in those fumes? This homemade version is not only safer and more eco-friendly, but it’s also incredibly budget-friendly. You probably already have most of the ingredients in your pantry! So, let’s ditch the chemicals and embrace a natural, effective way to restore your cabinets to their former glory. Get ready to learn how to make a powerful DIY cabinet cleaner that will leave your kitchen sparkling and smelling fresh!
DIY Cabinet Cleaner: Revive Your Kitchen with Natural Ingredients
Hey everyone! Tired of those harsh chemical cleaners leaving a lingering smell and potentially damaging your beautiful cabinets? I totally get it! I’ve been there, scrubbing away with store-bought products, only to be disappointed with the results. That’s why I started experimenting with homemade solutions, and let me tell you, the results have been amazing! This DIY cabinet cleaner is not only effective but also gentle on your cabinets and the environment. Plus, you probably already have most of the ingredients in your pantry!
Why Go DIY?
Before we dive into the recipe, let’s quickly talk about why making your own cabinet cleaner is a fantastic idea:
* Cost-Effective: You’ll save money by using ingredients you likely already have.
* Environmentally Friendly: No harsh chemicals going down the drain or polluting the air.
* Gentle on Cabinets: Avoid damaging finishes with abrasive chemicals.
* Customizable: Adjust the recipe to suit your specific needs and preferences.
* Peace of Mind: You know exactly what’s going on your cabinets!
Ingredients You’ll Need
Here’s what you’ll need to whip up this amazing cabinet cleaner:
* 1 cup warm water
* 1/2 cup white vinegar
* 2 tablespoons baking soda
* 1 tablespoon liquid dish soap (I prefer a natural, unscented one)
* 10-15 drops of your favorite essential oil (optional, but I love lemon or orange for a fresh scent!)
Equipment
* Spray bottle
* Microfiber cloths (you’ll need a few!)
* Soft-bristled brush (an old toothbrush works great for tight spots)
* Bowl for mixing (optional)
* Gloves (optional, but recommended if you have sensitive skin)
Step-by-Step Instructions: Making and Using Your DIY Cabinet Cleaner
Alright, let’s get started! This is super easy, I promise.
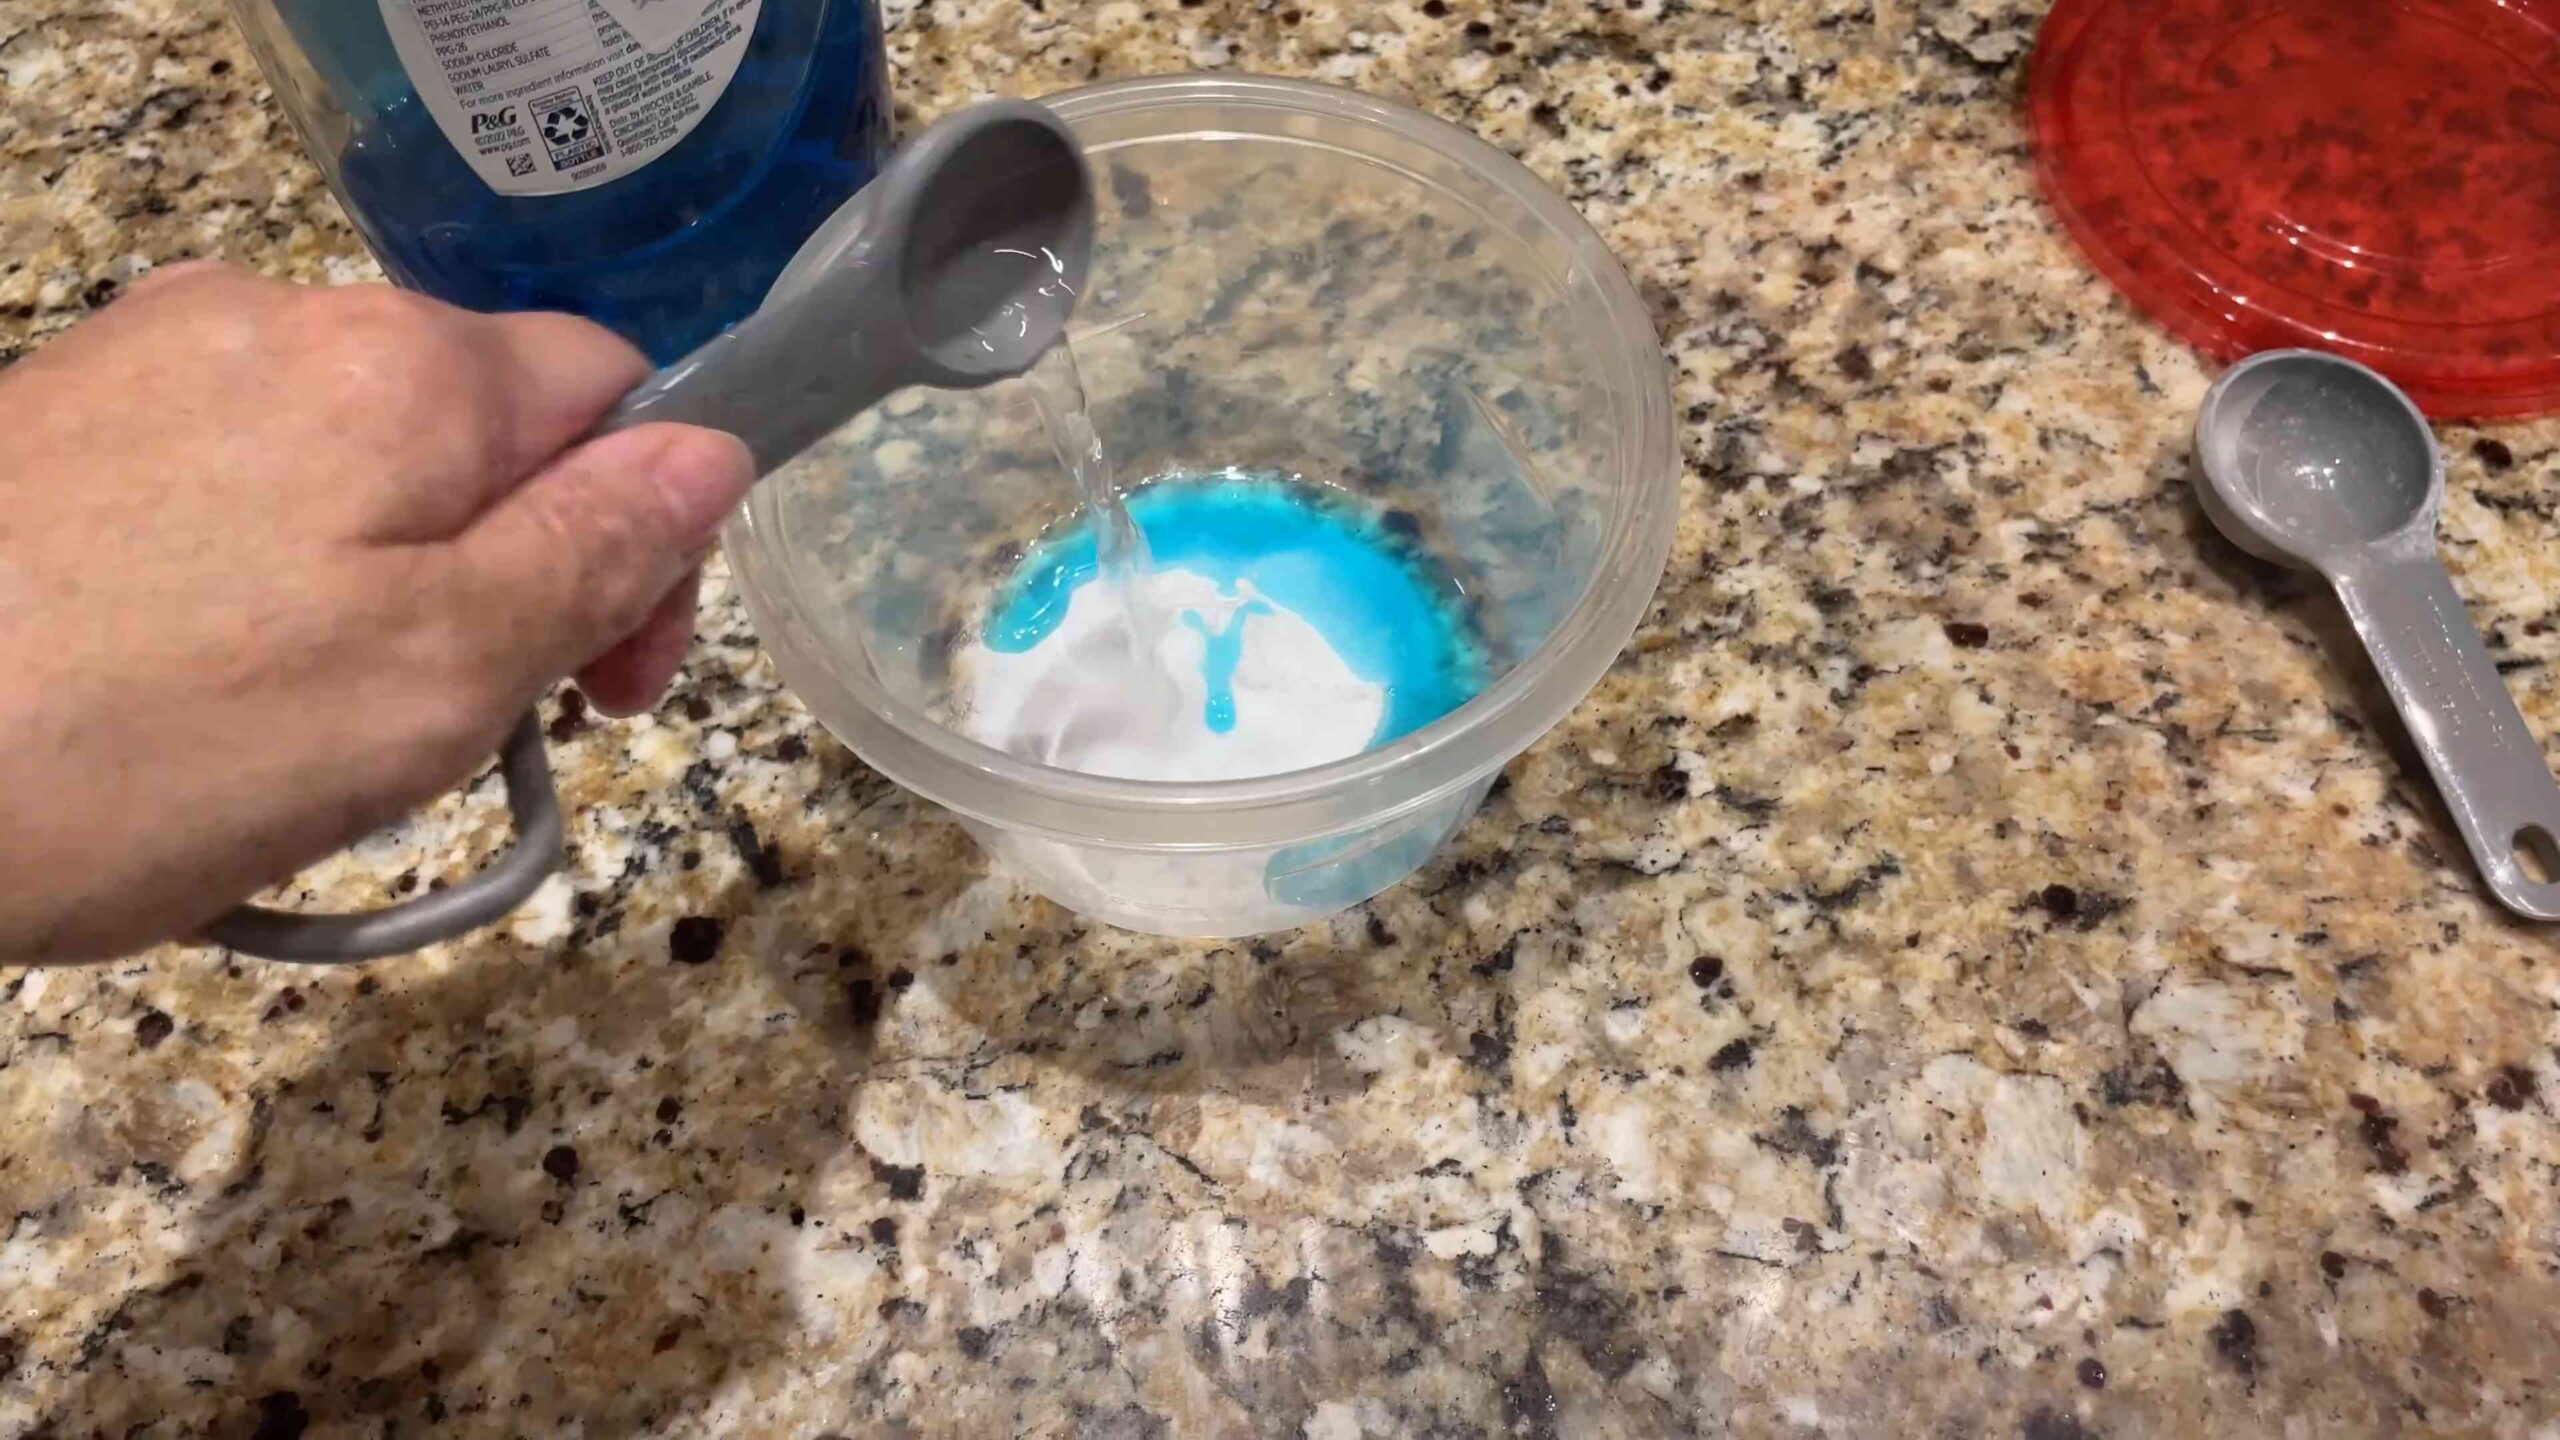
1. Prepare the Cleaning Solution:
* In a spray bottle, pour in the warm water.
* Add the white vinegar. The vinegar helps cut through grease and grime.
* Carefully add the baking soda. It will fizz a bit when it comes into contact with the vinegar, so add it slowly to avoid overflow. The baking soda acts as a gentle abrasive.
* Add the liquid dish soap. This helps to lift dirt and grease.
* If you’re using essential oils, add them now. I love the scent of lemon, but feel free to experiment with your favorites!
* Close the spray bottle tightly and gently shake to combine all the ingredients. Be careful not to shake too vigorously, as the mixture might foam up.
2. Test in an Inconspicuous Area:
* Before you go wild spraying your entire kitchen, it’s crucial to test the cleaner in a hidden spot. Choose an area inside a cabinet or on a lower corner that’s not easily visible.
* Spray a small amount of the cleaner onto the test area.
* Let it sit for a minute or two.
* Wipe it away with a clean microfiber cloth.
* Check for any discoloration, damage, or changes to the finish. If everything looks good, you’re ready to proceed! If you notice any issues, dilute the cleaner with more water or discontinue use.
3. Prepare Your Cabinets:
* Before you start cleaning, remove any items from your countertops and clear the area around your cabinets.
* Dust your cabinets with a dry microfiber cloth or a duster to remove any loose dirt or debris. This will prevent you from just smearing the dirt around when you start cleaning.
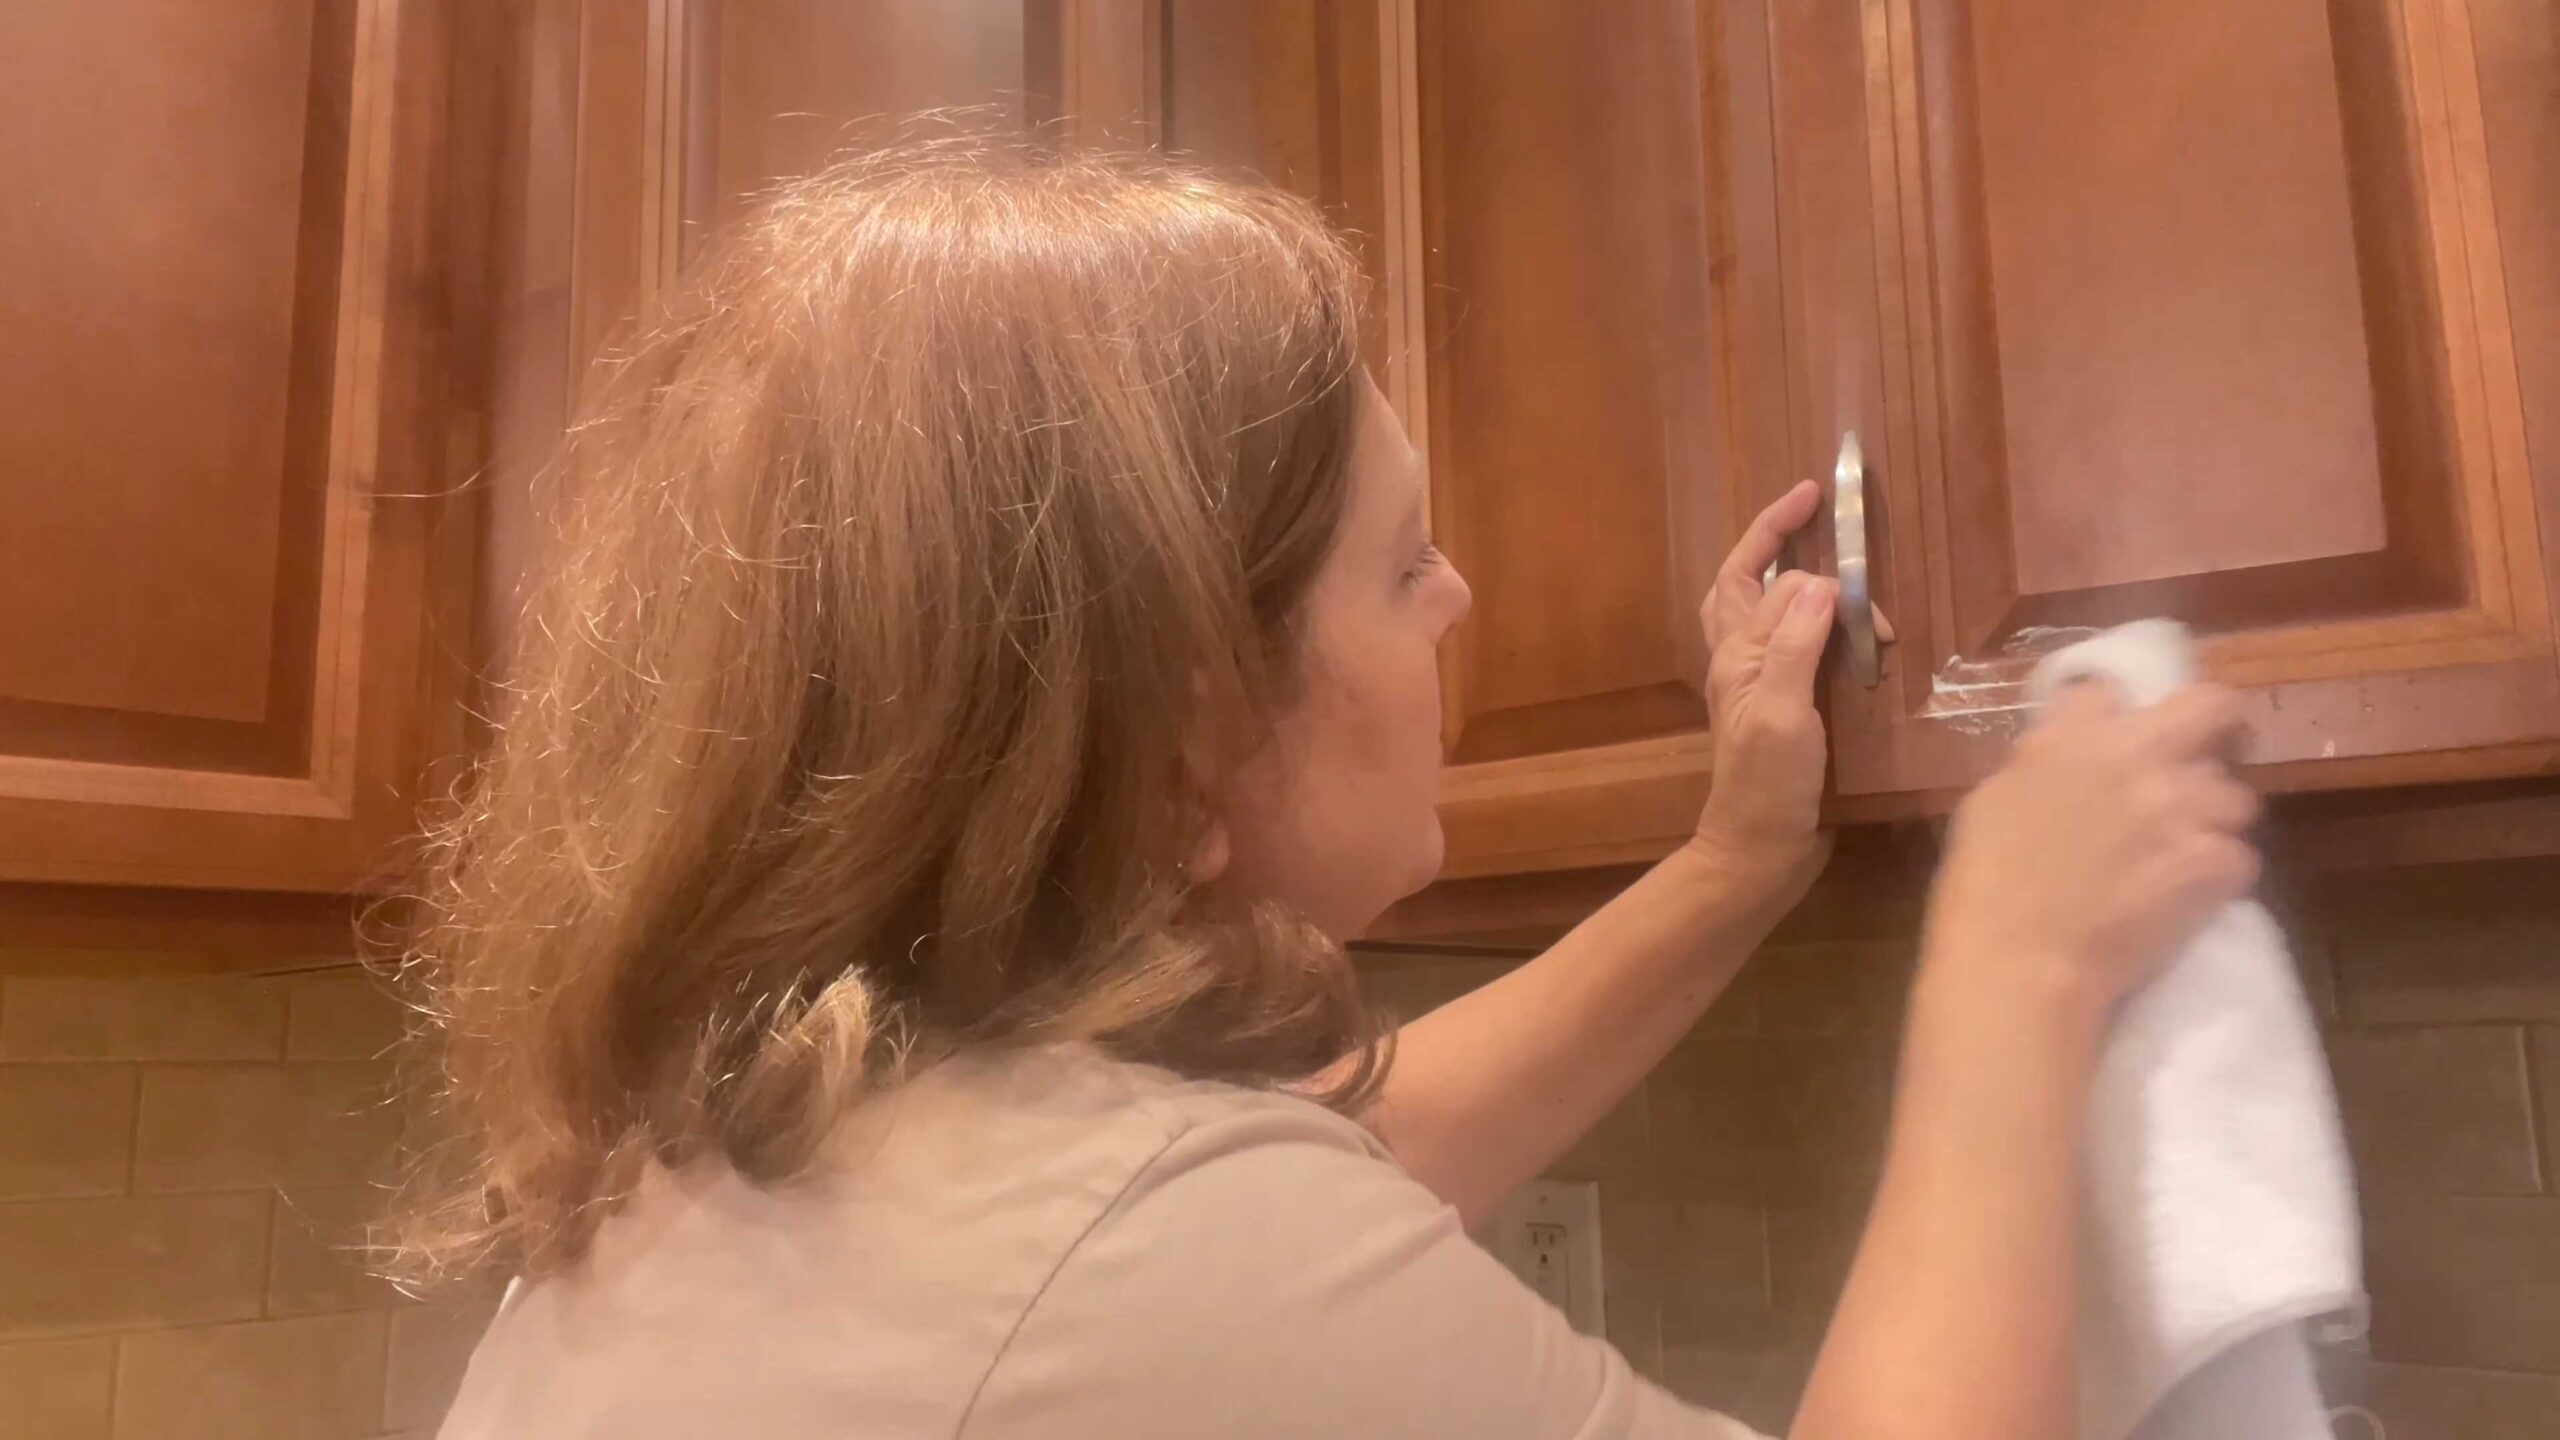
4. Spray and Wipe:
* Spray the cleaning solution directly onto your cabinets, focusing on areas with grease or grime buildup. Don’t saturate the wood; a light mist is all you need.
* Let the cleaner sit for a minute or two to loosen the dirt.
* Using a clean microfiber cloth, wipe the cabinets in a circular motion. Apply gentle pressure to remove stubborn stains.
* For heavily soiled areas, you might need to repeat the process.
5. Tackle Tough Spots:
* For those hard-to-reach areas, like around knobs and handles, or in the grooves of your cabinet doors, use a soft-bristled brush (an old toothbrush works perfectly!).
* Spray the cleaner onto the brush and gently scrub the area.
* Wipe away any residue with a clean microfiber cloth.
6. Rinse (Optional):
* If you feel like your cabinets are still a bit soapy after wiping, you can rinse them with a damp microfiber cloth.
* Make sure to wring out the cloth well so you’re not leaving excess water on the wood.
7. Dry Your Cabinets:
* After cleaning and rinsing (if you chose to rinse), dry your cabinets with a clean, dry microfiber cloth. This will prevent water spots and help to maintain the finish.
Dealing with Specific Cabinet Issues
Sometimes, you’ll encounter specific problems that require a little extra attention. Here are a few tips for dealing with common cabinet issues:
Grease Buildup
Grease is a common problem in kitchens, especially around the stove. For stubborn grease buildup:
* Increase the Vinegar: Add a little more vinegar to your cleaning solution. Vinegar is a natural degreaser.
* Baking Soda Paste: Make a paste of baking soda and water and apply it directly to the grease. Let it sit for a few minutes, then scrub gently with a soft cloth.
* Steam Cleaning: A handheld steamer can be surprisingly effective at loosening grease. Use the steamer to gently heat the grease, then wipe it away with a cloth. Be careful not to hold the steamer in one spot for too long, as this could damage the finish.
Sticky Residue
Sticky residue can be caused by spills, splatters, or even just dust and grime accumulating over time.
* Warm Water and Dish Soap: Sometimes, all you need is a little warm water and dish soap. Soak a cloth in warm, soapy water and wring it out well. Wipe the sticky area, then dry with a clean cloth.
* Goo Gone: For really stubborn sticky residue, you can try Goo Gone. Apply it according to the instructions on the bottle, and be sure to test it in an inconspicuous area first.
Water Stains
Water stains can be unsightly, but they’re usually not too difficult to remove.
* Hair Dryer: Believe it or not, a hair dryer can sometimes remove water stains. Hold the hair dryer a few inches away from the stain and use a low heat setting. The heat can help to evaporate the water and remove the stain.
* Mayonnaise: This sounds crazy, but it works! Apply a small amount of mayonnaise to the water stain and let it sit for a few hours or overnight. Wipe it away with a clean cloth. The oil in the mayonnaise helps to lift the stain.
Mold and Mildew
Mold and mildew can grow in damp areas, like under the sink.
* Vinegar: Vinegar is a natural disinfectant and can kill mold and mildew. Spray the affected area with vinegar and let it sit for a few minutes. Wipe it away with a clean cloth.
* Bleach Solution: For more severe mold and mildew, you can use a diluted bleach solution (1 part bleach to 10 parts water). Be sure to wear gloves and eye protection when using bleach. Apply the solution to the affected area and let it sit for a few minutes. Wipe it away with a clean cloth and rinse thoroughly. Important: Never mix bleach with vinegar, as this can create toxic fumes.
Tips for Maintaining Clean Cabinets
Once you’ve cleaned your cabinets, you’ll want to keep them looking their best. Here are a few tips for maintaining clean cabinets:
* Wipe Up Spills Immediately: The sooner you wipe up spills, the less likely they are to stain or leave sticky residue.
* Regular Dusting: Dust your cabinets regularly with a dry microfiber cloth or a duster. This will prevent dust and grime from building up.
* Ventilate Your Kitchen: Proper ventilation can help to prevent grease and moisture buildup. Use your range hood when cooking, and open windows when possible.
* Clean Regularly: Clean your cabinets every few weeks to prevent dirt and grime from accumulating.
Important Considerations
* Type of Cabinet Finish: Always consider the type of finish on your cabinets before using any cleaning product. Some finishes are more delicate than others. If you’re unsure, consult the manufacturer’s instructions or test the cleaner in an inconspicuous area.
* Wood vs. Laminate: Wood cabinets require more care than laminate cabinets. Avoid using harsh chemicals or abrasive cleaners on wood cabinets.
* Painted Cabinets: Painted
Conclusion
So, there you have it! Ditching the harsh chemicals and embracing this simple, effective DIY cabinet cleaner is not just a trend; it’s a smart choice for your home, your health, and your wallet. We’ve walked you through the easy steps, highlighting the natural power of ingredients you likely already have in your pantry.
Why is this a must-try? Because it works! It cuts through grease, grime, and everyday messes without leaving behind a lingering chemical odor or potentially damaging your cabinet finishes. Plus, you have complete control over what you’re using in your home, which is especially important if you have children, pets, or sensitivities to certain chemicals.
But the beauty of this DIY approach lies in its adaptability. Feel free to experiment with variations to suit your specific needs and preferences. For instance, if you’re dealing with particularly stubborn stains, consider adding a tablespoon of baking soda to the mixture for extra scrubbing power. For a refreshing scent boost, a few drops of lemon, orange, or lavender essential oil can transform your cleaning routine into an aromatherapy session. If you have dark wood cabinets, adding a teaspoon of olive oil to the mixture can help to nourish the wood and prevent it from drying out. Always test any variation on an inconspicuous area first to ensure it doesn’t damage the finish.
Remember, the key to success with any cleaning solution, DIY or store-bought, is regular maintenance. A quick wipe-down with your homemade cabinet cleaner every week or two will prevent grime from building up and make your cleaning tasks much easier in the long run.
We’re confident that once you try this DIY cabinet cleaner, you’ll be amazed by the results. It’s a simple, effective, and eco-friendly way to keep your cabinets looking their best. So, ditch the expensive, chemical-laden cleaners and give this recipe a try.
We’re eager to hear about your experiences! Did you find this recipe helpful? Did you try any variations? Share your tips, tricks, and before-and-after photos in the comments below. Let’s build a community of happy, healthy homes, one sparkling cabinet at a time! Your feedback will not only help other readers but also inspire us to create more helpful and sustainable DIY solutions for your home. Don’t be shy – let us know how this DIY cabinet cleaner worked for you!
Frequently Asked Questions (FAQ)
1. What types of cabinets can I use this DIY cleaner on?
This DIY cabinet cleaner is generally safe for most types of cabinets, including wood, laminate, and painted cabinets. However, it’s always crucial to test the cleaner on an inconspicuous area first, such as the inside of a cabinet door or a lower corner, to ensure it doesn’t damage the finish. Pay close attention to how the cleaner interacts with the surface. If you notice any discoloration, streaking, or damage, discontinue use immediately. For antique or delicate cabinets, it’s best to consult with a professional before using any cleaning product, even a DIY one.
2. Can I use vinegar on my cabinets? I’ve heard it can damage them.
Vinegar is a common ingredient in DIY cleaners due to its acidity, which helps to cut through grease and grime. However, vinegar can be too harsh for some cabinet finishes, especially those with a wax or oil-based coating. The acidity can strip away the finish over time, leaving the cabinets looking dull or damaged. If you choose to use vinegar, dilute it significantly with water (a 1:1 ratio is a good starting point) and test it on an inconspicuous area first. For cabinets with a delicate finish, it’s generally best to avoid vinegar altogether and opt for a milder cleaning solution, such as dish soap and water.
3. How often should I clean my cabinets?
The frequency of cleaning depends on how much use your kitchen gets and how prone your cabinets are to getting dirty. As a general guideline, wiping down your cabinets with a damp cloth or your DIY cabinet cleaner once a week can help prevent grime from building up. For cabinets near the stove or sink, which are more likely to get splattered with grease and food, you may need to clean them more frequently, perhaps every few days. A deep clean, which involves thoroughly scrubbing the cabinets and removing any stubborn stains, should be done every few months.
4. What’s the best way to remove stubborn grease stains from my cabinets?
Stubborn grease stains can be challenging to remove, but with the right approach, you can get your cabinets looking clean again. First, try applying a paste of baking soda and water to the stain. Let it sit for a few minutes to absorb the grease, then gently scrub with a soft cloth or sponge. For particularly stubborn stains, you can add a few drops of dish soap to the paste. Another option is to use a mixture of warm water and a degreasing dish soap. Apply the mixture to the stain, let it sit for a few minutes, and then scrub gently. Always rinse the area thoroughly with clean water and dry with a soft cloth.
5. Can I use essential oils in my DIY cabinet cleaner? If so, which ones are best?
Yes, you can definitely add essential oils to your DIY cabinet cleaner for a pleasant scent and added cleaning benefits. Some of the best essential oils for cleaning include lemon, orange, tea tree, lavender, and eucalyptus. Lemon and orange essential oils have degreasing properties and a refreshing scent. Tea tree oil is a natural disinfectant and can help to kill bacteria. Lavender oil has a calming scent and can help to create a relaxing atmosphere. Eucalyptus oil has a strong, clean scent and can help to remove odors. When using essential oils, add a few drops to your cleaning solution and test it on an inconspicuous area first to ensure it doesn’t damage the finish.
6. My cabinets have a sticky residue on them. Will this DIY cleaner remove it?
A sticky residue on cabinets can be caused by a variety of factors, such as grease buildup, food splatters, or even residue from previous cleaning products. This DIY cabinet cleaner should be effective in removing most sticky residues. The combination of warm water, dish soap, and vinegar (if you choose to use it) can help to break down the residue and lift it away from the surface. For particularly stubborn residues, you may need to let the cleaner sit on the surface for a few minutes before scrubbing. You can also try using a soft-bristled brush to help loosen the residue. After cleaning, be sure to rinse the area thoroughly with clean water and dry with a soft cloth.
7. How do I prevent my cabinets from getting dirty in the first place?
Prevention is always better than cure! To keep your cabinets clean and prevent grime from building up, try these tips:
* Wipe up spills and splatters immediately.
* Use a range hood when cooking to vent grease and steam.
* Keep your countertops clean and clutter-free.
* Regularly dust your cabinets with a soft cloth.
* Consider using placemats and coasters to protect your countertops from spills.
* Avoid placing hot items directly on your cabinets.
By following these simple tips, you can keep your cabinets looking clean and beautiful for years to come. Remember, a little bit of prevention goes a long way! And when it’s time to clean, your homemade DIY cabinet cleaner will be ready to tackle any mess.


Leave a Comment