

DIY fruit crate closet: Tired of staring at that mountain of clothes threatening to avalanche from your chair? Or maybe you’re just craving a unique storage solution that screams personality? I get it! We’ve all been there, yearning for a stylish and functional way to organize our belongings without breaking the bank. That’s where the magic of upcycling comes in!
For generations, resourceful individuals have found creative ways to repurpose everyday items. Think about it – our grandparents turning old flour sacks into dresses or using discarded tires as planters. This spirit of ingenuity is alive and well, and it’s the driving force behind this fantastic DIY project.
Why a DIY fruit crate closet, you ask? Well, beyond its undeniable charm, it’s an incredibly practical solution. Fruit crates are sturdy, readily available (often for free or at a low cost), and offer a rustic aesthetic that complements various home decor styles. Plus, building your own closet allows you to customize the size and configuration to perfectly fit your space and storage needs. No more struggling with flimsy shelves or generic plastic bins! I’m going to show you how to transform humble fruit crates into a stylish and functional closet that will not only declutter your space but also add a touch of unique character to your home. Let’s get started!
DIY Fruit Crate Closet: Rustic Charm Meets Organized Storage
Okay, so you’re tired of your clothes overflowing, and you’re craving a storage solution that’s both functional and bursting with personality? I get it! Let’s ditch the boring plastic bins and embrace a rustic, charming DIY fruit crate closet. This project is surprisingly easy, customizable to your space, and adds a unique touch to any room. Plus, it’s a fantastic way to upcycle!
Gathering Your Supplies: The Treasure Hunt Begins
Before we dive in, let’s make sure we have everything we need. This is crucial for a smooth and enjoyable building experience.
* **Fruit Crates:** The stars of the show! You’ll need several, depending on the size and configuration of your desired closet. I recommend sourcing them from local farms, farmers’ markets, or even online marketplaces. Look for crates that are sturdy and in relatively good condition. Don’t worry too much about minor imperfections; they add to the rustic charm. Aim for at least 6 crates to start, you can always add more later.
* **Sandpaper (Various Grits):** We’ll need to smooth out any rough edges and splinters. I suggest having a coarse grit (80-100), a medium grit (120-180), and a fine grit (220+).
* **Wood Stain or Paint (Optional):** If you want to customize the color of your crates, grab your favorite stain or paint. I personally love using a weathered gray stain for a rustic look, but the possibilities are endless!
* **Paintbrushes or Rags (For Stain/Paint):** For applying your chosen finish.
* **Wood Screws:** These will hold the crates together securely. I recommend screws that are at least 1 1/4 inches long.
* **Drill with Drill Bits:** Essential for pre-drilling holes and driving in the screws. Make sure you have a drill bit that’s slightly smaller than the diameter of your screws.
* **Measuring Tape:** To ensure your closet is the right size and that your crates are aligned properly.
* **Level:** Crucial for making sure your closet is straight and stable.
* **Safety Glasses:** Protect your eyes from dust and debris.
* **Work Gloves:** To protect your hands.
* **Optional: Wood Glue:** For extra stability, you can use wood glue in addition to the screws.
* **Optional: Casters (Wheels):** If you want a mobile closet, consider adding casters to the bottom.
* **Optional: Closet Rod and Hardware:** If you want to hang clothes, you’ll need a closet rod and the necessary brackets.
* **Optional: Wire Mesh or Fabric:** To create backs for the crates, preventing items from falling out.
* **Optional: Staple Gun:** If you’re using wire mesh or fabric for the backs.
Preparing the Crates: Sanding and Finishing
This step is all about making your crates look their best and ensuring they’re safe to handle.
1. **Inspect the Crates:** Before you start sanding, take a close look at each crate. Remove any loose nails or staples. If there are any large splinters, carefully remove them with pliers.
2. **Sanding:** This is where the elbow grease comes in! Start with the coarse grit sandpaper to remove any rough edges, splinters, or imperfections. Then, move on to the medium grit to smooth things out further. Finally, use the fine grit sandpaper for a super smooth finish. Pay special attention to the edges and corners.
3. **Cleaning:** After sanding, wipe down the crates with a damp cloth to remove any sanding dust. Let them dry completely before moving on to the next step.
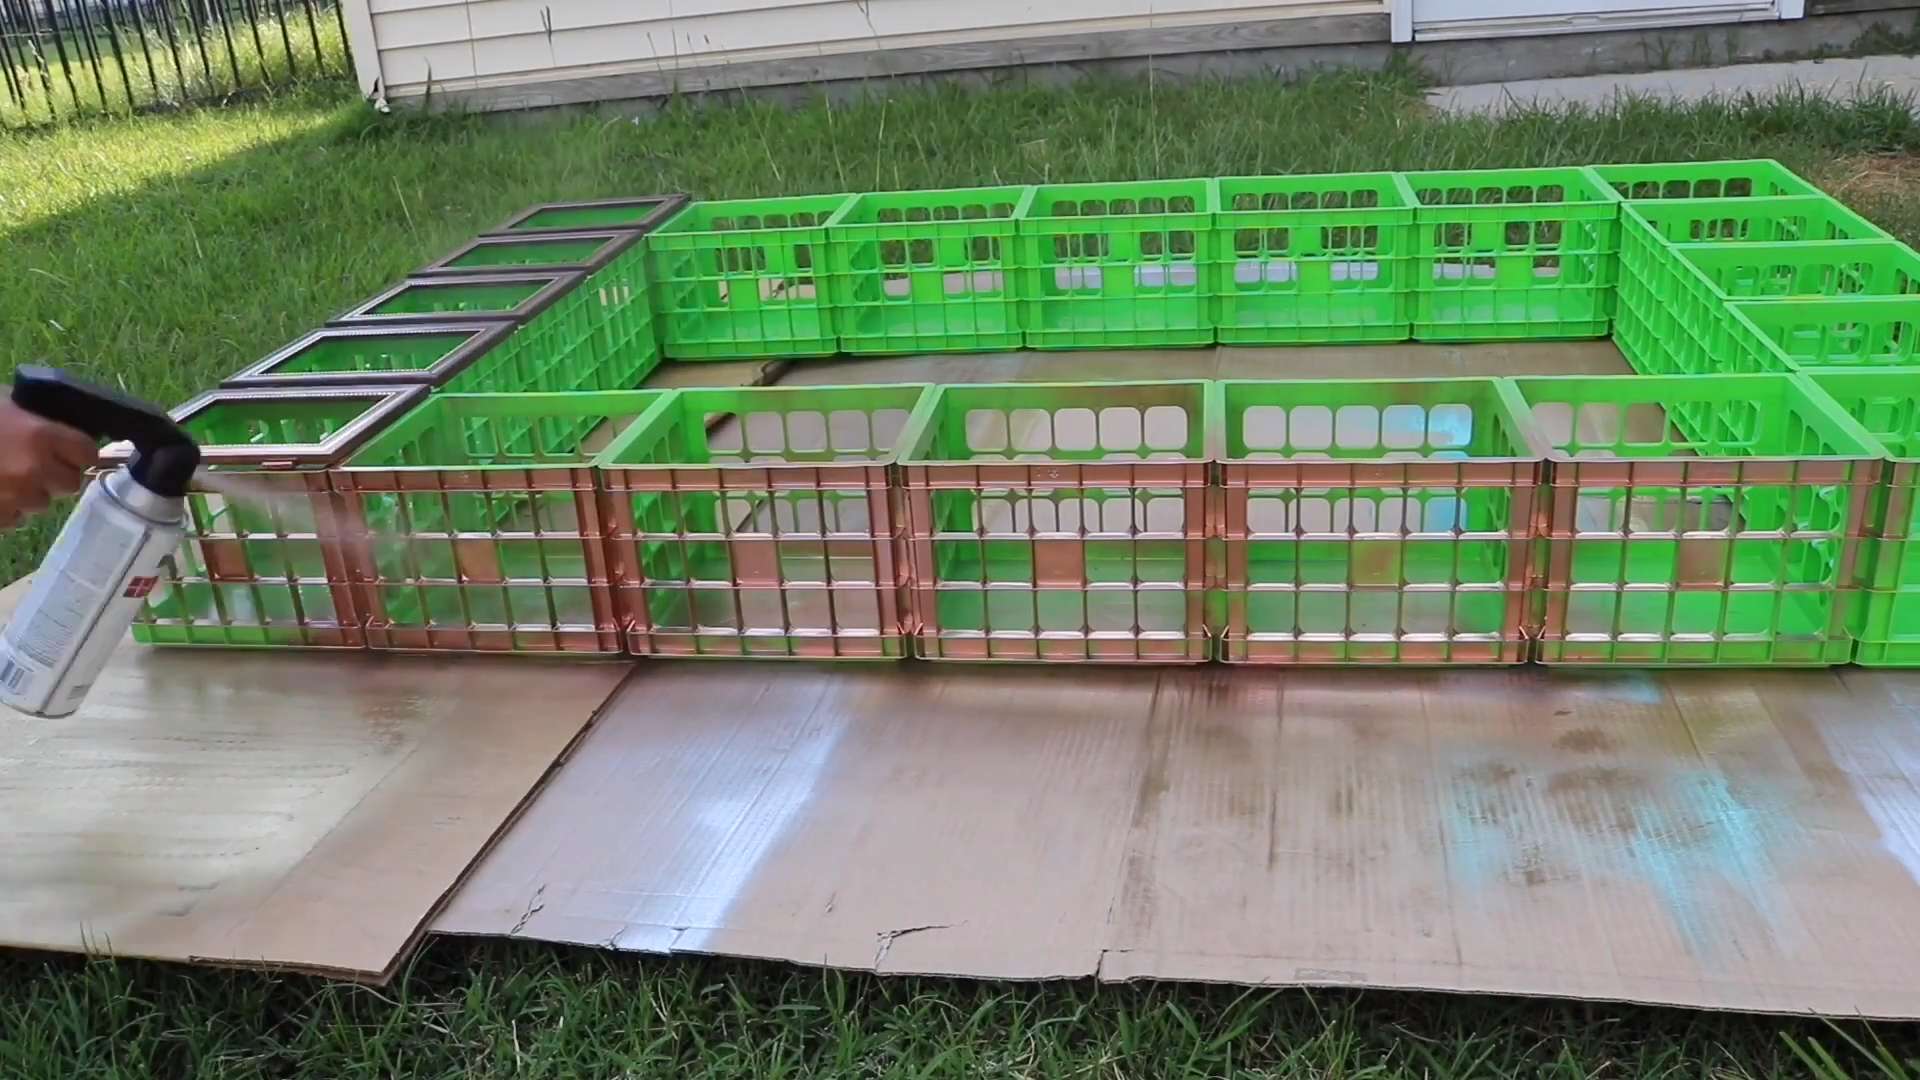
4. **Staining or Painting (Optional):** If you’re staining or painting your crates, now’s the time to do it. Apply the stain or paint evenly, following the manufacturer’s instructions. I usually do two coats for a richer color. Let the crates dry completely between coats. Remember to work in a well-ventilated area.
Assembling the Closet: Building Your Dream Storage
Now for the fun part – putting it all together! This is where your vision starts to take shape.
1. **Plan Your Layout:** Before you start screwing things together, take some time to plan the layout of your closet. Consider the space you have available and the types of items you’ll be storing. Do you want a tall, narrow closet or a wide, low one? Do you want shelves, hanging space, or a combination of both? Sketch out your design on paper to help you visualize the finished product.
2. **Stacking and Securing:** Once you’ve decided on your layout, start stacking the crates in the desired configuration. Use a level to ensure that the crates are aligned properly.
3. **Pre-Drilling:** Before you drive in the screws, pre-drill holes through the sides of the crates where they will be joined together. This will prevent the wood from splitting. Use a drill bit that’s slightly smaller than the diameter of your screws.
4. **Screwing the Crates Together:** Now, carefully screw the crates together using the wood screws. Make sure the screws are driven in straight and tight. If you’re using wood glue, apply a thin layer of glue to the surfaces that will be joined together before screwing them together.
5. **Adding Casters (Optional):** If you want a mobile closet, attach casters to the bottom of the bottom crates. Follow the manufacturer’s instructions for attaching the casters.
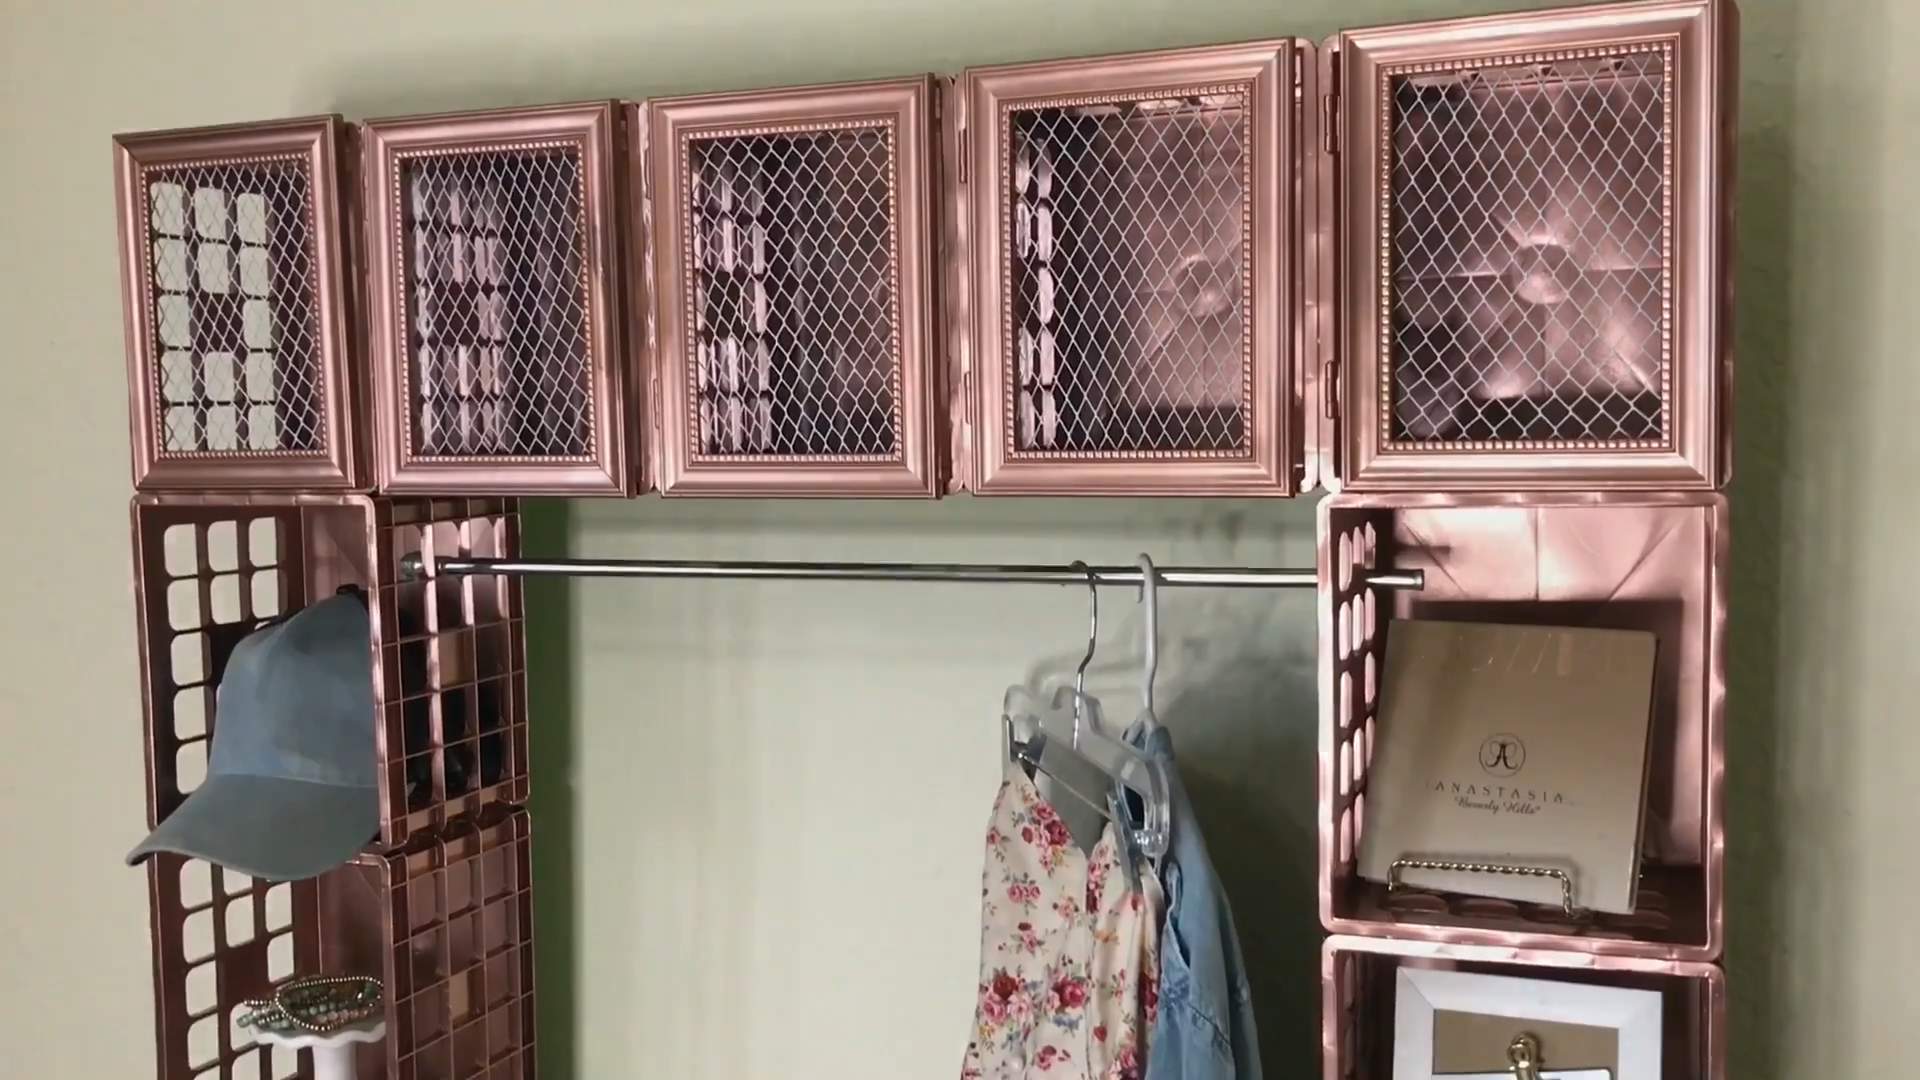
6. **Adding a Closet Rod (Optional):** If you want to hang clothes, install a closet rod. Measure the width of the closet and cut the closet rod to the appropriate length. Attach the closet rod brackets to the inside of the crates, making sure they are level. Then, insert the closet rod into the brackets.
7. **Adding Backs (Optional):** To prevent items from falling out of the back of the crates, you can add backs using wire mesh or fabric. Cut the wire mesh or fabric to the appropriate size and staple it to the back of the crates using a staple gun.
Finishing Touches: Personalizing Your Creation
This is where you can really let your creativity shine and make your fruit crate closet truly your own.
1. **Sanding and Smoothing (Again!):** After assembly, give the entire closet another light sanding to smooth out any rough edges or imperfections.
2. **Adding Decorative Elements:** Consider adding decorative elements to your closet, such as stencils, paint designs, or decorative hardware. You could also add labels to the crates to help you stay organized.
3. **Organizing Your Clothes:** Now for the best part – filling your new closet with your clothes and accessories! Arrange your items in a way that is both functional and aesthetically pleasing.
4. **Enjoy Your Handiwork:** Step back and admire your creation! You’ve just built a unique and stylish storage solution that will add character to your home.
Extra Tips and Tricks: Making Your Closet Even Better
* Reinforce Weak Crates: If you have any crates that are particularly weak or damaged, you can reinforce them by adding extra pieces of wood to the inside.
* Use Different Sized Crates: Don’t be afraid to use different sized crates to create a more interesting and dynamic design.
* Add Lighting: Consider adding a small LED strip light inside the closet to make it easier to see your clothes.
* Protect Your Floors: If you’re not using casters, consider adding felt pads to the bottom of the crates to protect your floors from scratches.
* Get Creative with the Backs: Instead of wire mesh or fabric, you could use reclaimed wood, wallpaper, or even old book pages to create unique and eye-catching backs for your crates.
* Consider the Weight: Be mindful of the weight you’re putting on the crates, especially if you’re stacking them high. Distribute the weight evenly to prevent the closet from becoming unstable.
* Safety First: Always wear safety glasses and work gloves when working with power tools and wood.
Alternative Ideas: Beyond the Basic Closet
* Bookshelf: Stack the crates horizontally to create a unique bookshelf.
* Side Table: Use a single crate as a rustic side table.
* Coffee Table: Combine several crates to create a coffee table with built-in storage.
* Entryway Organizer: Use crates to create a stylish and functional entryway organizer for shoes, bags, and coats.
* Kitchen Storage: Use crates to store fruits, vegetables, and other kitchen essentials.
I hope this guide has inspired you to create your own amazing fruit crate closet! It’s a fun, rewarding, and budget-friendly project that will add a touch of rustic charm to your home. Happy building!
Conclusion
So, there you have it! Transforming humble fruit crates into a stylish and functional closet is not just a budget-friendly solution; it’s a statement. It’s a statement about your creativity, your commitment to sustainability, and your unique personal style. This DIY fruit crate closet project offers a level of customization that you simply can’t achieve with store-bought alternatives. Forget cookie-cutter storage solutions – this is about creating something truly special, something that reflects your personality and perfectly fits your needs.
Why is this a must-try? Because it’s more than just storage; it’s an experience. It’s the satisfaction of building something with your own hands, the joy of repurposing materials, and the pride of showcasing a truly unique piece in your home. It’s about taking something ordinary and turning it into something extraordinary. Plus, let’s be honest, who doesn’t love a good upcycling project that saves money and reduces waste?
But the beauty of this project lies in its adaptability. Feeling adventurous? Paint each crate a different color for a vibrant, bohemian vibe. Prefer a more minimalist look? Stick to natural wood tones and add sleek metal hardware. Want to maximize space? Stack the crates higher and add shelves or hanging rods. The possibilities are truly endless. Consider adding fabric liners to the crates for a softer look and to protect delicate items. You could even attach wheels to the bottom for a mobile closet solution, perfect for small spaces or renters. Think about incorporating lighting, such as LED strips, to illuminate your clothes and accessories. This not only adds a touch of elegance but also makes it easier to find what you’re looking for.
Don’t be afraid to experiment with different crate arrangements. Try creating a staggered design for a more visually interesting look. Or, build a corner closet by arranging the crates in an L-shape. The key is to have fun and let your creativity guide you. Remember to sand the crates thoroughly to avoid splinters and apply a sealant to protect the wood from moisture.
We’ve covered the basics, but the real magic happens when you put your own spin on it. So, gather your supplies, unleash your inner DIY enthusiast, and get ready to transform those fruit crates into a closet that’s as unique as you are.
We are incredibly excited to see what you create! Don’t forget to share your finished DIY fruit crate closet projects with us on social media using #FruitCrateClosetDIY. We can’t wait to see your innovative designs and inspire others to embark on their own upcycling adventures. Your experiences, tips, and photos will help others learn and create their own amazing closets. Let’s build a community of creative DIYers who are passionate about sustainable living and unique home decor. So, go ahead, give it a try, and let your creativity shine!
Frequently Asked Questions (FAQ)
What kind of fruit crates should I use?
The best fruit crates for this project are sturdy wooden crates that are in good condition. Look for crates that are free from significant damage, such as cracks or splinters. You can often find these crates at farmers’ markets, produce suppliers, or even online marketplaces. Consider the size of the crates as well, ensuring they are large enough to accommodate your clothing and accessories. Both new and used crates can work, but used crates may require more cleaning and sanding. If you’re buying new crates, make sure they are made from sustainably sourced wood.
How do I clean and prepare the fruit crates?
Cleaning and preparing the fruit crates is crucial for a successful project. Start by removing any dirt, debris, or staples from the crates. Use a stiff brush and soapy water to scrub the crates thoroughly. If there are any stubborn stains, you can use a mild bleach solution. Rinse the crates well with clean water and allow them to dry completely. Once the crates are dry, sand them down with sandpaper to smooth out any rough edges or splinters. Start with a coarser grit sandpaper and then move to a finer grit for a smooth finish. After sanding, wipe down the crates with a damp cloth to remove any sanding dust.
How do I secure the fruit crates together?
There are several ways to secure the fruit crates together to create a stable closet. One option is to use wood screws to attach the crates to each other. Drill pilot holes before inserting the screws to prevent the wood from splitting. Another option is to use construction adhesive to glue the crates together. Apply the adhesive to the surfaces that will be in contact and then clamp the crates together until the adhesive dries. For added stability, you can also use metal brackets or corner braces to reinforce the connections between the crates. Consider the weight of the items you will be storing in the closet when choosing a method for securing the crates.
What kind of finish should I use on the fruit crates?
The type of finish you use on the fruit crates will depend on your personal preferences and the overall style of your closet. You can choose to leave the crates unfinished for a rustic look, or you can apply a stain, paint, or sealant. If you’re using a stain, choose a color that complements your existing decor. Apply the stain evenly with a brush or cloth and then wipe off any excess. If you’re using paint, choose a paint that is suitable for wood and apply several thin coats for a smooth finish. A sealant will protect the wood from moisture and prevent it from warping or cracking. Consider using a water-based sealant for a more environmentally friendly option.
How can I customize my fruit crate closet?
The possibilities for customizing your DIY fruit crate closet are endless. You can add shelves, drawers, or hanging rods to create a more functional storage space. Consider adding fabric liners to the crates to protect delicate items and add a touch of color. You can also attach wheels to the bottom of the crates to create a mobile closet. Experiment with different crate arrangements to create a unique and visually appealing design. Add decorative hardware, such as knobs or pulls, to enhance the look of the closet. Don’t be afraid to get creative and personalize your closet to reflect your own style.
Is this project suitable for beginners?
Yes, this project is definitely suitable for beginners. The basic construction is quite simple and involves stacking and securing the crates. The most important steps are cleaning, sanding, and finishing the crates properly. If you’re new to DIY projects, start with a small-scale closet and gradually expand as you gain confidence. There are plenty of online tutorials and resources available to guide you through the process. Don’t be afraid to ask for help from friends or family members who have experience with DIY projects. With a little patience and effort, you can create a beautiful and functional fruit crate closet, even if you’re a beginner.
How much does this project cost?
The cost of this project will vary depending on the number of crates you use, the type of finish you choose, and any additional hardware or accessories you add. Fruit crates can range in price from a few dollars to around $20 each, depending on where you source them. Paint, stain, and sealant can cost anywhere from $10 to $50 per can or container. Hardware, such as screws, brackets, and knobs, can add another $10 to $30 to the total cost. Overall, you can expect to spend anywhere from $50 to $200 on this project, depending on the size and complexity of your closet. However, this is still significantly cheaper than buying a new closet from a furniture store.


Leave a Comment