

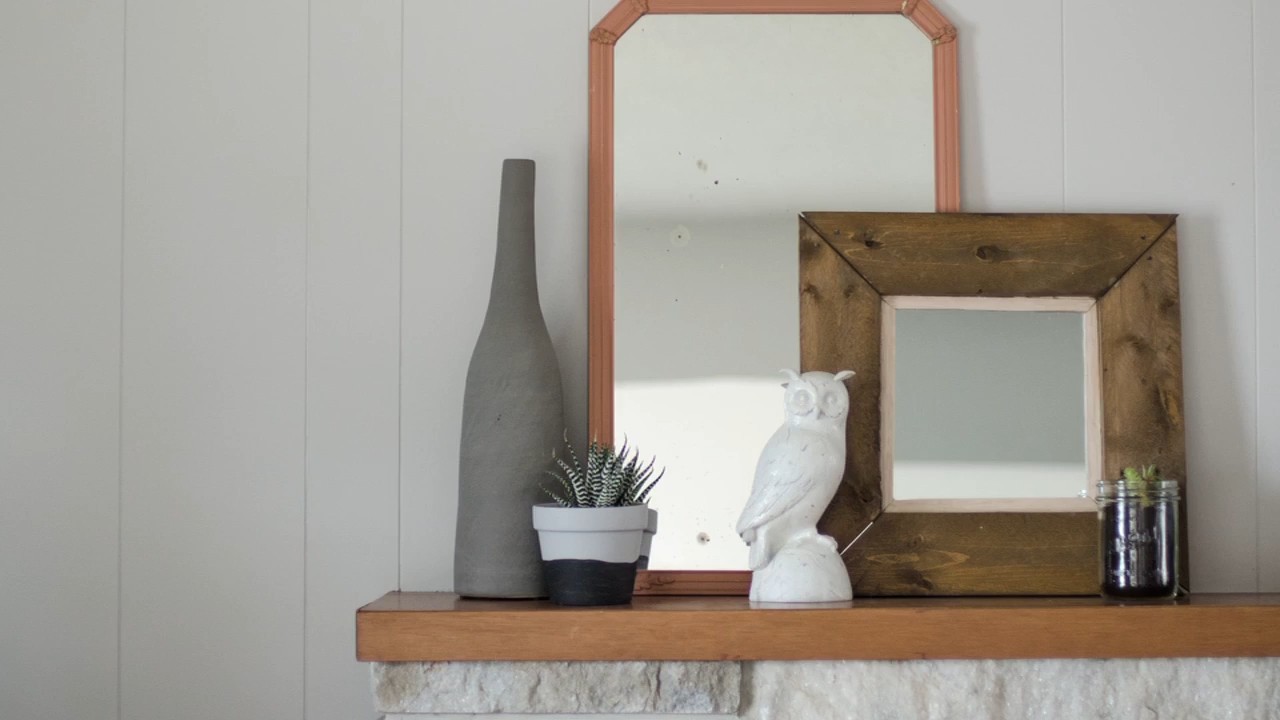
DIY Pallet Wood Mirror: Transform your space with rustic charm! Have you ever looked at a plain, boring mirror and thought, “This needs some serious personality”? I know I have! That’s where the magic of upcycling comes in. We’re diving headfirst into a fun and rewarding project: creating a stunning mirror using reclaimed pallet wood.
Pallet wood, once the unsung hero of shipping and logistics, has found new life in the world of DIY. Its rugged texture and weathered appearance add a touch of history and authenticity to any home. The use of reclaimed materials also connects us to a long tradition of resourcefulness and creativity, echoing the practices of our ancestors who valued making the most of what they had.
Why should you embark on this DIY Pallet Wood Mirror adventure? Because it’s an incredibly satisfying way to add a unique, personalized touch to your décor without breaking the bank. Plus, it’s a fantastic way to reduce waste and give discarded materials a beautiful new purpose. In this article, I’ll guide you through each step, from sourcing the perfect pallet to adding the finishing touches, ensuring you create a mirror that reflects your individual style and adds warmth to your home. Let’s get started!
DIY Pallet Wood Mirror: Rustic Charm for Your Home
Hey there, fellow DIY enthusiasts! Today, I’m super excited to share a project that’s close to my heart: creating a beautiful and rustic mirror using reclaimed pallet wood. This project is not only budget-friendly but also a fantastic way to add a touch of unique character to any room. Plus, it’s incredibly satisfying to transform something old and discarded into a stunning piece of home decor. So, grab your tools, and let’s get started!
Materials You’ll Need
Before we dive into the nitty-gritty, let’s gather all the necessary materials. Trust me, having everything organized beforehand will make the whole process much smoother.
* **Pallet Wood:** The star of the show! You’ll need enough pallet wood to create the frame around your mirror. Look for pallets that are in good condition, free from excessive damage or rot.
* **Mirror:** Choose a mirror size that suits your space and the amount of pallet wood you have. I recommend measuring your desired frame dimensions first, then finding a mirror that fits comfortably inside.
* **Wood Glue:** A strong wood glue is essential for securely bonding the pallet wood pieces together.
* **Nails or Screws:** For added reinforcement, use nails or screws to secure the frame. I prefer screws for their extra holding power.
* **Sandpaper:** Various grits (80, 120, 220) will help you achieve a smooth and polished finish.
* **Wood Stain or Paint (Optional):** If you want to customize the color of your frame, grab your favorite wood stain or paint.
* **Wood Sealer (Optional):** A sealer will protect the wood and enhance its durability.
* **Safety Glasses:** Protect your eyes from dust and debris.
* **Work Gloves:** Keep your hands safe from splinters and rough edges.
* **Measuring Tape:** Accurate measurements are crucial for a well-proportioned frame.
* **Pencil:** For marking measurements and guidelines.
* **Saw:** A circular saw, miter saw, or hand saw will be needed to cut the pallet wood.
* **Drill (Optional):** If using screws, a drill will make the job much easier.
* **Nail Gun or Hammer (Optional):** For securing the frame with nails.
* **Clamps:** Clamps will help hold the frame pieces together while the glue dries.
* **Mirror Mounting Clips or Adhesive:** To securely attach the mirror to the frame.
* **Level:** To ensure your mirror hangs straight.
Preparing the Pallet Wood
This is a crucial step, as the condition of your pallet wood will directly impact the final result.
1. **Disassemble the Pallet:** Carefully disassemble the pallet using a pry bar or hammer. Be cautious of nails and staples. Remove all nails and staples from the wood. I usually use a hammer and nail punch to drive them out from the back.
2. **Inspect and Select the Wood:** Examine each piece of wood for damage, rot, or excessive wear. Choose the best pieces for your frame. I like to look for pieces with interesting grain patterns or unique imperfections that will add character.
3. **Clean the Wood:** Thoroughly clean the wood with a brush and soapy water to remove any dirt, grime, or debris. Let it dry completely before proceeding.
4. **Sand the Wood:** Start with a coarse grit sandpaper (80 grit) to remove any rough edges or splinters. Then, gradually move to finer grits (120 and 220) to achieve a smooth surface. Remember to sand with the grain of the wood. This step is important for both aesthetics and safety.
Building the Pallet Wood Frame
Now for the fun part – constructing the frame!
1. **Measure and Cut the Wood:** Measure the dimensions of your mirror. Then, determine the desired width of your pallet wood frame. Cut the pallet wood pieces to the appropriate lengths, ensuring that the inner dimensions of the frame will snugly fit the mirror. I usually add about 1/4 inch extra space to make sure the mirror fits easily.
* You’ll need two pieces for the top and bottom of the frame, and two pieces for the sides.
2. **Miter the Corners (Optional):** For a more professional look, you can miter the corners of the frame at a 45-degree angle. This will create a seamless joint. If you don’t have a miter saw, you can use a hand saw and a miter box.
3. **Assemble the Frame:** Apply wood glue to the edges of the pallet wood pieces. Then, carefully join the pieces together to form the frame. Use clamps to hold the frame together while the glue dries.
* If you’re using mitered corners, make sure the angles align perfectly.
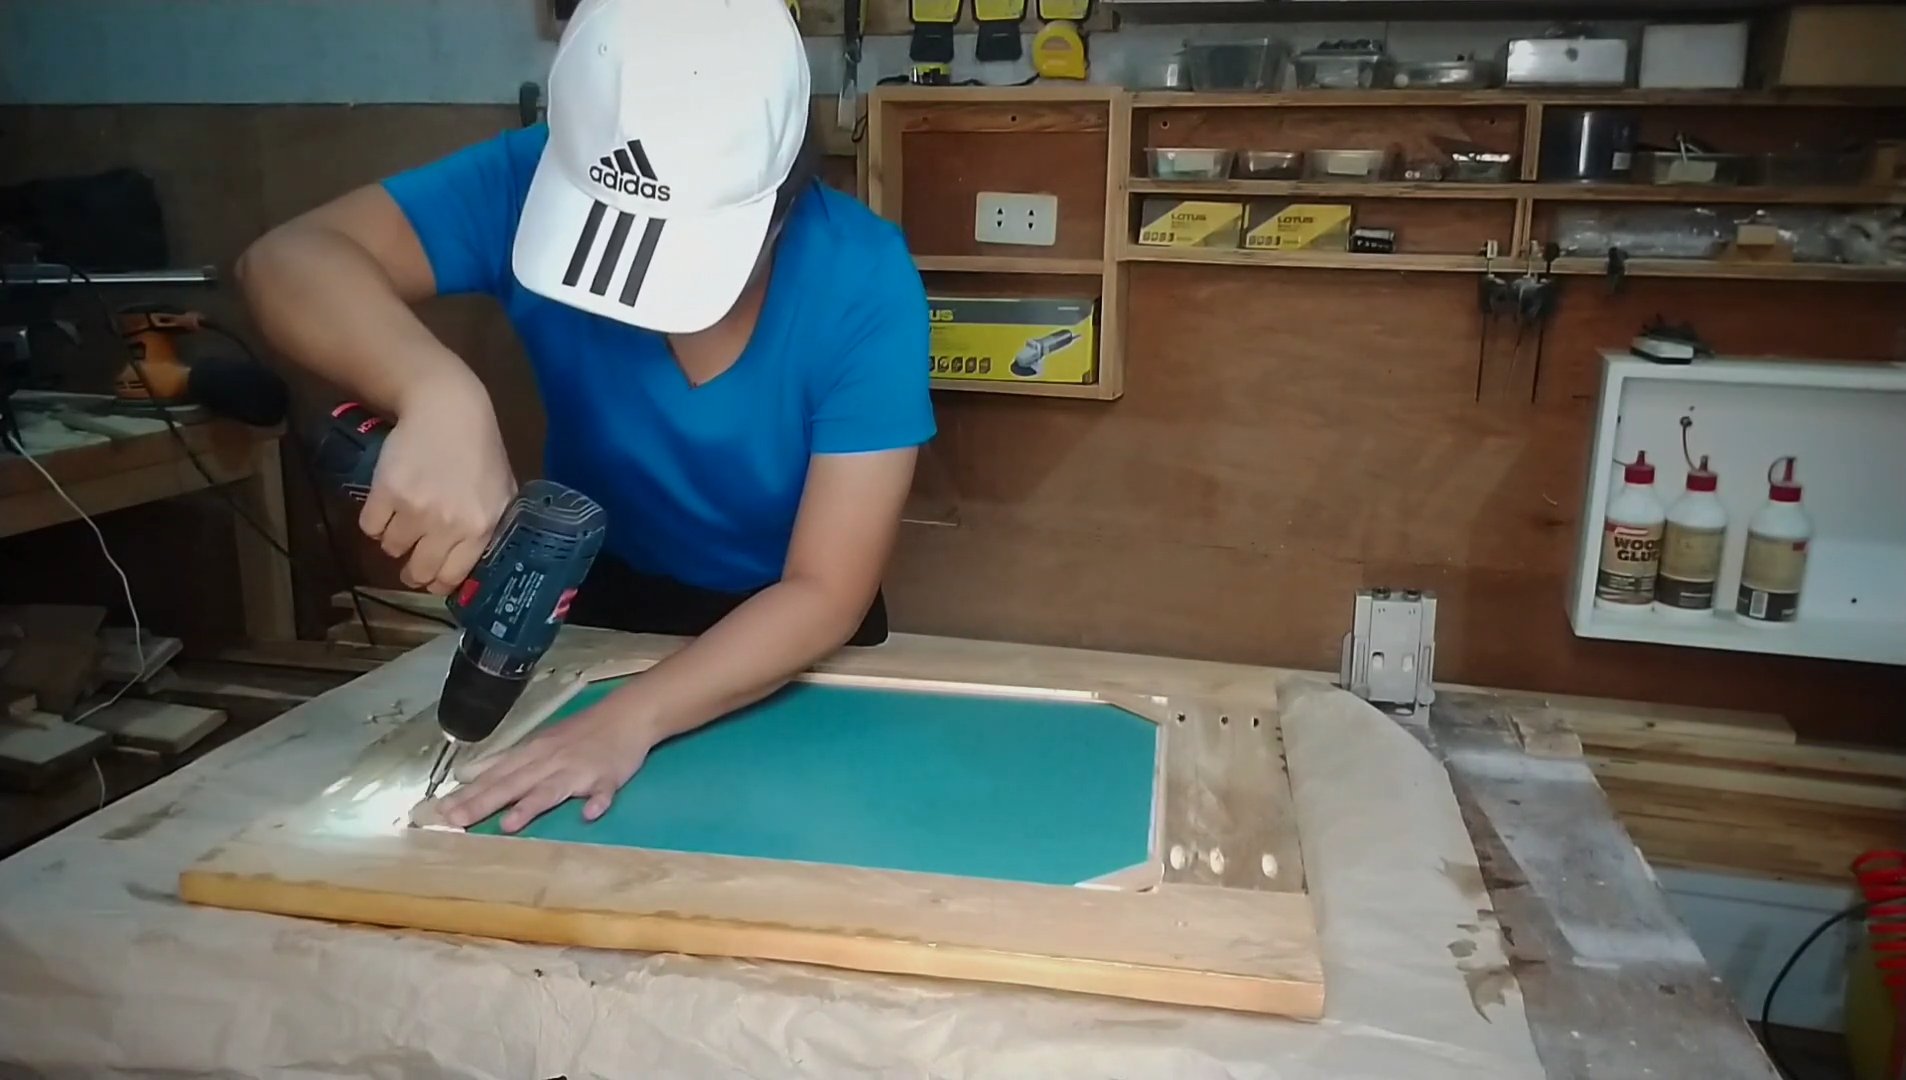
4. **Reinforce the Frame:** Once the glue has dried, reinforce the frame with nails or screws. Drive the nails or screws through the corners of the frame, ensuring they are countersunk to prevent them from protruding. I like to use screws because they provide a stronger hold than nails.
5. **Add a Backing (Optional):** For added stability, you can attach a piece of plywood or hardboard to the back of the frame. This will also provide a surface to attach the mirror mounting clips or adhesive.
Finishing the Frame
This is where you can really personalize your mirror!
1. **Sand Again:** After the frame is assembled, give it another light sanding with fine-grit sandpaper (220 grit) to smooth out any imperfections.
2. **Apply Stain or Paint (Optional):** If you want to change the color of the frame, apply your chosen wood stain or paint. Follow the manufacturer’s instructions for application and drying time. I personally love using a dark walnut stain to enhance the rustic look of the pallet wood.
* You can also experiment with different staining techniques, such as dry brushing or layering different colors.
3. **Apply Sealer (Optional):** To protect the wood and enhance its durability, apply a coat of wood sealer. This will also make the frame easier to clean.
4. **Let it Dry:** Allow the stain, paint, or sealer to dry completely before proceeding to the next step.
Attaching the Mirror
Almost there! This is the final step in bringing your DIY pallet wood mirror to life.
1. **Position the Mirror:** Carefully position the mirror inside the frame. Make sure it fits snugly and is centered.
2. **Attach the Mirror:** Use mirror mounting clips or adhesive to securely attach the mirror to the frame.
* If using mounting clips, attach them to the back of the frame, ensuring they hold the mirror firmly in place.
* If using adhesive, apply a thin, even layer to the back of the mirror and press it firmly against the frame.
3. **Let it Set:** Allow the adhesive to set completely before handling the mirror. Follow the manufacturer’s instructions for drying time.
Hanging Your Mirror
The moment of truth!
1. **Attach Hanging Hardware:** Attach D-rings or sawtooth hangers to the back of the frame. Make sure they are securely attached and evenly spaced.
2. **Measure and Mark:** Measure the distance between the hanging hardware on the back of the frame. Then, mark the corresponding points on the wall where you want to hang the mirror.
3. **Install Anchors or Hooks:** Install appropriate anchors or hooks in the wall at the marked points.
4. **Hang the Mirror:** Carefully hang the mirror on the anchors or hooks.
5. **Level the Mirror:** Use a level to ensure the mirror is hanging straight. Adjust as needed.
Extra Tips and Tricks
* Safety First: Always wear safety glasses and work gloves when working with wood and power tools.
* Pallet Wood Sourcing: Look for pallets at local businesses, construction sites, or online marketplaces. Always ask for permission before taking pallets.
* Experiment with Finishes: Don’t be afraid to experiment with different stains, paints, and finishes to create a unique look.
* Add Embellishments: Consider adding embellishments such as rope, metal accents, or decorative hardware to further enhance the rustic charm of your mirror.
* Custom Sizes: This project can be easily adapted to create mirrors of different sizes and shapes.
And there you have it! Your very own DIY pallet wood mirror. I hope you enjoyed this project as much as I did. Now, step back, admire your handiwork, and enjoy the rustic charm it brings to your space. Happy crafting!
Conclusion
So, there you have it! Transforming discarded pallet wood into a stunning, rustic mirror is not only incredibly satisfying but also a fantastic way to add a unique, personalized touch to your home decor. This DIY pallet wood mirror project is more than just a craft; it’s an opportunity to unleash your creativity, embrace sustainability, and create a conversation piece that reflects your individual style.
Why is this a must-try? Because it’s affordable, customizable, and eco-friendly. Forget spending a fortune on mass-produced mirrors from big box stores. With a little elbow grease and some readily available materials, you can craft a statement piece that’s truly one-of-a-kind. The imperfections in the pallet wood, the knots, the grain – they all contribute to the mirror’s rustic charm and tell a story that no store-bought item ever could.
But the beauty of this project lies in its versatility. Feel free to experiment with different stains and finishes to match your existing decor. Want a more modern look? Try sanding the wood smooth and applying a sleek, dark stain. Prefer a farmhouse vibe? Opt for a whitewash or distressed finish. You can even incorporate other decorative elements, such as rope, metal accents, or even small succulents, to further personalize your creation.
Consider these variations to truly make it your own:
* Geometric Designs: Instead of a simple rectangular frame, cut the pallet wood into geometric shapes and arrange them around the mirror for a more contemporary look.
* Painted Accents: Add pops of color by painting sections of the pallet wood with vibrant hues or intricate patterns.
* Epoxy Resin Inlays: Fill any gaps or imperfections in the wood with colored epoxy resin for a stunning, eye-catching effect.
* Built-in Shelves: Incorporate small shelves into the frame to display small plants, candles, or other decorative items.
* Different Mirror Shapes: While a rectangular mirror is classic, don’t be afraid to experiment with round, oval, or even asymmetrical mirror shapes.
The possibilities are truly endless! This project is not just about creating a mirror; it’s about expressing your creativity and adding a personal touch to your living space. It’s about taking something old and giving it new life, transforming discarded materials into a beautiful and functional piece of art.
We wholeheartedly encourage you to give this DIY pallet wood mirror project a try. It’s a rewarding experience that will leave you with a stunning piece of decor you can be proud of. And most importantly, we want to hear about your experience! Share your creations with us on social media using [Your Hashtag Here]. We can’t wait to see what you come up with! Let’s inspire each other and celebrate the beauty of DIY. So grab your pallet wood, gather your tools, and get ready to create a mirror that reflects your unique style and personality. You won’t regret it!
Frequently Asked Questions (FAQ)
Q1: Where can I find pallet wood?
Pallet wood can often be found for free or at a very low cost from various sources. Local businesses, such as grocery stores, hardware stores, and construction sites, frequently have pallets they are willing to give away. Always ask for permission before taking any pallets. Online marketplaces like Craigslist or Facebook Marketplace are also great resources for finding free or inexpensive pallets. Remember to inspect the pallets carefully for any signs of damage, rot, or chemical contamination before using them for your project. Pallets marked with “HT” (heat treated) are generally safe, while those marked with “MB” (methyl bromide) should be avoided due to potential health risks.
Q2: What tools do I need for this DIY pallet wood mirror project?
The essential tools for this project include:
* Safety Glasses: Protect your eyes from flying debris.
* Gloves: Protect your hands from splinters and rough wood.
* Measuring Tape: For accurate measurements.
* Pencil: For marking cut lines.
* Saw (Circular Saw, Hand Saw, or Jigsaw): For cutting the pallet wood to size. A circular saw is the fastest and most efficient option for straight cuts, while a jigsaw is useful for curved or intricate cuts. A hand saw is a good option if you don’t have power tools.
* Sander (Electric Sander or Sandpaper): For smoothing the rough edges of the pallet wood. An electric sander will save you time and effort, but sandpaper can be used for smaller areas or more detailed sanding.
* Drill/Screwdriver: For attaching the pallet wood pieces together.
* Wood Screws: For securely fastening the frame.
* Wood Glue: For added strength and stability.
* Clamps: To hold the wood pieces together while the glue dries.
* Mirror: The size and shape of the mirror will determine the dimensions of your frame.
* Mirror Adhesive or Clips: To secure the mirror to the frame.
* Stain, Paint, or Finish (Optional): To customize the look of your mirror.
* Polyurethane or Sealer (Optional): To protect the wood and enhance its durability.
Q3: How do I prepare the pallet wood for this project?
Preparing the pallet wood is a crucial step to ensure a safe and aesthetically pleasing final product. First, thoroughly inspect the pallet for any nails, staples, or other fasteners. Remove these using a hammer, pliers, or a nail puller. Next, clean the wood with soap and water to remove any dirt, grime, or debris. Allow the wood to dry completely before proceeding. Once dry, sand the wood to smooth out any rough edges or splinters. Start with a coarse grit sandpaper (e.g., 80 grit) and gradually move to finer grits (e.g., 120 grit, 220 grit) for a smoother finish. If desired, you can also stain or paint the wood at this stage.
Q4: How do I attach the mirror to the pallet wood frame?
There are several ways to attach the mirror to the pallet wood frame. One option is to use mirror adhesive, which is a specially formulated adhesive that won’t damage the mirror’s reflective surface. Apply the adhesive to the back of the mirror and carefully press it onto the frame. Use clamps or weights to hold the mirror in place while the adhesive dries completely. Another option is to use mirror clips, which are small metal or plastic clips that attach to the frame and hold the mirror in place. Position the clips evenly around the perimeter of the mirror and secure them to the frame with screws. Make sure the clips are tight enough to hold the mirror securely but not so tight that they could crack the glass.
Q5: What if I don’t have access to power tools? Can I still make this mirror?
Absolutely! While power tools can make the process faster and easier, you can definitely create a beautiful DIY pallet wood mirror without them. A hand saw can be used to cut the pallet wood, although it will require more time and effort. Sandpaper can be used to smooth the wood, although it will take longer than using an electric sander. A manual screwdriver can be used to attach the frame pieces together. The key is to be patient and take your time.
Q6: How can I make my pallet wood mirror more durable?
To enhance the durability of your pallet wood mirror, consider applying a coat of polyurethane or sealer to the wood. This will protect the wood from moisture, scratches, and other damage. Choose a polyurethane or sealer that is appropriate for the type of finish you have applied to the wood (e.g., water-based polyurethane for water-based paints or stains). Apply the polyurethane or sealer according to the manufacturer’s instructions, and allow it to dry completely before hanging the mirror.
Q7: What safety precautions should I take when working with pallet wood?
Safety is paramount when working with pallet wood. Always wear safety glasses to protect your eyes from flying debris. Wear gloves to protect your hands from splinters and rough wood. Work in a well-ventilated area, especially when sanding, staining, or applying finishes. If you are using power tools, be sure to follow the manufacturer’s instructions and wear appropriate safety gear, such as hearing protection. Inspect the pallet wood carefully for any signs of damage, rot, or chemical contamination before using it. Avoid using pallets that are marked with “MB” (methyl bromide), as this is a toxic fumigant.
Q8: Can I use different types of wood for this project besides pallet wood?
Yes, absolutely! While pallet wood is a great option for its rustic charm and affordability, you can certainly use other types of wood for this project. Pine, cedar, oak, and reclaimed wood are all excellent choices. The type of wood you choose will depend on your personal preferences and the desired aesthetic of your mirror. Keep in mind that different types of wood may require different finishing techniques.
Q9: How do I hang my finished pallet wood mirror?
The best way to hang your finished pallet wood mirror will depend on its size and weight. For smaller, lighter mirrors, you can use heavy-duty picture hanging hooks. For larger, heavier mirrors, it is recommended to use D-rings and picture wire. Attach

Leave a Comment