

DIY Raffia Wall Hanging: Ready to transform your living space with a touch of bohemian charm? I’m so excited to share this super easy and incredibly stylish DIY project that will add texture, warmth, and personality to any room. Forget those expensive store-bought decorations – we’re diving into the world of crafting our own stunning wall art using simple, affordable materials.
The art of weaving and knotting natural fibers like raffia has a rich history, dating back centuries across various cultures. From creating functional items like baskets and mats to decorative pieces that adorned homes, these techniques have always been a beautiful way to connect with nature and express creativity. Today, we’re bringing that tradition into the modern era with a chic and contemporary twist.
Why a DIY Raffia Wall Hanging, you ask? Well, in today’s fast-paced world, creating something with your own hands is incredibly rewarding. It’s a chance to slow down, de-stress, and unleash your inner artist. Plus, it’s a fantastic way to personalize your home decor and reflect your unique style. This project is perfect for adding a touch of natural elegance to your living room, bedroom, or even your office space. And let’s be honest, who doesn’t love a good DIY project that’s both budget-friendly and Instagram-worthy? Let’s get crafting!
DIY Raffia Wall Hanging: A Step-by-Step Guide to Bohemian Bliss
Hey there, fellow crafters! I’m so excited to share this super fun and surprisingly easy DIY project with you: a gorgeous raffia wall hanging! It’s the perfect way to add a touch of bohemian charm to any room, and trust me, it’s way easier than it looks. Plus, it’s a fantastic way to unwind and get creative. Let’s dive in!
What You’ll Need
Before we get started, let’s gather all the materials. Here’s what you’ll need:
* Raffia: This is the star of the show! You can find raffia in natural colors or dyed in a variety of shades. I recommend getting a few different colors or shades to add some depth and interest to your wall hanging. Consider how much space you want to fill and buy accordingly. A good starting point is 2-3 bundles.
* Dowel Rod or Branch: This will be the base of your wall hanging. A wooden dowel rod is readily available at most craft stores, but you could also use a cool-looking branch you find on a nature walk! Just make sure it’s clean and sturdy. The length will determine the width of your finished piece.
* Scissors: A good pair of sharp scissors is essential for cutting the raffia.
* Measuring Tape or Ruler: For measuring and cutting the raffia strands to the desired length.
* Comb or Brush: To fluff and separate the raffia strands for a more textured look.
* Optional Embellishments: Beads, feathers, yarn, macrame cord – anything you want to add for extra flair!
* Yarn or Twine: For hanging your masterpiece.
* Hot Glue Gun (Optional): For securing embellishments or reinforcing knots.
Preparing the Raffia
Okay, let’s get the raffia ready. This is a crucial step to ensure your wall hanging looks its best.
1. Unbundle the Raffia: Carefully remove the raffia from its packaging. It’s usually bundled tightly, so gently loosen it up.
2. Cut the Raffia Strands: Decide on the length you want your wall hanging to be. Remember that the raffia will be folded in half over the dowel rod, so the length you cut will be double the length of the hanging strands. For example, if you want the longest strands to be 24 inches long, you’ll need to cut the raffia into 48-inch pieces. I like to cut a bunch of strands at once to save time. You can always trim them later.
3. Vary the Lengths (Optional): To create a more dynamic and textured look, cut the raffia strands into different lengths. You can have some strands that are shorter, some that are longer, and some that are in between. This will give your wall hanging a more organic and free-flowing feel. I usually cut a few different piles of varying lengths.
4. Separate the Strands: Raffia often comes in thick clumps. Gently separate the strands to make them easier to work with and to create a fuller, more textured look. This is where the comb or brush comes in handy. You can use it to gently tease apart the strands.
Attaching the Raffia to the Dowel Rod
Now for the fun part – attaching the raffia to the dowel rod! This is where your wall hanging will really start to take shape.
1. Fold the Raffia Strand: Take one of your cut raffia strands and fold it in half, creating a loop at the top.
2. Position the Loop: Place the loop of the raffia strand over the dowel rod.
3. Pull the Ends Through: Reach through the loop and grab the two loose ends of the raffia strand. Pull the ends through the loop and tighten the knot. This is called a lark’s head knot.
4. Repeat: Continue adding raffia strands to the dowel rod using the lark’s head knot. Make sure to keep the knots close together to create a full and even look. You can alternate colors or lengths as you go to create different patterns and textures.
5. Maintain Even Spacing: As you add more raffia, make sure to keep the spacing between the knots consistent. This will help to create a more uniform and professional-looking wall hanging.
6. Adjust as Needed: Don’t be afraid to adjust the raffia strands as you go. You can slide them along the dowel rod to create different spacing or to adjust the overall look of your wall hanging.
Adding Embellishments (Optional)
This is where you can really let your creativity shine! Adding embellishments is a great way to personalize your wall hanging and make it truly unique.
1. Choose Your Embellishments: Gather your beads, feathers, yarn, macrame cord, or any other embellishments you want to use.
2. Attach the Embellishments: There are several ways to attach the embellishments to the raffia. You can tie them on with yarn or twine, glue them on with a hot glue gun, or thread them onto the raffia strands.
3. Experiment with Placement: Don’t be afraid to experiment with different placements for your embellishments. You can add them randomly throughout the wall hanging, or you can create specific patterns or designs.
4. Consider Symmetry: If you want a more balanced look, consider adding embellishments symmetrically. For example, you could add a bead to each side of the wall hanging at the same height.
5. Less is More: Sometimes, less is more. Don’t feel like you have to add a ton of embellishments to make your wall hanging look good. A few well-placed embellishments can be just as effective as a lot of them.
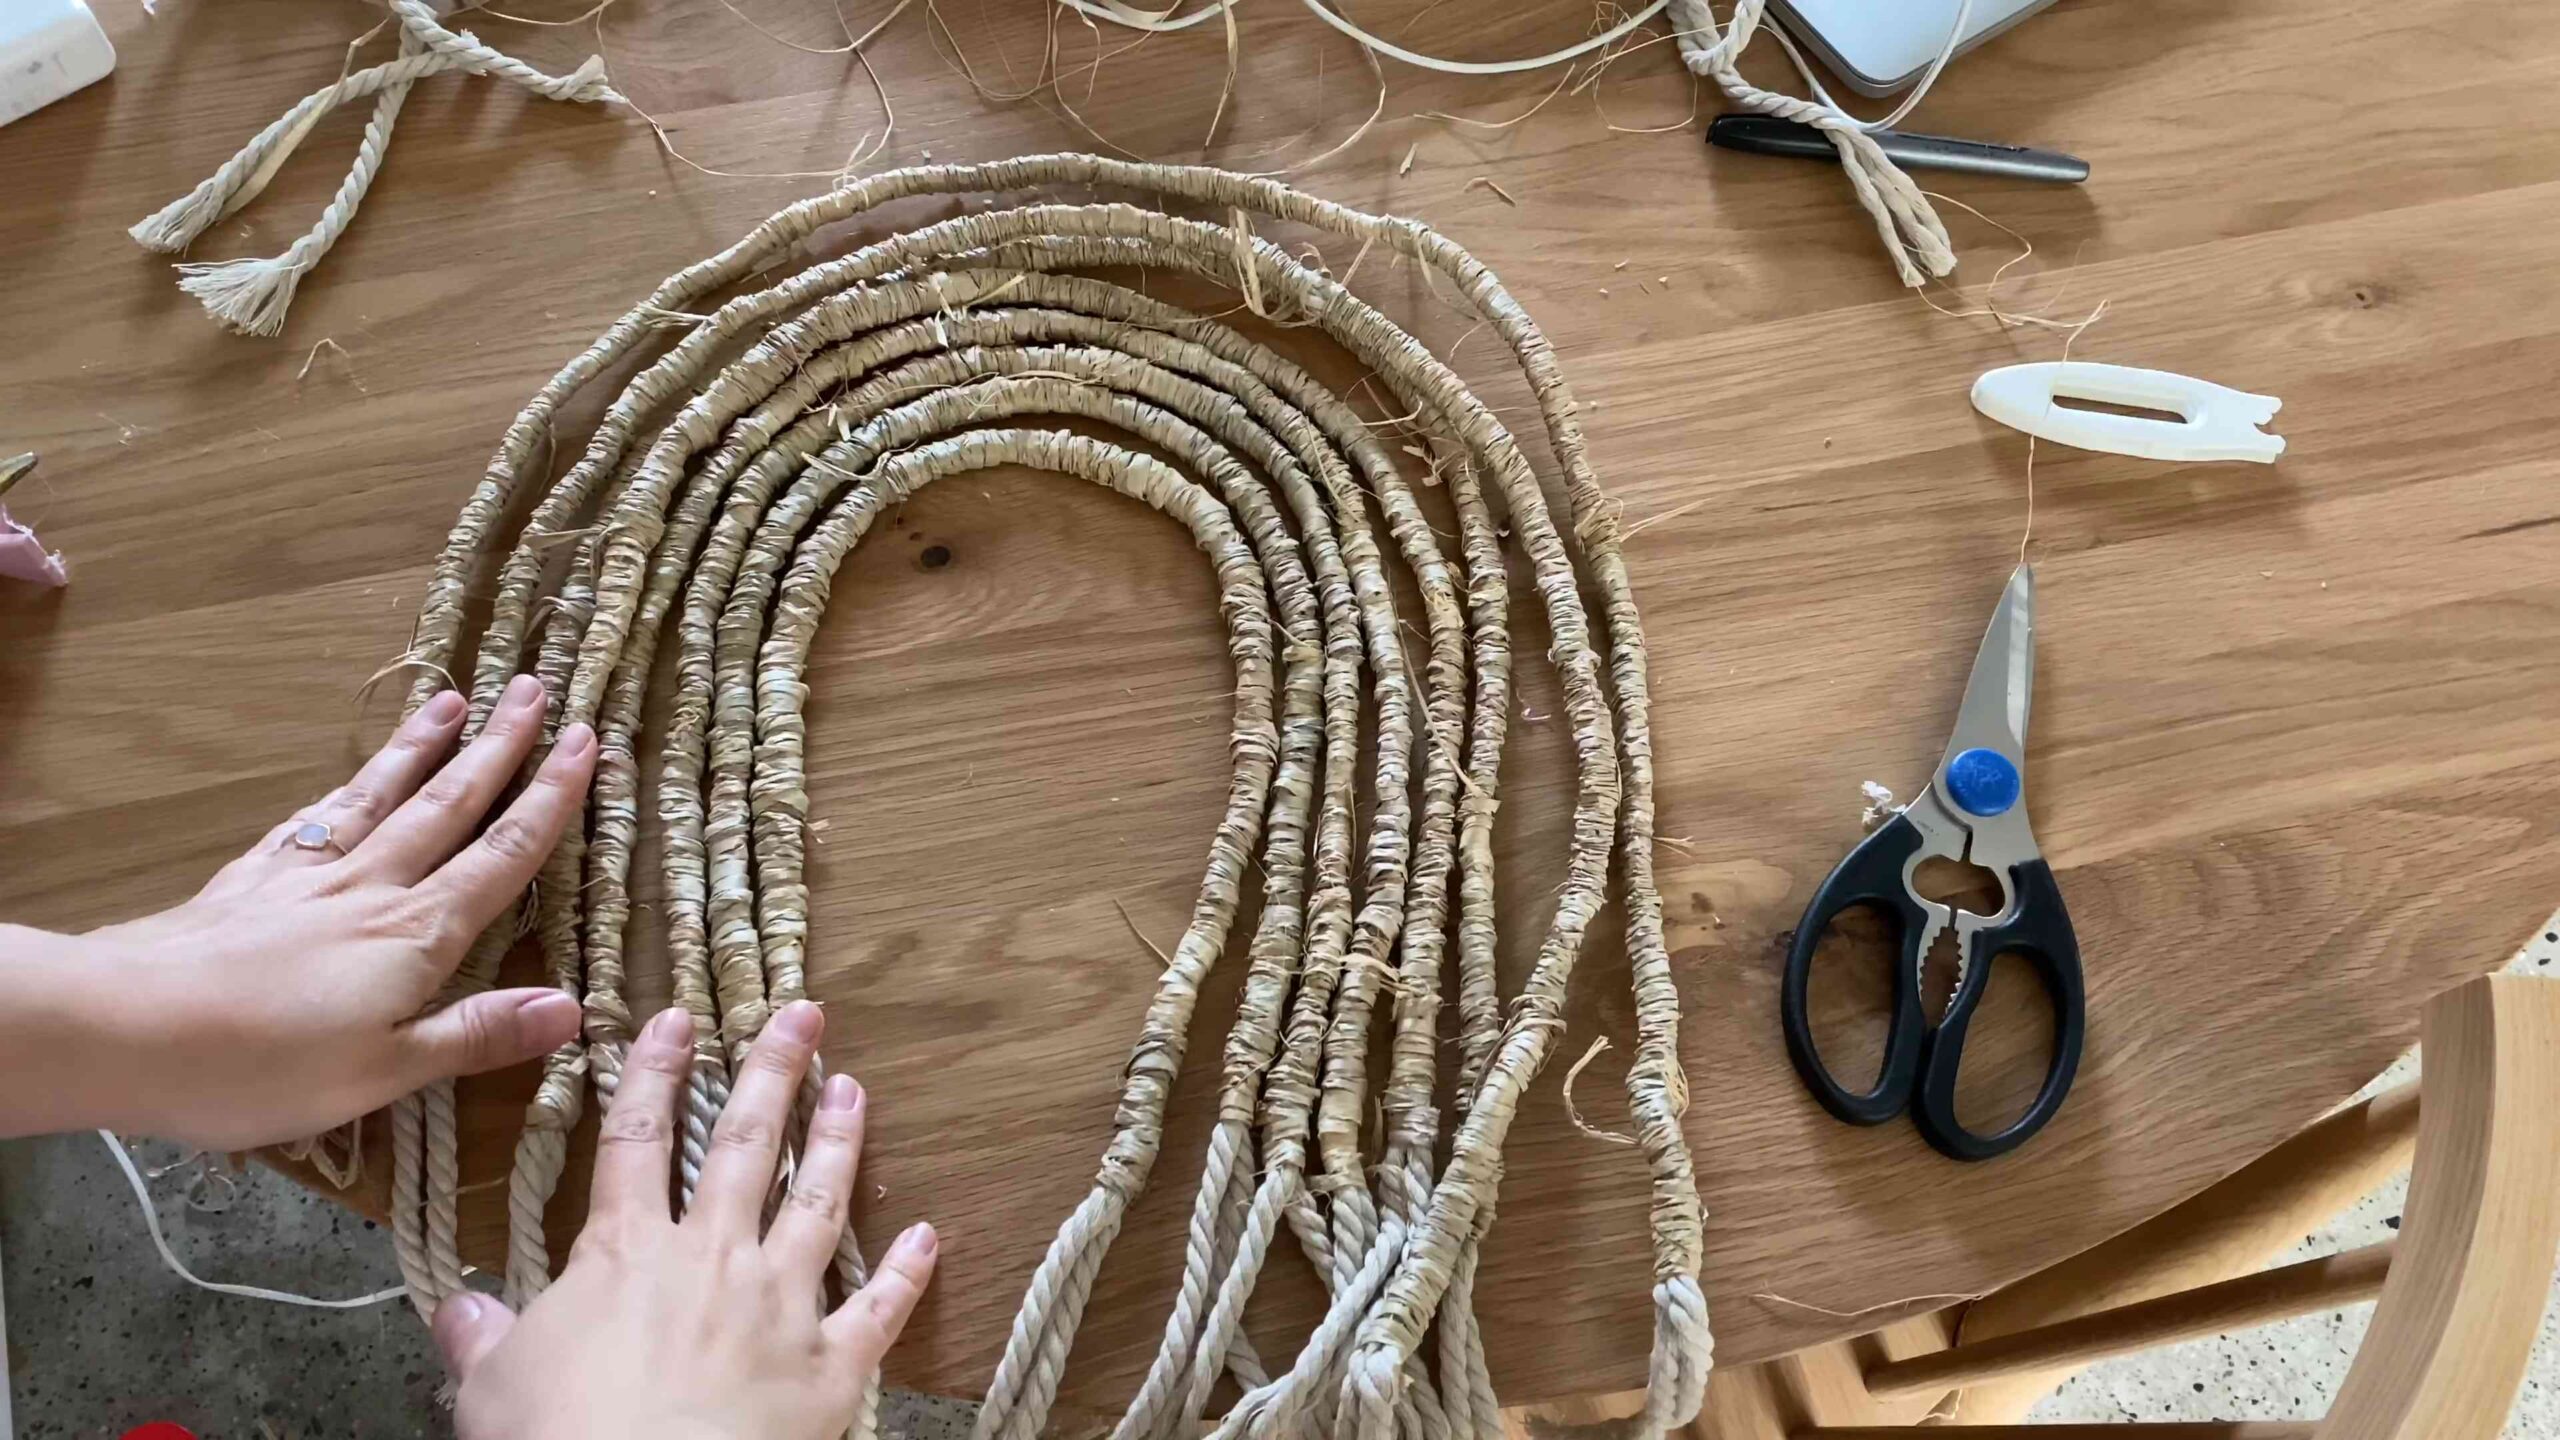
Trimming and Shaping the Raffia
Once you’ve attached all the raffia and embellishments, it’s time to trim and shape the wall hanging. This is where you’ll refine the overall look and create the desired silhouette.
1. Hang the Wall Hanging: Hang the wall hanging on a wall or from a hook so you can see it from a distance. This will help you to get a better sense of the overall shape and balance.
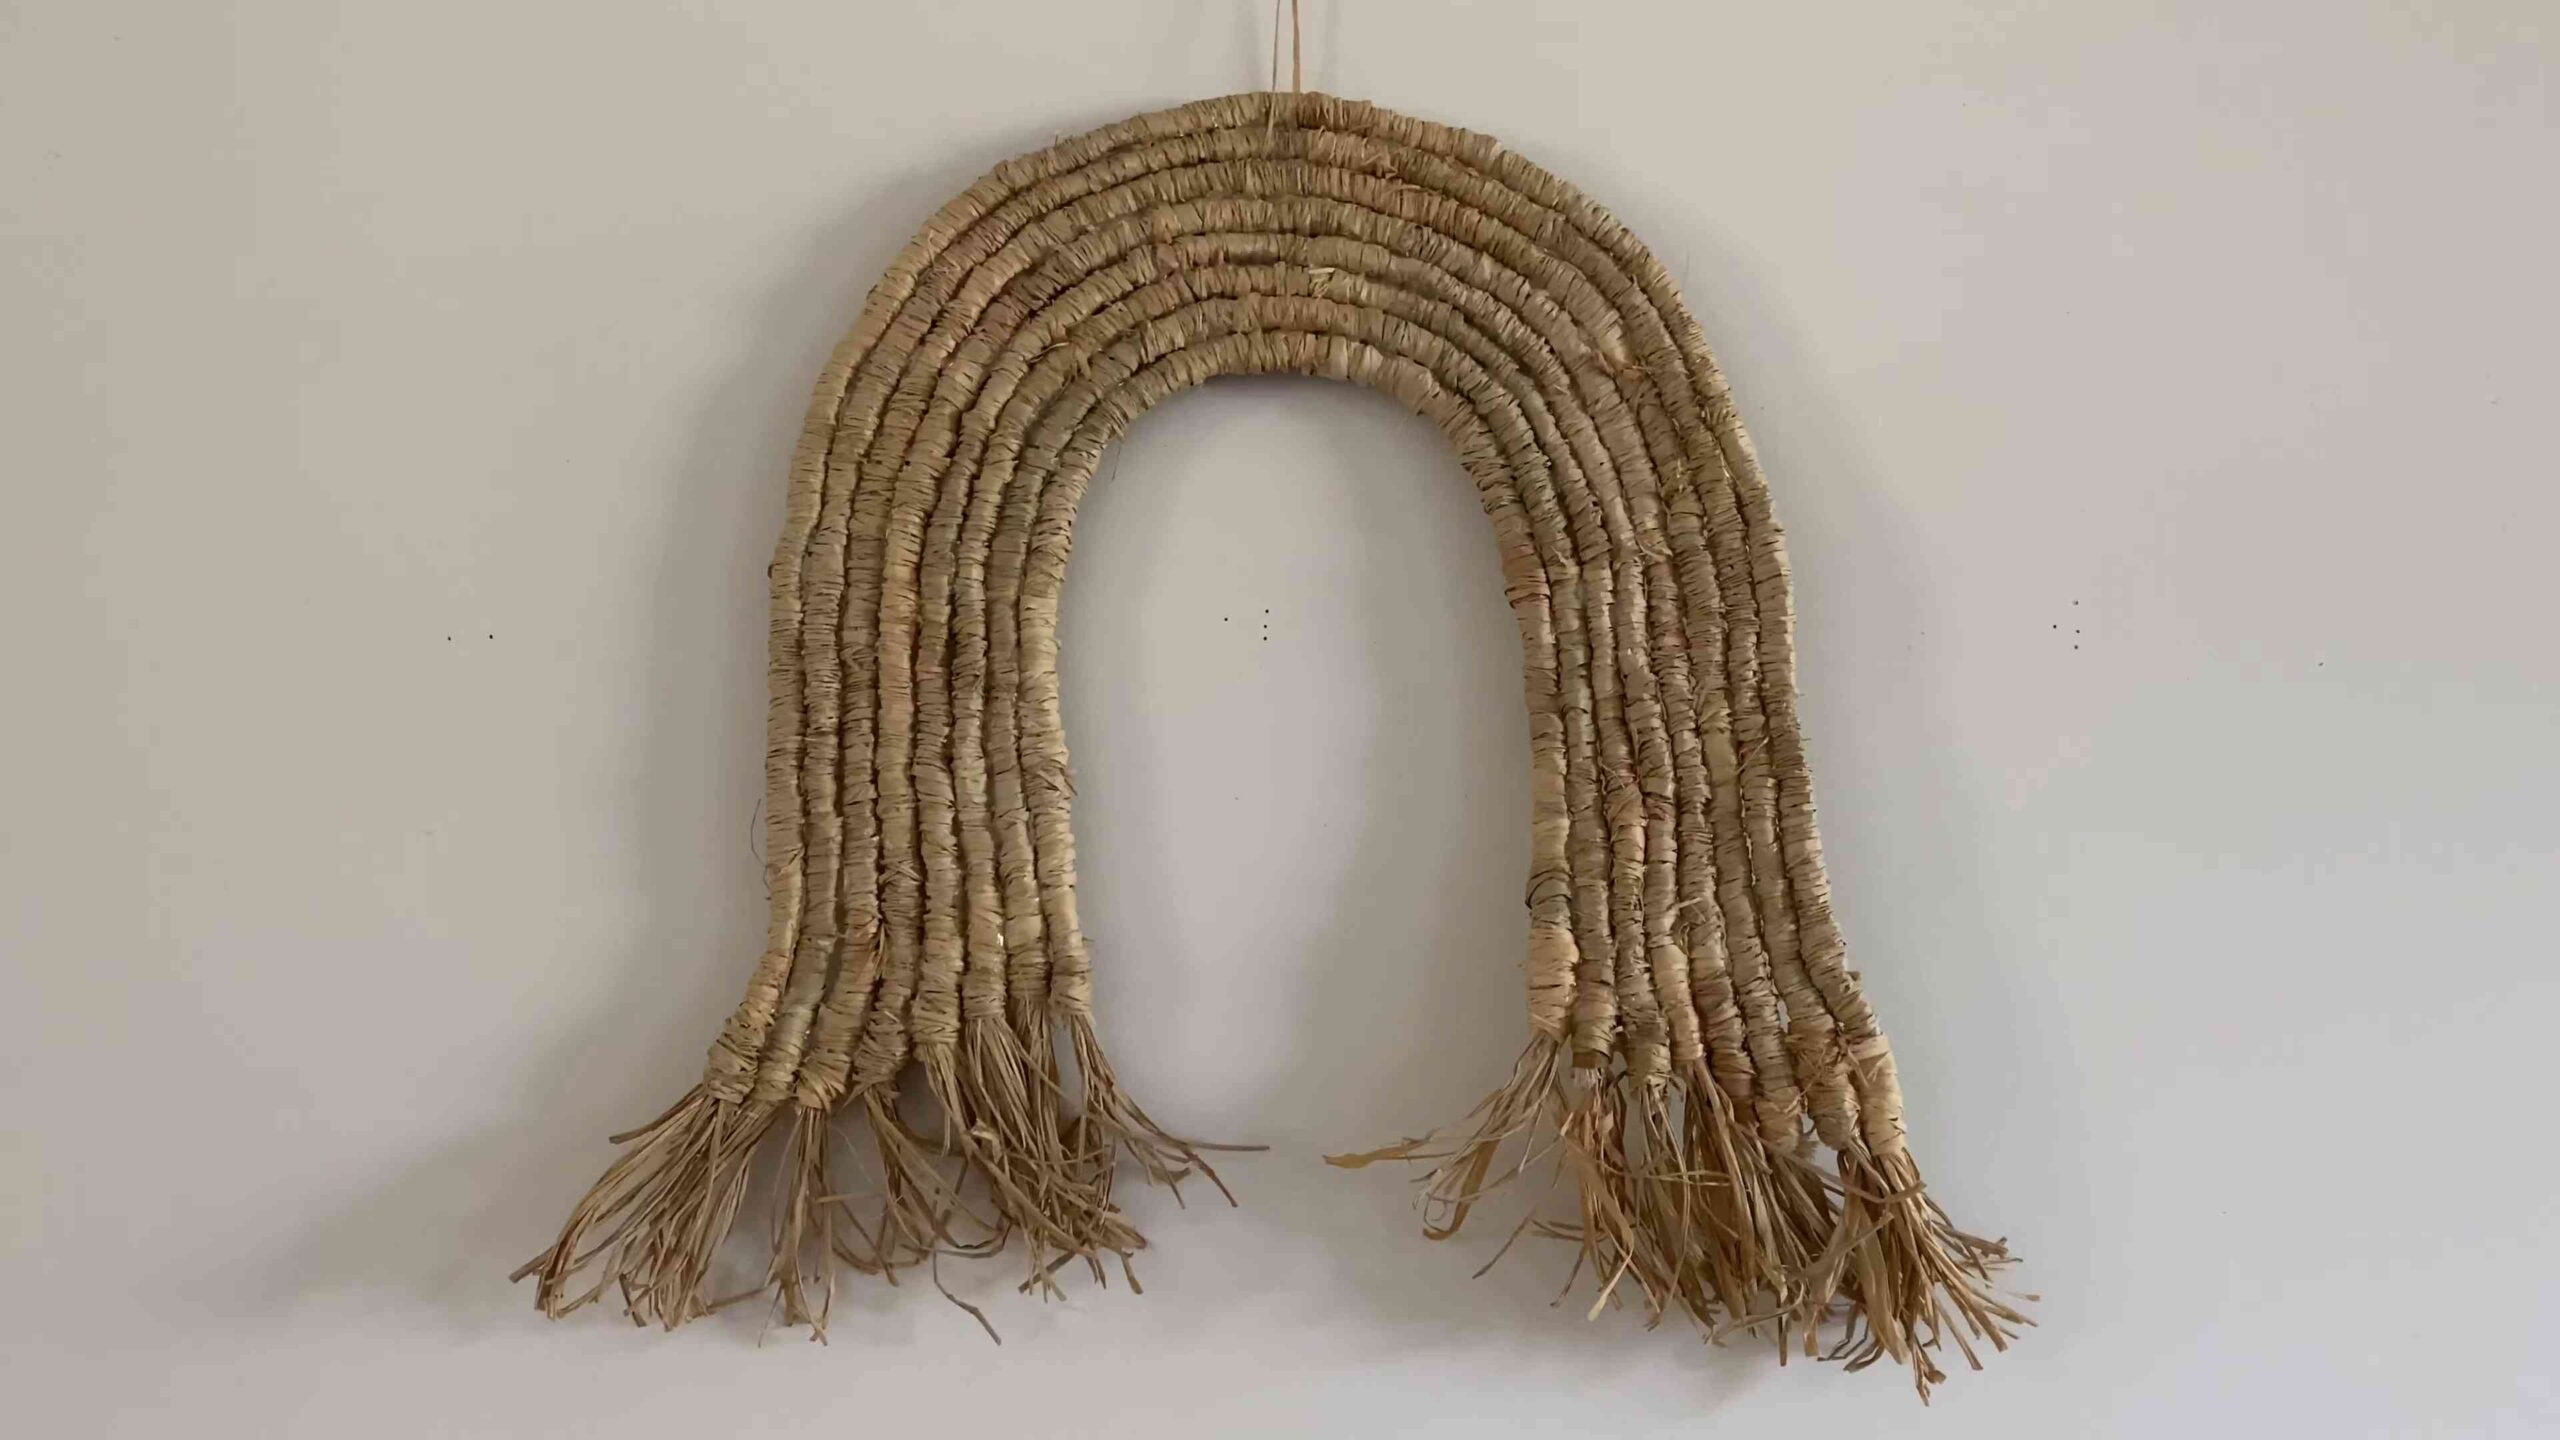
2. Trim the Bottom: Use your scissors to trim the bottom of the raffia to create the desired shape. You can create a straight line, a curved line, or an asymmetrical shape. I personally love a slightly uneven, organic look.
3. Create Layers: If you’ve used different lengths of raffia, you can create layers by trimming the shorter strands higher up than the longer strands. This will add depth and dimension to your wall hanging.
4. Shape the Sides: You can also trim the sides of the raffia to create a more tapered or rounded shape.
5. Fluff and Separate: After trimming, use your comb or brush to fluff and separate the raffia strands. This will help to create a more textured and voluminous look.
6. Make Final Adjustments: Step back and take a look at your wall hanging. Make any final adjustments to the trimming or shaping as needed.
Adding the Hanging Cord
Almost there! Now we just need to add the cord for hanging your beautiful creation.
1. Cut the Yarn or Twine: Cut a length of yarn or twine that is long enough to hang your wall hanging at the desired height.
2. Attach the Cord: Tie the ends of the yarn or twine to each end of the dowel rod. Make sure the knots are secure. You can use a simple overhand knot or a more decorative knot.
3. Adjust the Length: Adjust the length of the yarn or twine as needed to achieve the desired hanging height.
4. Hang and Enjoy! Hang your raffia wall hanging on a wall or from a hook and enjoy your beautiful creation!
Tips and Tricks for a Perfect Raffia Wall Hanging
Here are a few extra tips and tricks to help you create the perfect raffia wall hanging:
* Experiment with Colors: Don’t be afraid to experiment with different colors of raffia. You can create a monochromatic wall hanging, a colorful wall hanging, or a wall hanging with a mix of different colors.
* Add Texture: Add texture to your wall hanging by using different types of raffia, adding embellishments, or creating different knotting techniques.
* Use Different Knotting Techniques: There are many different knotting techniques you can use to create different patterns and textures in your wall hanging. Research different macrame knots for inspiration.
* Don’t Be Afraid to Make Mistakes: Everyone makes mistakes, especially when they’re learning something new. Don’t be afraid to make mistakes. Just learn from them and keep going.
* Have Fun! The most important thing is to have fun and enjoy the process of creating your raffia wall hanging.
I hope you enjoyed this tutorial! I
Conclusion
So, there you have it! Creating your own DIY raffia wall hanging isn’t just a craft project; it’s an invitation to infuse your living space with warmth, texture, and a touch of bohemian charm. We’ve walked you through the simple steps, highlighting how accessible and rewarding this creative endeavor can be. Forget those expensive store-bought decorations that lack personality. With a little time and effort, you can craft a unique piece of art that reflects your individual style and adds a personal touch to your home.
The beauty of this project lies in its versatility. Feel free to experiment with different colors of raffia to match your existing décor. Consider incorporating beads, feathers, or small pieces of driftwood for added visual interest. You could even try weaving in other natural fibers like jute or cotton yarn to create a more complex and textured design. Think about the overall aesthetic you’re aiming for – a minimalist, Scandinavian-inspired piece, or a vibrant, eclectic statement? The possibilities are truly endless.
Don’t be afraid to get creative with the shape and size of your wall hanging. A small, circular design can add a subtle touch of texture to a gallery wall, while a large, rectangular piece can serve as a stunning focal point in your living room or bedroom. You can even create a series of smaller raffia wall hangings and arrange them in a cluster for a more dynamic and impactful display.
This DIY raffia wall hanging project is more than just a decorative element; it’s an opportunity to connect with your creativity and express yourself through art. It’s a chance to slow down, unplug from the digital world, and engage in a mindful activity that can be both therapeutic and rewarding. And the best part? You’ll end up with a beautiful, handmade piece that you can proudly display in your home for years to come.
We truly believe that anyone can create a stunning raffia wall hanging, regardless of their crafting experience. The key is to be patient, have fun, and let your creativity guide you. So, gather your materials, clear your workspace, and prepare to embark on a fulfilling and artistic journey.
We’re confident that you’ll love the process and the final result. But don’t just take our word for it – try it yourself! We encourage you to share your creations with us and the rest of the crafting community. Post photos of your finished raffia wall hanging on social media using [Your Hashtag Here] and let us know what variations you tried and what you learned along the way. We can’t wait to see what you create! Let’s inspire each other and spread the joy of DIY crafting.
Frequently Asked Questions (FAQ)
What kind of raffia should I use?
There are generally two types of raffia available: natural and dyed. Natural raffia is typically a light tan color and has a more rustic, organic look. Dyed raffia comes in a wide range of colors, allowing for more creative expression. The choice is entirely up to you and depends on the aesthetic you’re aiming for. Consider the color palette of your room and choose raffia that complements your existing décor. Also, consider the quality of the raffia. Some raffia is more brittle than others. Look for raffia that is strong and flexible to avoid breakage during the weaving process.
How do I prevent the raffia from fraying?
Fraying is a common issue with raffia, but there are a few things you can do to minimize it. First, try to work with longer strands of raffia to reduce the number of ends that are exposed. Second, you can apply a small amount of clear glue or fabric stiffener to the ends of the raffia to prevent them from unraveling. Be careful not to use too much glue, as it can make the raffia stiff and unnatural-looking. A light touch is key. Finally, you can trim any stray fibers with sharp scissors as needed.
What if I don’t have a dowel rod? What else can I use?
A dowel rod is a common choice for hanging a raffia wall hanging, but it’s not the only option. You can also use a branch, a piece of driftwood, or even a metal ring. If you’re using a branch or driftwood, make sure it’s clean and dry before you start working with it. You may also want to sand it down to remove any rough edges. A metal ring can provide a more modern and minimalist look. Consider the overall style of your wall hanging and choose a hanging element that complements it.
How do I attach the raffia to the dowel rod (or other hanging element)?
There are several ways to attach the raffia to the dowel rod. The most common method is to use a lark’s head knot. To do this, fold a strand of raffia in half and place the loop over the dowel rod. Then, pull the ends of the raffia through the loop and tighten. Repeat this process with each strand of raffia, spacing them evenly along the dowel rod. You can also use a simple overhand knot or a macrame knot for a more decorative effect. Experiment with different knots to find one that you like.
Can I add other embellishments to my raffia wall hanging?
Absolutely! Adding embellishments is a great way to personalize your raffia wall hanging and make it truly unique. Consider incorporating beads, feathers, shells, small pieces of driftwood, or even dried flowers. You can attach these embellishments using glue, thread, or wire. Be mindful of the overall balance and composition of your wall hanging when adding embellishments. You don’t want to overcrowd it or make it look too busy.
How do I care for my raffia wall hanging?
Raffia is a natural fiber and can be susceptible to moisture and dust. To keep your raffia wall hanging looking its best, avoid hanging it in direct sunlight or in areas with high humidity. Dust it regularly with a soft brush or a vacuum cleaner with a brush attachment. If your wall hanging gets wet, allow it to air dry completely before storing it. With proper care, your raffia wall hanging will last for years to come.
My raffia wall hanging looks uneven. How can I fix it?
It’s common for raffia wall hangings to look slightly uneven, especially if you’re a beginner. Don’t worry, it’s easy to fix! Simply trim the ends of the raffia to create a more even line. You can use sharp scissors or a rotary cutter for this. If you want to create a more textured look, you can intentionally leave some strands longer than others. Experiment with different lengths and textures to find a look that you like.
What if I run out of raffia in the middle of the project?
Running out of raffia is a common occurrence, especially with larger projects. Simply tie a new strand of raffia to the end of the old strand using a small, secure knot. Trim the excess ends of the knot to minimize bulk. You can also try to hide the knot within the existing raffia strands to make it less visible. If you’re using dyed raffia, make sure the new strand is the same color as the old strand to avoid any noticeable color variations.
Is this project suitable for children?
This project can be suitable for older children and teenagers with adult supervision. The use of scissors and glue requires caution. Younger children may be able to assist with simpler tasks, such as sorting the raffia or adding embellishments. It’s a great way to introduce children to the world of crafting and encourage their creativity.
Where can I find inspiration for my raffia wall hanging design?
There are countless sources of inspiration for raffia wall hanging designs. Browse online platforms like Pinterest and Instagram for ideas. Look at nature for inspiration – the colors and textures of the natural world can be a great starting point. Visit craft fairs and art galleries to see what other artists are creating. Don’t be afraid to experiment and develop your own unique style. The most important thing is to have fun and let your creativity guide you.


Leave a Comment