

DIY Rope Basket: Ever find yourself staring at a tangled mess of rope, wondering if there’s more to life than just knots and tangles? Well, my friend, you’re in for a treat! We’re diving headfirst into the wonderful world of crafting, and our mission today is to transform that humble rope into a stylish and functional DIY rope basket.
Basket weaving, in general, has been around for centuries, dating back to ancient civilizations. From carrying food to storing precious belongings, baskets have always been an integral part of human life. While traditional basketry often involves intricate weaving techniques with natural fibers, we’re putting a modern spin on things with our trusty rope.
Why a DIY rope basket, you ask? Because, let’s be honest, we all have those little nooks and crannies in our homes that could use a touch of organization and a dash of personality. Whether it’s corralling stray blankets in the living room, tidying up toiletries in the bathroom, or adding a rustic charm to your plant collection, a handmade rope basket is the perfect solution. Plus, it’s a fantastic way to recycle old rope and unleash your inner creative genius. I’m excited to show you how easy and rewarding it is to create your very own unique piece!
DIY Rope Basket: A Stylish and Functional Project
Hey there, fellow DIY enthusiasts! Today, I’m super excited to share a project that’s both incredibly useful and adds a touch of rustic charm to any space: a DIY rope basket! This project is surprisingly easy, even for beginners, and the results are stunning. You can use these baskets for storing blankets, toys, plants, or just about anything else you can imagine. Plus, it’s a fantastic way to personalize your home decor. Let’s get started!
Materials You’ll Need
Before we dive in, let’s gather all the necessary materials. Trust me, having everything ready beforehand will make the process much smoother.
* Rope: This is the star of the show! I recommend using a thick cotton rope, around 1/4 to 1/2 inch in diameter. The amount you’ll need depends on the size of your basket. For a medium-sized basket (about 12 inches in diameter and 8 inches tall), you’ll probably need around 50-75 feet. It’s always better to have a little extra than not enough!
* Hot Glue Gun and Glue Sticks: A high-temperature glue gun is essential for securely bonding the rope together. Make sure you have plenty of glue sticks on hand – you’ll be surprised how quickly you go through them.
* Scissors or Utility Knife: For cutting the rope. A sharp pair of scissors or a utility knife will do the trick.
* Fabric or Felt (Optional): If you want to line the inside of your basket, you’ll need some fabric or felt. This is a great way to add a pop of color or protect delicate items stored inside.
* Measuring Tape or Ruler: To ensure your basket is the size you want.
* Clothespins or Clips (Optional): These can be helpful for holding the rope in place while the glue dries, especially when you’re working on the base.
* Protective Surface: Protect your work surface from hot glue drips. I like to use a silicone mat or a piece of cardboard.
Creating the Base of Your Basket
The base is the foundation of your entire basket, so it’s important to get it right. Don’t worry, it’s not as complicated as it sounds!
1. Start with a Coil: Take the end of your rope and create a small coil, about 1-2 inches in diameter. Apply a generous amount of hot glue to the inside of the coil, pressing the rope together to secure it.
2. Continue Coiling and Gluing: Now, start wrapping the rope around the initial coil, adding hot glue to the inside of each new layer as you go. Make sure to press the rope firmly against the previous layer to create a strong bond. I like to apply the glue in short sections, about 2-3 inches at a time, and then press the rope together immediately. This prevents the glue from cooling down too quickly.
3. Maintain a Flat Surface: As you continue coiling, try to keep the base as flat as possible. If you notice any bumps or unevenness, you can gently press down on the rope to flatten it out. Using clothespins or clips can be helpful at this stage to hold the rope in place while the glue dries.
4. Determine the Base Size: Keep coiling until your base reaches the desired diameter. For a medium-sized basket, I usually aim for a base that’s around 6-8 inches in diameter. Remember, the size of the base will determine the overall size of your basket.
5. Finishing the Base: Once you’ve reached the desired size, carefully cut the rope at an angle to create a clean finish. Apply a generous amount of hot glue to the end of the rope and press it firmly against the last layer of the coil. Hold it in place until the glue has cooled and set.
Building the Walls of Your Basket
Now that the base is complete, it’s time to start building the walls of your basket. This is where your basket will really start to take shape!
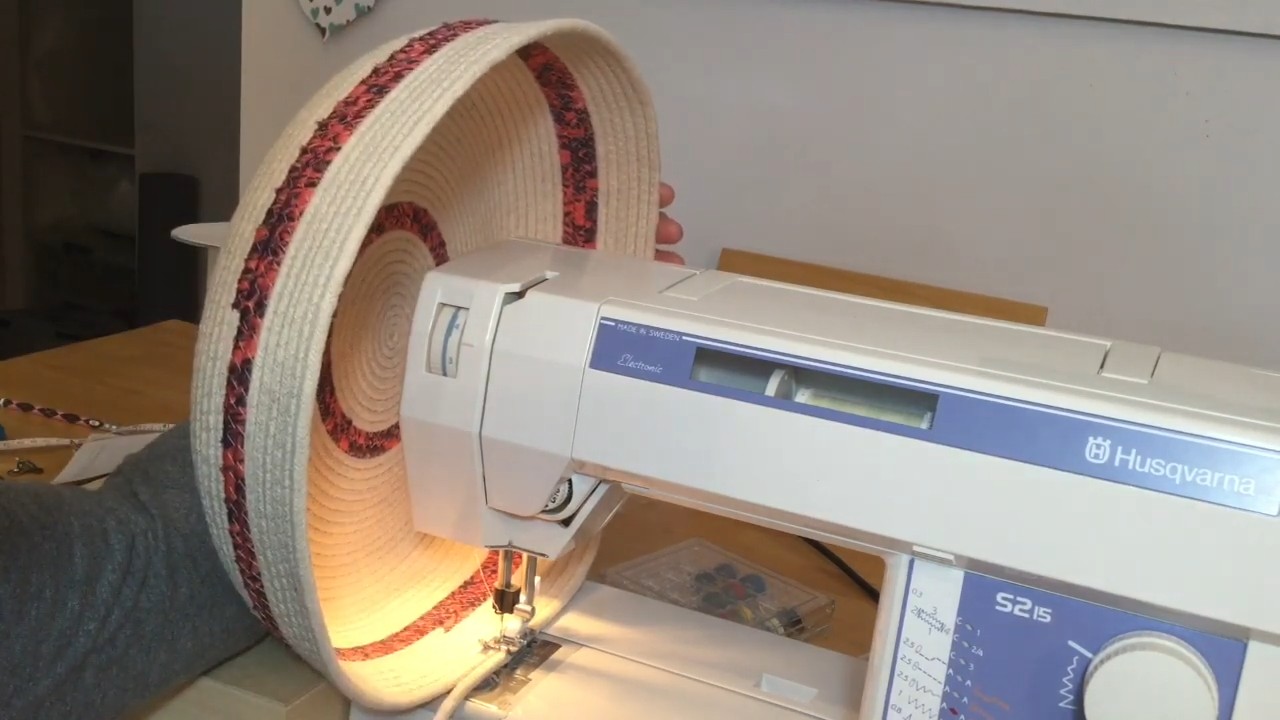
1. Transition to Upward Coiling: To start building the walls, simply begin coiling the rope upwards instead of outwards. Instead of gluing the rope to the side of the previous layer, you’ll be gluing it on top. This will create the vertical walls of your basket.
2. Maintain Consistent Angle: As you coil upwards, try to maintain a consistent angle. This will ensure that your basket has a uniform shape. If you want your basket to have straight walls, keep the angle at 90 degrees. If you want it to flare out slightly, angle the rope outwards a bit.
3. Gluing the Walls: Just like with the base, apply hot glue to the top of each layer of rope and press the new layer firmly against it. Work in small sections and use clothespins or clips to hold the rope in place while the glue dries.
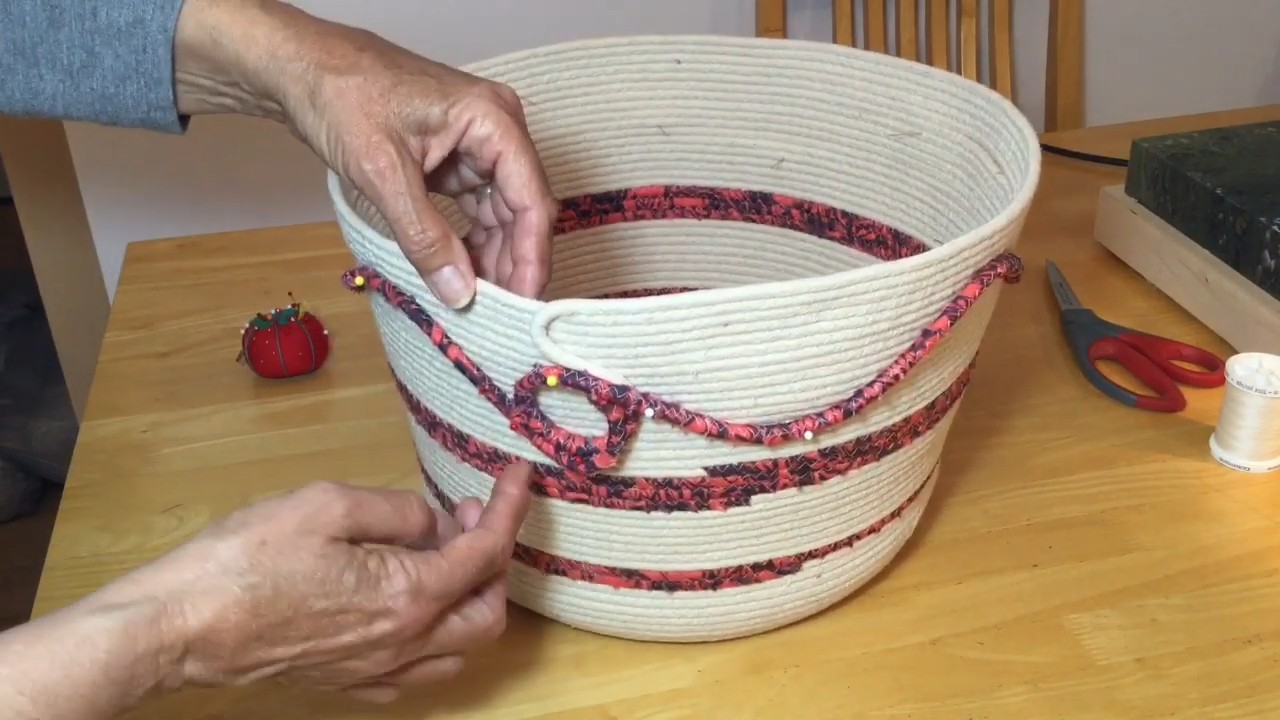
4. Adding Handles (Optional): If you want to add handles to your basket, now is the time to do it. To create a handle, simply leave a gap in the rope on opposite sides of the basket. The size of the gap will determine the size of the handle. Once you’ve reached the desired height for the handle, continue coiling the rope, bridging the gap to create the handle. Reinforce the handle by adding extra glue to the points where it connects to the basket. You can also braid a separate piece of rope and glue it over the handle for added strength and visual appeal.
5. Continue Coiling: Keep coiling the rope upwards until your basket reaches the desired height. Remember to maintain a consistent angle and apply plenty of hot glue to ensure a strong and durable basket.
Finishing Touches
You’re almost there! Now it’s time to add the finishing touches that will really make your basket shine.
1. Finishing the Top Edge: When you reach the desired height, carefully cut the rope at an angle to create a clean finish. Apply a generous amount of hot glue to the end of the rope and press it firmly against the last layer of the coil. Hold it in place until the glue has cooled and set. You can also tuck the end of the rope under the previous layer for a more seamless look.
2. Reinforce the Basket: Go over the entire basket, adding extra glue to any areas that seem weak or loose. Pay special attention to the base and the handles, as these areas will be under the most stress.
3. Lining the Basket (Optional): If you want to line the inside of your basket, now is the time to do it. Measure the inside of the basket and cut a piece of fabric or felt to fit. You can either hand-sew the lining into place or use hot glue to attach it. If you’re using hot glue, be careful not to use too much, as it can seep through the fabric.
4. Adding Embellishments (Optional): Get creative and add any embellishments you like! You can add tassels, beads, buttons, or anything else that strikes your fancy. This is a great way to personalize your basket and make it truly unique.
5. Clean Up: Once the glue has completely dried, carefully trim any stray glue strings with scissors. This will give your basket a clean and professional look.
Tips and Tricks for Success
Here are a few extra tips and tricks that I’ve learned along the way to help you create the perfect rope basket:
* Use a High-Temperature Glue Gun: A high-temperature glue gun will provide a stronger bond than a low-temperature glue gun.
* Work in Small Sections: Applying the glue in small sections will prevent it from cooling down too quickly.
* Press Firmly: Press the rope firmly against the previous layer to create a strong bond.
* Use Clothespins or Clips: Clothespins or clips can be helpful for holding the rope in place while the glue dries.
* Don’t Be Afraid to Experiment: This is your project, so don’t be afraid to experiment with different sizes, shapes, and embellishments.
* Protect Your Work Surface: Hot glue can be messy, so be sure to protect your work surface with a silicone mat or a piece of cardboard.
* Be Patient: This project takes time and patience, so don’t get discouraged if it doesn’t turn out perfectly the first time. Just keep practicing, and you’ll get the hang of it.
* Choose the Right Rope: Cotton rope is generally the easiest to work with and provides a nice, natural look. However, you can also use other types of rope, such as jute or sisal, for a more rustic feel. Just be aware that these types of rope can be a bit more difficult to work with.
* Consider the Basket’s Purpose: Think about what you’ll be using the basket for when deciding on the size and shape. A larger basket is great for storing blankets or toys, while a smaller basket is perfect for holding
Conclusion
So, there you have it! Transforming humble rope into a stylish and functional basket is not only incredibly satisfying, but also a fantastic way to add a personal touch to your home decor. This DIY rope basket project is more than just a craft; it’s an opportunity to unleash your creativity, repurpose materials, and create something truly unique.
Why is this a must-try? Because it’s accessible, affordable, and adaptable. Unlike store-bought baskets that can be generic and overpriced, your handmade rope basket will be a reflection of your individual style. Plus, the process itself is surprisingly therapeutic. The rhythmic coiling and gluing can be incredibly calming, offering a welcome break from the stresses of daily life.
But the beauty of this project lies in its versatility. Feel free to experiment with different types of rope. Consider using thicker rope for a more rustic, substantial basket, or thinner rope for a delicate, refined look. You could even try incorporating colorful twine or yarn into the rope as you coil, adding pops of color and visual interest.
Another exciting variation is to play with the shape and size of your basket. Create a tall, narrow basket for storing umbrellas or magazines, or a shallow, wide basket for displaying fruit or decorative items. You can even add handles made from leather scraps or sturdy rope for easy carrying. Don’t be afraid to get creative with embellishments too. Consider adding beads, buttons, or fabric scraps to personalize your basket further. Painting the finished basket with acrylic paint or using fabric dye to color the rope before you start are also great options.
The possibilities are truly endless! This DIY rope basket project is a blank canvas for your imagination. It’s a chance to create something beautiful and functional that perfectly complements your home.
We wholeheartedly encourage you to give this DIY rope basket project a try. It’s a rewarding experience that will leave you with a beautiful and unique piece of home decor. And most importantly, we want to hear about your experience! Share your creations with us on social media using [Your Hashtag Here]. We can’t wait to see what you come up with! Let us know what variations you tried, what challenges you faced, and what you learned along the way. Your feedback will help inspire others and make this DIY project even better. Happy crafting!
Frequently Asked Questions (FAQ)
What kind of rope is best for making a rope basket?
The best type of rope for a DIY rope basket depends on the look and feel you’re going for. Cotton rope is a popular choice because it’s soft, easy to work with, and readily available. It also takes dye well if you want to add color. Jute rope offers a more rustic, natural look and is very durable. However, it can be a bit rougher on the hands. Synthetic ropes like nylon or polypropylene are also options, but they may not be as aesthetically pleasing as natural fibers. Consider the thickness of the rope as well. Thicker rope will create a sturdier, more substantial basket, while thinner rope will result in a more delicate and flexible basket. Ultimately, the best rope is the one that you like the look and feel of, and that fits your budget.
What kind of glue should I use?
A strong adhesive is crucial for a durable rope basket. Hot glue is a popular choice because it sets quickly and provides a strong bond. However, it can be a bit messy and requires some practice to apply evenly. Fabric glue is another good option, especially for cotton rope. It’s less likely to create hard spots and provides a flexible bond. For heavier ropes like jute, consider using a construction adhesive or a multi-purpose craft glue that’s designed for bonding porous materials. Always test the glue on a small piece of rope before starting your project to ensure it adheres well and doesn’t damage the rope. Make sure to work in a well-ventilated area when using any type of glue.
How do I prevent the basket from unraveling?
Preventing your rope basket from unraveling is key to its longevity. The most important step is to ensure that each coil of rope is securely glued to the previous one. Apply a generous amount of glue to the rope and press it firmly against the adjacent coil. Hold it in place for a few seconds until the glue sets. At the very end of the rope, apply extra glue and tuck the end neatly under the last coil. You can also reinforce the end by wrapping it with twine or yarn and securing it with glue. For added security, consider using a clear sealant or varnish on the finished basket. This will help to protect the rope from moisture and wear and tear, further preventing unraveling.
Can I wash my rope basket?
Whether you can wash your rope basket depends on the type of rope and glue you used. If you used cotton rope and fabric glue, you may be able to gently hand wash the basket with mild soap and water. However, avoid submerging the basket completely in water, as this can weaken the glue and cause the rope to shrink. If you used jute rope or hot glue, it’s best to spot clean the basket with a damp cloth. Avoid using harsh chemicals or abrasive cleaners, as these can damage the rope and the glue. Always allow the basket to air dry completely before using it again. To prevent stains, consider using a fabric protector spray on the finished basket.
How can I make my rope basket more sturdy?
There are several ways to make your rope basket more sturdy. First, choose a thicker rope. The thicker the rope, the more substantial the basket will be. Second, use a strong adhesive and apply it generously. Make sure each coil of rope is securely glued to the previous one. Third, consider adding a base to the basket. You can use a piece of cardboard, wood, or even a sturdy plastic container as a base. Glue the rope to the base, starting from the center and working your way outwards. Fourth, reinforce the sides of the basket by adding extra layers of rope or by stitching the coils together with twine or yarn. Finally, consider using a sealant or varnish on the finished basket. This will help to protect the rope and add extra stability.
What are some creative variations I can try?
The possibilities for creative variations are endless! Try using different colors of rope or twine to create patterns and designs. You can also add embellishments like beads, buttons, shells, or fabric scraps. Consider painting the finished basket with acrylic paint or using fabric dye to color the rope before you start. You can also experiment with different shapes and sizes. Create a tall, narrow basket for storing umbrellas or magazines, or a shallow, wide basket for displaying fruit or decorative items. Add handles made from leather scraps or sturdy rope for easy carrying. You can even create a hanging basket by attaching rope or macrame cords to the sides. Let your imagination run wild and create a rope basket that’s truly unique!

Leave a Comment