

DIY Sofa Stain Removal: Let’s face it, life happens, and sometimes, life leaves its mark on our beloved sofas. Whether it’s a spilled glass of wine during movie night, a rogue crayon attack from the kids, or a muddy paw print from your furry friend, sofa stains are practically inevitable. But don’t despair! Before you resign yourself to living with unsightly blemishes or shelling out a fortune for professional cleaning, I’m here to tell you that you can tackle those stains yourself with some clever DIY tricks.
For generations, resourceful homeowners have relied on homemade remedies to keep their homes looking their best. Think about it – before the age of specialized cleaning products, people used simple ingredients like vinegar, baking soda, and lemon juice to combat all sorts of household messes. These time-tested methods are not only effective but also often gentler on your fabrics and the environment.
Why is mastering DIY sofa stain removal so important? Well, beyond the obvious aesthetic benefits of a clean and fresh-looking sofa, it can also save you a significant amount of money in the long run. Plus, knowing how to handle stains quickly and effectively can prevent them from setting in permanently, extending the life of your furniture. So, grab your apron, gather your supplies, and let’s dive into the world of DIY sofa stain removal! I’m confident that with these tips and tricks, you’ll be able to banish those blemishes and restore your sofa to its former glory.
DIY Sofa Stain Removal: A Comprehensive Guide
Hey there! Spilled something on your beloved sofa? Don’t panic! We’ve all been there. Before you resign yourself to living with that unsightly stain or shelling out big bucks for professional cleaning, let’s try some DIY magic. I’m going to walk you through a comprehensive guide to tackling common sofa stains using simple household ingredients. Remember, acting fast is key! The sooner you address the stain, the easier it will be to remove.
Understanding Your Enemy: Identifying the Stain
Before you grab any cleaning supplies, take a moment to identify what caused the stain. Different stains require different approaches. Here’s a quick rundown of common culprits:
* Water-based stains: Coffee, tea, juice, soda, wine (especially red!), milk, and even muddy paw prints fall into this category.
* Oil-based stains: Grease, butter, oil, makeup, and some food spills are oil-based.
* Protein-based stains: Blood, vomit, urine, and egg are protein-based and require special attention.
* Ink stains: Pen ink, marker ink, and even printer ink can be tricky to remove.
Knowing what you’re dealing with will help you choose the right cleaning method.
Gathering Your Arsenal: Essential Supplies
Now, let’s gather our cleaning supplies. You probably already have most of these items at home:
* Clean white cloths or paper towels: Avoid colored cloths, as the dye could transfer to your sofa.
* Baking soda: A natural deodorizer and absorbent.
* White vinegar: A mild acid that helps break down stains.
* Dish soap: Choose a mild, clear dish soap. Avoid anything with bleach or strong dyes.
* Hydrogen peroxide (3%): A mild bleaching agent, but use with caution on dark fabrics.
* Rubbing alcohol (isopropyl alcohol): Effective for ink and some other stains.
* Spray bottle: For applying cleaning solutions.
* Soft-bristled brush: An old toothbrush works great.
* Vacuum cleaner with upholstery attachment: For removing loose debris and drying the sofa.
* Dry cleaning solvent (optional): For stubborn oil-based stains, but always test in an inconspicuous area first.
* Enzyme cleaner (optional): Specifically designed for protein-based stains.
The Golden Rule: Testing, Testing, Testing!
Before you apply any cleaning solution to the stain, it’s absolutely crucial to test it in an inconspicuous area of your sofa. This could be on the back, underneath, or on a hidden seam. Apply a small amount of the solution, let it sit for a few minutes, and then blot it with a clean white cloth. Check for any discoloration, damage, or color transfer. If everything looks good, you can proceed with cleaning the stain.
Tackling Water-Based Stains
These are usually the easiest to remove if you act quickly.
1. Blot, Don’t Rub: Immediately blot the stain with a clean white cloth or paper towel. Work from the outside of the stain inward to prevent it from spreading. Apply firm pressure to absorb as much liquid as possible.
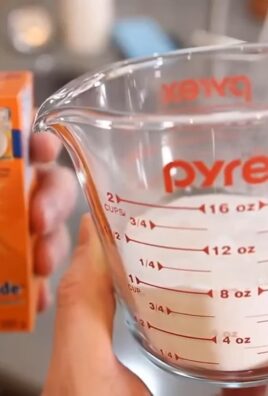
2. Create a Cleaning Solution: Mix a small amount of mild dish soap (about 1 teaspoon) with 1 cup of cool water.
3. Apply the Solution: Dip a clean white cloth into the soapy water and gently blot the stain. Avoid soaking the fabric.
4. Rinse: Dampen another clean white cloth with plain water and blot the area to remove any soap residue.
5. Dry: Blot the area with a dry white cloth or paper towel. You can also use a fan or hairdryer (on a cool setting) to speed up the drying process.
6. Vacuum: Once the area is completely dry, vacuum it with the upholstery attachment to restore the fabric’s texture.
Battling Oil-Based Stains
Oil-based stains require a different approach, as water-based solutions won’t be effective.
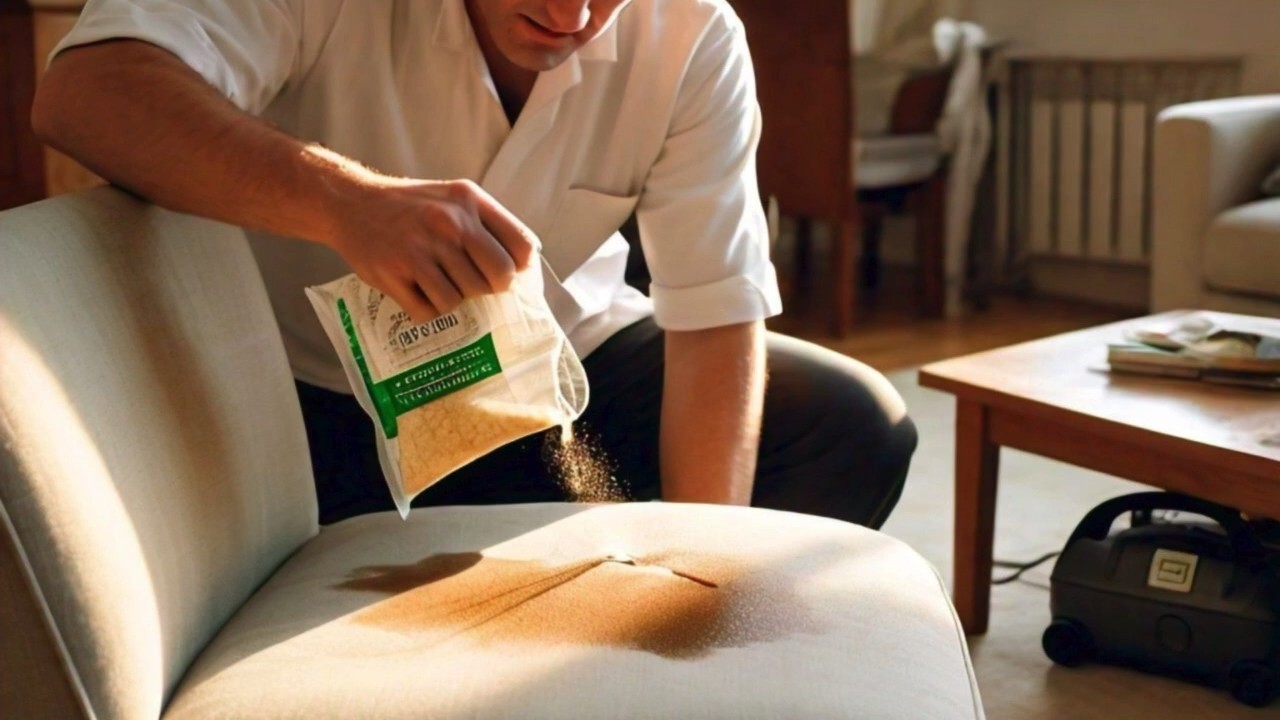
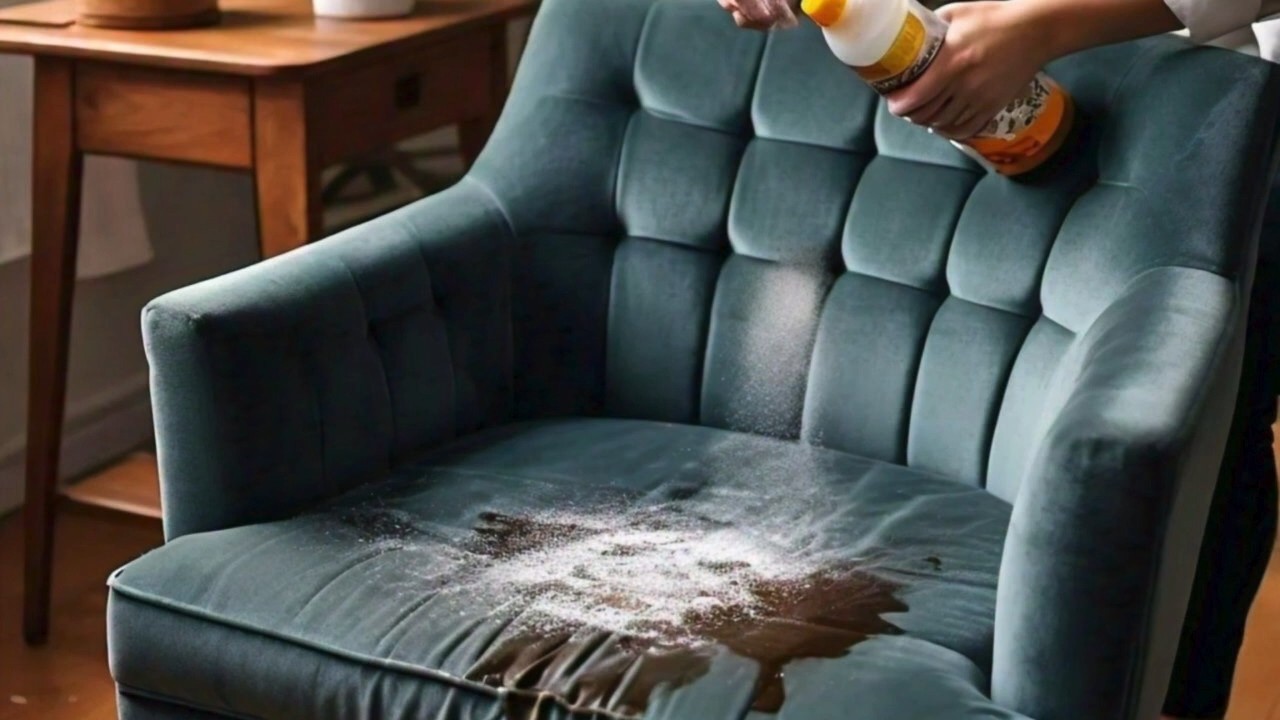
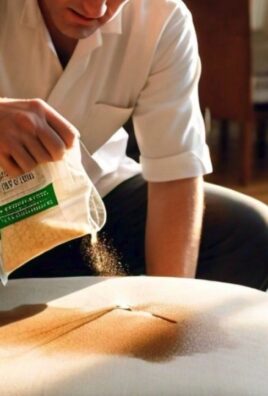
1. Absorb Excess Oil: Sprinkle baking soda generously over the stain. Let it sit for at least 30 minutes, or even overnight, to absorb the oil.
2. Vacuum: Vacuum up the baking soda thoroughly.
3. Apply Dish Soap: Apply a small amount of mild dish soap directly to the stain.
4. Gently Scrub: Use a soft-bristled brush or a clean white cloth to gently scrub the stain. Work in a circular motion.
5. Rinse: Dampen a clean white cloth with plain water and blot the area to remove any soap residue.
6. Dry Cleaning Solvent (Optional): If the stain persists, you can try using a dry cleaning solvent. Follow the manufacturer’s instructions carefully and always test in an inconspicuous area first. Apply the solvent to a clean white cloth and blot the stain.
7. Dry: Blot the area with a dry white cloth or paper towel. You can also use a fan or hairdryer (on a cool setting) to speed up the drying process.
8. Vacuum: Once the area is completely dry, vacuum it with the upholstery attachment to restore the fabric’s texture.
Conquering Protein-Based Stains
Protein-based stains can be tricky because they can set quickly and leave behind a lingering odor.
1. Remove Solids: If there are any solid pieces of the stain (like vomit or egg), carefully remove them with a spoon or spatula.
2. Cold Water Only: Always use cold water when dealing with protein-based stains. Hot water can cause the protein to coagulate and set the stain.
3. Create a Cleaning Solution: Mix a small amount of mild dish soap (about 1 teaspoon) with 1 cup of cold water.
4. Apply the Solution: Dip a clean white cloth into the soapy water and gently blot the stain. Avoid soaking the fabric.
5. Enzyme Cleaner (Optional): For stubborn protein-based stains, consider using an enzyme cleaner. These cleaners contain enzymes that break down the proteins in the stain. Follow the manufacturer’s instructions carefully.
6. Rinse: Dampen another clean white cloth with plain water and blot the area to remove any soap residue.
7. Dry: Blot the area with a dry white cloth or paper towel. You can also use a fan or hairdryer (on a cool setting) to speed up the drying process.
8. Vacuum: Once the area is completely dry, vacuum it with the upholstery attachment to restore the fabric’s texture.
Eradicating Ink Stains
Ink stains can be particularly challenging, but don’t give up hope!
1. Blot Immediately: If the ink is still wet, blot it immediately with a clean white cloth or paper towel. Avoid rubbing, as this will only spread the stain.
2. Rubbing Alcohol: Dampen a clean white cloth with rubbing alcohol (isopropyl alcohol).
3. Blot the Stain: Gently blot the ink stain with the alcohol-soaked cloth. Work from the outside of the stain inward.
4. Repeat: Repeat the blotting process, using a clean area of the cloth each time, until the ink is no longer transferring to the cloth.
5. Rinse: Dampen another clean white cloth with plain water and blot the area to remove any alcohol residue.
6. Dry: Blot the area with a dry white cloth or paper towel. You can also use a fan or hairdryer (on a cool setting) to speed up the drying process.
7. Hairspray (Optional): Some people have success using hairspray to remove ink stains. Spray a small amount of hairspray onto the stain and let it sit for a few minutes. Then, blot it with a clean white cloth.
8. Vacuum: Once the area is completely dry, vacuum it with the upholstery attachment to restore the fabric’s texture.
A Note on Red Wine Stains
Red wine stains are notorious for being difficult to remove, but here’s a trick I’ve found helpful:
1. Blot Immediately: As with any stain, blot the red wine stain immediately with a clean white cloth or paper towel.
2. Salt: Cover the stain generously with salt. The salt will absorb the wine.
3. Wait: Let the salt sit on the stain for several hours, or even overnight.
4. Vacuum: Vacuum up the salt thoroughly.
5. Follow Water-Based Stain Removal: Follow the steps for removing water-based stains, using a solution of mild dish soap and water.
Dealing with Stubborn Stains
Sometimes, despite your best efforts, a stain just won’t budge. In these cases, you might consider:
* Repeating the Cleaning Process: Sometimes, it takes multiple attempts to remove a stubborn stain. Repeat the cleaning
Conclusion
So, there you have it! This DIY sofa stain removal trick is more than just a quick fix; it’s a game-changer for anyone who wants to keep their furniture looking its best without resorting to expensive professional cleaning or harsh chemicals. We’ve armed you with a simple, effective, and budget-friendly method to tackle those inevitable spills and mishaps that life throws our way.
Why is this a must-try? Because it empowers you to take control of your home’s cleanliness and appearance. No more panicking over a dropped glass of wine or a muddy paw print. No more accepting stained furniture as an unavoidable part of life. This method is accessible, using ingredients you likely already have in your pantry, and it delivers impressive results. It’s a win-win!
But don’t just take our word for it. We encourage you to experiment and adapt this technique to your specific needs. For instance, if you’re dealing with a particularly stubborn stain, consider pre-treating it with a paste of baking soda and water before applying the vinegar solution. For delicate fabrics, test the solution on an inconspicuous area first to ensure colorfastness. You could also add a few drops of your favorite essential oil to the vinegar solution for a pleasant, fresh scent. Lavender, lemon, or eucalyptus are all excellent choices.
Another variation to consider is the type of cloth you use. Microfiber cloths are generally excellent for stain removal due to their absorbent properties. However, for textured fabrics, a soft-bristled brush might be more effective at working the solution into the fibers. Remember to always blot, never rub, to avoid spreading the stain.
Ultimately, the best way to discover the full potential of this DIY sofa stain removal method is to try it yourself. We’re confident that you’ll be amazed by the results. And once you’ve experienced the satisfaction of banishing those unsightly stains, we want to hear about it! Share your experiences, tips, and variations in the comments below. Let’s create a community of stain-fighting experts and help each other keep our sofas looking their absolute best. Your insights could be invaluable to someone else struggling with a similar stain. So go ahead, give it a try, and let us know how it goes! You’ll be surprised at how easy and effective this method can be.
Frequently Asked Questions (FAQs)
What types of stains does this DIY sofa stain removal method work best on?
This method is generally effective on a wide range of common household stains, including food spills (like coffee, tea, juice, and sauces), pet accidents (urine, vomit), dirt, and some types of ink. However, its effectiveness can vary depending on the age and severity of the stain, as well as the type of fabric. Fresh stains are always easier to remove than old, set-in stains. For particularly stubborn stains like grease or blood, you might need to pre-treat the area with a specialized stain remover before using this DIY method. Always test in an inconspicuous area first.
Is this DIY stain removal method safe for all types of sofa fabrics?
While this method is generally considered safe for most common sofa fabrics like cotton, linen, and synthetic blends, it’s crucial to test it on an inconspicuous area first to ensure colorfastness and avoid any potential damage. Delicate fabrics like silk, velvet, and leather require special care and may not be suitable for this method. For these materials, it’s best to consult a professional upholstery cleaner. Always check the manufacturer’s care label on your sofa for specific cleaning instructions. If the label says “dry clean only,” it’s best to avoid using any DIY methods and seek professional help.
How much vinegar should I use in the solution?
The recommended ratio is typically 1 part white vinegar to 2 parts water. This creates a solution that’s effective at breaking down stains without being too harsh on the fabric. However, you can adjust the ratio slightly depending on the severity of the stain. For lighter stains, you might use a weaker solution (e.g., 1 part vinegar to 3 parts water). For tougher stains, you can try a slightly stronger solution (e.g., 1 part vinegar to 1 part water), but always test in an inconspicuous area first. Remember, less is more. Start with a weaker solution and gradually increase the concentration if needed.
How do I prevent water rings from forming after cleaning my sofa?
Water rings can occur when the fabric is saturated with water and then dries unevenly. To prevent this, avoid over-wetting the area. Use a spray bottle to apply the solution sparingly and blot the area thoroughly with a clean, dry cloth. You can also use a fan or hairdryer (on a low setting) to speed up the drying process. Another helpful tip is to feather the edges of the cleaned area by gently blotting outwards to blend the moisture into the surrounding fabric. This helps to create a more even drying pattern and minimize the risk of water rings.
What if the stain doesn’t come out completely after the first attempt?
Don’t be discouraged! Some stains require multiple treatments. If the stain is still visible after the first attempt, repeat the process. You can also try letting the solution sit on the stain for a longer period of time (e.g., 15-20 minutes) before blotting it away. For stubborn stains, consider pre-treating the area with a paste of baking soda and water or a commercial stain remover before using the vinegar solution. Remember to always test any cleaning product on an inconspicuous area first. If the stain persists after several attempts, it might be best to consult a professional upholstery cleaner.
Can I use this method on other upholstered furniture, like chairs or ottomans?
Yes, this DIY sofa stain removal method can be used on other upholstered furniture, such as chairs, ottomans, and even car seats. However, it’s essential to follow the same precautions as with sofas, including testing the solution on an inconspicuous area first and checking the manufacturer’s care label for specific cleaning instructions. The same principles apply: avoid over-wetting the fabric, blot instead of rubbing, and feather the edges to prevent water rings.
What are some alternative cleaning solutions I can use if I don’t have vinegar?
If you don’t have white vinegar on hand, you can try using a solution of mild dish soap and water. Mix a few drops of dish soap with warm water and apply it to the stain using a clean cloth. Blot the area thoroughly and then rinse with clean water. Another alternative is to use a solution of baking soda and water. Make a paste of baking soda and water and apply it to the stain. Let it dry completely and then vacuum it up. These alternatives may not be as effective as vinegar for certain types of stains, but they can be a good option in a pinch.
How often should I clean my sofa to prevent stains from setting in?
Regular cleaning is key to preventing stains from setting in and keeping your sofa looking its best. Vacuum your sofa regularly (at least once a week) to remove dust, dirt, and debris. Spot clean any spills or stains as soon as they occur. You can also deep clean your sofa every few months using this DIY method or a professional upholstery cleaner. The frequency of cleaning will depend on how often you use your sofa and whether you have pets or children.
What if the vinegar smell lingers after cleaning?
The vinegar smell should dissipate quickly after the area dries. However, if the smell lingers, you can try a few things. Open windows and doors to ventilate the room. You can also sprinkle baking soda on the cleaned area and let it sit for a few hours before vacuuming it up. Baking soda is a natural odor absorber and will help to neutralize the vinegar smell. Another option is to use a fabric refresher spray to mask the odor.

Leave a Comment