

DIY strawberry growing can seem daunting, but trust me, it’s more rewarding than you might think! Imagine plucking juicy, sun-ripened strawberries straight from your own backyard – a taste far superior to anything you’ll find in the grocery store. For centuries, strawberries have been cherished, not just for their delicious flavor, but also for their vibrant color and perceived health benefits. From ancient Roman gardens to medieval monastery plots, these little red gems have held a special place in our hearts and diets.
But let’s be honest, who has the space (or the time!) for a sprawling strawberry patch? That’s where the magic of DIY comes in. This article is packed with clever tricks and hacks to help you cultivate a thriving strawberry harvest, even if you’re short on space or gardening experience. We’ll explore innovative container gardening techniques, vertical growing solutions, and even repurpose everyday items to create the perfect strawberry-growing environment.
Why do you need these DIY strawberry growing tricks? Because fresh, homegrown strawberries are simply irresistible! Plus, knowing exactly where your food comes from and how it’s grown is incredibly empowering. So, ditch the store-bought berries and get ready to embark on a fun and fruitful gardening adventure. I’m excited to share my favorite tips and tricks with you, so let’s get started!

DIY Strawberry Growing: From Seed to Sweetness!
Hey there, fellow gardening enthusiasts! I’m so excited to share my tried-and-true method for growing delicious, juicy strawberries right in your own backyard (or even on your balcony!). Forget those bland, store-bought berries – we’re talking about sun-ripened, bursting-with-flavor strawberries that you’ll be snacking on all summer long. This guide will walk you through everything you need to know, from starting seeds to harvesting your bounty. Let’s get our hands dirty!
Choosing Your Strawberry Variety
Before we dive into the nitty-gritty, let’s talk about strawberry varieties. There are three main types, and each has its own unique characteristics:
* June-Bearing: These strawberries produce one large crop of berries, typically in June (hence the name!). They’re great if you want a big harvest all at once for making jam or freezing.
* Everbearing: Everbearing varieties produce two or three smaller crops throughout the growing season – spring, summer, and fall. They’re perfect for a continuous supply of fresh berries.
* Day-Neutral: Day-neutral strawberries are similar to everbearing, producing fruit throughout the growing season, but they’re less affected by day length. This means they’ll produce consistently as long as the temperature is right.
I personally love growing a mix of everbearing and day-neutral varieties to have a steady supply of strawberries all season long. Do some research and choose the varieties that best suit your climate and your taste preferences!
Starting Strawberries from Seed: A Patient Gardener’s Delight
Growing strawberries from seed requires a little patience, but it’s incredibly rewarding. Plus, it gives you access to a wider range of varieties that you might not find as starter plants.
What You’ll Need:
* Strawberry seeds (purchase from a reputable source)
* Seed starting trays or small pots
* Seed starting mix (a fine, sterile soil mix)
* Spray bottle with water
* Clear plastic wrap or a humidity dome
* Grow lights (optional, but highly recommended)
* Small fan (optional)
Step-by-Step Instructions:
1. Prepare Your Seed Starting Trays: Fill your seed starting trays or small pots with seed starting mix. Gently press down the soil to create a level surface.
2. Sow the Seeds: Strawberry seeds are tiny, so sprinkle them very thinly over the surface of the soil. You don’t want to overcrowd them. I like to use a folded piece of paper to help me distribute the seeds evenly.
3. Lightly Cover the Seeds: Gently sprinkle a very thin layer of seed starting mix over the seeds. They need light to germinate, so don’t bury them too deep.
4. Moisten the Soil: Use a spray bottle to gently mist the soil until it’s evenly moist. Avoid overwatering, as this can cause the seeds to rot.
5. Create a Humid Environment: Cover the seed starting trays with clear plastic wrap or a humidity dome. This will help to keep the soil moist and create a warm, humid environment that’s ideal for germination.
6. Provide Light and Warmth: Place the seed starting trays under grow lights or in a bright, sunny window. Strawberry seeds need light to germinate, so make sure they get at least 12-14 hours of light per day. The ideal temperature for germination is around 70-75°F (21-24°C).
7. Monitor and Water: Check the soil moisture daily and mist with water as needed to keep it consistently moist. Remove the plastic wrap or humidity dome for a few hours each day to allow for air circulation and prevent fungal growth. A small fan can also help with air circulation.
8. Be Patient: Strawberry seeds can take anywhere from 1 to 4 weeks to germinate, so don’t get discouraged if you don’t see sprouts right away. Just keep the soil moist and provide plenty of light and warmth.
9. Thin the Seedlings: Once the seedlings have developed a few sets of true leaves (the leaves that look like miniature strawberry leaves), thin them out so that they’re spaced about 1-2 inches apart. This will give them room to grow and prevent overcrowding.
10. Harden Off the Seedlings: Before transplanting the seedlings outdoors, you’ll need to harden them off. This means gradually exposing them to outdoor conditions over a period of 1-2 weeks. Start by placing them in a sheltered spot outdoors for a few hours each day, gradually increasing the amount of time they spend outside. This will help them to acclimate to the sun, wind, and temperature changes.
Transplanting Your Strawberry Seedlings
Once your strawberry seedlings are hardened off, they’re ready to be transplanted into their permanent home.
What You’ll Need:
* Strawberry seedlings
* Gardening gloves
* Trowel or small shovel
* Well-draining soil (amend with compost for added nutrients)
* Mulch (straw, wood chips, or pine needles)
* Watering can or hose
Step-by-Step Instructions:
1. Prepare the Planting Bed: Choose a sunny location with well-draining soil. Strawberries need at least 6-8 hours of sunlight per day. Amend the soil with compost or other organic matter to improve drainage and fertility.
2. Dig the Planting Holes: Dig holes that are slightly larger than the root balls of your strawberry seedlings. Space the holes about 12-18 inches apart for June-bearing varieties and 8-12 inches apart for everbearing and day-neutral varieties.
3. Carefully Remove the Seedlings: Gently remove the strawberry seedlings from their seed starting trays or pots. Be careful not to damage the roots.
4. Plant the Seedlings: Place the seedlings in the planting holes, making sure that the crown of the plant (the point where the roots meet the stem) is level with the soil surface. Don’t bury the crown, as this can cause the plant to rot.
5. Fill in the Holes: Fill in the holes with soil and gently firm the soil around the base of the plants.
6. Water Thoroughly: Water the newly transplanted seedlings thoroughly to help them settle in.
7. Mulch Around the Plants: Apply a layer of mulch around the plants to help retain moisture, suppress weeds, and keep the berries clean. Straw is a traditional choice for mulching strawberries, but you can also use wood chips or pine needles.
Caring for Your Strawberry Plants
Now that your strawberry plants are in the ground, it’s important to provide them with the care they need to thrive.
Watering: Strawberries need consistent moisture, especially during fruit production. Water deeply whenever the top inch of soil feels dry. Avoid overhead watering, as this can promote fungal diseases. Drip irrigation is a great option for watering strawberries.
Fertilizing: Fertilize your strawberry plants in the spring with a balanced fertilizer. Avoid over-fertilizing, as this can lead to excessive foliage growth and reduced fruit production. I like to use a fertilizer specifically formulated for berries.
Weeding: Keep the planting bed free of weeds, as they can compete with the strawberry plants for nutrients and water. Hand-pull weeds regularly or use a hoe to cultivate the soil.
Pest and Disease Control: Monitor your strawberry plants regularly for signs of pests and diseases. Common pests include aphids, spider mites, and slugs. Common diseases include gray mold and leaf spot. Treat any problems promptly with appropriate organic pest control methods or fungicides.
Renovating June-Bearing Strawberries: After your June-bearing strawberries have finished producing fruit, it’s important to renovate the planting bed. This involves mowing the foliage down to about 1 inch above the crown and thinning out the plants. This will help to promote new growth and ensure a good crop of berries the following year.
Harvesting Your Strawberries
The moment you’ve been waiting for! Harvesting your own homegrown strawberries is one of the most rewarding experiences a gardener can have.
When to Harvest: Strawberries are ready to harvest when they’re fully red, plump, and slightly soft to the touch. They should also detach easily from the plant.
How to Harvest: Gently grasp the strawberry near the stem and twist or snip it off the plant. Be careful not to bruise the berries.
Storing Your Strawberries: Freshly harvested strawberries are best eaten right away. If you need to store them, keep them in the refrigerator in a single layer in a container lined with paper towels. Don’t wash them until you’re ready to eat them.
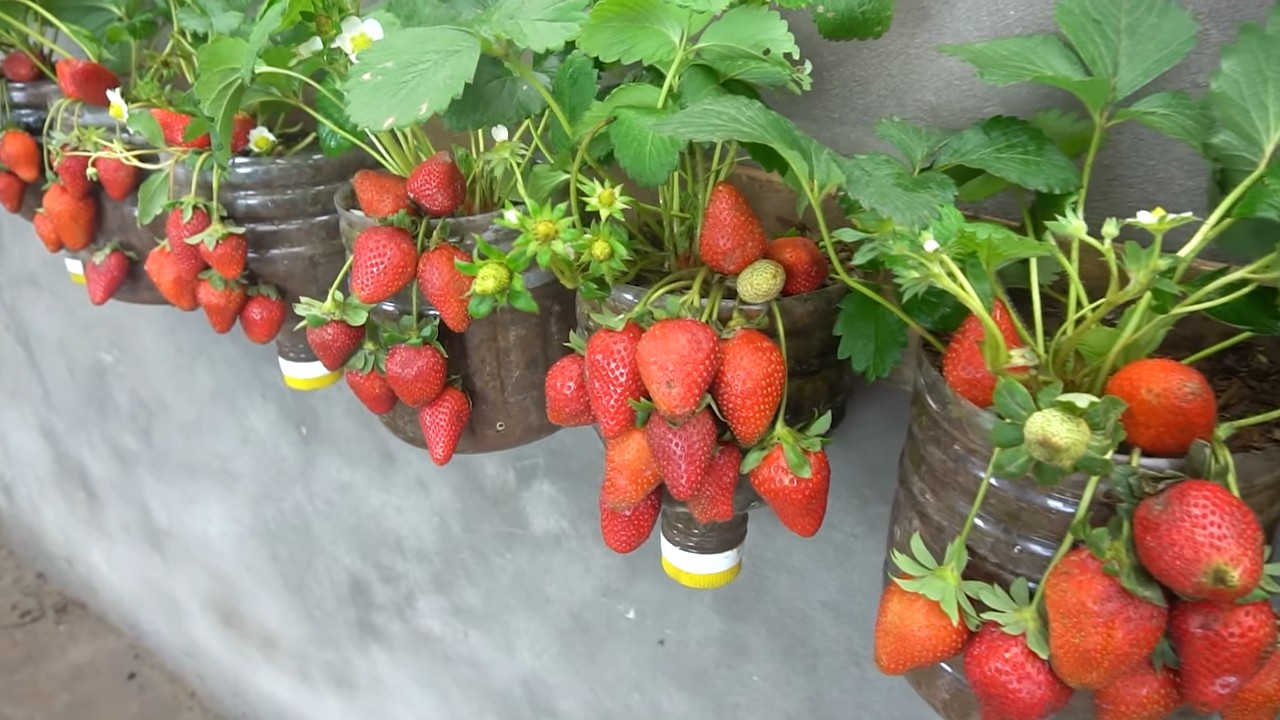
Growing Strawberries in Containers
Don’t have a garden? No problem! Strawberries grow beautifully in containers.
Choosing the Right Container: Select a container that’s at least 12 inches in diameter and 8 inches deep. Make sure it has drainage holes.
Potting Mix: Use a high
Conclusion
So, there you have it! Transforming your backyard, balcony, or even a sunny windowsill into a thriving strawberry patch is not only achievable but incredibly rewarding. This DIY strawberry growing method, whether you choose the vertical tower, the repurposed container, or the traditional raised bed, offers a fantastic way to enjoy fresh, juicy strawberries right at your fingertips.
Why is this a must-try? Beyond the obvious benefit of delicious, homegrown fruit, this project connects you with nature, reduces your reliance on store-bought produce (often laden with pesticides), and provides a fun and educational activity for the whole family. Imagine the satisfaction of biting into a perfectly ripe strawberry, knowing you nurtured it from seedling to fruit. That’s an experience you simply can’t buy.
But the beauty of DIY lies in its adaptability. Feel free to experiment with different varieties of strawberries. Everbearing varieties will provide fruit throughout the growing season, while June-bearing varieties offer a concentrated harvest. Consider companion planting – basil, thyme, and marigolds are excellent choices that can deter pests and enhance the flavor of your strawberries. You can also adjust the soil mix based on your local climate and the specific needs of your chosen strawberry variety. For example, if you live in a particularly hot climate, adding more moisture-retentive materials like coco coir to your soil mix can be beneficial.
Don’t be afraid to get creative with your containers! Old tires, repurposed pallets, even hanging baskets can be transformed into charming strawberry planters. Just ensure proper drainage and adequate sunlight. Remember, the key to successful DIY strawberry growing is observation and adaptation. Pay attention to your plants, adjust your watering schedule as needed, and don’t hesitate to experiment with different techniques.
We wholeheartedly encourage you to embark on this delightful DIY adventure. The taste of homegrown strawberries is unparalleled, and the process itself is incredibly fulfilling. Plus, it’s a sustainable way to enjoy one of summer’s most beloved fruits.
So, grab your gardening gloves, gather your supplies, and get ready to experience the joy of DIY strawberry growing. We’re confident that you’ll be amazed by the results.
And most importantly, we want to hear about your experiences! Share your photos, tips, and triumphs with us in the comments below. Let’s build a community of strawberry enthusiasts and inspire others to embrace the joys of homegrown goodness. What worked for you? What challenges did you face? Your insights can help others succeed in their own DIY strawberry growing endeavors. Let’s cultivate a thriving community, one strawberry plant at a time!
Frequently Asked Questions (FAQ)
What is the best time of year to start growing strawberries?
The best time to plant strawberries depends on your climate and the type of strawberry you’re growing. In general, early spring or late fall are ideal. Spring planting allows the plants to establish themselves before the heat of summer, while fall planting gives them a head start for the following spring. For everbearing varieties, you can often plant them throughout the growing season, but avoid planting during the hottest periods. Check your local climate and the specific recommendations for your chosen strawberry variety for the most accurate guidance.
What kind of soil is best for growing strawberries?
Strawberries thrive in well-draining, slightly acidic soil with a pH between 5.5 and 6.5. A good soil mix should be rich in organic matter. You can amend your existing soil with compost, aged manure, or peat moss to improve drainage and fertility. Avoid heavy clay soils, as they can retain too much water and lead to root rot. If you’re growing in containers, use a high-quality potting mix specifically formulated for fruits and vegetables.
How much sunlight do strawberries need?
Strawberries need at least 6-8 hours of direct sunlight per day to produce abundant fruit. Choose a location that receives plenty of sunlight throughout the day. If you’re growing in containers, you can move them around to ensure they get adequate sunlight. Insufficient sunlight can result in smaller, less flavorful berries and reduced yields.
How often should I water my strawberry plants?
Water your strawberry plants regularly, especially during dry periods. The soil should be consistently moist but not waterlogged. Water deeply and less frequently, rather than shallowly and more often. Check the soil moisture by sticking your finger about an inch into the soil. If it feels dry, it’s time to water. Avoid overhead watering, as it can promote fungal diseases. Drip irrigation or soaker hoses are excellent options for delivering water directly to the roots.
What are some common pests and diseases that affect strawberries?
Common pests that affect strawberries include aphids, spider mites, slugs, and snails. Common diseases include gray mold (Botrytis), powdery mildew, and leaf spot. Regularly inspect your plants for signs of pests or diseases. Remove any affected leaves or fruit promptly. Use organic pest control methods, such as insecticidal soap or neem oil, to control pests. Ensure good air circulation around your plants to prevent fungal diseases.
How do I fertilize my strawberry plants?
Fertilize your strawberry plants in early spring and again after the first harvest. Use a balanced fertilizer specifically formulated for fruits and vegetables. Follow the instructions on the fertilizer package carefully. Avoid over-fertilizing, as it can lead to excessive foliage growth at the expense of fruit production. You can also amend the soil with compost or aged manure to provide a slow-release source of nutrients.
How do I overwinter my strawberry plants?
In colder climates, strawberry plants need protection during the winter. Mulch around the plants with straw or pine needles to insulate the roots. You can also cover the plants with a row cover or a cold frame to provide additional protection. In very cold climates, you may need to move container-grown plants to a sheltered location, such as a garage or shed. Remove the mulch in the spring when the weather warms up.
How long does it take for strawberry plants to produce fruit?
The time it takes for strawberry plants to produce fruit depends on the variety and the planting time. June-bearing varieties typically produce fruit the following spring after planting. Everbearing varieties may produce some fruit in the first year, but the main harvest will be in the second year. Day-neutral varieties can produce fruit throughout the growing season. Be patient and provide your plants with proper care, and you’ll be rewarded with delicious strawberries in due time.
Can I grow strawberries in hanging baskets?
Yes, strawberries grow very well in hanging baskets! Choose a trailing variety of strawberry for the best results. Use a well-draining potting mix and water regularly. Hanging baskets tend to dry out quickly, so check the soil moisture frequently. Fertilize regularly to provide the plants with the nutrients they need. Hanging baskets are a great way to add a touch of beauty and deliciousness to your patio or balcony.
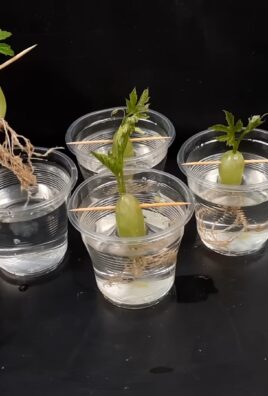
How do I propagate strawberry plants?
Strawberry plants can be propagated through runners, which are horizontal stems that grow from the mother plant. These runners will develop roots and form new plants. Once the new plants have established roots, you can cut them from the mother plant and transplant them to a new location. This is a simple and effective way to expand your strawberry patch.

Leave a Comment