

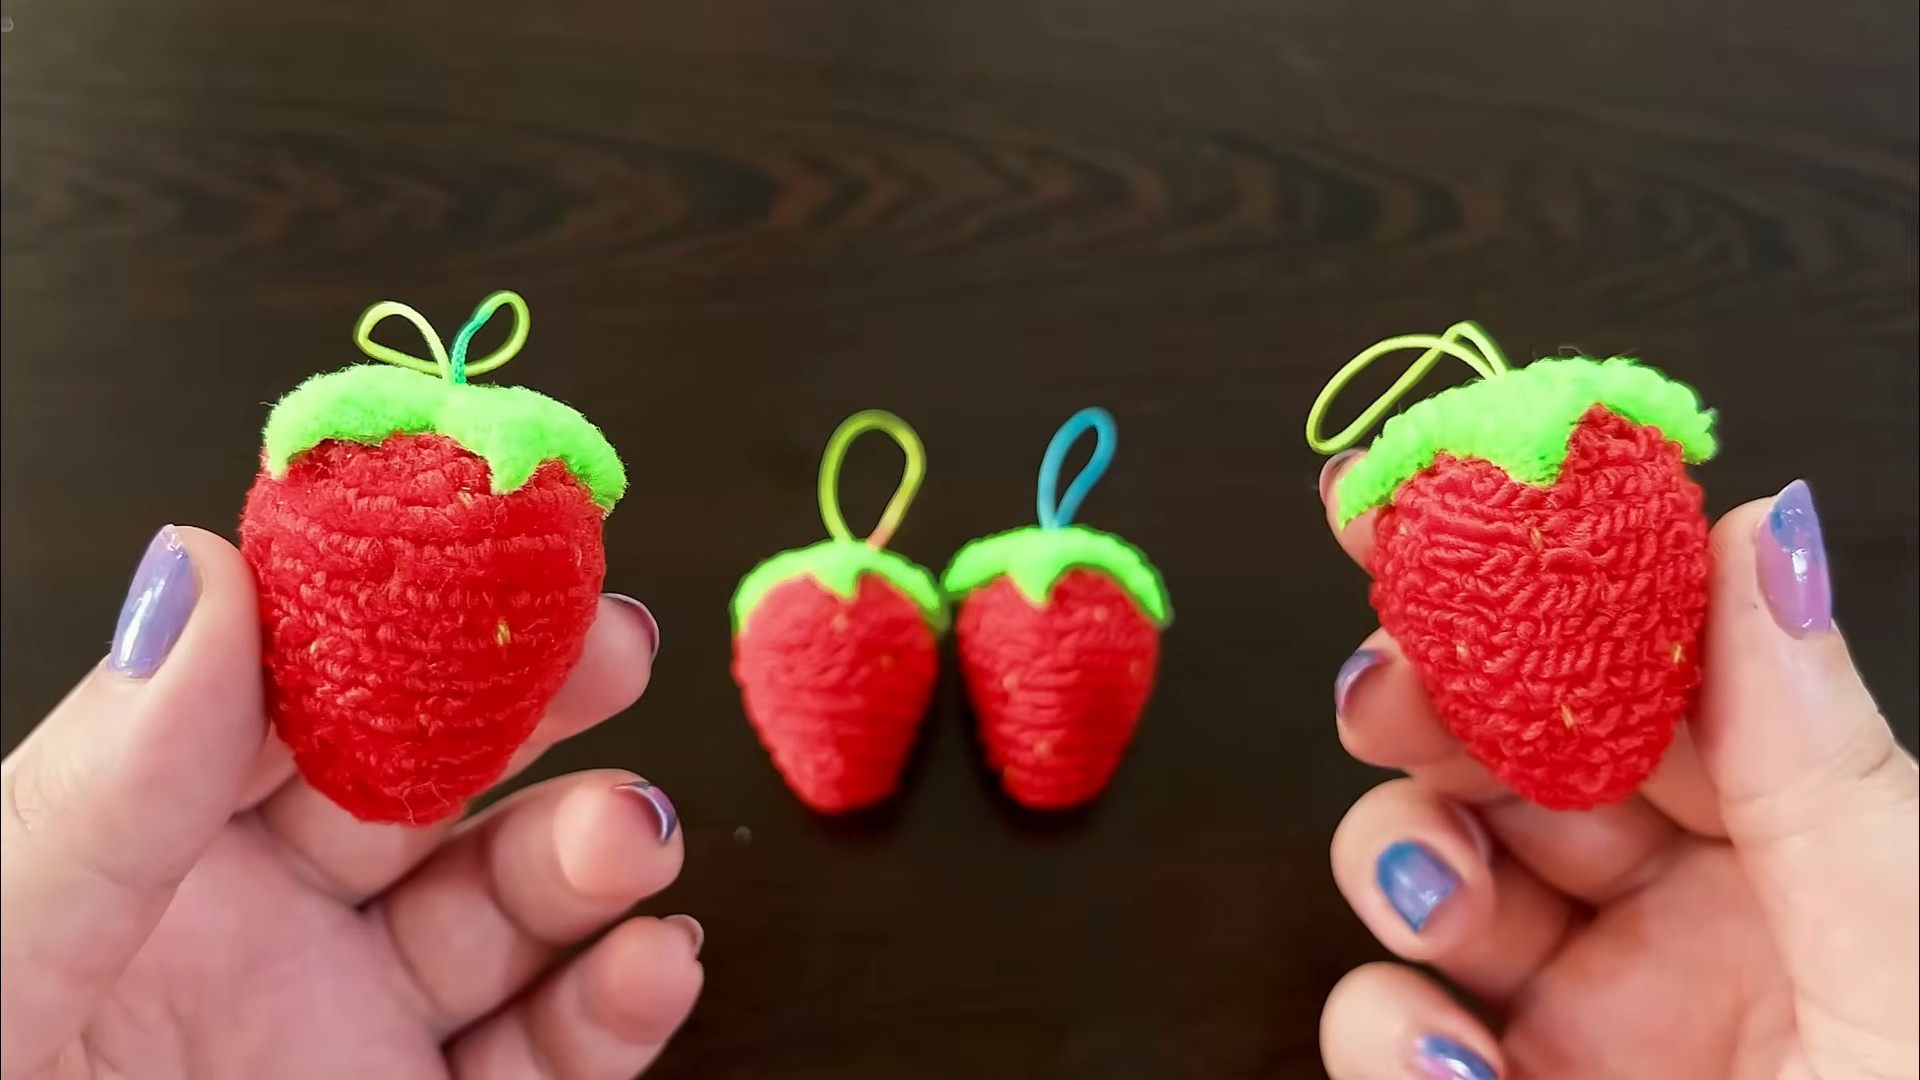
DIY Strawberry Keychain: Your Pocket-Sized Burst of Summer Fun! Ever wished you could carry a little piece of summer sunshine with you wherever you go? Well, now you can! This isn’t just another craft project; it’s a chance to create a charming, personalized accessory that’s as sweet as the real thing.
From ancient times, fruit motifs have symbolized abundance and good fortune. Think of the vibrant fruit depicted in Renaissance paintings – a testament to nature’s beauty and bounty. While we’re not painting masterpieces, we are channeling that same spirit of creativity and appreciation for simple pleasures with this adorable DIY Strawberry Keychain project.
In today’s fast-paced world, it’s easy to lose touch with the joy of making things with our own hands. This DIY Strawberry Keychain is the perfect antidote! It’s a quick, easy, and incredibly satisfying craft that anyone can do, regardless of their skill level. Plus, it’s a fantastic way to add a personal touch to your keys, backpack, or even use it as a cute zipper pull. I’m excited to show you how to create this delightful little accessory that’s sure to bring a smile to your face every time you see it!
DIY Adorable Strawberry Keychain: A Sweet Project!
Hey there, crafty friends! Today, I’m super excited to share a super cute and easy DIY project with you: a strawberry keychain! This little charm is perfect for adding a touch of sweetness to your keys, backpack, or even as a cute little gift. It’s a fantastic project for beginners, and I promise you’ll be hooked once you see how simple and rewarding it is. Let’s get started!
What You’ll Need: Gathering Your Supplies
Before we dive in, let’s make sure we have everything we need. This will make the process smooth and enjoyable. Here’s your shopping list:
* Felt: Red, green, and white felt sheets. You can find these at any craft store. I usually get the thicker felt for durability.
* Embroidery Floss: Red, green, and white embroidery floss to match your felt colors.
* Embroidery Needle: A sharp needle with a large enough eye to thread your embroidery floss.
* Scissors: A good pair of sharp scissors for cutting the felt.
* Pencil or Fabric Marker: For tracing your pattern onto the felt. A fabric marker is ideal, but a regular pencil works too, just be gentle!
* Stuffing: Polyester fiberfill to give your strawberry some plumpness.
* Keychain Ring: A standard keychain ring to attach your strawberry to your keys.
* Jump Ring: A small metal ring to connect the strawberry to the keychain ring.
* Pliers (Optional): For opening and closing the jump ring.
* Hot Glue Gun and Glue Sticks (Optional): For faster assembly, but sewing is more durable.
* Strawberry Template: You can easily find a free strawberry template online, or you can draw your own! I’ll provide instructions on how to create your own template below.
Creating Your Strawberry Template
If you can’t find a template you like online, don’t worry! Making your own is super easy.
1. Draw a Strawberry Shape: On a piece of paper, sketch a simple strawberry shape. It doesn’t have to be perfect! Think of a rounded triangle with a slightly curved top. I usually aim for about 2-3 inches in height.
2. Add the Leaf Top: Draw a small, leafy crown at the top of the strawberry. This will be a separate piece that we’ll attach later. Think of a few overlapping triangles or rounded leaves.
3. Cut Out the Template: Carefully cut out both the strawberry body and the leaf top. Now you have your custom templates!
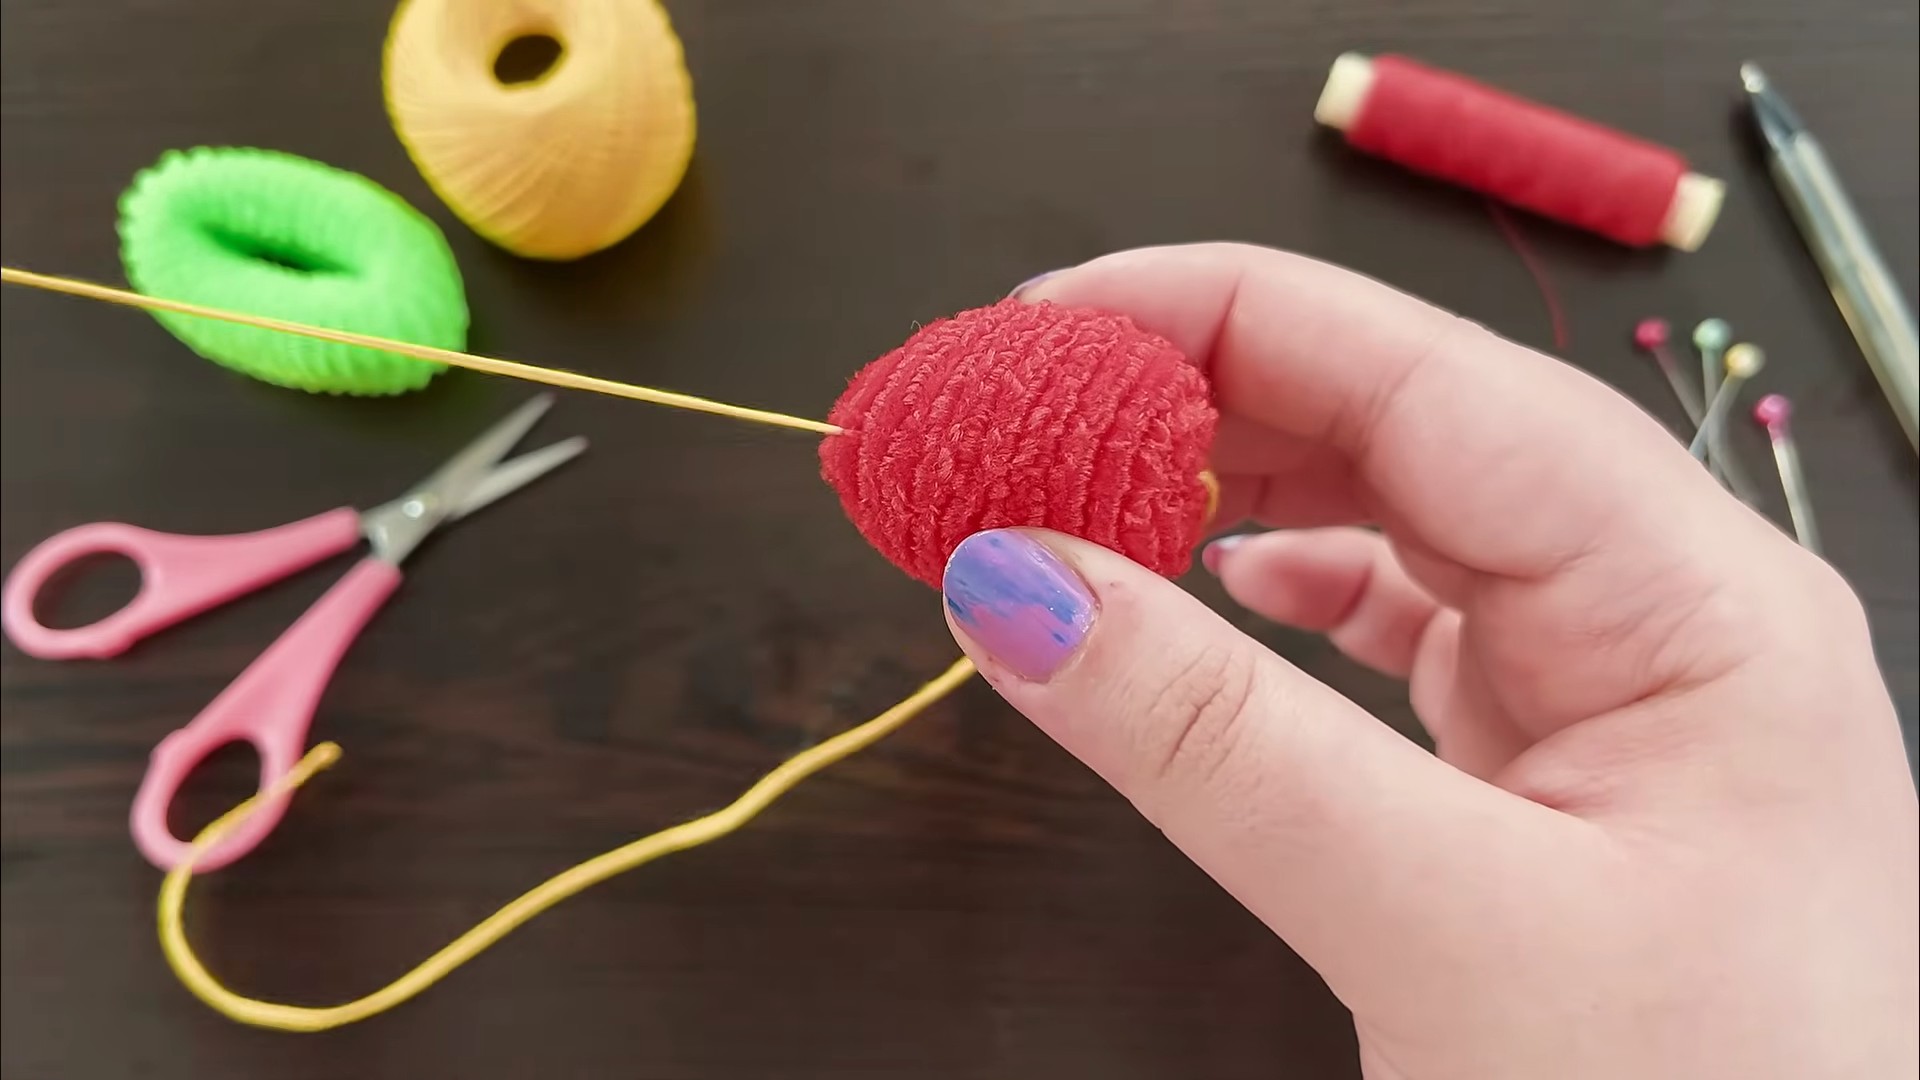
Sewing Your Strawberry: Step-by-Step Instructions
Okay, now for the fun part! Let’s bring our strawberry to life.
1. Trace the Template: Place your strawberry template onto the red felt and trace around it with your pencil or fabric marker. Repeat this so you have two identical strawberry shapes. Do the same with the leaf top template on the green felt, creating two leaf top pieces.
2. Cut Out the Felt Pieces: Carefully cut out all four felt pieces (two red strawberry bodies and two green leaf tops). Try to cut just inside the traced line for a cleaner look.
3. Adding the Seeds: Now, let’s add those iconic strawberry seeds! Thread your embroidery needle with white embroidery floss.
* Knot the End: Tie a knot at the end of your floss.
* Seed Stitch: On one of the red felt pieces, create small, scattered seed stitches using the white floss. A seed stitch is simply a tiny straight stitch. Randomly place these all over the strawberry, leaving some space near the edges for sewing.
* Repeat: Repeat this process on the other red felt piece.
4. Sewing the Strawberry Body: Now it’s time to sew the two strawberry pieces together.
* Blanket Stitch (Recommended): I prefer using a blanket stitch for a neat and decorative edge. If you’re not familiar with it, don’t worry! It’s easy to learn.
* Start Stitch: Bring your needle up through the back of one felt piece, near the edge.
* Loop Stitch: Bring your needle down through both felt pieces, close to where you came up, but leave a loop of thread on the front.
* Pull Through Loop: Bring your needle up through the loop you just created and pull the thread tight. This creates a small “L” shape along the edge.
* Repeat: Continue this process all the way around the strawberry, keeping your stitches evenly spaced.
* Running Stitch (Alternative): If you’re not comfortable with the blanket stitch, a simple running stitch will work just fine. Just sew small, even stitches around the edge of the strawberry.
* Leave an Opening: Remember to leave a small opening (about 1-2 inches) at the top of the strawberry for stuffing.
5. Stuffing the Strawberry: Now, let’s give our strawberry some shape!
* Add Stuffing: Gently stuff the strawberry with polyester fiberfill. Use small pieces and push them into the corners and edges first.
* Don’t Overstuff: Be careful not to overstuff it, or it will look lumpy. You want it to be firm but still soft.
6. Closing the Opening: Once you’re happy with the stuffing, sew the opening closed using the same stitch you used to sew the rest of the strawberry.
7. Attaching the Leaf Top: Now, let’s add the leafy crown!
* Sew or Glue: You can either sew the two green felt leaf top pieces together using a blanket stitch or running stitch, or you can use a hot glue gun to glue them together. If you’re sewing, leave a small opening for a tiny bit of stuffing to give the leaves some dimension.
* Attach to Strawberry: Once the leaf top is assembled, attach it to the top of the strawberry using either glue or stitches. Make sure it’s securely attached.
8. Adding the Keychain: Almost there! Now for the final touch.
* Attach Jump Ring: Use pliers (if needed) to open the jump ring. Attach it to the top of the strawberry, either by threading it through the felt or by creating a small loop with embroidery floss and attaching the jump ring to that.
* Attach Keychain Ring: Attach the keychain ring to the jump ring.
Alternative Method: Using Hot Glue (Faster but Less Durable)
If you’re short on time or prefer not to sew, you can use a hot glue gun for most of this project. However, keep in mind that glue is generally less durable than sewing.
1. Cut Out Felt Pieces: Follow steps 1 and 2 from the sewing instructions.
2. Add Seeds (Optional): You can still add the white seed stitches if you want, or you can skip this step.
3. Glue the Strawberry Body: Carefully apply a thin line of hot glue along the edge of one red felt piece. Quickly attach the other red felt piece, leaving a small opening at the top for stuffing.
4. Stuff the Strawberry: Follow step 5 from the sewing instructions.
5. Close the Opening: Glue the opening closed.
6. Assemble and Attach Leaf Top: Follow step 7 from the sewing instructions, using hot glue to assemble and attach the leaf top.
7. Attach Keychain: Follow step 8 from the sewing instructions.
Tips and Tricks for a Perfect Strawberry Keychain
* Use Quality Felt: Invest in good quality felt for a more durable and professional-looking keychain.
* Even Stitches: Try to keep your stitches as even as possible for a neat finish.
* Don’t Overstuff: Overstuffing can make your strawberry look lumpy.
* Experiment with Colors: Don’t be afraid to experiment with different colors of felt and floss! You could make a pink strawberry, a yellow strawberry, or even a rainbow strawberry!
* Add Embellishments: Get creative and add other embellishments, such as beads, sequins, or buttons.
* Practice Your Stitches: If you’re new to embroidery, practice your stitches on a scrap piece of felt before starting on your strawberry.
* Use a Thimble: If you’re having trouble pushing the needle through the felt, use a thimble to protect your finger.
* Be Patient: Don’t rush the process. Take your time and enjoy the craft!
Variations and Customizations
The possibilities are endless when it comes to customizing your strawberry keychain! Here are a few ideas to get you started:
* Different Sizes: Make a mini strawberry keychain or a larger strawberry charm for your bag.
* Different Colors:
Conclusion
So, there you have it! Crafting your own DIY strawberry keychain is not just a fun afternoon project; it’s a gateway to personalized style, a sustainable alternative to mass-produced trinkets, and a fantastic way to express your creativity. We’ve walked you through the steps, highlighting the simplicity and affordability of this delightful craft. But why is this DIY trick a must-try?
Firstly, the sheer joy of creating something with your own hands is unparalleled. In a world dominated by instant gratification, taking the time to slow down and engage in a tactile activity is incredibly rewarding. Seeing a simple piece of felt or yarn transform into a charming strawberry keychain is a testament to your own abilities and a source of immense satisfaction.
Secondly, this DIY project offers a unique opportunity for personalization. While we’ve provided a basic template and instructions, the possibilities for customization are endless. Experiment with different shades of red and green for a more realistic or whimsical look. Add tiny seed beads for a touch of sparkle, or embroider intricate details for a truly bespoke creation. Consider using different materials altogether – leather scraps for a rustic vibe, or even recycled fabric for an eco-friendly approach. You could even create a whole patch of strawberry keychains, each slightly different, to give as gifts to friends and family. Imagine the delight of receiving a handmade present, crafted with love and attention to detail!
Furthermore, this DIY strawberry keychain is a sustainable choice. By repurposing materials you already have on hand or opting for eco-friendly alternatives, you’re reducing your environmental impact and contributing to a more sustainable lifestyle. In a world grappling with environmental concerns, every small step counts, and choosing to create your own accessories is a powerful statement.
Don’t be afraid to experiment! Try adding a small bell inside for a delightful jingle, or attach a miniature charm for extra flair. Consider using different stitching techniques to add texture and dimension to your keychain. The beauty of DIY is that there are no rules – let your imagination run wild and create a keychain that truly reflects your personality.
We wholeheartedly encourage you to try this DIY strawberry keychain project. It’s a simple, affordable, and incredibly rewarding way to unleash your creativity and add a touch of handmade charm to your everyday life. And most importantly, we want to hear about your experience! Share your creations with us on social media using #DIYStrawberryKeychain and let us see your unique interpretations of this classic design. We can’t wait to see what you come up with! So grab your supplies, get crafting, and let the strawberry fun begin!
Frequently Asked Questions (FAQ)
What kind of felt is best for making the DIY strawberry keychain?
The best type of felt for this project is generally acrylic felt or wool felt. Acrylic felt is more affordable and readily available, making it a great choice for beginners. It comes in a wide range of colors and is easy to cut and sew. Wool felt, on the other hand, is a higher-quality option that is softer, more durable, and has a richer texture. It’s also more resistant to pilling and wear. If you’re looking for a more luxurious finish and plan to use the keychain frequently, wool felt is a worthwhile investment. However, for a simple and cost-effective project, acrylic felt will work perfectly well. Consider using a blend of wool and rayon felt for a balance of durability and affordability.
Can I use a sewing machine instead of hand-sewing?
Absolutely! While the instructions are written for hand-sewing, using a sewing machine can significantly speed up the process, especially if you’re making multiple keychains. If you choose to use a sewing machine, be sure to use a needle appropriate for the thickness of your felt and a stitch length that is neither too long nor too short (a medium stitch length is usually ideal). When sewing around the curves of the strawberry, take your time and pivot the fabric frequently to ensure a smooth and even seam. Remember to leave a small opening for stuffing and turning the keychain right-side out.
What kind of stuffing should I use?
Polyester fiberfill is the most common and readily available stuffing material for craft projects like this. It’s lightweight, washable, and hypoallergenic. You can find it at most craft stores or online. Alternatively, you can use cotton balls or scraps of fabric as stuffing, but these may not provide as smooth or even a finish as fiberfill. If you’re concerned about the environment, consider using recycled fiberfill made from plastic bottles.
How do I attach the keychain ring securely?
The most secure way to attach the keychain ring is to use a jump ring and pliers. First, open the jump ring using two pairs of pliers (one to hold each side of the ring). Then, thread the jump ring through the loop you’ve created on the top of the strawberry. Finally, attach the keychain ring to the jump ring and close the jump ring securely using the pliers. Make sure the jump ring is completely closed to prevent the keychain from falling off. You can also reinforce the loop on the strawberry by adding a few extra stitches around the base of the loop before attaching the jump ring.
Can I make a larger or smaller strawberry keychain?
Yes, you can easily adjust the size of the keychain by scaling the template up or down. When printing the template, adjust the percentage in your printer settings to increase or decrease the size. Keep in mind that if you make the keychain significantly larger, you may need to use more stuffing and adjust the length of the keychain ring attachment. If you make it smaller, you may need to use finer needles and thread for sewing.
How do I clean my DIY strawberry keychain?
To clean your DIY strawberry keychain, gently hand-wash it with mild soap and water. Avoid using harsh chemicals or bleach, as these can damage the felt and stuffing. Rinse thoroughly with clean water and gently squeeze out any excess water. Do not wring or twist the keychain, as this can distort its shape. Allow the keychain to air dry completely before using it again. You can also spot-clean any stains with a damp cloth and mild detergent.
What other variations can I try?
The possibilities are endless! You can add embellishments like beads, sequins, or embroidery to personalize your keychain. Try using different colors of felt to create a rainbow strawberry or a strawberry with polka dots. You can also add a small tag with your initials or a special message. Consider making a whole set of fruit keychains, such as apples, bananas, and oranges, to create a fun and colorful collection. You can also experiment with different stitching techniques, such as blanket stitch or whip stitch, to add texture and visual interest.
What if I don’t have felt? Can I use other materials?
While felt is the most common and recommended material, you can certainly experiment with other fabrics. Cotton fabric, denim scraps, or even thin leather can be used to create a unique strawberry keychain. Keep in mind that different fabrics may require different sewing techniques and may not be as durable as felt. If you’re using a fabric that frays easily, consider using a seam sealant to prevent the edges from unraveling.
Is this a good project for kids?
Yes, this DIY strawberry keychain project is a great activity for kids, with adult supervision. It’s a fun and engaging way to develop their fine motor skills, creativity, and hand-eye coordination. However, be sure to supervise them closely when using sharp objects like scissors and needles. You can also pre-cut the felt pieces for younger children to make the project easier for them.
Where can I find inspiration for my DIY strawberry keychain?
The internet is a treasure trove of inspiration! Search for “strawberry keychain DIY” on platforms like Pinterest, Instagram, and YouTube to find countless ideas and tutorials. You can also browse craft blogs and online forums for inspiration and tips. Don’t be afraid to experiment and put your own unique spin on the project!

Leave a Comment