

DIY vanity tray projects are a fantastic way to add a touch of elegance and organization to your space without breaking the bank. Have you ever looked at those stunning vanity displays in magazines and thought, “I wish I could have that!”? Well, guess what? You absolutely can! This article is your ultimate guide to creating your own personalized vanity tray, transforming cluttered countertops into chic, organized havens.
The concept of a vanity tray, while seemingly modern, has roots in centuries past. Think of the ornate silver trays used to display perfumes and powders in Victorian dressing rooms. These were more than just functional; they were statements of style and sophistication. Today, we’re bringing that same sense of luxury to our everyday routines, but with a fun, DIY twist!
Let’s face it, our vanities can quickly become dumping grounds for makeup, jewelry, and skincare products. A DIY vanity tray not only corrals the chaos but also elevates the entire look of your bathroom or bedroom. It’s a simple yet effective way to showcase your favorite items, protect your surfaces from spills and scratches, and add a personal touch to your décor. Plus, who doesn’t love a good excuse to get crafty? I’m excited to share some easy and creative ideas that will help you create a vanity tray that’s both beautiful and functional. Let’s get started!
DIY Vanity Tray: Elevate Your Space with Style
Hey there, fellow DIY enthusiasts! I’m so excited to share this project with you – creating your own gorgeous vanity tray. It’s a fantastic way to organize your makeup, perfumes, jewelry, or even just add a touch of elegance to your bathroom or bedroom. Plus, it’s surprisingly easy and budget-friendly! Let’s dive in!
Materials You’ll Need
Before we get started, let’s gather all the necessary supplies. This will make the process smoother and more enjoyable.
* A base: This could be a picture frame (remove the glass and backing), a wooden tray blank, a ceramic tile, or even a repurposed serving platter. I’m using a 12×16 inch wooden tray blank for this project.
* Paint or stain: Choose a color that complements your décor. I’m going with a soft, matte white paint for a classic look.
* Paintbrushes or foam rollers: For applying the paint or stain. I prefer foam rollers for a smooth, even finish.
* Sealer (optional but recommended): To protect your painted or stained surface. A clear acrylic sealer works great.
* Decorative handles or knobs: These will add a touch of personality and make the tray easier to carry. I found some beautiful antique-style knobs at my local craft store.
* Strong adhesive: To attach the handles or knobs. Epoxy or a strong craft glue will do the trick.
* Felt pads (optional): To protect your furniture from scratches.
* Sandpaper (optional): If your base has a rough surface, you’ll want to sand it down first.
* Primer (optional): If you’re painting a dark surface a light color, primer will help prevent the dark color from bleeding through.
* Measuring tape or ruler: For accurate placement of handles.
* Pencil: For marking handle placement.
* Drill (optional): If your handles require screws and your base isn’t pre-drilled.
* Screwdriver (optional): If using screws to attach handles.
* Clean cloths: For wiping away dust and spills.
* Protective covering: To protect your work surface.
Preparing Your Base
This step is crucial for ensuring a professional-looking finish. A little prep work goes a long way!
1. Clean the Base: Start by thoroughly cleaning your chosen base with a damp cloth to remove any dust, dirt, or grease. Let it dry completely.
2. Sand (if necessary): If your base has a rough surface or any imperfections, lightly sand it down with fine-grit sandpaper. This will create a smoother surface for painting or staining. Remember to wipe away any sanding dust with a clean cloth.
3. Prime (if necessary): If you’re painting a dark surface a light color, apply a coat of primer to prevent the dark color from bleeding through. Let the primer dry completely according to the manufacturer’s instructions.
Painting or Staining Your Base
Now for the fun part – adding color and personality to your vanity tray!
1. Apply the First Coat: Using your chosen paintbrush or foam roller, apply a thin, even coat of paint or stain to the entire surface of the base. Work in long, smooth strokes, avoiding drips and pooling.
2. Let it Dry: Allow the first coat to dry completely according to the paint or stain manufacturer’s instructions. This is important to prevent the second coat from lifting the first.
3. Apply the Second Coat (if needed): Once the first coat is dry, inspect the surface. If you can still see the original color or grain of the base, apply a second thin coat of paint or stain. Again, let it dry completely. You might even need a third coat for full coverage, depending on the paint and base material.
4. Distress (optional): If you want to give your vanity tray a vintage or distressed look, you can lightly sand the edges and corners after the paint is dry. This will reveal the underlying material and create a worn effect.
Sealing Your Tray (Optional but Recommended)
Sealing your tray will protect the painted or stained surface from scratches, spills, and moisture. This is especially important if you plan to use your tray in a bathroom.
1. Apply the Sealer: Using a clean paintbrush or foam roller, apply a thin, even coat of clear acrylic sealer to the entire painted or stained surface.
2. Let it Dry: Allow the sealer to dry completely according to the manufacturer’s instructions. You may need to apply two coats for maximum protection, allowing each coat to dry completely before applying the next.
Attaching the Handles or Knobs
This is where your vanity tray really starts to come to life!
1. Measure and Mark: Use a measuring tape or ruler to determine the desired placement of your handles or knobs. Mark the locations with a pencil. Make sure the handles are evenly spaced and aligned. I usually place mine about 2-3 inches from each end of the tray.
2. Drill Holes (if necessary): If your handles require screws and your base isn’t pre-drilled, use a drill to create pilot holes at the marked locations. Be careful not to drill all the way through the base. Choose a drill bit that is slightly smaller than the diameter of the screws.
3. Attach the Handles or Knobs: Apply a small amount of strong adhesive to the back of each handle or knob. If using screws, insert them through the handles and into the pilot holes. Tighten the screws with a screwdriver until the handles are securely attached. If using adhesive, press the handles firmly onto the base and hold them in place for a few minutes until the adhesive sets.
4. Let the Adhesive Cure: Allow the adhesive to cure completely according to the manufacturer’s instructions. This may take several hours or even overnight.
Adding Felt Pads (Optional)
Adding felt pads to the bottom of your vanity tray will protect your furniture from scratches and prevent the tray from sliding around.
1. Attach the Felt Pads: Peel off the backing from the felt pads and stick them to the four corners of the bottom of the tray. Make sure the pads are securely attached.
Finishing Touches
Now that your vanity tray is complete, it’s time to add the finishing touches and style it to your liking!
1. Clean Up: Wipe down the entire tray with a clean cloth to remove any dust or fingerprints.
2. Arrange Your Items: Arrange your makeup, perfumes, jewelry, or other items on the tray in an aesthetically pleasing way. Consider using small containers or organizers to keep things tidy.
3. Enjoy Your Creation: Step back and admire your beautiful new vanity tray! Place it on your bathroom counter, dresser, or anywhere else you want to add a touch of elegance and organization.
Tips and Tricks for a Perfect Vanity Tray
Here are a few extra tips and tricks to help you create the perfect vanity tray:
* Choose the Right Base: Consider the size and shape of your vanity tray based on the items you plan to store on it. A larger tray is great for holding a variety of items, while a smaller tray is perfect for displaying a few select pieces.
* Experiment with Colors and Finishes: Don’t be afraid to experiment with different colors and finishes to create a vanity tray that reflects your personal style. You can use metallic paints, glitter, or even decoupage to add a unique touch.
* Add Decorative Accents: Consider adding decorative accents to your vanity tray, such as ribbons, beads, or charms. These small details can make a big difference in the overall look and feel of your tray.
* Repurpose Old Items: Get creative and repurpose old items to create your vanity tray. An old picture frame, serving platter, or even a drawer can be transformed into a beautiful and functional vanity tray.
* Personalize It: Add a personal touch to your vanity tray by adding your initials, a favorite quote, or a meaningful symbol. This will make your tray even more special and unique.
* Consider the Weight: When choosing your base and handles, consider the weight of the items you plan to store on the tray. Make sure the base is sturdy enough to support the weight and the handles are strong enough to carry it.
* Protect Delicate Items: If you plan to store delicate items on your vanity tray, such as jewelry or perfume bottles, consider lining the tray with a soft material, such as velvet or felt. This will help protect your items from scratches and damage.
* Clean Regularly: To keep your vanity tray looking its best, clean it regularly with a damp cloth. Avoid using harsh chemicals or abrasive cleaners, as these can damage the painted or stained surface.
Alternative Ideas for Your DIY Vanity Tray
The possibilities are endless when it comes to creating your own DIY vanity tray! Here are a few alternative ideas to inspire you:
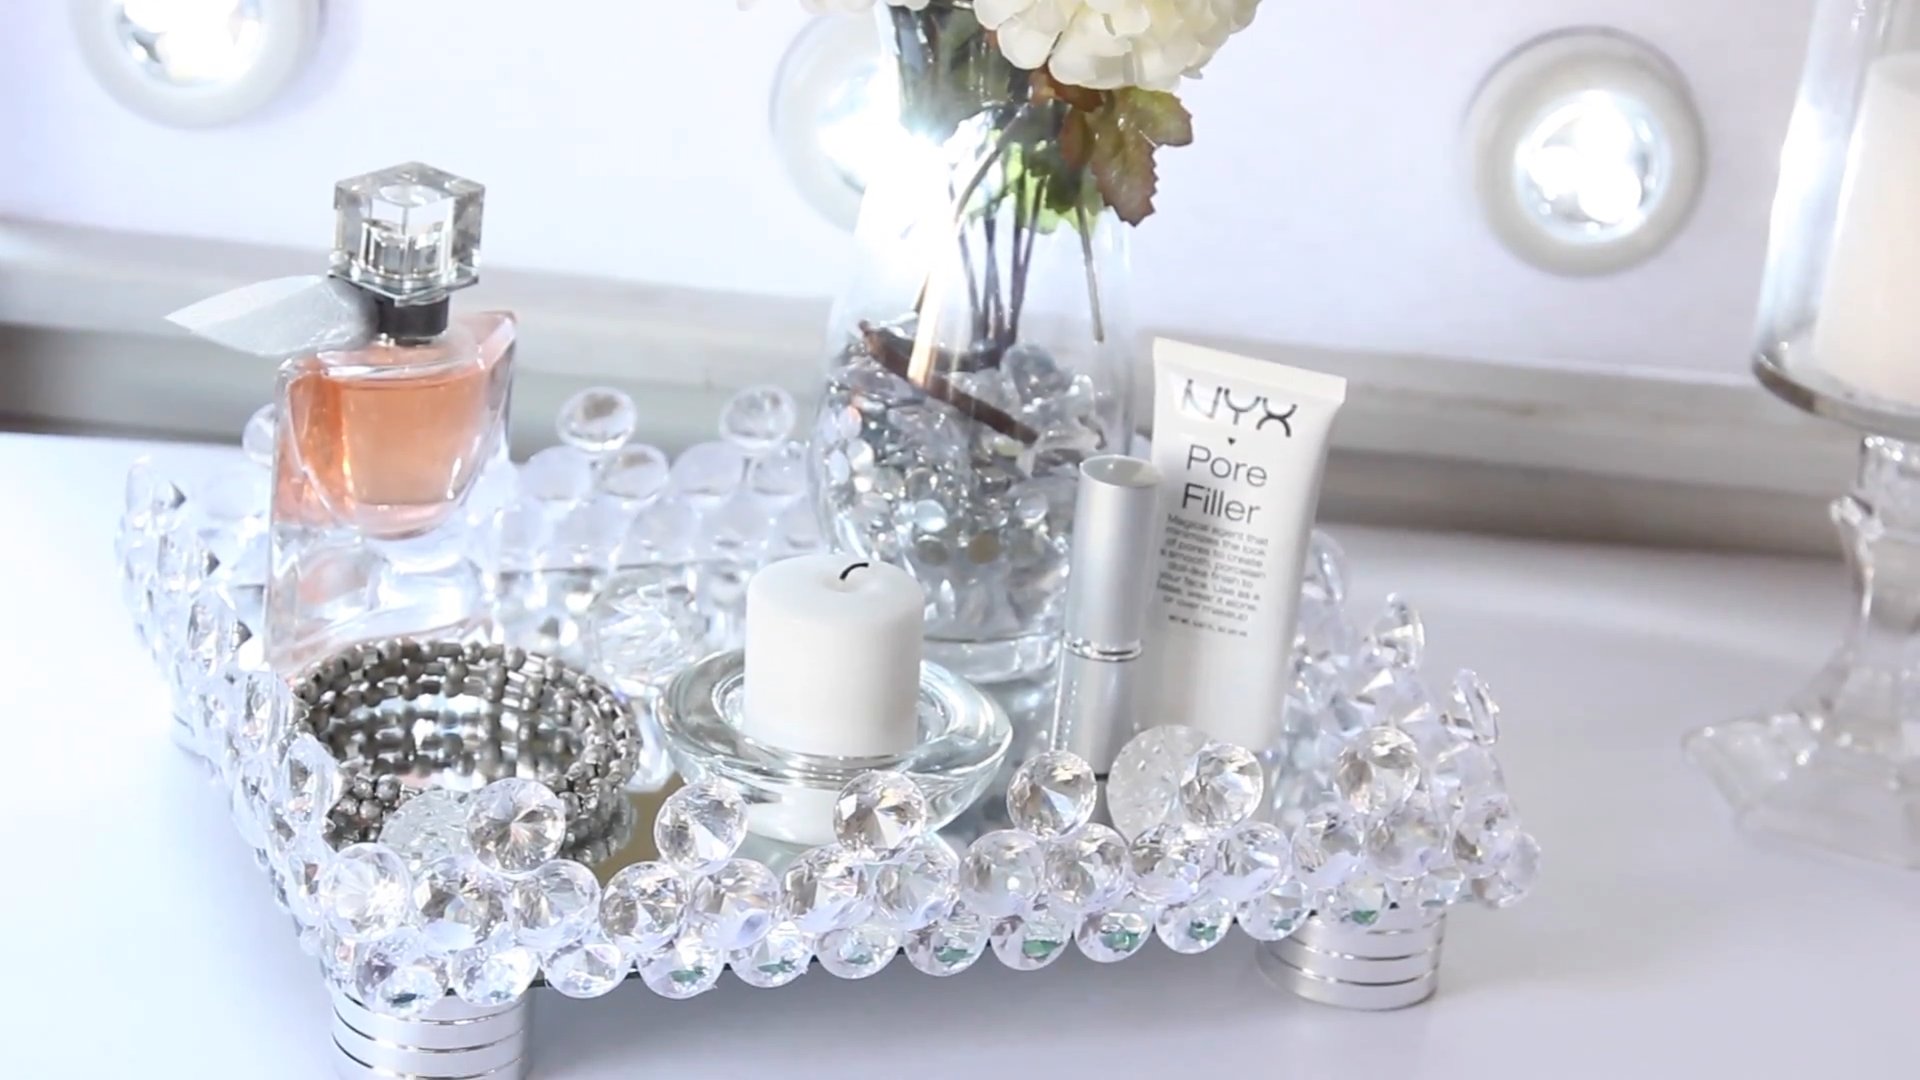
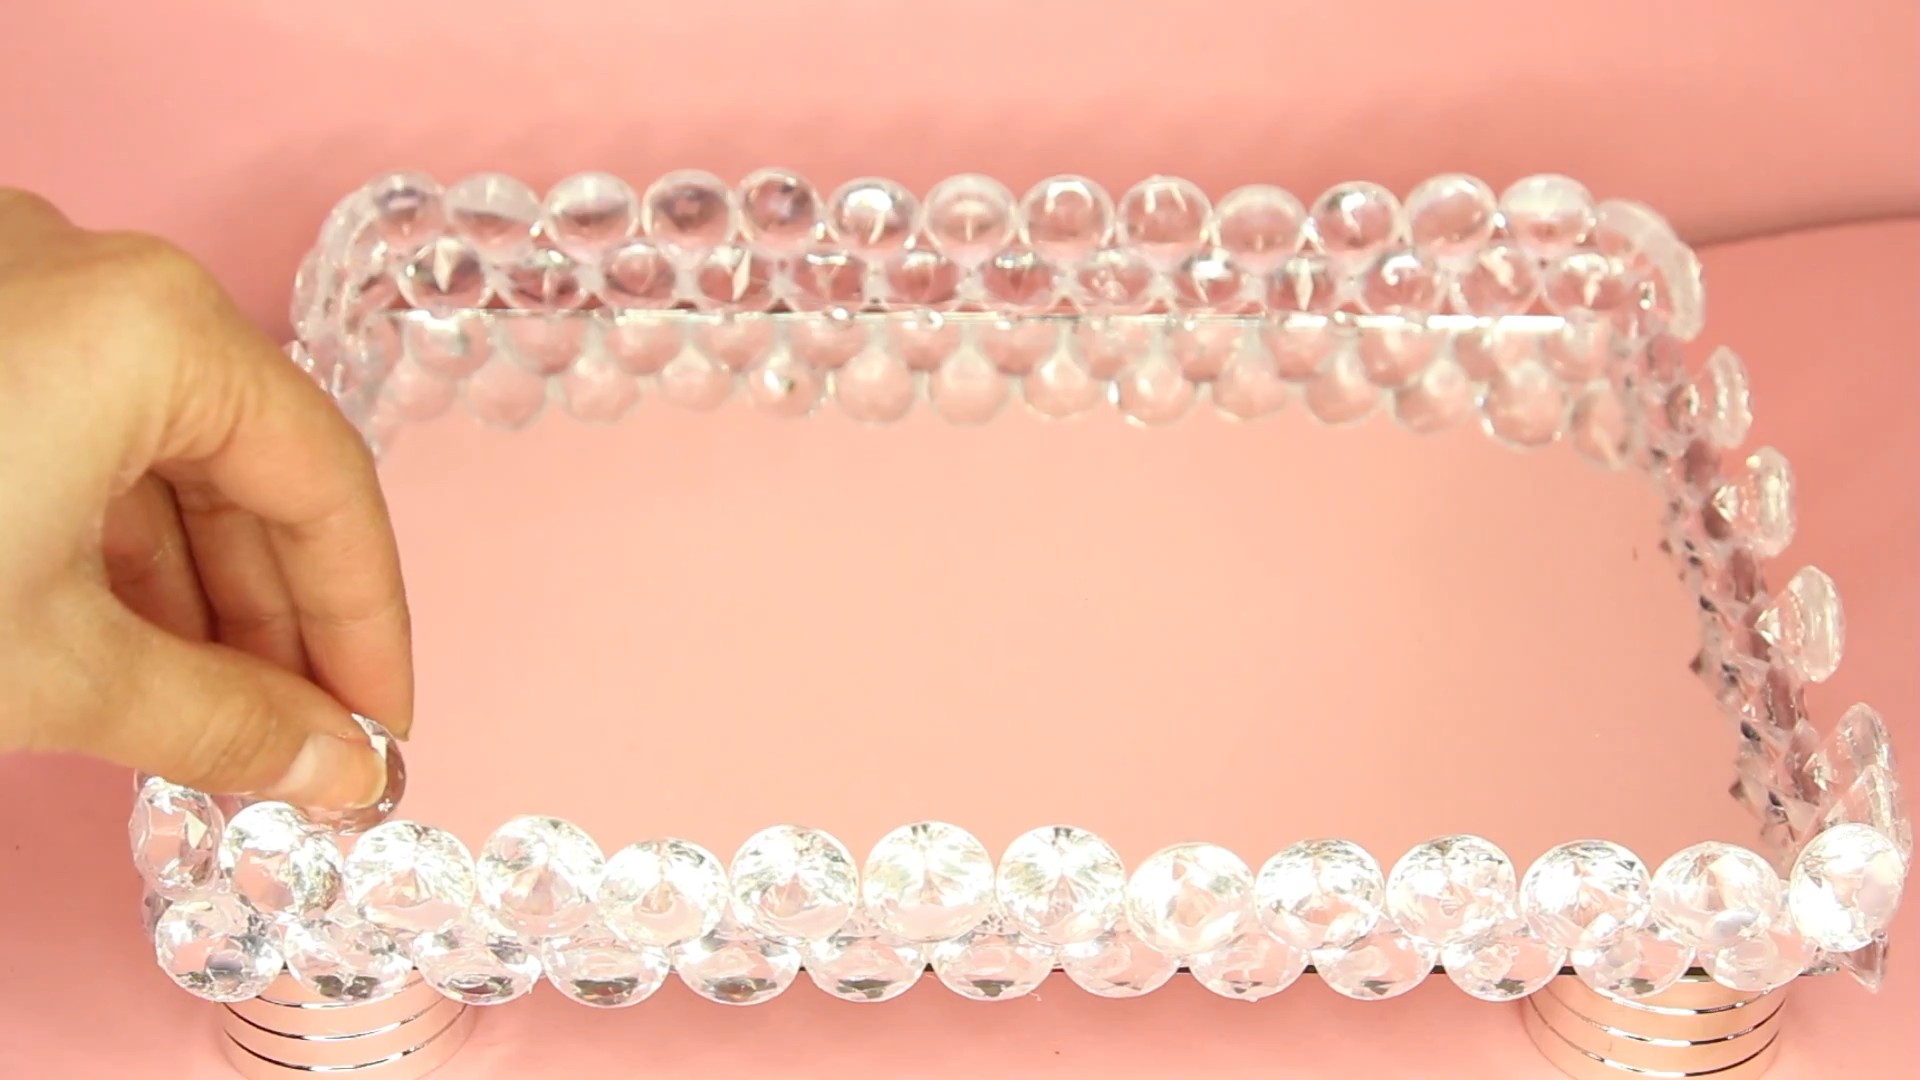
* Mirror Tray: Use a mirror as the base for your vanity tray. This will add a touch of glamour and reflect light, making your space feel brighter.
*
Conclusion
So, there you have it! Transforming an ordinary item into a stunning, personalized DIY vanity tray is not only incredibly rewarding but also surprisingly simple. We’ve walked you through the steps, highlighting the ease and affordability of this project. But why is this DIY trick a must-try?
Firstly, it’s a fantastic way to inject your personality into your space. Forget generic store-bought trays; this is your chance to create something truly unique that reflects your style and complements your existing décor. Whether you’re drawn to minimalist chic, bohemian flair, or vintage glamour, the possibilities are endless.
Secondly, it’s a budget-friendly alternative to expensive designer trays. By repurposing materials you might already have or sourcing inexpensive items from thrift stores or craft shops, you can achieve a high-end look without breaking the bank. Think of the satisfaction of knowing you created something beautiful and functional for a fraction of the cost!
Thirdly, it’s a mindful and creative activity. In our increasingly digital world, taking the time to engage in a hands-on project can be incredibly therapeutic. It allows you to disconnect from screens, focus on the present moment, and unleash your inner artist.
But the fun doesn’t stop there! Consider these variations to further personalize your DIY vanity tray:
* Mirror, Mirror: Add a mirrored base for a touch of glamour and to reflect light beautifully.
* Decoupage Delight: Use decoupage techniques to apply patterned paper, fabric scraps, or even vintage maps to the tray’s surface.
* Resin River: For a more advanced project, incorporate resin to create a stunning “river” effect with embedded stones, glitter, or dried flowers.
* Seasonal Sparkle: Decorate your tray with seasonal embellishments like miniature pumpkins for fall or shimmering ornaments for the holidays.
* Personalized Initials: Add your initials or a meaningful quote using stencils and paint for a truly bespoke touch.
* Jeweled Edges: Glue rhinestones, pearls, or other decorative gems around the edges of the tray for added sparkle and sophistication.
* Painted Patterns: Use stencils or freehand painting to create intricate patterns on the tray’s surface. Consider geometric designs, floral motifs, or abstract art.
* Fabric Lining: Line the bottom of the tray with a soft fabric like velvet or felt to protect delicate items and add a touch of luxury.
* Upcycled Handles: Attach vintage drawer pulls or cabinet knobs to the sides of the tray to create handles for easy carrying.
* Themed Trays: Create themed trays based on your hobbies or interests. For example, a makeup-themed tray with compartments for brushes and palettes, or a jewelry-themed tray with hooks for necklaces and earrings.
We are confident that you’ll find this DIY project both enjoyable and rewarding. So, gather your supplies, unleash your creativity, and get ready to create a stunning DIY vanity tray that will elevate your space and showcase your unique style.
We can’t wait to see what you create! Don’t forget to share your finished DIY vanity tray creations with us on social media using [Your Hashtag]. We’re eager to be inspired by your ingenuity and creativity. Happy crafting!
Frequently Asked Questions (FAQ)
What materials do I need to make a DIY vanity tray?
The beauty of this project is its versatility! You can use a wide range of materials depending on the look you’re going for. A basic list includes a tray (this could be an old serving tray, a wooden plaque, or even a repurposed picture frame), paint or stain, sealant, decorative elements (like beads, stones, or fabric), and glue. Specific materials will depend on the variations you choose. For example, if you’re adding a mirror, you’ll need a mirror cut to size and appropriate adhesive. If you’re using resin, you’ll need resin, hardener, and any desired inclusions.
What kind of tray should I use as a base?
Almost anything can be used as a base. Wooden trays are great for painting or staining. Metal trays offer a more industrial look. Plastic trays are lightweight and easy to clean. Even a sturdy cardboard box can be transformed with some creativity. Consider the size and shape you need, as well as the overall aesthetic you’re aiming for. Thrift stores and dollar stores are excellent places to find inexpensive tray options.
What kind of paint is best for a DIY vanity tray?
The best type of paint depends on the material of your tray. For wood, acrylic paint, chalk paint, or latex paint are all good choices. For metal, use a paint specifically designed for metal surfaces to prevent rust. For plastic, use a paint that adheres well to plastic. Always prime the surface before painting to ensure better adhesion and a more even finish. Consider using a sealant after painting to protect the finish and make the tray more durable.
How do I seal my DIY vanity tray?
Sealing your tray is crucial for protecting the paint and decorative elements from moisture and wear. A clear acrylic sealant is a good option for most materials. You can choose between a spray-on sealant or a brush-on sealant. Apply several thin coats, allowing each coat to dry completely before applying the next. Make sure to seal all surfaces, including the edges and bottom of the tray.
How do I attach embellishments to my DIY vanity tray?
The best adhesive for attaching embellishments depends on the type of embellishment and the material of the tray. For small beads, rhinestones, or gems, craft glue or super glue can be used. For larger items, such as stones or fabric, a stronger adhesive like epoxy or construction adhesive may be necessary. Always follow the manufacturer’s instructions for the adhesive you choose.
How do I clean my DIY vanity tray?
The cleaning method will depend on the materials used to create your tray. In general, avoid using harsh chemicals or abrasive cleaners. A damp cloth with mild soap is usually sufficient for cleaning most surfaces. For trays with delicate embellishments, use a soft brush to gently remove dust and debris. If you’ve used a sealant, it will make the tray more resistant to staining and easier to clean.
Can I use this DIY vanity tray for food?
It depends on the materials you’ve used. If you’ve used food-safe paint and sealant, and the base tray is also food-safe, then yes, you can use it for food. However, if you’re unsure about the safety of the materials, it’s best to use the tray for decorative purposes only.
How long does it take to make a DIY vanity tray?
The time it takes to make a DIY vanity tray will vary depending on the complexity of the design and the materials you use. A simple tray can be completed in a few hours, while a more elaborate tray may take several days. Be sure to factor in drying time for paint, glue, and sealant.
What if I make a mistake?
Don’t worry, mistakes happen! If you make a mistake with the paint, you can usually sand it down and repaint. If you accidentally glue something in the wrong place, try using a solvent to dissolve the glue. The key is to be patient and persistent. Remember, this is a DIY project, so don’t be afraid to experiment and learn from your mistakes.
Where can I find inspiration for my DIY vanity tray?
The internet is a treasure trove of inspiration! Browse Pinterest, Instagram, and other social media platforms for ideas. Look at images of designer vanity trays for inspiration, and then adapt those ideas to your own style and budget. Don’t be afraid to get creative and come up with your own unique designs.


Leave a Comment