

DIY wood stain removal can feel like a daunting task, especially when your favorite piece of furniture falls victim to an unsightly mark. But fear not, fellow home enthusiasts! I’m here to guide you through the process with some simple, effective, and budget-friendly DIY tricks.
Wood staining, a practice dating back centuries, has been used to enhance and protect wood surfaces. From the elaborate inlays of ancient Egyptian furniture to the rustic charm of colonial American homes, wood finishing has always been a vital part of craftsmanship. However, accidents happen, and sometimes those beautiful finishes get marred by unwanted stains.
Let’s face it, spills and mishaps are a part of life. Whether it’s a coffee ring on your antique table or a rogue ink blot on your wooden desk, stains can diminish the beauty and value of your cherished wooden items. Instead of resorting to expensive professional services or harsh chemicals, I’m going to show you how to tackle these blemishes yourself. These DIY wood stain removal hacks will save you money, time, and the potential headache of dealing with complicated solutions. Plus, you’ll gain the satisfaction of restoring your furniture to its former glory with your own two hands!
DIY Wood Stain Removal: A Comprehensive Guide
Okay, so you’ve got a stain on your beautiful wood furniture or flooring. Don’t panic! I’ve been there, done that, and I’m here to tell you that most stains can be tackled with a little elbow grease and the right techniques. This guide will walk you through several methods, starting with the gentlest and moving to more aggressive options if needed. Remember to always test in an inconspicuous area first!
Identifying the Stain
Before we dive in, it’s helpful to know what kind of stain you’re dealing with. This will influence the best approach.
* Water-based stains: These are usually caused by spills like juice, coffee, tea, or water rings. They often appear as light or dark marks.
* Oil-based stains: Think grease, oil, or food stains. These tend to be darker and more stubborn.
* Ink stains: These can be tricky, especially if the ink has soaked deep into the wood.
* Heat stains: These are often white or cloudy marks caused by hot dishes or appliances.
* Pet stains: These require special attention due to their organic nature and potential for odor.
Method 1: The Gentle Approach – Soap and Water
This is always my first go-to. It’s the least likely to damage the wood finish.
1. Gather your supplies: You’ll need warm water, a mild dish soap (like Dawn), a soft cloth, and a clean, dry cloth.
2. Mix your solution: In a bowl, mix a few drops of dish soap with warm water. Don’t overdo it with the soap; you just want a slightly sudsy solution.
3. Dampen the cloth: Dip the soft cloth into the soapy water and wring it out thoroughly. You want the cloth to be damp, not soaking wet.
4. Gently blot the stain: Blot the stain with the damp cloth, working from the outside in. Avoid rubbing, as this can spread the stain.
5. Rinse with a clean, damp cloth: Once you’ve blotted the stain, use a clean, damp cloth to rinse the area. Again, wring out the cloth well to avoid over-wetting the wood.
6. Dry thoroughly: Use a clean, dry cloth to dry the area completely.
7. Evaluate: If the stain is still visible, move on to the next method.
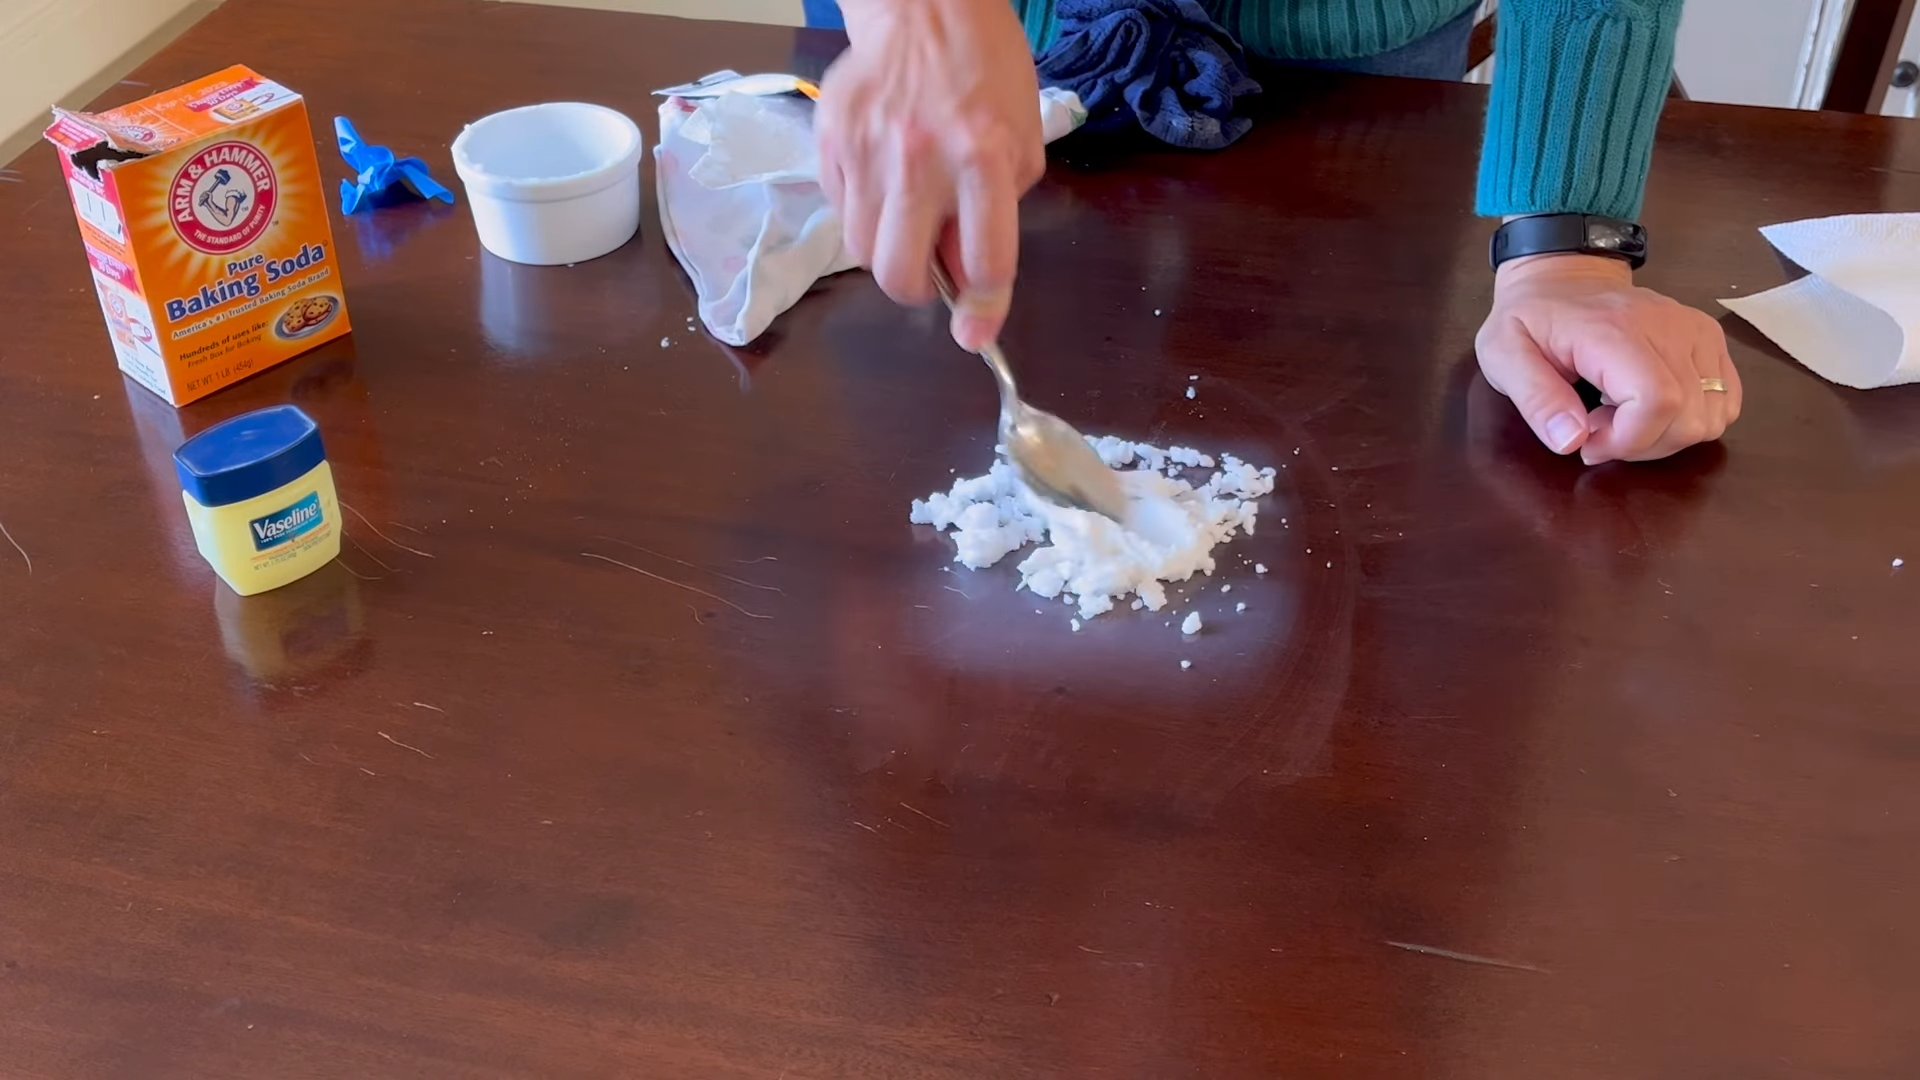
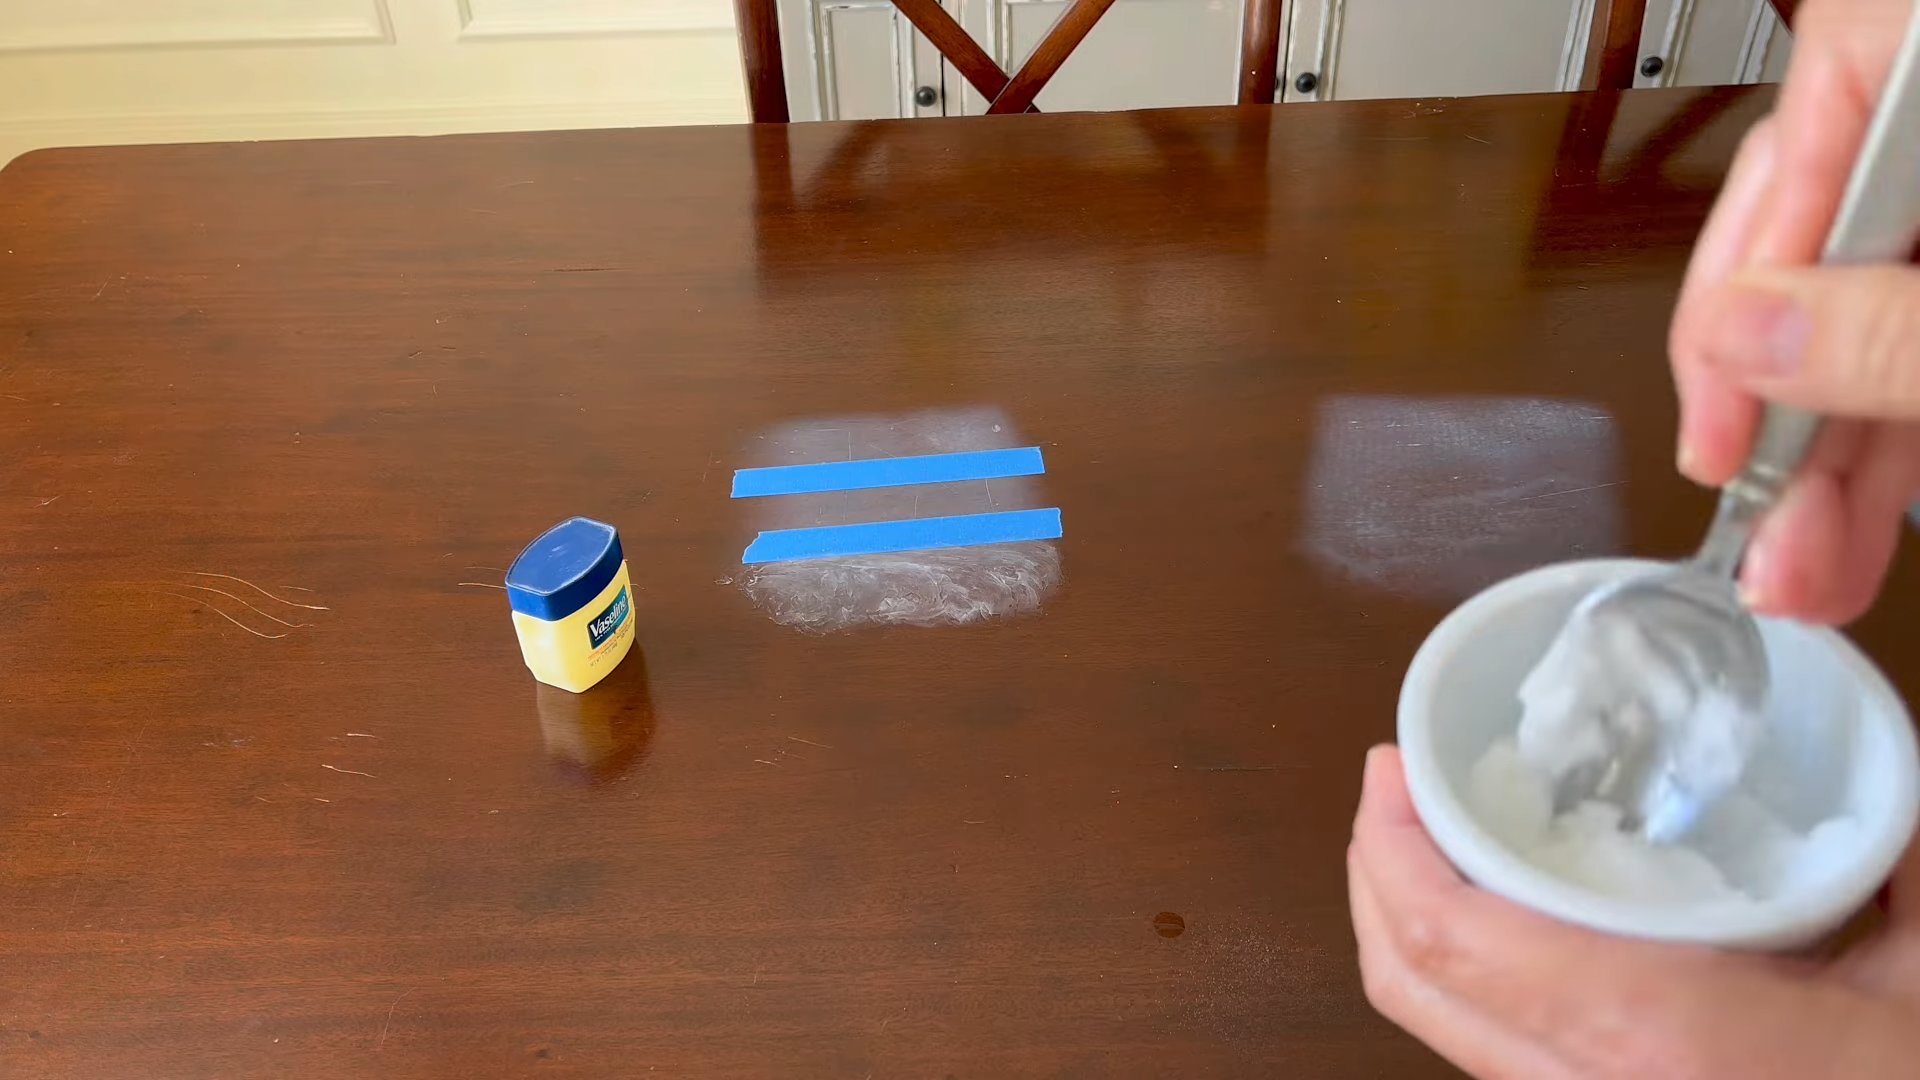
Method 2: Baking Soda Paste
Baking soda is a mild abrasive that can help lift stains without being too harsh.
1. Gather your supplies: You’ll need baking soda, water, a small bowl, a soft cloth, and a clean, dry cloth.
2. Make a paste: In the bowl, mix baking soda with a small amount of water to form a thick paste. The consistency should be similar to toothpaste.
3. Apply the paste: Apply the baking soda paste to the stain, covering it completely.
4. Let it sit: Allow the paste to sit on the stain for 15-30 minutes. This gives the baking soda time to absorb the stain.
5. Gently rub: Using a soft cloth, gently rub the paste in a circular motion. Be careful not to apply too much pressure, as you don’t want to scratch the wood.
6. Wipe away the paste: Wipe away the paste with a clean, damp cloth.
7. Dry thoroughly: Use a clean, dry cloth to dry the area completely.
8. Evaluate: If the stain persists, try the next method.
Method 3: Vinegar Solution
Vinegar is a natural acid that can help break down stains.
1. Gather your supplies: You’ll need white vinegar, water, a spray bottle (optional), a soft cloth, and a clean, dry cloth.
2. Mix your solution: In a spray bottle or bowl, mix equal parts white vinegar and water.
3. Apply the solution: You can either spray the solution directly onto the stain or dampen a cloth with the solution and blot the stain.
4. Let it sit: Allow the solution to sit on the stain for 5-10 minutes.
5. Wipe away the solution: Wipe away the solution with a clean, damp cloth.
6. Dry thoroughly: Use a clean, dry cloth to dry the area completely.
7. Evaluate: If the stain remains, proceed to the next method.
Method 4: Hydrogen Peroxide
Hydrogen peroxide is a mild bleaching agent that can be effective on stubborn stains, especially water-based ones. Use with caution, as it can lighten the wood. Always test in an inconspicuous area first!
1. Gather your supplies: You’ll need 3% hydrogen peroxide (the kind you find at the drugstore), a cotton ball or soft cloth, and a clean, dry cloth.
2. Apply the hydrogen peroxide: Dip a cotton ball or soft cloth into the hydrogen peroxide and gently blot the stain.
3. Let it sit: Allow the hydrogen peroxide to sit on the stain for 1-2 hours. You may need to reapply it periodically to keep the area moist.
4. Wipe away the hydrogen peroxide: Wipe away the hydrogen peroxide with a clean, damp cloth.
5. Dry thoroughly: Use a clean, dry cloth to dry the area completely.
6. Evaluate: If the stain is still visible, you may need to repeat the process or try a different method. If the wood has lightened too much, you may need to apply a wood stain to match the surrounding area.
Method 5: Ironing Out Heat Stains
This method works specifically for those annoying white heat rings.
1. Gather your supplies: You’ll need an iron (set to low heat, no steam), a clean, dry cotton cloth (like a t-shirt), and water (optional).
2. Prepare the area: Make sure the surface is clean and dry.
3. Place the cloth: Place the clean, dry cotton cloth over the heat stain.
4. Iron the cloth: Gently iron the cloth over the stain in a circular motion. Check the cloth frequently to see if the stain is transferring to the cloth.
5. Repeat as needed: Repeat the process until the stain disappears. If the cloth becomes too dry, you can lightly dampen it with water.
6. Dry thoroughly: Use a clean, dry cloth to dry the area completely.
Method 6: Mayonnaise (Yes, Really!) for Water Rings
This sounds crazy, but the oil in mayonnaise can help displace the moisture trapped in the wood that causes water rings.
1. Gather your supplies: You’ll need mayonnaise (full-fat works best), a soft cloth, and a clean, dry cloth.
2. Apply the mayonnaise: Apply a thick layer of mayonnaise to the water ring.
3. Let it sit: Allow the mayonnaise to sit on the stain for several hours, or even overnight.
4. Wipe away the mayonnaise: Wipe away the mayonnaise with a soft cloth.
5. Polish the area: Polish the area with a clean, dry cloth to restore the shine.
Method 7: Mineral Spirits
Mineral spirits are a stronger solvent that can be effective on oil-based stains. Use with caution and in a well-ventilated area. Wear gloves.
1. Gather your supplies: You’ll need mineral spirits, a soft cloth, a clean, dry cloth, and gloves.
2. Apply the mineral spirits: Dampen a soft cloth with mineral spirits and gently blot the stain.
3. Let it sit: Allow the mineral spirits to sit on the stain for a few minutes.
4. Wipe away the mineral spirits: Wipe away the mineral spirits with a clean, damp cloth.
5. Dry thoroughly: Use a clean, dry cloth to dry the area completely.
6. Evaluate: If the stain persists, you may need to repeat the process or try a different method.
Method 8: Oxalic Acid (Wood Bleach)
Oxalic acid is a powerful bleaching agent that can be used to remove stubborn stains, especially dark water stains or ink stains. This is a last resort and should only be used if other methods have failed. Use with extreme caution and follow all safety precautions. Wear gloves, eye protection, and a respirator. Work in a well-ventilated area.
1. Gather your supplies: You’ll need oxalic acid crystals, hot water, a plastic container, a plastic spoon, gloves, eye protection, a respirator, a soft cloth, and a clean, dry cloth.
2. Prepare the solution: In the plastic container, dissolve the
Conclusion
So, there you have it! Mastering DIY wood stain removal is not only achievable but also incredibly rewarding. We’ve explored a range of effective methods, from the gentle power of baking soda paste to the targeted action of hydrogen peroxide, empowering you to tackle those unsightly stains with confidence and reclaim the beauty of your wooden surfaces.
Why is this a must-try? Because it saves you money, reduces your reliance on harsh chemicals, and gives you a sense of accomplishment. Instead of rushing out to buy expensive, potentially toxic stain removers, you can utilize common household ingredients to achieve professional-level results. Plus, you’re in control of the process, ensuring the safety of your wood and the environment.
But the journey doesn’t end here! Feel free to experiment with variations to suit your specific needs. For instance, if you’re dealing with a particularly stubborn stain on a delicate antique, consider diluting the hydrogen peroxide further or using a gentler abrasive like toothpaste. You could also try combining methods – perhaps starting with baking soda paste to lift the stain and then following up with a hydrogen peroxide treatment for any remaining discoloration. Remember to always test any solution on an inconspicuous area first to ensure it doesn’t damage the wood’s finish.
Another variation to consider is the type of wood you’re working with. Hardwoods like oak and maple are generally more resistant to staining and can withstand more aggressive cleaning methods. Softwoods like pine and cedar, on the other hand, are more porous and require a gentler approach. Adjust your technique and cleaning solutions accordingly. For instance, on softwood, you might want to use a less concentrated baking soda paste or a shorter dwell time for the hydrogen peroxide.
Don’t be afraid to get creative and adapt these techniques to your unique situation. The key is to be patient, persistent, and observant. Watch how the stain responds to each treatment and adjust your approach as needed.
We wholeheartedly encourage you to try these DIY wood stain removal techniques. Not only will you save money and protect your wood, but you’ll also gain a valuable skill that will serve you well for years to come.
And most importantly, we want to hear about your experiences! Did you find one method more effective than another? Did you discover a clever variation that worked wonders? Share your tips, tricks, and before-and-after photos in the comments below. Let’s build a community of DIY stain removal experts and help each other keep our wooden surfaces looking their best. Your insights could be invaluable to someone else struggling with a stubborn stain. So, go ahead, give it a try, and let us know how it goes! We’re excited to see your success stories.
Frequently Asked Questions (FAQ)
What types of stains can these DIY methods remove?
These DIY methods are effective for removing a wide range of common wood stains, including water rings, coffee stains, ink marks, crayon marks, food spills, and even some types of mildew. However, the success rate depends on the type of stain, how long it has been present, and the type of wood. Older, more deeply ingrained stains may require multiple treatments or a combination of methods. For particularly stubborn stains like permanent marker or certain types of paint, you might need to consider more specialized stain removers or professional help.
Will these methods damage the finish on my wood furniture?
It’s possible, which is why testing in an inconspicuous area is crucial. Harsh chemicals and abrasive scrubbing can damage or remove the finish. The methods described here are generally gentler than commercial stain removers, but it’s still important to proceed with caution. Always start with the mildest method and gradually increase the intensity if necessary. If you notice any damage to the finish, stop immediately and consider consulting a professional furniture restorer. Applying a furniture polish or wax after stain removal can help restore the finish and protect the wood.
How long should I leave the baking soda paste or hydrogen peroxide on the stain?
The dwell time depends on the severity of the stain and the type of wood. For baking soda paste, start with 30 minutes to an hour. For hydrogen peroxide, begin with 15-30 minutes. Check the stain periodically and reapply if needed. Avoid leaving the solutions on for extended periods, as this could potentially damage the wood. If the stain persists after the initial treatment, repeat the process several times, allowing the wood to dry completely between applications.
Can I use these methods on all types of wood?
While these methods are generally safe for most types of wood, it’s essential to consider the wood’s porosity and finish. As mentioned earlier, softwoods like pine and cedar are more porous and require a gentler approach than hardwoods like oak and maple. Always test any solution on an inconspicuous area first to ensure it doesn’t damage the wood. If you’re unsure about the type of wood you’re dealing with, consult a professional furniture restorer or woodworker.
What if the stain is still visible after trying these methods?
If the stain persists after multiple attempts, it may be deeply ingrained or require a more specialized treatment. You could try using a commercial wood stain remover specifically designed for the type of stain you’re dealing with. Alternatively, you could consult a professional furniture restorer who has the expertise and tools to remove stubborn stains without damaging the wood. In some cases, sanding and refinishing the wood may be the only option to completely remove the stain.
Is it necessary to wear gloves and eye protection when using these methods?
While baking soda and hydrogen peroxide are generally considered safe, it’s always a good idea to wear gloves to protect your skin from irritation. Eye protection is also recommended, especially when working with hydrogen peroxide, as it can cause stinging if it gets in your eyes.
How do I prevent future wood stains?
Prevention is always better than cure! Protect your wood furniture with coasters, placemats, and tablecloths. Clean up spills immediately to prevent them from soaking into the wood. Apply a protective finish, such as furniture polish or wax, to create a barrier against stains. Avoid placing hot or wet items directly on wooden surfaces. Regular cleaning and maintenance will also help prevent stains from accumulating.
What is the best way to dry the wood after applying these solutions?
After applying any of these solutions, gently blot the area with a clean, dry cloth to remove any excess moisture. Allow the wood to air dry completely. Avoid using a hairdryer or other heat source, as this could cause the wood to warp or crack. You can also place a fan nearby to help speed up the drying process. Ensure the wood is completely dry before applying any furniture polish or wax.
Can I use these methods on painted wood?
These methods are generally not recommended for painted wood, as they can damage or remove the paint. If you have a stain on painted wood, try gently wiping it with a damp cloth and mild soap. Avoid using abrasive cleaners or scrubbing too hard, as this could scratch the paint. If the stain persists, you may need to repaint the affected area.
Where can I find the ingredients mentioned in this article?
All the ingredients mentioned in this article, such as baking soda, hydrogen peroxide, vinegar, and toothpaste, are readily available at most grocery stores, pharmacies, and home improvement stores. They are also relatively inexpensive, making these DIY wood stain removal methods a cost-effective alternative to commercial stain removers.
Leave a Comment