

Door Squeak Fix: That’s right, we’re tackling that annoying, ear-piercing screech that haunts your home every time someone dares to open or close a door! You know the one – the sound that makes you cringe and sends shivers down your spine? Well, fear not, because I’m here to share some simple, effective, and budget-friendly DIY tricks to silence those squeaky hinges for good.
Believe it or not, the humble door hinge has a long and storied past. From the elaborate ironwork hinges of medieval castles to the simple wooden pivots of ancient dwellings, hinges have been essential for providing access and security for centuries. But even the most well-crafted hinge can fall victim to the dreaded squeak. This isn’t just a modern annoyance; think of all the creaky doors in old movies, adding to the suspense and drama! While dramatic in film, it’s just plain irritating in real life.
Why is a door squeak fix so important? Beyond the obvious auditory assault, a squeaky door can actually be a sign of a bigger problem. It could indicate that the hinges are dry, rusty, or misaligned, which can eventually lead to damage to the door frame or even the door itself. Plus, let’s be honest, a quiet home is a more peaceful home. These DIY solutions will not only eliminate the noise but also help prolong the life of your doors. So, grab your toolbox, and let’s get started on banishing those squeaks for good!
Silence That Squeak: A DIY Guide to Fixing a Noisy Door
Okay, let’s face it: that squeaky door is driving you nuts, right? Every time someone opens or closes it, it’s like nails on a chalkboard. But don’t worry, you don’t need to call a handyman! I’m going to walk you through a few simple DIY methods to silence that squeak for good. Trust me, it’s easier than you think!
What You’ll Need
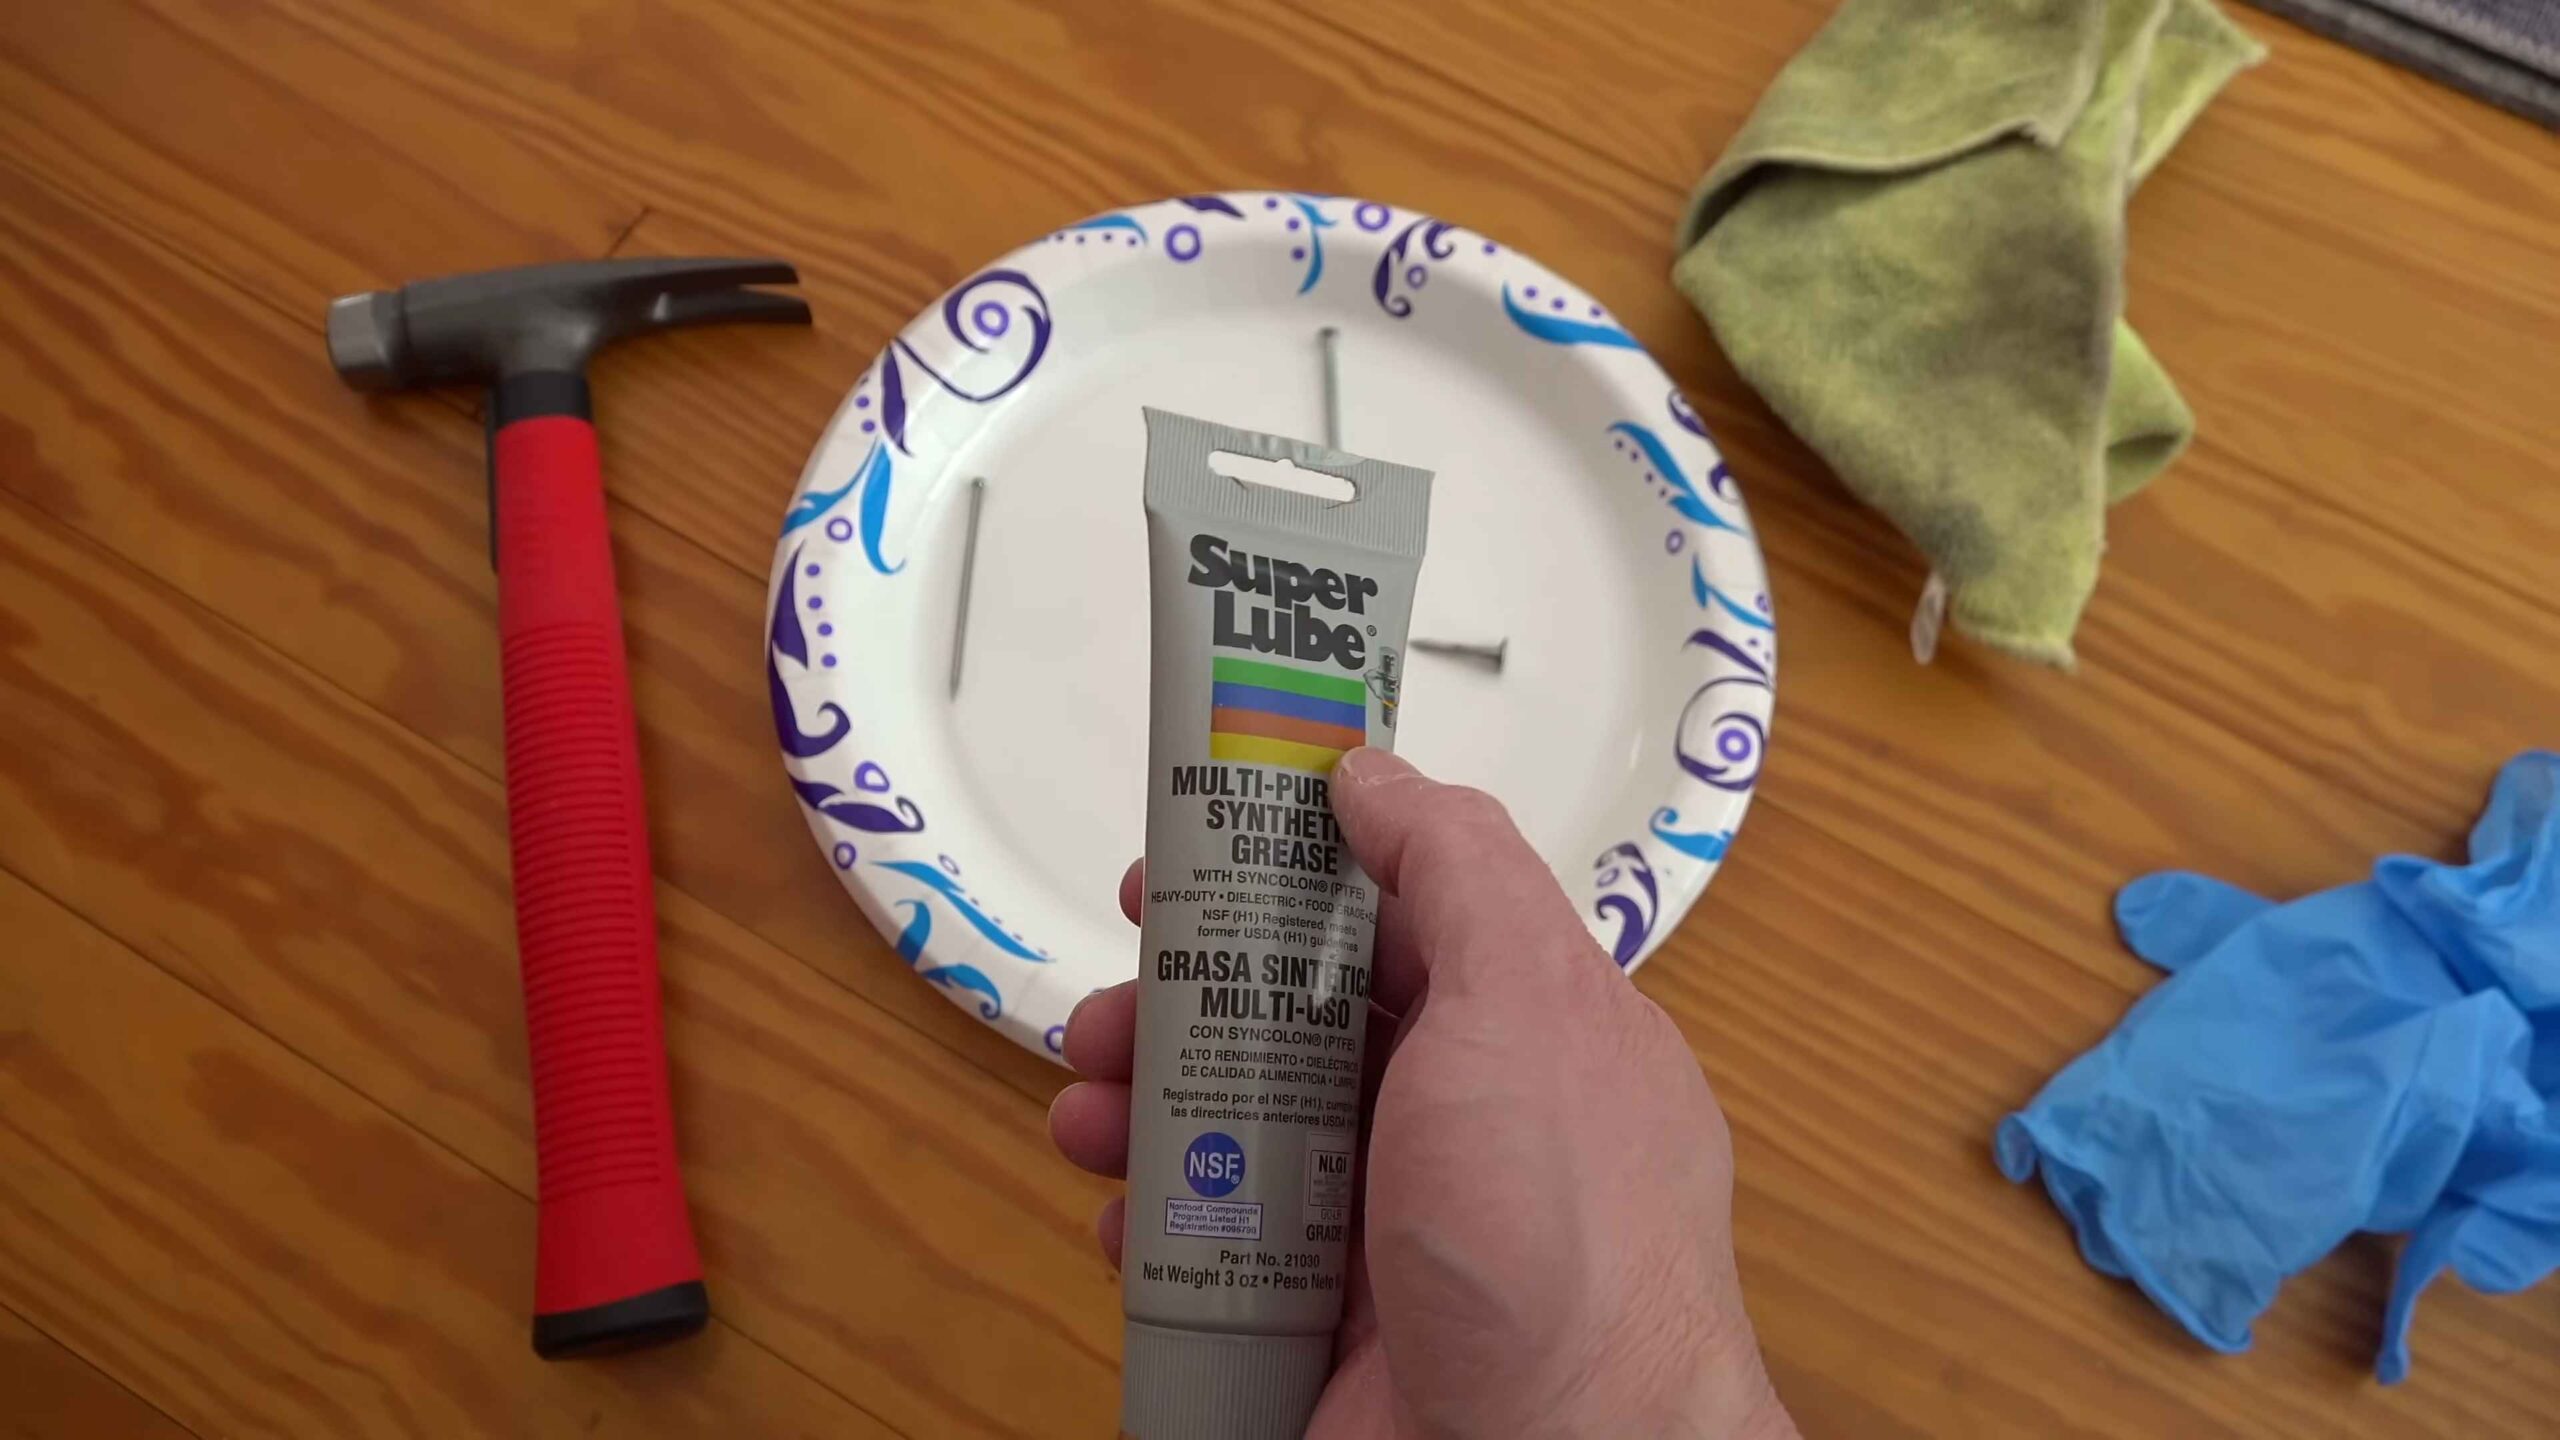
Before we dive in, let’s gather our supplies. The good news is, you probably already have most of these lying around the house. Here’s a checklist:
* Lubricant: This is key! We’ll talk about different options below, but WD-40, silicone spray, white lithium grease, or even household items like petroleum jelly or bar soap can work in a pinch.
* A stool or ladder: Depending on the height of your door hinges. Safety first!
* Hammer and nail (or a hinge pin removal tool): For removing the hinge pins. A nail set is even better if you have one.
* Paper towels or a rag: For wiping up excess lubricant.
* Screwdriver (Phillips or flathead): To tighten loose hinge screws.
* Small brush (optional): For applying lubricant precisely.
* Safety glasses: Protect those peepers!
* Gloves (optional): To keep your hands clean.
Understanding the Squeak
The first step is understanding *why* your door is squeaking. Usually, it’s friction between the metal parts of the hinges. The hinge pin, which holds the two leaves of the hinge together, rubs against the metal of the hinge leaves as the door swings. Over time, the lubricant that was originally there dries up or gets displaced, leading to that annoying squeak. Sometimes, it can also be caused by loose screws or a misaligned door.
Method 1: The Quick Fix – Lubricating the Hinges
This is the easiest and often most effective method. We’re going to apply lubricant directly to the hinges.
1. Identify the Squeaky Hinge(s): Open and close the door slowly and listen carefully to pinpoint exactly which hinge(s) are causing the noise. Sometimes it’s just one, sometimes it’s all of them.
2. Prepare the Area: Place a paper towel or rag underneath the hinge to catch any drips. This will prevent staining your floor or door frame.
3. Apply Lubricant: This is where your choice of lubricant comes in.
* WD-40 or Silicone Spray: These are great for a quick fix. Insert the straw applicator into the nozzle and aim it directly at the top and bottom of the hinge pin where it meets the hinge leaves. Give it a good spray. Open and close the door several times to work the lubricant in.
* White Lithium Grease: This is a thicker lubricant that lasts longer than WD-40. You can spray it on or apply it with a small brush. Again, focus on the areas where the hinge pin meets the hinge leaves.
* Petroleum Jelly or Bar Soap (Emergency Fix): If you don’t have any of the above, you can use a small amount of petroleum jelly or rub a bar of soap directly onto the hinge pin. This is a temporary solution, but it can work in a pinch.
4. Work it In: Open and close the door several times, slowly and deliberately, to distribute the lubricant throughout the hinge.
5. Wipe Away Excess: Use a clean paper towel or rag to wipe away any excess lubricant that drips out. You don’t want it attracting dust and grime.
6. Test and Repeat: Listen carefully to see if the squeak is gone. If not, repeat the process. You might need to apply more lubricant or try a different type.
Method 2: The Deeper Dive – Removing and Lubricating the Hinge Pins
If simply spraying lubricant on the hinges doesn’t do the trick, it’s time to get a little more involved. This method involves removing the hinge pins and lubricating them directly.
Removing the Hinge Pins
1. Position the Door: Open the door slightly so you can easily access the hinges.
2. Prepare for Removal: Place a paper towel or rag underneath the hinge to catch any falling debris.
3. Use a Hammer and Nail (or Hinge Pin Removal Tool): Place the tip of the nail (or the hinge pin removal tool) against the bottom of the hinge pin. Gently tap the nail with the hammer to push the pin upwards. Be careful not to hit the door frame. A nail set will help keep the nail from slipping.
4. Remove the Pin: Once the pin is sticking out far enough, you should be able to grab it with your fingers and pull it out completely. If it’s stuck, try wiggling it gently while pulling.
5. Repeat for Other Hinges: Repeat steps 3 and 4 for each hinge pin you want to remove. I usually do one hinge at a time to avoid the door sagging or becoming misaligned.
6. Important Note: If the hinge pins are really stuck, don’t force them! You could damage the hinges or the door frame. Try spraying some WD-40 or penetrating oil around the pin and let it sit for a few minutes before trying again.
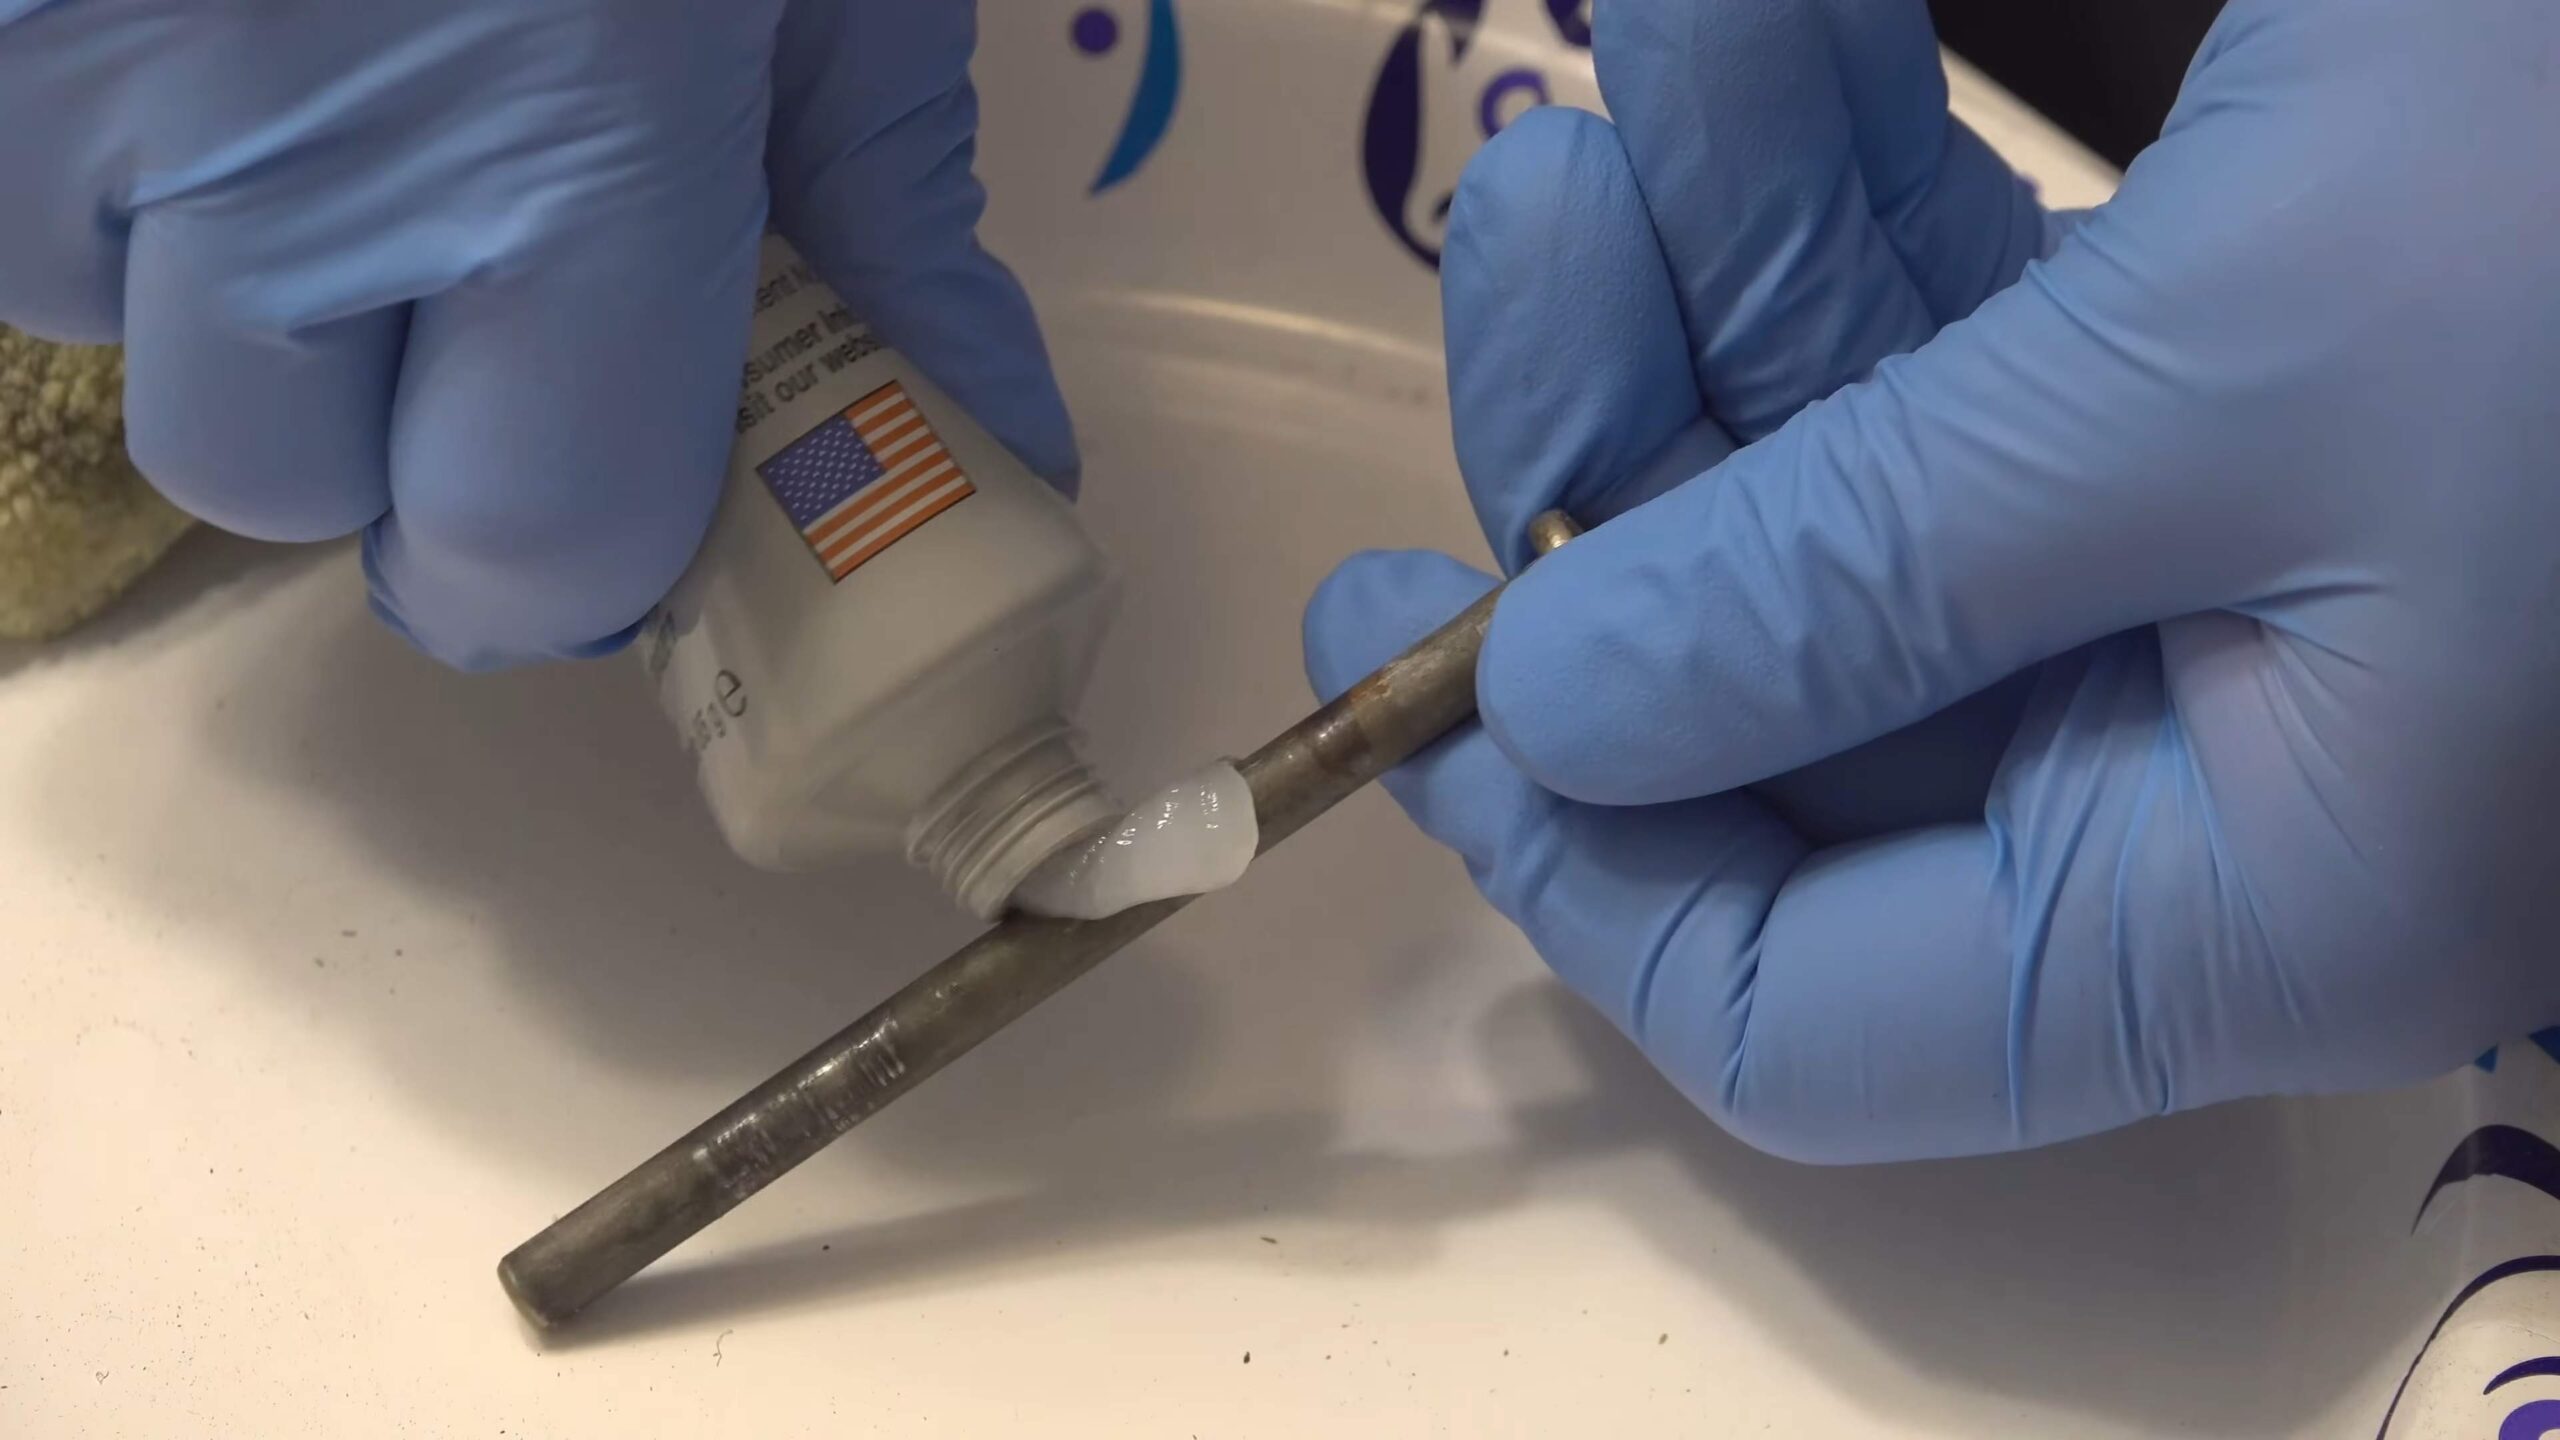
Lubricating the Hinge Pins
1. Clean the Hinge Pins: Use a clean rag to wipe off any dirt, rust, or old lubricant from the hinge pins.
2. Apply Lubricant: Apply a generous amount of lubricant to the entire surface of the hinge pin. White lithium grease is a good choice for this, as it’s thicker and will stay in place longer. You can also use petroleum jelly.
3. Reinsert the Hinge Pins: Carefully reinsert the hinge pins into the hinges. You might need to wiggle the door slightly to align the holes.
4. Tap the Pins into Place: If the pins are difficult to push in, use the hammer and nail (or hinge pin removal tool) to gently tap them into place. Be careful not to damage the pins or the hinges.
5. Test and Repeat: Open and close the door several times to work the lubricant in. Listen carefully to see if the squeak is gone. If not, repeat the process.
Method 3: Tightening Loose Hinge Screws
Sometimes, the squeak isn’t caused by friction in the hinges themselves, but by loose screws that are allowing the door to shift and rub against the frame.
1. Inspect the Hinges: Carefully examine each hinge to see if any of the screws are loose or stripped.
2. Tighten Loose Screws: Use a screwdriver (Phillips or flathead, depending on the type of screws) to tighten any loose screws. Be careful not to overtighten them, as this could strip the screw holes.
3. Replace Stripped Screws: If a screw is stripped and won’t tighten, you’ll need to replace it with a longer screw. This will allow the screw to grip into fresh wood and hold the hinge securely.
4. Consider Toothpicks or Wood Glue: If the screw holes are badly stripped, you can try filling them with toothpicks or wood glue before reinserting the screws. Break off the toothpicks flush with the surface of the hinge, or let the wood glue dry completely before drilling a pilot hole and inserting the screw.
Method 4: Addressing Door Misalignment
If your door is rubbing against the frame, it could be causing a squeak or other noises. This is often due to a misaligned door.
1. Identify the Rubbing Point: Open and close the door slowly and carefully observe where it’s rubbing against the frame.
2. Check the Hinges: Make sure the hinges are securely attached to both the door and the frame. Tighten any loose screws.
3. Shim the Hinges: If the door is sagging on one side, you can try shimming the hinges to realign it. This involves placing thin pieces of cardboard or wood behind the hinge leaves to adjust their position.
* Loosen the Hinge Screws: Loosen the screws on the hinge leaf that you want to shim.
* Insert the Shim: Place a thin piece of cardboard or wood behind the hinge leaf.
* Tighten the Screws: Tighten the screws back down, making sure the shim stays in place.
* Test the Door: Open and close the door to see if the rubbing is gone. If not, you may need to add more shims or adjust their position.
4. Plane the Door: If shimming doesn’t work, you may need to plane down the edge of the door where it’s rubbing. This is a more advanced technique, so if you
Conclusion
So, there you have it! Banishing that annoying door squeak doesn’t require a trip to the hardware store or a call to a handyman. This simple, effective DIY trick, using items you likely already have in your home, is a game-changer for anyone tired of that grating noise. We’ve shown you how to silence those hinges with a method that’s not only cost-effective but also surprisingly satisfying.
Why is this a must-try? Because peace and quiet are priceless. A squeaky door can be more than just an annoyance; it can disrupt your focus, wake sleeping family members, and generally detract from the tranquility of your home. This DIY solution offers a quick, easy, and affordable way to reclaim that peace. Plus, it’s a fantastic feeling to fix something yourself!
Beyond the basic method we’ve outlined, there are a few variations you can explore. For instance, if you’re dealing with a particularly stubborn squeak, you might try using a combination of lubricants. A light spray of WD-40 followed by a dab of petroleum jelly can create a long-lasting solution. Alternatively, if you’re concerned about using petroleum-based products, consider using a natural oil like olive oil or coconut oil. While these might not last as long, they are a more eco-friendly option. Another variation involves using powdered graphite, which is an excellent dry lubricant that won’t attract dust and grime. You can apply it with a small brush or even a cotton swab. Remember to always test any lubricant in an inconspicuous area first to ensure it doesn’t damage the door’s finish.
Don’t just take our word for it, though. We wholeheartedly encourage you to try this door squeak fix yourself. It’s a quick project that yields immediate and noticeable results. Once you’ve experienced the joy of a silent door, you’ll wonder why you didn’t try it sooner.
We’re confident that this DIY trick will work wonders for you. But more than that, we want to hear about your experience! Did you try one of the variations we suggested? Did you discover a different method that worked even better? Share your tips, tricks, and success stories in the comments below. Your insights could help other readers finally conquer their own squeaky door woes. Let’s create a community of DIY enthusiasts who are dedicated to making their homes a little quieter, one hinge at a time. So go ahead, give it a try, and let us know how it goes! We can’t wait to hear from you.
Frequently Asked Questions (FAQ)
Q: What causes a door to squeak in the first place?
A: Door squeaks are typically caused by friction between the moving parts of the hinges. This friction can be due to a lack of lubrication, rust, dirt, or even misaligned hinges. Over time, the constant rubbing of metal against metal creates that irritating squeaking sound. Sometimes, the squeak isn’t the hinges themselves, but the door rubbing against the frame. Identifying the exact source of the squeak is the first step in finding the right solution.
Q: What kind of lubricant should I use for a squeaky door?
A: There are several options for lubricating a squeaky door, each with its own advantages. WD-40 is a popular choice because it’s readily available and effective at penetrating tight spaces. However, it’s a solvent-based lubricant, which means it can evaporate over time and may require reapplication. Petroleum jelly is another good option, as it’s thicker and longer-lasting. However, it can attract dust and grime. For a dry lubricant, powdered graphite is an excellent choice. It won’t attract dirt and provides long-lasting lubrication. Natural oils like olive oil or coconut oil can also be used, but they may not last as long as other options. Ultimately, the best lubricant depends on your personal preference and the severity of the squeak.
Q: How often should I lubricate my door hinges?
A: The frequency of lubrication depends on several factors, including the type of lubricant used, the climate, and how often the door is used. As a general rule, it’s a good idea to lubricate your door hinges every six months to a year. However, if you notice the squeak returning sooner, you may need to lubricate them more frequently. Regularly inspecting your hinges for rust, dirt, or misalignment can also help you determine when lubrication is needed.
Q: What if lubrication doesn’t fix the squeak?
A: If lubrication doesn’t solve the problem, there are a few other things you can try. First, check the hinges for rust or corrosion. If they are heavily rusted, you may need to replace them. Second, make sure the hinges are properly aligned. If they are loose or misaligned, tighten the screws or adjust the hinges as needed. Third, check to see if the door is rubbing against the frame. If it is, you may need to sand down the area where it’s rubbing or adjust the door’s position. Finally, if all else fails, you may need to consult a professional handyman.
Q: Can I use cooking spray to fix a squeaky door?
A: While cooking spray might seem like a convenient option, it’s generally not recommended for lubricating door hinges. Cooking spray is designed for cooking, not for lubricating metal parts. It can attract dust and grime, which can actually make the squeak worse over time. Additionally, some cooking sprays can contain ingredients that can damage the finish of your door. It’s always best to use a lubricant specifically designed for metal parts.
Q: Is it safe to use WD-40 on door hinges?
A: Yes, WD-40 is generally safe to use on door hinges. It’s effective at penetrating tight spaces and loosening rust and corrosion. However, it’s important to note that WD-40 is a solvent-based lubricant, which means it can evaporate over time and may require reapplication. It’s also a good idea to wipe off any excess WD-40 to prevent it from dripping or staining the surrounding area.
Q: My door is still squeaking after I lubricated it. What should I do?
A: If your door is still squeaking after you lubricated it, try these steps:
1. **Apply More Lubricant:** Sometimes, the initial application isn’t enough. Try applying more lubricant, making sure to get it into all the crevices of the hinges.
2. **Work the Door:** Open and close the door several times to help the lubricant penetrate the hinges.
3. **Clean the Hinges:** Use a clean cloth to wipe away any excess lubricant and any dirt or grime that may have accumulated.
4. **Check for Loose Screws:** Tighten any loose screws on the hinges.
5. **Consider a Different Lubricant:** If the lubricant you used didn’t work, try a different type, such as powdered graphite or petroleum jelly.
6. **Inspect the Door Frame:** Make sure the door isn’t rubbing against the frame. If it is, you may need to adjust the door or frame.
7. **Replace the Hinges:** If all else fails, the hinges may be worn out and need to be replaced.
Q: How can I prevent my doors from squeaking in the future?
A: Preventing door squeaks is easier than fixing them! Here are some tips:
* **Regular Lubrication:** Lubricate your door hinges every six months to a year.
* **Clean Hinges:** Regularly clean your hinges to remove dirt and grime.
* **Check for Loose Screws:** Tighten any loose screws on the hinges.
* **Proper Alignment:** Make sure your hinges are properly aligned.
* **Use Quality Hinges:** When replacing hinges, choose high-quality hinges that are designed to last.
* **Avoid Slamming Doors:** Slamming doors can damage the hinges and cause them to squeak.
By following these tips, you can keep your doors squeak-free for years to come. Remember, a little preventative maintenance can go a long way in maintaining the peace and quiet of your home. And when a squeak does inevitably arise, you’ll be armed with the knowledge to tackle it head-on with this easy door squeak fix.


Leave a Comment