

Eggshell Bioplastic Bowl DIY: Ever wondered if you could transform your breakfast leftovers into something truly amazing? I’m talking about turning those humble eggshells into a durable, eco-friendly bowl! For centuries, resourceful individuals have sought ways to repurpose materials, and this project taps into that very spirit. Think of it as a modern twist on ancient pottery techniques, where natural resources were ingeniously molded into functional art.
In a world increasingly aware of plastic waste, finding sustainable alternatives is more crucial than ever. This Eggshell Bioplastic Bowl DIY isn’t just a fun craft; it’s a small step towards reducing our reliance on synthetic materials. Imagine the satisfaction of creating a unique, biodegradable bowl from something you’d normally toss in the trash! Plus, it’s a fantastic conversation starter and a testament to your commitment to a greener lifestyle.
This guide will walk you through the entire process, from gathering your eggshells to molding and finishing your very own bioplastic bowl. I’ll share my tips and tricks for achieving the best results, ensuring your creation is both beautiful and functional. So, let’s dive in and discover the magic of Eggshell Bioplastic Bowl DIY!
DIY Eggshell Bioplastic Bowl: A Sustainable and Creative Project
Hey there, fellow DIY enthusiasts! Today, I’m super excited to share a project that’s not only fun and creative but also incredibly eco-friendly: making a bioplastic bowl from eggshells! Yes, you read that right! We’re turning those seemingly useless eggshells into a sturdy and beautiful bowl. This project is a fantastic way to reduce waste, learn about bioplastics, and create something unique for your home. Let’s dive in!
Materials You’ll Need
Before we get started, let’s gather all the necessary materials. Trust me, having everything ready beforehand will make the process much smoother.
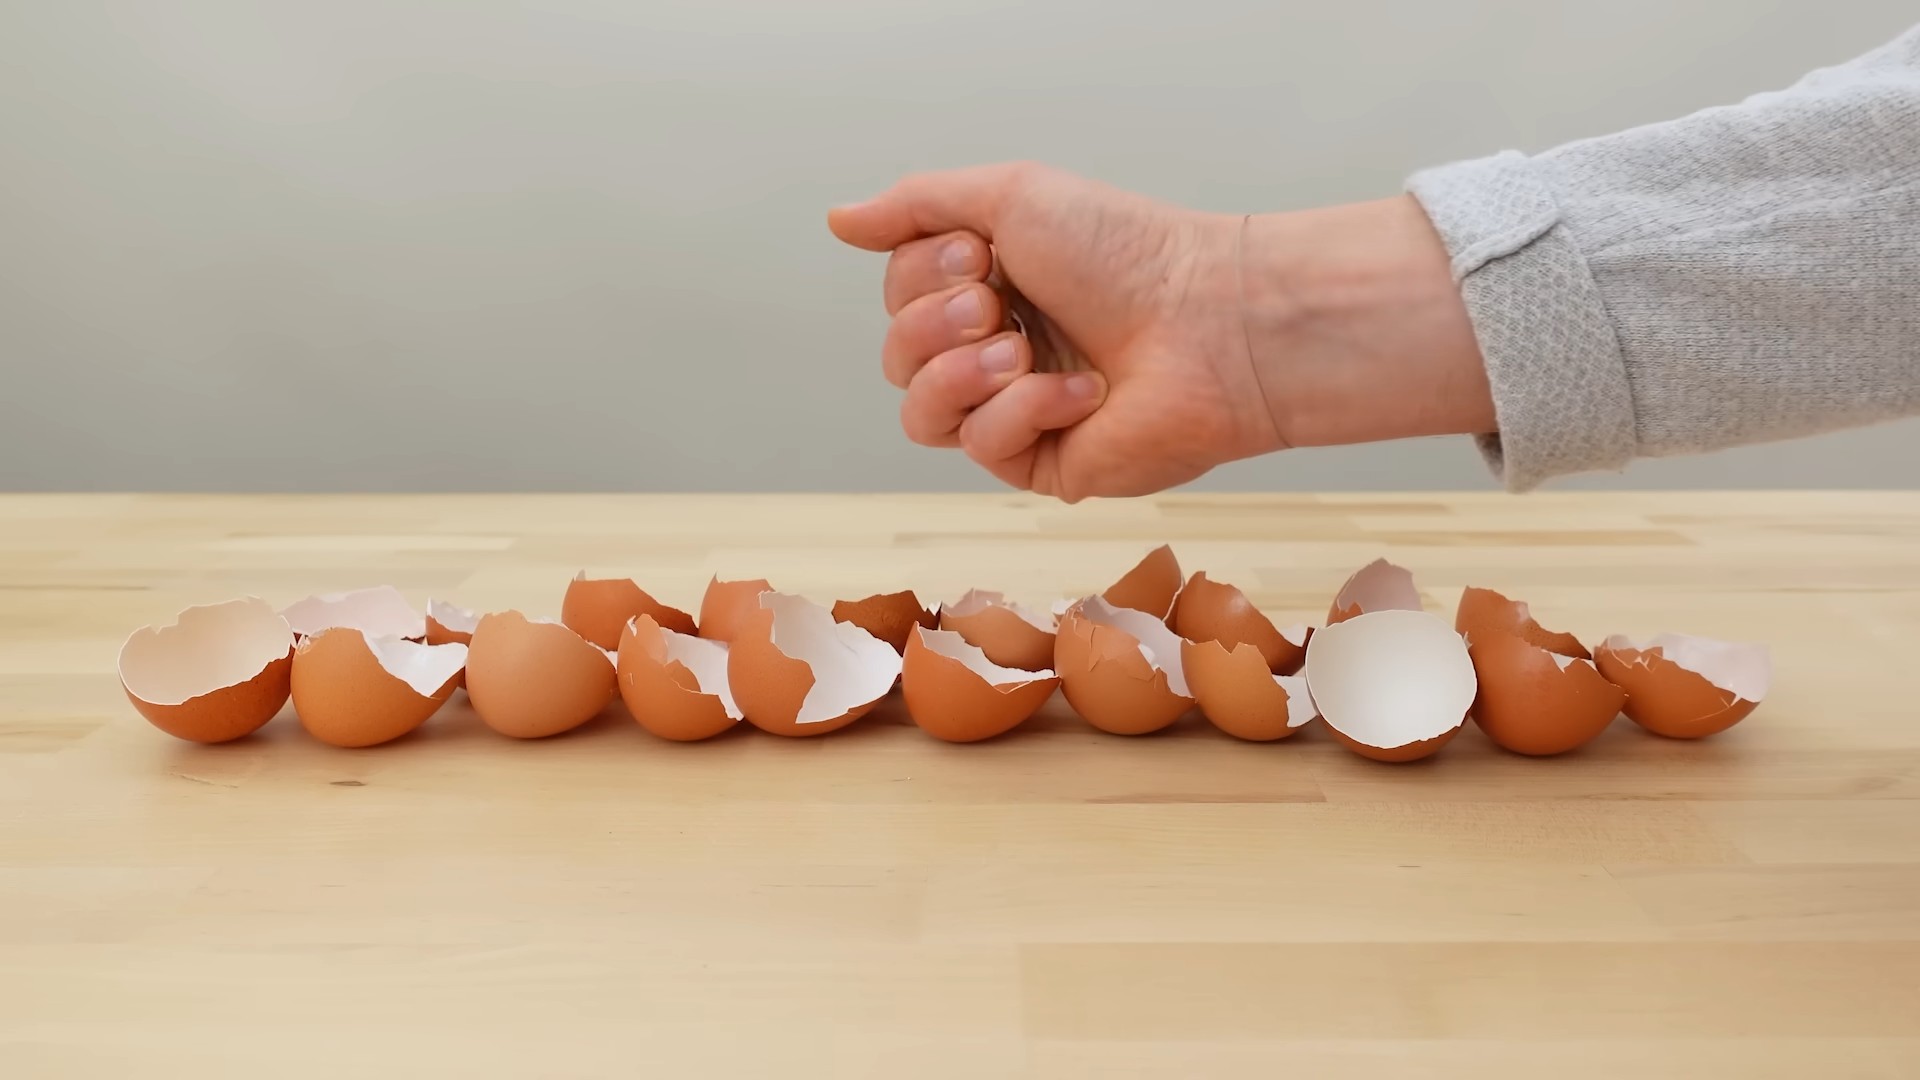
* Eggshells: Lots of them! Aim for at least 20-30 eggshells, depending on the size of the bowl you want to create. The more, the merrier!
* Cornstarch: This will act as our binding agent. You’ll need about 1/2 cup.
* Glycerin: This adds flexibility to the bioplastic. About 2 tablespoons should do the trick. You can find this at most pharmacies or online.
* White Vinegar: This helps break down the eggshells and create a smoother mixture. We’ll need about 1/4 cup.
* Water: For mixing and cleaning.
* Food Coloring (Optional): If you want to add some color to your bowl, grab your favorite food coloring.
* Mixing Bowls: You’ll need a couple of different sizes.
* Blender or Food Processor: To grind the eggshells into a fine powder.
* Spoon or Spatula: For mixing.
* Sandpaper (Various Grits): To smooth out the edges of the bowl.
* Mold: This is what will give your bowl its shape. You can use a regular bowl, a silicone mold, or even a plastic container. Get creative!
* Parchment Paper or Plastic Wrap: To line the mold and prevent sticking.
* Oven: For baking the bioplastic.
* Oven-Safe Dish: For baking the bioplastic mixture.
* Protective Gloves: To protect your hands.
* Dust Mask: To avoid inhaling eggshell dust.
* Optional: Mod Podge or other sealant for waterproofing.
Preparing the Eggshells
This is a crucial step, so pay close attention! We need to make sure the eggshells are clean and properly prepared for the bioplastic mixture.
1. Cleaning the Eggshells: After cracking your eggs, rinse the shells thoroughly with warm water. Remove any remaining membrane inside the shell. This is important because the membrane can cause the bioplastic to smell and potentially mold.
2. Boiling the Eggshells: Place the cleaned eggshells in a pot of boiling water for about 10-15 minutes. This will further sanitize them and remove any lingering bacteria.
3. Drying the Eggshells: After boiling, drain the eggshells and spread them out on a baking sheet lined with parchment paper. Let them dry completely. You can speed up the process by placing them in a low-temperature oven (around 200°F or 93°C) for about 30 minutes. Make sure they are completely dry before moving on to the next step.
4. Grinding the Eggshells: Once the eggshells are dry, it’s time to grind them into a fine powder. Put on your dust mask! Place the dried eggshells in a blender or food processor and grind them until they reach a powder-like consistency. The finer the powder, the smoother your bioplastic will be. If you don’t have a blender or food processor, you can use a mortar and pestle, but it will take a bit more elbow grease.
5. Sifting the Eggshell Powder: To ensure a smooth mixture, sift the eggshell powder through a fine-mesh sieve. This will remove any larger pieces that didn’t grind properly.
Creating the Bioplastic Mixture
Now for the fun part! We’re going to combine all our ingredients to create the bioplastic mixture.
1. Mixing the Dry Ingredients: In a mixing bowl, combine the eggshell powder and cornstarch. Mix them thoroughly until they are well combined.
2. Adding the Wet Ingredients: In a separate bowl, mix the glycerin, white vinegar, and water. Stir until everything is well dissolved. If you’re using food coloring, add it to the wet ingredients at this stage.
3. Combining Wet and Dry: Slowly pour the wet ingredients into the dry ingredients, mixing constantly with a spoon or spatula. Make sure to scrape the sides of the bowl to ensure everything is incorporated. The mixture should be smooth and have a paste-like consistency. If it’s too thick, add a little more water. If it’s too thin, add a little more cornstarch.
4. Cooking the Mixture: Pour the bioplastic mixture into an oven-safe dish. Place the dish in a preheated oven at 250°F (121°C) for about 15-20 minutes. Keep a close eye on it! The mixture should start to thicken and become translucent. Stir it every 5 minutes to prevent it from burning. The cooking time may vary depending on your oven, so watch it carefully.
5. Checking for Consistency: The bioplastic is ready when it has a thick, gel-like consistency and is mostly translucent. It should be easy to mold and hold its shape.
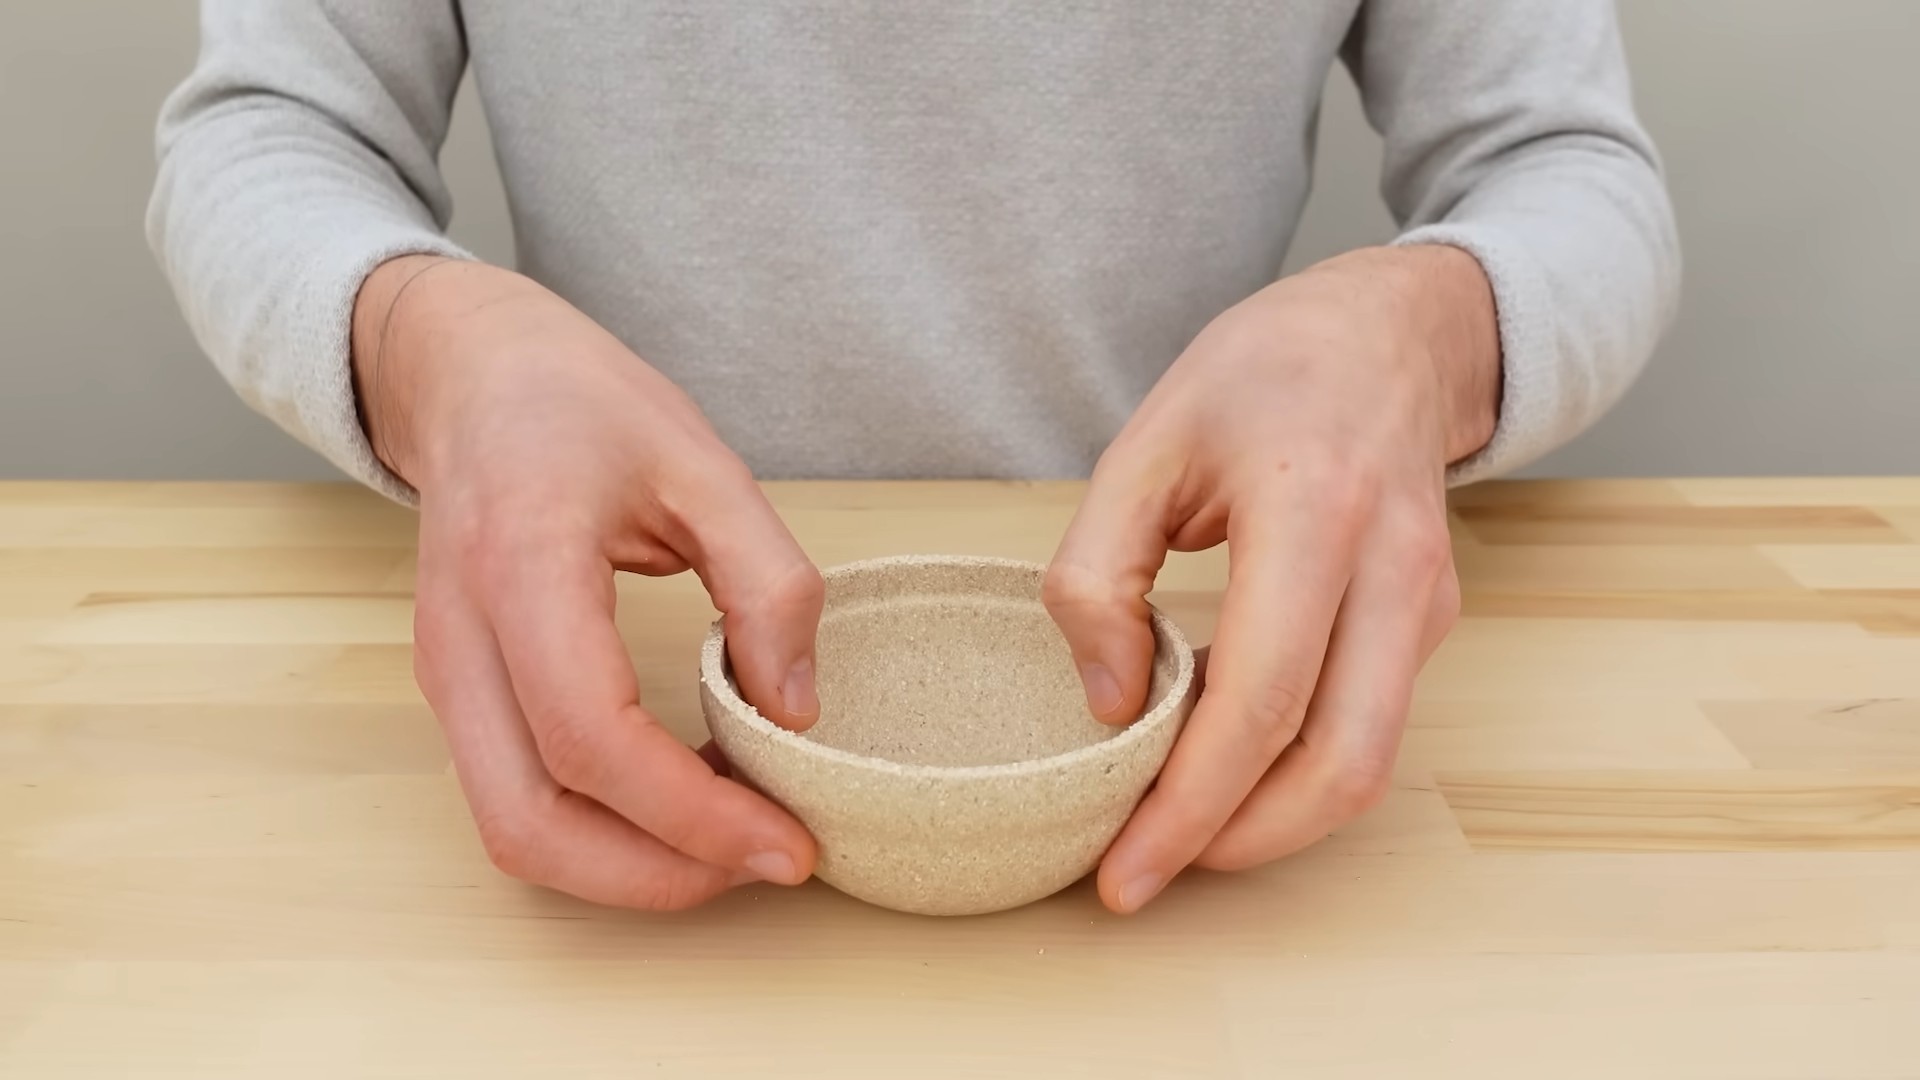
Molding the Bioplastic Bowl
This is where your creativity comes into play! We’re going to shape the bioplastic mixture into a beautiful bowl.
1. Preparing the Mold: Line your chosen mold with parchment paper or plastic wrap. This will prevent the bioplastic from sticking to the mold. Make sure the lining is smooth and wrinkle-free.
2. Pouring the Bioplastic: Carefully pour the hot bioplastic mixture into the prepared mold. Spread it evenly around the mold, making sure to fill all the corners and edges.
3. Shaping the Bowl: Use a spoon or spatula to shape the bioplastic into the desired bowl shape. You can create a smooth, even surface or add texture for a more rustic look. Get creative!
4. Removing Air Bubbles: Gently tap the mold on a flat surface to release any trapped air bubbles. This will help create a smoother and more even surface.
5. Drying the Bowl: Allow the bioplastic bowl to dry completely. This can take anywhere from 24 to 48 hours, depending on the thickness of the bowl and the humidity in your environment. You can speed up the drying process by placing the bowl in a low-temperature oven (around 150°F or 65°C) for a few hours.
Finishing Touches
Almost there! Now we’re going to refine our bowl and make it look its best.
1. Removing from the Mold: Once the bowl is completely dry, carefully remove it from the mold. Peel away the parchment paper or plastic wrap.
2. Sanding the Edges: Use sandpaper to smooth out any rough edges or imperfections. Start with a coarse grit sandpaper and gradually move to finer grits for a smoother finish. Be patient and take your time.
3. Sealing the Bowl (Optional): To make your bioplastic bowl more water-resistant, you can seal it with Mod Podge or another sealant. Apply a thin, even coat of sealant to the entire surface of the bowl and let it dry completely. You may need to apply multiple coats for better protection.
4. Decorating (Optional): If you want to add some extra flair to your bowl, you can decorate it with paint, markers, or other embellishments. Let your imagination run wild!
Important Considerations and Tips
* Safety First: Always wear protective gloves and a dust mask when working with eggshell powder.
* Experiment with Colors: Don’t be afraid to experiment with different food coloring to create unique and vibrant bowls.
* Adjust the Recipe: The recipe can be adjusted to suit your needs. If you want a thicker bioplastic, add more cornstarch. If you want a more flexible bioplastic, add more glycerin.
* Storage: Store your bioplastic bowl in a cool, dry place. Avoid exposing it to extreme temperatures or humidity.
* Water Resistance: While the sealant will help, remember that bioplastic is not completely waterproof. Avoid using your bowl for liquids for extended periods.
* Durability: Bioplastic is not as durable as traditional plastic. Handle your bowl with care to avoid cracking or breaking.
* Mold Options: Get creative with your mold choices! You can use bowls, containers, or even create your own custom molds.
* Troubleshooting: If your bioplastic is too brittle, add more glycerin. If it’s too sticky, add more cornstarch.
Conclusion
So, there you have it! Transforming humble eggshells into a surprisingly durable and eco-friendly bioplastic bowl is not just a fun craft project; it’s a small step towards a more sustainable lifestyle. We’ve walked you through the process, highlighting the simplicity and accessibility of this DIY trick. But why should you actually try it?
Firstly, it’s a fantastic way to reduce waste. Instead of tossing those eggshells into the trash, contributing to landfill overflow, you’re giving them a new life, a new purpose. You’re actively participating in a circular economy, where materials are reused and repurposed instead of discarded. This is especially important in today’s world, where environmental consciousness is no longer a trend but a necessity.
Secondly, the resulting bioplastic bowl is surprisingly versatile. While it’s not suitable for holding hot liquids or microwaving, it’s perfect for storing dry goods like spices, small trinkets, or even as a charming little planter for succulents. Think of it as a unique and conversation-starting piece of décor that you made yourself!
Thirdly, the process itself is incredibly rewarding. There’s a certain satisfaction that comes from creating something beautiful and functional from something that would otherwise be considered garbage. It’s a tangible reminder that we all have the power to make a difference, no matter how small.
But the best part is the potential for customization. Feel free to experiment with different natural dyes to color your eggshell bioplastic. Beet juice can create a beautiful pink hue, turmeric a vibrant yellow, and spinach a subtle green. You can also incorporate other natural materials like dried flower petals or coffee grounds into the mixture for added texture and visual appeal. Consider adding a few drops of essential oils during the mixing process to infuse your bowl with a pleasant aroma. Lavender, chamomile, or citrus oils would be excellent choices.
For a more rustic look, you can leave the edges of the bowl slightly uneven. Or, for a more polished finish, sand the edges smooth after the bioplastic has fully cured. You can even try creating different shapes by using different molds. Small ramekins, silicone molds, or even carefully shaped aluminum foil can be used to achieve unique designs.
We encourage you to embrace your creativity and personalize your eggshell bioplastic bowl to reflect your own style and preferences. Don’t be afraid to experiment and learn from your mistakes. That’s all part of the fun!
Ultimately, this DIY trick is more than just a craft project; it’s a statement. It’s a statement about your commitment to sustainability, your creativity, and your resourcefulness. It’s a reminder that even the smallest actions can have a positive impact on the planet.
So, gather your eggshells, grab your supplies, and get ready to create something amazing. We’re confident that you’ll be pleasantly surprised by the results. And most importantly, we want to hear about your experience! Share your creations with us on social media using #EggshellBioplasticBowlDIY. We can’t wait to see what you come up with! Let’s inspire each other to live more sustainably, one eggshell at a time.
Frequently Asked Questions
What kind of glue should I use for the eggshell bioplastic?
The best type of glue to use is a non-toxic, water-based glue like school glue (PVA glue). Avoid using super glue or other strong adhesives, as they may not be food-safe and can be difficult to work with. The goal is to create a bioplastic that is as natural and eco-friendly as possible, so opting for a natural glue is ideal.
How long does it take for the eggshell bioplastic to dry completely?
The drying time can vary depending on the humidity and temperature of your environment. Generally, it takes about 24-48 hours for the bioplastic to dry completely. To ensure proper drying, place the bowl in a well-ventilated area and avoid direct sunlight, which can cause cracking. You’ll know it’s dry when the bowl feels hard and rigid to the touch.
Can I use colored eggshells for this project?
Absolutely! Using colored eggshells can add a unique and beautiful touch to your bioplastic bowl. The color will be subtle, but it can create a lovely marbled effect. Just make sure the dye used to color the eggshells is food-safe if you plan to use the bowl for storing edible items.
Is the eggshell bioplastic bowl waterproof?
No, the eggshell bioplastic bowl is not waterproof. It’s best suited for storing dry goods or decorative purposes. Avoid using it to hold liquids, as the bioplastic can soften and degrade over time.
How do I clean the eggshell bioplastic bowl?
To clean the bowl, gently wipe it with a dry or slightly damp cloth. Avoid using harsh chemicals or abrasive cleaners, as they can damage the surface. If necessary, you can use a mild soap and water solution, but be sure to dry the bowl thoroughly afterward.
Can I add other ingredients to the eggshell mixture?
Yes, you can experiment with adding other natural ingredients to the eggshell mixture to enhance its properties or appearance. For example, you can add a small amount of cornstarch to make the bioplastic more durable. You can also add natural dyes, dried flower petals, or coffee grounds for color and texture. Just be sure to use ingredients that are safe and non-toxic.
What if my eggshell mixture is too thick or too thin?
If the mixture is too thick, add a small amount of water, one teaspoon at a time, until you reach the desired consistency. If the mixture is too thin, add a bit more eggshell powder until it thickens up. The ideal consistency should be similar to a thick paste.
How do I prevent the bioplastic from cracking while drying?
To prevent cracking, ensure that the bowl is drying in a well-ventilated area but away from direct sunlight or heat sources. You can also try covering the bowl with a damp cloth during the first few hours of drying to slow down the process and prevent the edges from drying too quickly.
Can I use this bioplastic for other projects besides a bowl?
Yes, you can use this bioplastic for a variety of other projects. You can create small decorative items, ornaments, or even use it to reinforce other craft projects. The possibilities are endless! Just keep in mind that the bioplastic is not food-safe or waterproof, so avoid using it for projects that require those properties.
Is this eggshell bioplastic biodegradable?
While the eggshells themselves are biodegradable, the glue used in the mixture may not be. However, using a natural, biodegradable glue will significantly increase the overall biodegradability of the bioplastic. When disposing of the bioplastic, consider breaking it into small pieces and composting it if your compost system allows for it.
Leave a Comment