

Forgotten cleaning areas – we all have them! Those little nooks and crannies, the spots we consistently overlook in our cleaning routines. Let’s be honest, life gets busy, and sometimes, the less-obvious areas get, well, forgotten. But fear not, fellow cleaning enthusiasts! This article is your ultimate guide to tackling those neglected spaces and achieving a truly sparkling home.
Throughout history, a clean home has been more than just aesthetically pleasing; it’s been linked to health, well-being, and even social standing. From ancient Roman bathhouses to the meticulous cleaning rituals of various cultures, the pursuit of cleanliness has always been a significant part of human life. While we may not be scrubbing our floors with lye soap anymore, the desire for a tidy and healthy living space remains strong.
Why is it so important to address these forgotten cleaning areas? Because these neglected spots can harbor dust, allergens, and even bacteria, impacting your indoor air quality and overall health. Plus, tackling these areas can make a huge difference in the overall feel of your home, creating a more inviting and relaxing environment. I’m here to share some simple, effective DIY tricks and hacks that will help you conquer those overlooked spaces and achieve a truly clean and healthy home. Get ready to say goodbye to dust bunnies and hello to a sparkling clean space!
DIY Deep Clean: Tackling Those Forgotten Cleaning Spots!
Okay, let’s be honest, we all have those areas in our homes that we conveniently “forget” to clean. You know, the ones that are out of sight, out of mind… until they’re not. Well, today, we’re tackling those neglected spots head-on! I’m going to walk you through a deep clean of some of the most commonly overlooked areas, giving you step-by-step instructions and tips to make the process as painless as possible. Get ready to feel amazing when you finally check these off your list!
Cleaning the Dishwasher (Yes, It Needs Cleaning!)
It seems counterintuitive, right? The dishwasher cleans dishes, so it should be clean itself. Wrong! Food particles, grease, and hard water can build up over time, affecting its performance and even causing unpleasant odors. Let’s get it sparkling.
What You’ll Need:
* White vinegar
* Baking soda
* Dish soap
* Toothbrush or small scrub brush
* Paper towels or a clean cloth
Step-by-Step Instructions:
1. Empty the Dishwasher: Make sure your dishwasher is completely empty. No stray forks or rogue coffee mugs allowed!
2. Clean the Filter: This is the most crucial step. Locate the filter (usually at the bottom of the dishwasher). Remove it and rinse it thoroughly under hot water. Use a toothbrush or small scrub brush to remove any stubborn debris. You might be surprised (and slightly disgusted) by what you find!
3. Clean the Spray Arms: Check the spray arms for any clogs. Food particles can get stuck in the small holes, reducing their effectiveness. Use a toothpick or small wire to clear any blockages. You can also remove the spray arms (check your dishwasher’s manual for instructions) and soak them in hot, soapy water for a deeper clean.
4. Vinegar Rinse: Place a dishwasher-safe cup or bowl filled with one cup of white vinegar on the top rack of the dishwasher. Run the dishwasher on a hot cycle. The vinegar will help to dissolve grease and mineral buildup.
5. Baking Soda Freshener: After the vinegar cycle, sprinkle one cup of baking soda on the bottom of the dishwasher. Run a short, hot cycle. The baking soda will help to absorb any remaining odors and leave your dishwasher smelling fresh.
6. Wipe Down the Interior: Use a damp cloth or paper towels to wipe down the interior of the dishwasher, paying attention to the door seals and any areas where you see residue.
7. Clean the Exterior: Finally, wipe down the exterior of the dishwasher with a damp cloth and a little dish soap.
Tackling the Washing Machine (Front Loaders Especially!)
Similar to the dishwasher, your washing machine needs regular cleaning to prevent mold, mildew, and unpleasant odors. Front-loading machines are particularly prone to these issues due to their rubber seals.
What You’ll Need:
* White vinegar
* Baking soda
* Bleach (optional, for heavily soiled machines)
* Microfiber cloths
* Spray bottle
* Toothbrush or small scrub brush
Step-by-Step Instructions:
1. Empty the Washing Machine: Ensure the washing machine is completely empty.
2. Clean the Dispenser Drawers: Remove the detergent and fabric softener dispenser drawers. Rinse them thoroughly under hot water, removing any residue. Use a toothbrush or small scrub brush to clean any stubborn buildup. You can also soak them in hot, soapy water if needed.
3. Clean the Rubber Seal (Front Loaders): This is where the magic happens (or rather, where the mold and mildew hide). Carefully inspect the rubber seal around the door of your front-loading washing machine. Use a microfiber cloth dampened with a mixture of white vinegar and water to wipe away any visible mold or mildew. For stubborn stains, you can use a toothbrush or small scrub brush. Be sure to get into all the nooks and crannies.
4. Run a Cleaning Cycle with Vinegar: Pour two cups of white vinegar into the detergent dispenser. Run the washing machine on the hottest, longest cycle. This will help to sanitize the machine and remove any lingering odors.
5. Bleach Cycle (Optional): If your washing machine is heavily soiled or has a strong odor, you can run a cleaning cycle with bleach instead of vinegar. Pour one cup of bleach into the bleach dispenser and run the washing machine on the hottest, longest cycle. Important: Never mix bleach and vinegar!
6. Baking Soda Rinse: After the vinegar or bleach cycle, sprinkle half a cup of baking soda directly into the drum of the washing machine. Run a short, hot cycle to rinse away any remaining residue and freshen the machine.
7. Wipe Down the Exterior: Wipe down the exterior of the washing machine with a damp cloth and a little dish soap.
8. Leave the Door Ajar: After cleaning, leave the washing machine door ajar to allow it to air dry completely. This will help to prevent mold and mildew growth.
Deep Cleaning Your Mattress
We spend a significant portion of our lives sleeping on our mattresses, so it’s important to keep them clean and fresh. Dust mites, dead skin cells, and other allergens can accumulate over time, affecting our sleep quality and overall health.
What You’ll Need:
* Vacuum cleaner with upholstery attachment
* Baking soda
* Essential oil (optional, for fragrance)
* Spray bottle
* Hydrogen peroxide (optional, for stain removal)
* Clean cloths
Step-by-Step Instructions:
1. Strip the Bed: Remove all bedding, including sheets, blankets, and pillowcases. Wash them in hot water to kill any dust mites.
2. Vacuum the Mattress: Use the upholstery attachment of your vacuum cleaner to thoroughly vacuum the entire surface of the mattress, including the sides and any crevices. Pay special attention to seams and tufts, where dust mites tend to accumulate.
3. Deodorize with Baking Soda: Sprinkle a generous layer of baking soda over the entire surface of the mattress. If you want to add a pleasant scent, you can mix a few drops of your favorite essential oil (like lavender or eucalyptus) with the baking soda before sprinkling it on.
4. Let it Sit: Allow the baking soda to sit on the mattress for at least 30 minutes, or even longer (up to a few hours) for a deeper clean. The baking soda will absorb odors and moisture.
5. Vacuum Again: After the baking soda has sat for the desired amount of time, vacuum it up thoroughly.
6. Spot Clean Stains (Optional): If you have any stains on your mattress, you can try to remove them with a solution of hydrogen peroxide and water. Mix equal parts hydrogen peroxide and water in a spray bottle. Spray the solution onto the stain and let it sit for a few minutes. Then, blot the stain with a clean cloth. Repeat as needed until the stain is gone. Always test the solution on a small, inconspicuous area of the mattress first to ensure it doesn’t discolor the fabric.
7. Air Dry: Allow the mattress to air dry completely before putting clean bedding back on. You can speed up the drying process by opening windows or using a fan.
8. Protect Your Mattress: Consider using a mattress protector to prevent future stains and allergens from penetrating the mattress.
Cleaning Behind the Toilet
This area is often overlooked due to its awkward location, but it’s a breeding ground for dust, grime, and even mold.
What You’ll Need:
* Toilet bowl cleaner
* All-purpose cleaner
* Disinfectant wipes
* Toilet brush
* Gloves
* Paper towels or clean cloths
* Small brush or toothbrush
Step-by-Step Instructions:
1. Prepare the Area: Put on your gloves. Remove any items that might be in the way, such as rugs or trash cans.
2. Apply Toilet Bowl Cleaner: Apply toilet bowl cleaner under the rim of the toilet bowl and let it sit for the recommended time (usually 10-15 minutes).
3. Clean the Toilet Bowl: Use a toilet brush to scrub the inside of the toilet bowl, paying attention to the waterline and any stains. Flush the toilet to rinse.
4. Spray with All-Purpose Cleaner: Spray all-purpose cleaner on the walls, floor, and base of the toilet behind the toilet.
5. Scrub and Wipe: Use a small brush or toothbrush to scrub any stubborn grime or stains. Wipe down all surfaces with paper towels or clean cloths.
6. Disinfect: Use disinfectant wipes to wipe down the toilet handle, seat, and any other areas that are frequently touched.
7. Dry: Dry all surfaces with a clean cloth or paper towel.
Cleaning Light Fixtures
Dust and grime can accumulate on light fixtures, reducing their brightness and affecting the overall ambiance of

Conclusion
So, there you have it! Unveiling the secrets to tackling those often-forgotten cleaning areas in your home doesn’t have to be a daunting task. By implementing these simple yet effective DIY tricks, you can transform your living space into a haven of cleanliness and freshness. We’ve shown you how to conquer the grime lurking in your dishwasher, banish the dust bunnies hiding under your furniture, and revitalize those overlooked corners that contribute to overall home hygiene.
The beauty of these DIY solutions lies in their simplicity and accessibility. You likely already have most, if not all, of the necessary ingredients and tools readily available in your pantry or cleaning supplies cabinet. This means you can start tackling these forgotten cleaning areas right now, without breaking the bank or spending hours searching for specialized products.
But why is this DIY approach a must-try? Because it’s not just about cleaning; it’s about creating a healthier and more enjoyable living environment for you and your family. A clean home is a happy home, and by addressing these often-neglected spots, you’re contributing to improved air quality, reduced allergens, and a sense of overall well-being. Plus, the satisfaction of knowing you’ve conquered those hidden grime zones is incredibly rewarding!
This DIY cleaning approach is also incredibly versatile. Feel free to experiment with variations to suit your specific needs and preferences. For instance, if you’re sensitive to strong scents, you can substitute essential oils like lavender or lemon for vinegar in some of the cleaning solutions. Or, if you have particularly stubborn stains, you might consider adding a small amount of baking soda to your cleaning paste for extra scrubbing power.
Consider these variations:
* **For Dishwasher Cleaning:** Instead of plain vinegar, try using a citrus-infused vinegar for a more pleasant scent. Simply steep citrus peels (lemon, orange, grapefruit) in white vinegar for a few days before using.
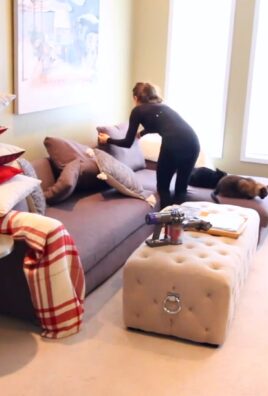
* **For Under-Furniture Dusting:** Attach a microfiber cloth to a paint roller extension pole for even easier access to those hard-to-reach areas.
* **For Grout Cleaning:** Create a paste of baking soda and hydrogen peroxide for a powerful, natural grout cleaner. Let it sit for a few minutes before scrubbing.
* **For Cleaning Behind Appliances:** Use a long, flexible duster or a vacuum cleaner attachment designed for tight spaces.
We are confident that these DIY tricks will make a noticeable difference in the cleanliness and freshness of your home. But don’t just take our word for it – try them out for yourself! We encourage you to embark on this cleaning adventure and discover the transformative power of addressing those forgotten cleaning areas.
And most importantly, we want to hear about your experience! Share your before-and-after photos, your favorite variations, and any tips or tricks you’ve discovered along the way. Let’s create a community of clean-home enthusiasts who are passionate about creating healthy and happy living spaces. Share your stories on social media using #DIYCleanHome and let us know how these tips worked for you. Your feedback will not only inspire others but also help us refine and improve these DIY cleaning methods. So, grab your cleaning supplies, roll up your sleeves, and get ready to conquer those forgotten cleaning areas! You’ll be amazed at the difference it makes.
Frequently Asked Questions (FAQ)
Q1: Why are these “forgotten cleaning areas” so important to address?
A1: These areas, such as under furniture, behind appliances, and inside dishwashers, often accumulate dust, grime, and bacteria over time. Ignoring them can lead to several issues. Firstly, accumulated dust and allergens can negatively impact indoor air quality, potentially triggering allergies and respiratory problems. Secondly, food debris and moisture in areas like dishwashers can create breeding grounds for mold and bacteria, posing a health risk. Finally, neglecting these areas can contribute to unpleasant odors and a generally unclean feeling in your home, even if the rest of your house appears tidy. Addressing these forgotten cleaning areas is crucial for maintaining a healthy, hygienic, and pleasant living environment.
Q2: How often should I clean these forgotten areas?
A2: The frequency depends on several factors, including your lifestyle, the number of people living in your home, and whether you have pets. However, a good rule of thumb is to clean these areas at least once a month. For high-traffic areas or homes with pets, you might consider cleaning them more frequently, perhaps every two weeks. For example, cleaning under furniture and behind appliances monthly can prevent excessive dust buildup. Dishwashers should ideally be cleaned monthly to prevent the accumulation of food debris and mineral deposits. Regular maintenance will not only keep your home cleaner but also extend the lifespan of your appliances.
Q3: Are these DIY cleaning solutions safe for all surfaces?
A3: While most of the DIY cleaning solutions mentioned are generally safe for a wide range of surfaces, it’s always a good idea to test them on an inconspicuous area first, especially on delicate or sensitive materials. For instance, vinegar, while effective for cleaning, can be acidic and may damage certain types of stone or wood finishes. Similarly, abrasive cleaners like baking soda should be used with caution on easily scratched surfaces. Always read the labels of any commercial cleaning products you use in conjunction with these DIY methods and follow the manufacturer’s instructions. When in doubt, consult a professional cleaning service for advice on cleaning specific surfaces.
Q4: Can I use these DIY cleaning methods if I have allergies or sensitivities?
A4: Yes, in many cases, these DIY cleaning methods can be a great alternative for individuals with allergies or sensitivities to harsh chemicals found in commercial cleaning products. Many of the ingredients used in these DIY solutions, such as vinegar, baking soda, and essential oils, are natural and less likely to trigger allergic reactions. However, it’s essential to be mindful of your specific allergies and sensitivities. For example, if you’re allergic to citrus, avoid using citrus-infused vinegar. Always wear gloves and a mask when cleaning to minimize exposure to dust and allergens. If you experience any adverse reactions, discontinue use immediately and consult a doctor.
Q5: What if I don’t have all the ingredients for these DIY cleaning solutions?
A5: The beauty of these DIY cleaning solutions is that they are often adaptable. If you’re missing a specific ingredient, you can often substitute it with something else. For example, if you don’t have vinegar, you can try using lemon juice as a natural alternative. If you don’t have baking soda, you can use a mild dish soap for some cleaning tasks. The key is to experiment and find what works best for you. You can also find many online resources that offer alternative DIY cleaning recipes using different ingredients.
Q6: How can I make cleaning these forgotten areas less of a chore?
A6: Making cleaning less of a chore is all about incorporating it into your routine and breaking it down into manageable tasks. Instead of tackling all the forgotten areas at once, try focusing on one or two areas each week. For example, you could clean under the furniture one week and clean the dishwasher the next. Put on some music or a podcast to make the task more enjoyable. Enlist the help of family members to share the workload. The more you make cleaning a regular part of your routine, the less daunting it will become.
Q7: Are there any tools that can make cleaning these areas easier?
A7: Absolutely! Investing in a few key tools can significantly simplify the process of cleaning forgotten areas. A long-handled duster or a vacuum cleaner attachment designed for tight spaces can be invaluable for reaching under furniture and behind appliances. A grout brush can make cleaning grout lines much easier. Microfiber cloths are excellent for dusting and wiping surfaces. A spray bottle is essential for applying cleaning solutions. Having the right tools on hand can make cleaning more efficient and less physically demanding.
Q8: How can I prevent these areas from getting so dirty in the first place?
A8: Prevention is always better than cure! There are several steps you can take to minimize the accumulation of dirt and grime in these forgotten areas. Regularly vacuum or sweep under furniture to prevent dust buildup. Use placemats and coasters to protect surfaces from spills. Wipe up spills immediately to prevent them from staining or attracting dirt. Use a dishwasher cleaner regularly to prevent the buildup of food debris and mineral deposits. By taking these preventative measures, you can significantly reduce the amount of cleaning required in these areas.
Q9: What is the best way to dispose of the cleaning solutions after I’m done?
A9: Most of the DIY cleaning solutions mentioned are safe to dispose of down the drain. However, it’s always a good idea to dilute them with plenty of water before pouring them down the drain. Avoid pouring large quantities of undiluted cleaning solutions down the drain, as this can potentially harm your plumbing system. If you’re unsure about the proper disposal method, consult your local waste management authority for guidance.
Q10: Where can I find more information about DIY cleaning and maintaining a clean home?
A10: There are numerous online resources available that offer tips, tricks, and recipes for DIY cleaning and maintaining a clean home. Websites, blogs, and social media platforms dedicated to cleaning and home organization are excellent sources of information. You can also find helpful videos and tutorials on YouTube. Additionally, many libraries and bookstores offer books on cleaning and home organization. Don’t be afraid to explore different resources and find what works best for you.
Leave a Comment