

Grow Angled Luffa at Home and unlock a world of natural sponges right in your backyard! Have you ever imagined ditching those synthetic sponges and instead, harvesting your own eco-friendly, exfoliating wonders? This isn’t just a gardening project; it’s a step towards sustainable living and a fascinating journey into the world of plant-based resources.
The Luffa, also known as the sponge gourd, has a rich history, particularly in Asian cultures where it’s been cultivated for centuries not only for its fibrous interior but also as a delicious vegetable when young. Imagine, a plant that feeds you and cleans your dishes! It’s a testament to the ingenuity of traditional farming practices.
Why should you learn this DIY trick? Because in today’s world, we’re all looking for ways to reduce our environmental impact and embrace a more natural lifestyle. Growing your own angled luffa provides a sustainable alternative to mass-produced sponges, reduces plastic waste, and connects you with the natural world in a tangible way. Plus, it’s incredibly rewarding to watch these unique gourds flourish under your care. I’m excited to share my tips and tricks to help you successfully grow angled luffa at home, even if you’re a beginner gardener!

Grow Your Own Angled Luffa Sponges: A DIY Guide
Hey there, fellow gardening enthusiasts! Have you ever thought about growing your own sponges? I know, it sounds a little crazy, but it’s totally possible, and incredibly rewarding! I’m talking about angled luffa, also known as Chinese okra or silk gourd. These amazing gourds, when dried, transform into the perfect natural sponges for your kitchen, bath, or even for crafting. Plus, the young fruits are delicious in stir-fries and soups!
This guide will walk you through everything you need to know to successfully grow angled luffa at home, from seed to sponge. Get ready to get your hands dirty!
What You’ll Need
Before we dive in, let’s gather our supplies. Here’s a list of what you’ll need to grow your own angled luffa:
* Angled Luffa Seeds: You can find these online or at some specialty garden centers. Make sure you’re getting angled luffa (Luffa acutangula) and not the smooth luffa (Luffa aegyptiaca) if you specifically want the ridged sponge.
* Seed Starting Trays or Pots: For starting your seeds indoors.
* Seed Starting Mix: A light, well-draining mix is essential for healthy seedlings.
* Potting Soil: For transplanting your seedlings into larger containers or directly into the garden.
* A Sunny Location: Luffa needs at least 6-8 hours of direct sunlight per day.
* A Strong Trellis or Support Structure: These vines can get HUGE and heavy, so a sturdy trellis is a must. Think about a fence, pergola, or a custom-built structure.
* Compost or Aged Manure: To enrich the soil and provide nutrients.
* Watering Can or Hose: For regular watering.
* Gardening Gloves: To protect your hands.
* Pruning Shears or Scissors: For trimming the vines.
* Patience: Luffa takes time to grow, so be prepared to wait!
Starting Your Luffa Seeds
Luffa has a long growing season, so starting your seeds indoors is highly recommended, especially if you live in a cooler climate. I usually start mine about 6-8 weeks before the last expected frost.
1. Soak the Seeds: To help with germination, soak your luffa seeds in warm water for 24 hours before planting. This softens the seed coat and encourages sprouting.
2. Prepare Your Seed Starting Trays: Fill your seed starting trays or pots with seed starting mix. Moisten the mix thoroughly, but don’t let it get soggy.
3. Plant the Seeds: Plant the seeds about 1 inch deep in the soil. I usually plant 2-3 seeds per cell or pot, just in case some don’t germinate.
4. Provide Warmth: Luffa seeds need warmth to germinate. The ideal temperature is around 70-80°F (21-27°C). You can use a heat mat to provide consistent warmth.
5. Keep the Soil Moist: Keep the soil consistently moist, but not waterlogged. Use a spray bottle to gently mist the soil as needed.
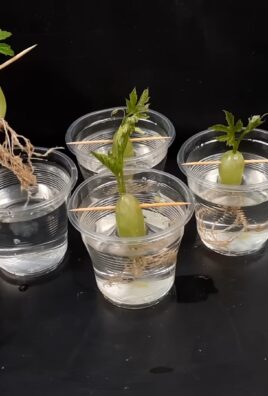
6. Wait for Germination: Germination can take anywhere from 1-3 weeks, so be patient. Once the seedlings emerge, provide them with plenty of light. A grow light is ideal, but a sunny windowsill can also work.
Transplanting Your Luffa Seedlings
Once your seedlings have developed a few sets of true leaves and the weather has warmed up, it’s time to transplant them outdoors. Make sure all danger of frost has passed before transplanting.
1. Harden Off the Seedlings: Before transplanting, you’ll need to harden off your seedlings. This means gradually exposing them to outdoor conditions over a period of 1-2 weeks. Start by placing them outside for a few hours each day, gradually increasing the amount of time they spend outdoors.
2. Prepare the Planting Site: Choose a sunny location with well-drained soil. Amend the soil with compost or aged manure to improve its fertility.
3. Install the Trellis: Before transplanting, make sure your trellis or support structure is in place. Luffa vines can grow up to 30 feet long, so you’ll need a strong and sturdy support.
4. Transplant the Seedlings: Dig a hole that is slightly larger than the root ball of the seedling. Gently remove the seedling from its container and place it in the hole. Backfill with soil and water thoroughly. Space the seedlings about 2-3 feet apart.
Caring for Your Luffa Vines
Once your luffa vines are established, they’re relatively easy to care for. Here are a few tips to keep them happy and healthy:
1. Water Regularly: Luffa needs consistent watering, especially during hot, dry weather. Water deeply whenever the soil feels dry to the touch.
2. Fertilize: Feed your luffa vines with a balanced fertilizer every few weeks. You can also side-dress them with compost or aged manure.
3. Prune the Vines: Pruning can help to improve air circulation and encourage fruit production. Remove any dead or diseased leaves and stems. You can also trim the vines to keep them from getting too unruly.
4. Pollination: Luffa flowers are pollinated by insects, so encourage pollinators to visit your garden by planting flowers that attract bees and butterflies. If you’re not seeing a lot of insect activity, you can hand-pollinate the flowers yourself. To do this, use a small paintbrush to transfer pollen from the male flowers to the female flowers. Female flowers have a small luffa fruit behind the flower.
5. Pest and Disease Control: Luffa is generally resistant to pests and diseases, but keep an eye out for common garden pests like aphids and squash bugs. You can control these pests with insecticidal soap or neem oil.
Harvesting Your Luffa Sponges
The key to getting good sponges is letting the luffa fruits mature fully on the vine. This is probably the hardest part, because you have to resist the urge to pick them when they’re still green and tender!
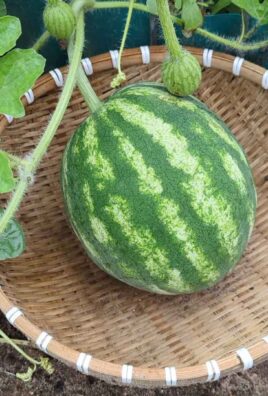
1. Wait for Maturity: The luffa fruits are ready to harvest when they turn brown and dry on the vine. The skin will become hard and brittle, and the fruit will feel lightweight. You should be able to hear the seeds rattling inside.
2. Harvest the Fruits: Use pruning shears or scissors to cut the luffa fruits from the vine.
3. Peel the Skin: Once you’ve harvested the fruits, you’ll need to remove the outer skin. This can be a bit messy, so I recommend doing it outdoors. You can soak the luffa fruits in water for a few days to soften the skin, which will make it easier to peel. I usually just crush the dry skin with my hands and then peel it off.
4. Remove the Seeds: After peeling the skin, you’ll need to remove the seeds. You can do this by shaking the luffa fruit vigorously or by cutting off one end and scooping out the seeds. Save the seeds for planting next year!
5. Rinse and Dry: Rinse the luffa sponge thoroughly with water to remove any remaining pulp or seeds. Then, hang it up to dry in a well-ventilated area. It may take several days for the sponge to dry completely.
6. Bleach (Optional): If you want to lighten the color of your luffa sponge, you can soak it in a diluted bleach solution for a few minutes. Be sure to rinse it thoroughly afterwards.
Using Your Homegrown Luffa Sponges
Now that you’ve grown and processed your own luffa sponges, it’s time to put them to use! Here are a few ideas:
* Kitchen Sponges: Luffa sponges are great for washing dishes and scrubbing pots and pans. They’re naturally abrasive, so they’re effective at removing dirt and grime.
* Bath Sponges: Luffa sponges are also great for exfoliating your skin in the shower or bath. They help to remove dead skin cells and leave your skin feeling soft and smooth.
* Crafting: Luffa sponges can be used in a variety of craft projects. You can cut them into different shapes and sizes and use them to create decorative items.
* Gardening: Use smaller pieces of luffa sponge as a natural alternative to synthetic sponges for starting seeds or cleaning gardening tools.
Troubleshooting
Even with the best planning, sometimes things don’t go exactly as expected. Here are a few common problems you might encounter when growing luffa and how to address them:
* Poor Germination: If

Conclusion
So, there you have it! Growing your own angled luffa at home is not just a gardening project; it’s an investment in sustainable living, a creative outlet, and a pathway to incredibly rewarding harvests. Forget those mass-produced, often chemically treated sponges from the store. Imagine the satisfaction of exfoliating with a luffa you nurtured from seed to shower!
This DIY trick is a must-try for several compelling reasons. First, you gain complete control over the growing process, ensuring your luffas are free from harmful pesticides and herbicides. Second, you significantly reduce your environmental footprint by minimizing transportation and packaging waste associated with commercially produced luffas. Third, and perhaps most exciting, you unlock a world of possibilities beyond just sponges.
Think about the variations you can explore! Experiment with different soil compositions to see how they affect the texture and density of the luffa. Try growing your luffas on different types of trellises to influence their shape. Consider interplanting with companion plants like basil or marigolds to deter pests naturally. You can even let some of your luffas mature fully and save the seeds for next year, creating a self-sustaining cycle of homegrown goodness.
Beyond the bathroom, your homegrown angled luffa can be used for a variety of purposes. Use smaller, younger luffas as gentle scrubbers for delicate surfaces in your kitchen. Cut them into smaller pieces and add them to your compost pile for added aeration. Get crafty and use dried luffa slices in decorative arrangements or even as natural paintbrushes for unique textures. The possibilities are truly endless!
But the real magic lies in the experience itself. From the moment you sow the seeds to the day you harvest your first luffa, you’ll be captivated by the plant’s incredible growth and transformation. You’ll develop a deeper appreciation for the natural world and a sense of accomplishment that comes from nurturing something from start to finish.
We wholeheartedly encourage you to embark on this rewarding journey. Don’t be intimidated if you’re a beginner gardener; growing angled luffa is surprisingly straightforward with a little patience and care. Follow our guide, adapt it to your specific climate and growing conditions, and get ready to be amazed by the results.
And most importantly, we want to hear about your experience! Share your photos, tips, and challenges in the comments below. Let’s create a community of angled luffa enthusiasts and learn from each other’s successes and failures. Together, we can unlock the full potential of this amazing plant and enjoy the many benefits of growing our own natural sponges at home. So grab your seeds, get your hands dirty, and prepare to be amazed by the wonders of homegrown angled luffa!
Frequently Asked Questions (FAQ)
What is the best time to plant angled luffa seeds?
The ideal time to plant angled luffa seeds is in the late spring or early summer, after the last frost has passed and the soil has warmed up to at least 70°F (21°C). Angled luffa requires a long growing season (around 150-200 days) to fully mature, so starting them indoors 6-8 weeks before the last frost can give you a head start, especially in cooler climates.
How much space does an angled luffa plant need?
Angled luffa vines are vigorous growers and require ample space to spread. Each plant needs at least 3-4 feet of space in all directions. They also need a strong trellis or support structure to climb on, as the fruits can become quite heavy. A sturdy fence, pergola, or custom-built trellis are all good options.
What kind of soil is best for growing angled luffa?
Angled luffa thrives in well-drained, fertile soil that is rich in organic matter. Amend your soil with compost, aged manure, or other organic amendments before planting. A slightly acidic to neutral soil pH (around 6.0-7.0) is ideal. Good drainage is crucial to prevent root rot.
How often should I water my angled luffa plants?
Angled luffa plants need consistent watering, especially during hot, dry weather. Water deeply and regularly, ensuring the soil stays consistently moist but not waterlogged. Mulching around the base of the plants can help retain moisture and suppress weeds. Check the soil moisture regularly and adjust your watering schedule accordingly.
How do I know when my angled luffa is ready to harvest?
The best time to harvest angled luffa for sponges is when the fruit is fully mature but still green and slightly flexible. The skin should be firm but not rock hard. You can gently squeeze the fruit to test its ripeness. If it feels firm and the skin is starting to turn slightly yellow or brown, it’s likely ready to harvest. If you wait too long, the luffa will become too fibrous and difficult to process.
How do I process my harvested angled luffa into a sponge?
Processing angled luffa into a sponge is a relatively simple process. First, cut the luffa from the vine, leaving a few inches of stem. Then, peel off the outer skin. This can be done by hand or with a vegetable peeler. Once the skin is removed, shake out the seeds. Rinse the luffa thoroughly with water to remove any remaining pulp or debris. Finally, allow the luffa to dry completely in a well-ventilated area. This may take several days or even weeks, depending on the humidity.
Can I eat angled luffa?
Yes, young angled luffa fruits can be eaten like zucchini or squash. They are delicious stir-fried, steamed, or added to soups and stews. However, only eat the young, tender fruits. Once the luffa starts to mature and become fibrous, it is no longer suitable for consumption.
Are there any pests or diseases that affect angled luffa?
Angled luffa can be susceptible to certain pests and diseases, such as squash bugs, vine borers, and powdery mildew. Regularly inspect your plants for signs of infestation or disease. Use organic pest control methods, such as insecticidal soap or neem oil, to control pests. Ensure good air circulation to prevent powdery mildew.
Can I grow angled luffa in containers?
Yes, you can grow angled luffa in containers, but you will need a large container (at least 20 gallons) and a sturdy trellis. Choose a well-draining potting mix and provide regular watering and fertilization. Container-grown luffas may not produce as many fruits as those grown in the ground, but it is still a viable option for those with limited space.
How can I save seeds from my angled luffa for next year?
To save seeds from your angled luffa, allow the fruit to fully mature on the vine until it turns brown and dry. Once the fruit is completely dry, shake out the seeds. Store the seeds in a cool, dry place until next spring. Be sure to label the seeds with the date and variety.

Leave a Comment