

Grow Birds Eye Chili, and unlock a world of fiery flavor right in your own backyard! Have you ever dreamed of adding a zesty kick to your meals with chilies you’ve nurtured from seed to spicy perfection? This isn’t just about gardening; it’s about embracing a culinary adventure and experiencing the satisfaction of creating something truly delicious.
Chili peppers, including the Birds Eye variety, boast a rich history, tracing back thousands of years to South America. They’ve been prized not only for their culinary uses but also for their medicinal properties and cultural significance. Imagine connecting with that ancient tradition as you cultivate your own vibrant chili plants!
But why should you embark on this spicy journey? Well, for starters, store-bought chilies can sometimes lack the intense flavor and freshness of homegrown varieties. Plus, knowing exactly where your food comes from and how it’s grown offers peace of mind. I’m here to guide you through simple, effective DIY tricks and hacks that will make growing Birds Eye Chili a breeze, even if you’re a complete beginner. Get ready to add some serious heat to your garden and your plate!
Growing Birds Eye Chili: A Fiery DIY Guide
Hey there, fellow chili enthusiasts! Ever dreamt of harvesting your own fiery Birds Eye chilies? Well, you’ve come to the right place! I’m going to walk you through the entire process, from seed to sizzling harvest. Trust me, there’s nothing quite like the satisfaction of adding your homegrown heat to your favorite dishes. Let’s get started!
Choosing Your Seeds and Starting Indoors
Okay, so the first step is getting your hands on some Birds Eye chili seeds. You can find them online, at your local garden center, or even extract them from a dried chili (though germination rates might be lower with the latter). I personally prefer buying seeds from a reputable source to ensure good quality and germination.
Here’s what you’ll need:
* Birds Eye chili seeds
* Seed starting tray or small pots
* Seed starting mix (or a well-draining potting mix)
* Spray bottle
* Heat mat (optional, but recommended)
* Grow light (optional, but recommended)
* Clear plastic dome or plastic wrap
Now, let’s get those seeds germinating!
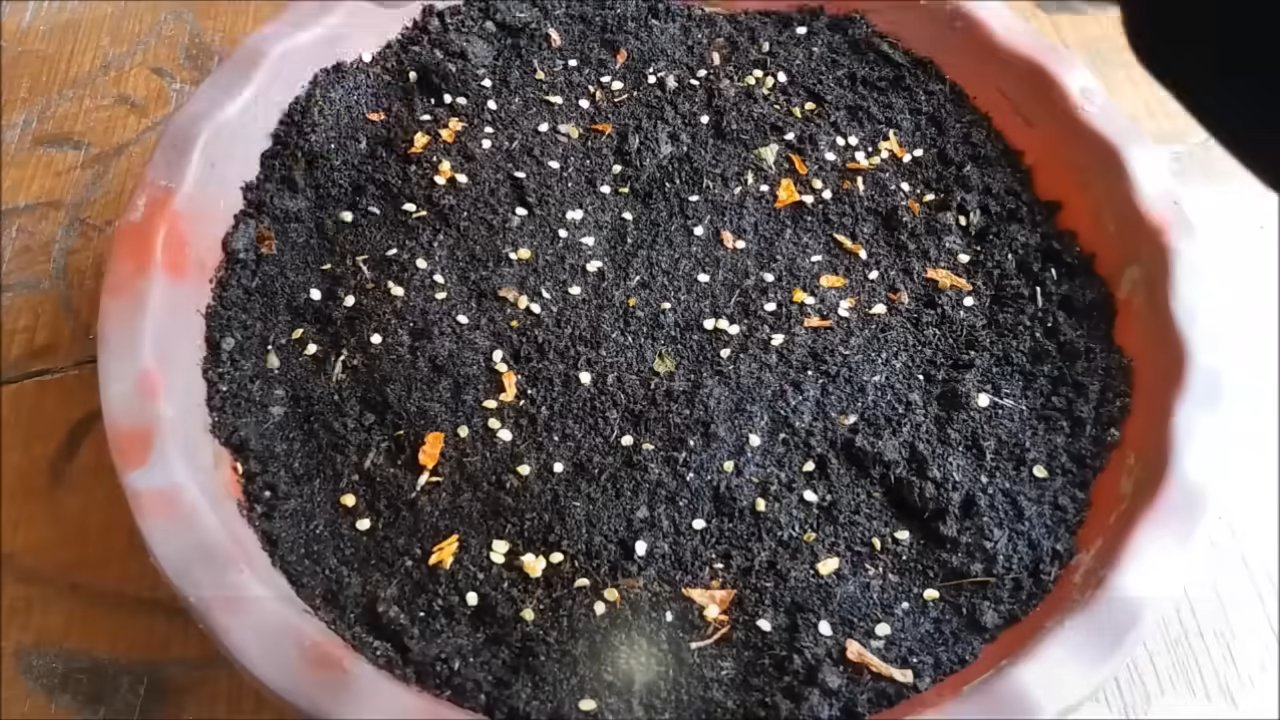
1. Prepare your seed starting tray or pots: Fill your chosen container with seed starting mix. Gently pat it down to remove any large air pockets, but don’t compact it too much. You want the soil to be loose and well-draining.
2. Sow the seeds: Make a small indentation (about 1/4 inch deep) in the center of each cell or pot. Place 2-3 seeds in each indentation. This increases your chances of at least one seed germinating.
3. Cover the seeds: Gently cover the seeds with more seed starting mix. Lightly pat it down.
4. Water gently: Use a spray bottle to thoroughly moisten the soil. Avoid overwatering, as this can lead to damping off (a fungal disease that kills seedlings). The soil should be damp, not soggy.
5. Create a humid environment: Cover the tray or pots with a clear plastic dome or plastic wrap. This helps to retain moisture and create a warm, humid environment that’s ideal for germination.
6. Provide warmth: Place the tray or pots on a heat mat. Birds Eye chilies germinate best at temperatures between 75-85°F (24-29°C). If you don’t have a heat mat, you can place them in a warm location, such as near a radiator or on top of your refrigerator.
7. Provide light: Place the tray or pots under a grow light. If you don’t have a grow light, you can place them in a sunny windowsill, but be sure to rotate them regularly to prevent them from leaning towards the light.
8. Monitor and maintain: Check the soil moisture daily and mist with water as needed to keep it damp. Remove the plastic dome or plastic wrap for a few hours each day to allow for air circulation and prevent fungal growth.
9. Wait patiently: Germination typically takes 7-21 days, but it can sometimes take longer depending on the conditions. Be patient and keep monitoring the soil moisture and temperature.
10. Thin the seedlings: Once the seedlings have emerged and have a few sets of true leaves (the leaves that look like miniature chili pepper leaves), thin them out to one seedling per cell or pot. Choose the strongest, healthiest-looking seedling and snip off the others at the soil line with scissors. Don’t pull them out, as this can disturb the roots of the remaining seedling.
Transplanting Your Seedlings
Once your seedlings are a few inches tall and have a good root system, it’s time to transplant them into larger pots or directly into your garden. I usually wait until the risk of frost has passed before transplanting outdoors.
Here’s what you’ll need:
* Larger pots (at least 6 inches in diameter) or a garden bed
* Potting mix (for pots) or well-draining garden soil
* Trowel
* Watering can
* Fertilizer (optional)
Let’s get those seedlings transplanted!
1. Harden off the seedlings: Before transplanting outdoors, you need to harden off the seedlings. This means gradually exposing them to outdoor conditions over a period of 7-10 days. Start by placing them outdoors in a sheltered location for a few hours each day, gradually increasing the amount of time they spend outdoors. This will help them to acclimate to the sun, wind, and temperature changes.
2. Prepare the pots or garden bed: If you’re using pots, fill them with potting mix. If you’re planting in a garden bed, make sure the soil is well-draining and amended with compost or other organic matter.
3. Dig a hole: Dig a hole in the center of each pot or in the garden bed that’s large enough to accommodate the root ball of the seedling.
4. Gently remove the seedling: Gently remove the seedling from its original container. Be careful not to damage the roots. If the seedling is root-bound (the roots are circling around the bottom of the pot), gently loosen the roots before planting.
5. Place the seedling in the hole: Place the seedling in the hole and backfill with soil. Gently pat the soil down around the base of the plant.
6. Water thoroughly: Water the seedling thoroughly after transplanting.
7. Fertilize (optional): You can fertilize the seedling with a balanced fertilizer after transplanting. Follow the instructions on the fertilizer package.
Caring for Your Birds Eye Chili Plants
Now that your plants are transplanted, it’s time to provide them with the care they need to thrive. Birds Eye chilies are relatively easy to grow, but they do require some attention.
Here’s what you need to keep in mind:
* Sunlight: Birds Eye chilies need at least 6-8 hours of sunlight per day. Choose a location that receives plenty of sun.
* Watering: Water your plants regularly, especially during hot, dry weather. Allow the soil to dry out slightly between waterings. Avoid overwatering, as this can lead to root rot.
* Fertilizing: Fertilize your plants every 2-3 weeks with a balanced fertilizer. You can also use a fertilizer specifically formulated for chili peppers.
* Pruning: Pruning is not essential, but it can help to promote bushier growth and increase yields. You can prune your plants by pinching off the tips of the branches.
* Pest and disease control: Birds Eye chilies are susceptible to a few pests and diseases, such as aphids, spider mites, and fungal diseases. Inspect your plants regularly for signs of pests or diseases and take action promptly. You can use insecticidal soap or neem oil to control pests, and fungicides to control fungal diseases.
* Support: As your plants grow taller, they may need support to prevent them from falling over. You can use stakes or cages to support the plants.
Harvesting Your Chilies
The moment you’ve been waiting for! Birds Eye chilies are typically ready to harvest about 60-80 days after transplanting.
Here’s how to harvest them:
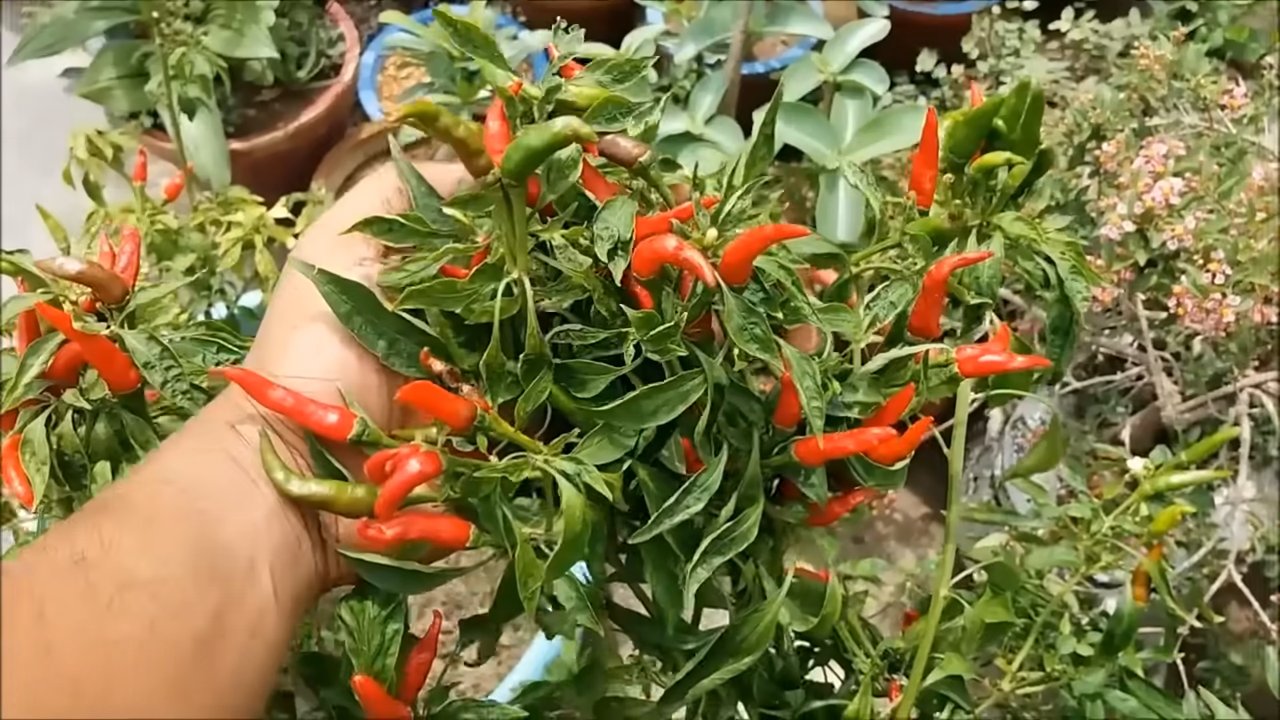
1. Look for ripe chilies: Ripe Birds Eye chilies are typically bright red, but they can also be green, yellow, or orange depending on the variety.
2. Use scissors or pruning shears: Use scissors or pruning shears to cut the chilies from the plant. Be careful not to damage the plant.
3. Harvest regularly: Harvest your chilies regularly to encourage the plant to produce more.
Storing Your Chilies
Once you’ve harvested your chilies, you can store them in a variety of ways.
Here are a few options:
* Fresh: You can store fresh chilies in the refrigerator for up to a week.
* Dried: You can dry your chilies by stringing them together and hanging them in a warm, dry place. You can also use a dehydrator.
* Frozen: You can freeze your chilies whole or chopped.
* Pickled: You can pickle your chilies in vinegar or brine.
And there you have it! You’ve successfully grown your own Birds Eye chilies. Now go forth and add some fiery flavor to your culinary creations! Remember to always handle chilies with care and wash your hands thoroughly after handling them. Happy growing!
Conclusion
So, there you have it! Growing your own Birds Eye Chili plants isn’t just a fun gardening project; it’s a gateway to unlocking a world of flavor and freshness right in your own backyard. Forget those bland, store-bought chilies that lack the fiery punch you crave. With a little patience and these simple steps, you’ll be harvesting vibrant, potent Birds Eye Chilies that will elevate your culinary creations to a whole new level.
Why is this DIY trick a must-try? Because it empowers you to control the entire process, from seed to table. You know exactly what goes into your chilies – no hidden pesticides or questionable growing practices. Plus, the satisfaction of nurturing a plant from a tiny seed to a bountiful harvest is incredibly rewarding. Imagine the pride you’ll feel when you add your home-grown Birds Eye Chili to your favorite dish, knowing you cultivated that intense flavor yourself.
But the fun doesn’t stop there! Feel free to experiment with different growing conditions to see how they affect the heat level and flavor profile of your chilies. Try growing them in different types of soil, adjusting the amount of sunlight they receive, or even experimenting with different fertilizers. You can also explore different varieties of Birds Eye Chili, each with its own unique characteristics. Some are smaller and more compact, while others are larger and more prolific.
Consider these variations to personalize your chili-growing experience:
* Hydroponic Birds Eye Chili: For those with limited space or a desire for a more controlled environment, hydroponics offers a fantastic alternative.
* Container Gardening: If you don’t have a garden, don’t worry! Birds Eye Chilies thrive in containers, making them perfect for balconies, patios, or even indoor growing with the help of grow lights.
* Companion Planting: Enhance your chili’s growth and deter pests by planting companion plants like basil, marigolds, or carrots nearby.
Growing your own Birds Eye Chili is more than just a gardening project; it’s an investment in flavor, freshness, and self-sufficiency. It’s a chance to connect with nature, learn new skills, and enjoy the fruits (or rather, chilies!) of your labor.
We wholeheartedly encourage you to give this DIY trick a try. Don’t be intimidated if you’re a beginner gardener – the steps are straightforward, and the rewards are well worth the effort. And once you’ve harvested your first batch of fiery Birds Eye Chilies, we’d love to hear about your experience! Share your tips, tricks, and culinary creations with us in the comments below. Let’s build a community of chili-growing enthusiasts and inspire others to embark on this flavorful journey. So, grab your seeds, get your hands dirty, and prepare to experience the unparalleled taste of home-grown Birds Eye Chili!
Frequently Asked Questions (FAQ)
What is the best time of year to start growing Birds Eye Chili?
The best time to start growing Birds Eye Chili depends on your climate. In warmer climates with mild winters, you can start seeds indoors in late winter or early spring. In colder climates, it’s best to start seeds indoors 6-8 weeks before the last expected frost. This gives the seedlings enough time to develop before being transplanted outdoors. You can also purchase seedlings from a nursery if you prefer to skip the seed-starting process.
How much sunlight do Birds Eye Chili plants need?
Birds Eye Chili plants thrive in full sun, requiring at least 6-8 hours of direct sunlight per day. If you’re growing them indoors, supplement with grow lights to ensure they receive adequate light. Insufficient sunlight can lead to leggy growth, reduced flowering, and smaller, less potent chilies.
What type of soil is best for growing Birds Eye Chili?
Birds Eye Chili plants prefer well-draining soil that is rich in organic matter. A good potting mix for containers or a garden bed amended with compost or aged manure will provide the necessary nutrients and drainage. Avoid heavy clay soils, as they can retain too much moisture and lead to root rot. The ideal soil pH is between 6.0 and 7.0.
How often should I water my Birds Eye Chili plants?
Water your Birds Eye Chili plants regularly, especially during hot, dry weather. The soil should be kept consistently moist but not waterlogged. Check the soil moisture by sticking your finger about an inch deep. If the soil feels dry, it’s time to water. Avoid overhead watering, as this can promote fungal diseases. Instead, water at the base of the plant.
How often should I fertilize my Birds Eye Chili plants?
Feed your Birds Eye Chili plants regularly with a balanced fertilizer, especially during the growing season. Start fertilizing about two weeks after transplanting seedlings or when the plants begin to flower. Use a fertilizer that is specifically formulated for vegetables or peppers, following the instructions on the label. Avoid over-fertilizing, as this can lead to excessive foliage growth at the expense of fruit production.
What are some common pests and diseases that affect Birds Eye Chili plants?
Common pests that can affect Birds Eye Chili plants include aphids, spider mites, whiteflies, and chili thrips. These pests can suck the sap from the plants, causing stunted growth and reduced yields. Control pests by spraying with insecticidal soap, neem oil, or horticultural oil. Common diseases include fungal diseases like powdery mildew, anthracnose, and root rot. Prevent diseases by providing good air circulation, avoiding overhead watering, and using disease-resistant varieties.
How long does it take for Birds Eye Chili plants to produce fruit?
Birds Eye Chili plants typically take 60-90 days to produce fruit after transplanting. The exact time will depend on the variety, growing conditions, and climate. The chilies will start out green and then turn red as they ripen. You can harvest them at any stage, but they will be hottest when fully ripe.
How do I harvest Birds Eye Chilies?
Harvest Birds Eye Chilies when they are fully ripe and have reached their desired color. Use scissors or pruning shears to cut the chilies from the plant, leaving a small stem attached. Avoid pulling the chilies off, as this can damage the plant. Wear gloves when harvesting, as the capsaicin in the chilies can irritate your skin.
How do I store Birds Eye Chilies?
Fresh Birds Eye Chilies can be stored in the refrigerator for up to a week. For longer storage, you can dry them, freeze them, or pickle them. To dry chilies, string them together and hang them in a well-ventilated area until they are completely dry. To freeze chilies, wash them, dry them, and then place them in a freezer bag. To pickle chilies, follow a recipe for pickled peppers.
Can I grow Birds Eye Chili indoors?
Yes, you can grow Birds Eye Chili indoors, but you will need to provide them with adequate light and warmth. Place the plants near a sunny window or use grow lights to supplement the natural light. Keep the temperature between 70-80°F during the day and 60-70°F at night. Water regularly and fertilize as needed.
How hot are Birds Eye Chilies?
Birds Eye Chilies are known for their intense heat. They typically range from 50,000 to 100,000 Scoville Heat Units (SHU) on the Scoville scale, which measures the pungency (spiciness or “heat”) of chili peppers. This makes them significantly hotter than jalapeños, which typically range from 2,500 to 8,000 SHU. Use caution when handling and consuming Birds Eye Chilies.
Leave a Comment