

Grow bitter gourd at home? Absolutely! And I’m here to tell you it’s easier than you might think. Forget those bland, overpriced gourds at the supermarket; imagine harvesting your own fresh, vibrant, and slightly quirky bitter gourds right from your backyard or balcony. This isn’t just about saving money; it’s about connecting with nature and experiencing the satisfaction of nurturing your own food.
Bitter gourd, also known as karela, has a rich history, deeply rooted in traditional medicine and culinary practices across Asia and Africa for centuries. It’s revered not only for its unique flavor profile but also for its potential health benefits. But let’s be honest, sometimes the bitterness can be a bit much! That’s where my DIY tricks come in.
In this article, I’m going to share my favorite, tried-and-true methods for successfully growing bitter gourd at home, even if you’re a complete beginner. We’ll cover everything from seed selection and soil preparation to trellising techniques and pest control. But more importantly, I’ll reveal my secret hacks for minimizing that intense bitterness, so you can actually enjoy the fruits (or rather, vegetables!) of your labor. So, are you ready to grow bitter gourd at home and impress your friends and family with your green thumb? Let’s get started!
Growing Bitter Gourd at Home: A Comprehensive DIY Guide
Hey there, fellow gardening enthusiasts! I’m so excited to share my experience and guide you through growing your own bitter gourd (also known as bitter melon or karela) right in your backyard or even on your balcony. It might seem intimidating at first, but trust me, with a little patience and the right steps, you’ll be harvesting your own healthy and delicious bitter gourds in no time!
Why Grow Bitter Gourd?
Before we dive into the how-to, let’s quickly talk about why you should consider growing bitter gourd. Besides the satisfaction of growing your own food, bitter gourd is packed with nutrients and has numerous health benefits. Plus, fresh, homegrown bitter gourd tastes so much better than the ones you find at the store!
What You’ll Need: Gathering Your Supplies
Okay, let’s get started by gathering everything you’ll need. This is crucial for a smooth and successful growing experience.
* Bitter Gourd Seeds: Choose a variety that suits your climate and space. You can find these at your local garden center or online. I personally prefer the long, green varieties, but experiment and see what works best for you!
* Seed Starting Tray or Small Pots: These are for starting your seeds indoors, which I highly recommend for a head start.
* Potting Mix: Use a well-draining potting mix specifically designed for seedlings. Avoid using garden soil directly, as it can be too heavy and compact.
* Larger Pots or Garden Space: If you’re growing in containers, you’ll need pots that are at least 12 inches in diameter. If you’re planting directly in the garden, make sure you have enough space for the vines to spread.
* Well-Draining Soil: Bitter gourd thrives in well-draining soil that’s rich in organic matter. Amend your garden soil with compost or well-rotted manure to improve its fertility and drainage.
* Trellis or Support Structure: Bitter gourd is a vine, so it needs something to climb on. A trellis, fence, or even a sturdy bamboo structure will work perfectly.
* Fertilizer: A balanced fertilizer (like 10-10-10) or an organic fertilizer will help your plants grow strong and produce plenty of fruit.
* Watering Can or Hose: For regular watering.
* Gardening Gloves: To protect your hands.
* Hand Trowel or Small Shovel: For planting and transplanting.
* Pruning Shears: For trimming and pruning the vines.
Phase 1: Starting Your Seeds
Starting your seeds indoors gives them a head start, especially if you live in a region with a shorter growing season. I’ve found this method significantly increases my chances of a successful harvest.
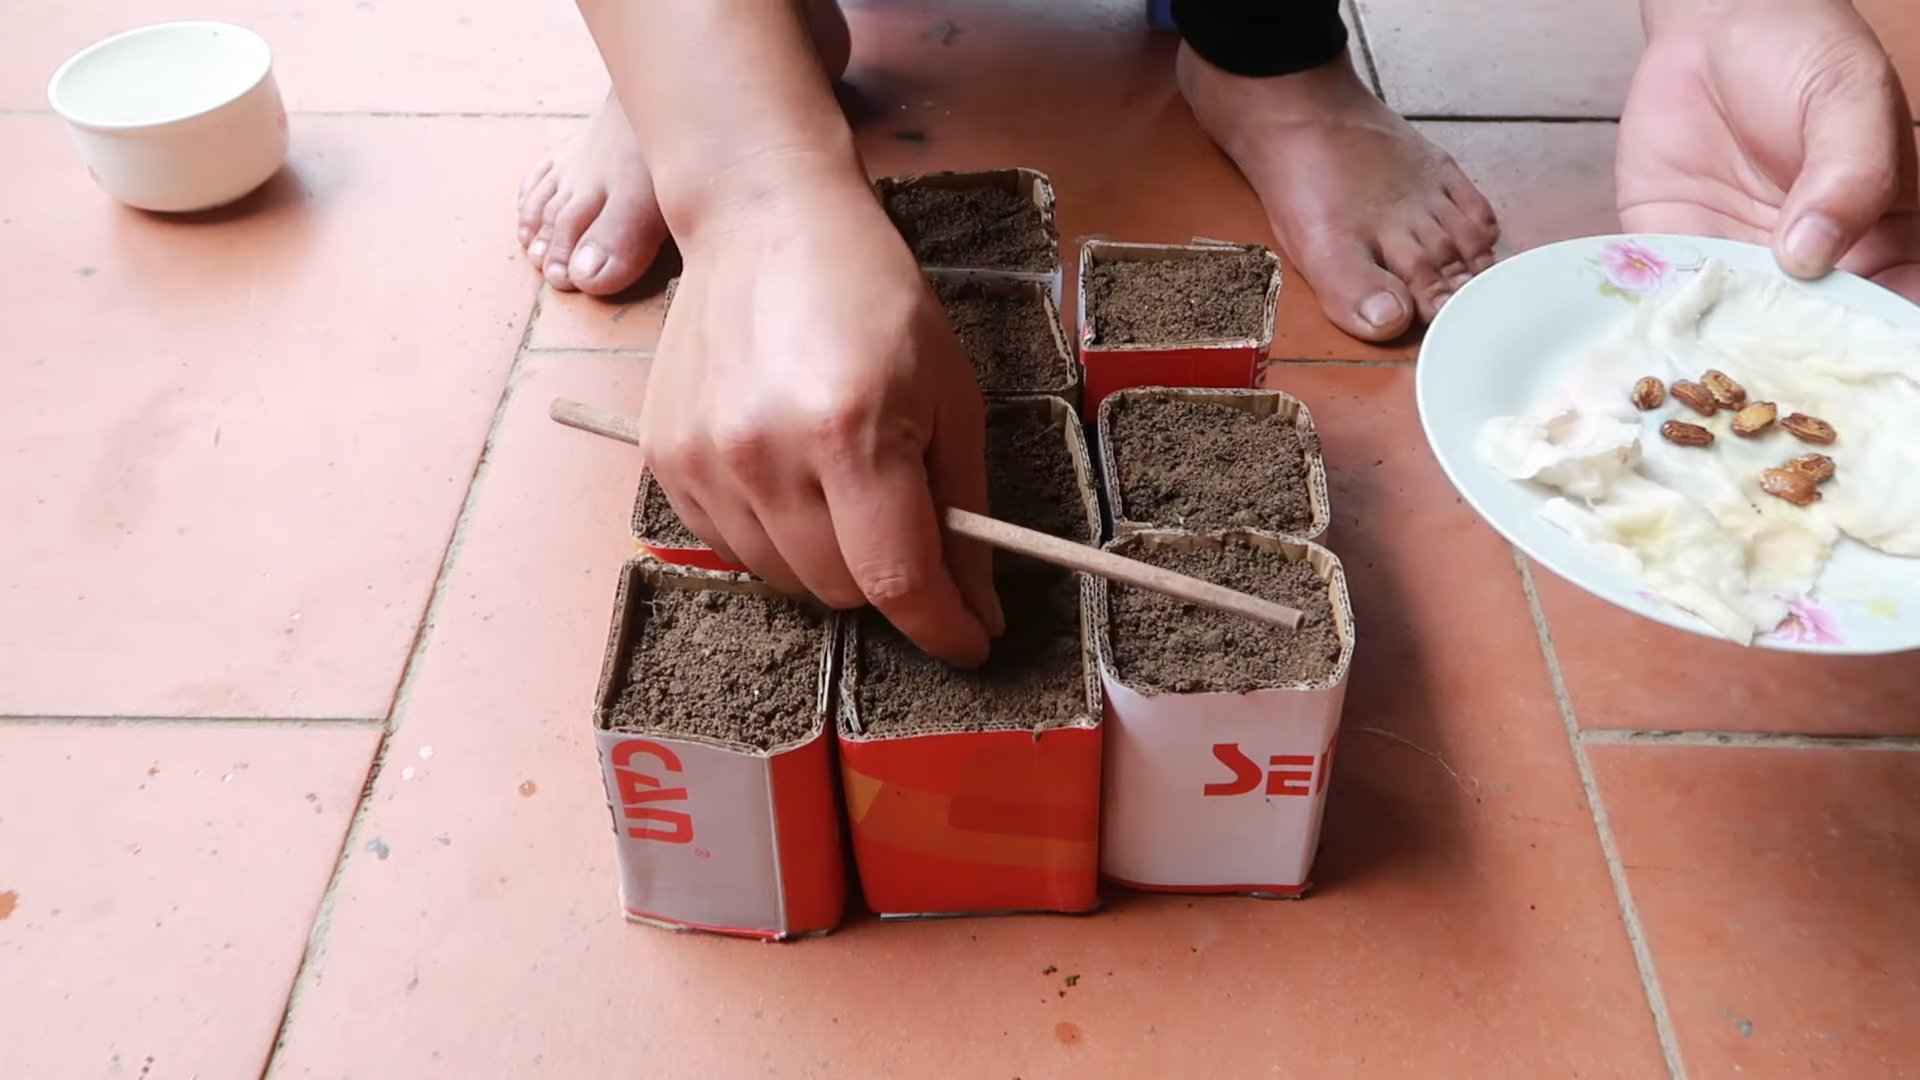
1. Soak the Seeds: Before planting, soak the bitter gourd seeds in warm water for 24 hours. This helps soften the seed coat and promotes faster germination.
2. Prepare the Seed Starting Tray: Fill your seed starting tray or small pots with the potting mix. Moisten the soil gently.
3. Plant the Seeds: Make a small hole (about 1/2 inch deep) in the center of each pot or cell. Place one seed in each hole and cover it with soil. Gently pat the soil down.
4. Water Gently: Water the seeds gently using a watering can or spray bottle. Avoid overwatering, as this can lead to rot.
5. Provide Warmth and Light: Place the seed starting tray in a warm location with plenty of sunlight. A sunny windowsill or a grow light works well. The ideal temperature for germination is between 75-85°F (24-29°C).
6. Keep the Soil Moist: Keep the soil consistently moist, but not soggy. Check the soil moisture daily and water as needed.
7. Wait for Germination: Bitter gourd seeds typically germinate in 7-14 days. Be patient!
Phase 2: Transplanting Seedlings
Once your seedlings have developed a few true leaves (the leaves that appear after the initial seed leaves), it’s time to transplant them into larger pots or directly into your garden.
1. Harden Off the Seedlings: Before transplanting, you need to “harden off” the seedlings. This means gradually exposing them to outdoor conditions to help them adjust. Start by placing the seedlings outdoors in a sheltered location for a few hours each day, gradually increasing the amount of time they spend outside over the course of a week.
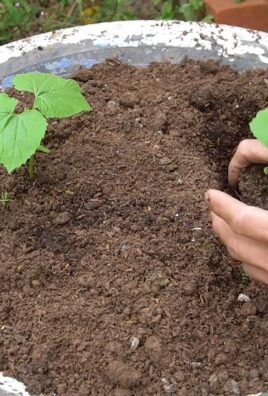
2. Prepare the Planting Location: Choose a sunny location with well-draining soil. If you’re planting in containers, make sure the pots are large enough to accommodate the mature vines. Amend the soil with compost or well-rotted manure to improve its fertility.
3. Dig the Holes: Dig holes that are slightly larger than the root balls of the seedlings. Space the holes about 2-3 feet apart if you’re planting in the garden.
4. Transplant the Seedlings: Gently remove the seedlings from their pots or cells. Be careful not to damage the roots. Place each seedling in a hole and cover the roots with soil. Gently pat the soil down.
5. Water Thoroughly: Water the transplanted seedlings thoroughly.
6. Provide Support: Install a trellis or other support structure near the seedlings. As the vines grow, they will need something to climb on.
Phase 3: Caring for Your Bitter Gourd Plants
Now that your bitter gourd plants are in their permanent location, it’s time to provide them with the care they need to thrive.
1. Watering: Water your bitter gourd plants regularly, especially during hot, dry weather. Keep the soil consistently moist, but avoid overwatering. Water deeply, allowing the water to soak into the soil. I usually water in the morning to allow the foliage to dry before nightfall, which helps prevent fungal diseases.
2. Fertilizing: Fertilize your bitter gourd plants every 2-3 weeks with a balanced fertilizer or an organic fertilizer. Follow the instructions on the fertilizer package. I like to use a liquid fertilizer diluted in water for easy application.
3. Pruning: Prune your bitter gourd vines regularly to encourage branching and fruit production. Remove any dead or yellowing leaves. You can also pinch off the tips of the vines to promote bushier growth.
4. Training the Vines: Train the vines to climb the trellis or support structure. Gently guide the vines and tie them to the support using soft twine or plant ties.
5. Pest and Disease Control: Keep an eye out for pests and diseases. Common pests that affect bitter gourd include aphids, spider mites, and squash bugs. You can control these pests with insecticidal soap or neem oil. Common diseases include powdery mildew and downy mildew. You can prevent these diseases by providing good air circulation and avoiding overhead watering. If you notice any signs of disease, treat the plants with a fungicide. I always prefer organic solutions whenever possible.
6. Pollination: Bitter gourd plants produce both male and female flowers. The female flowers have a small fruit behind them, while the male flowers do not. Pollination is necessary for fruit to develop. If you’re growing bitter gourd indoors or in an area with limited pollinators, you may need to hand-pollinate the flowers. To do this, use a small paintbrush to transfer pollen from the male flowers to the female flowers.
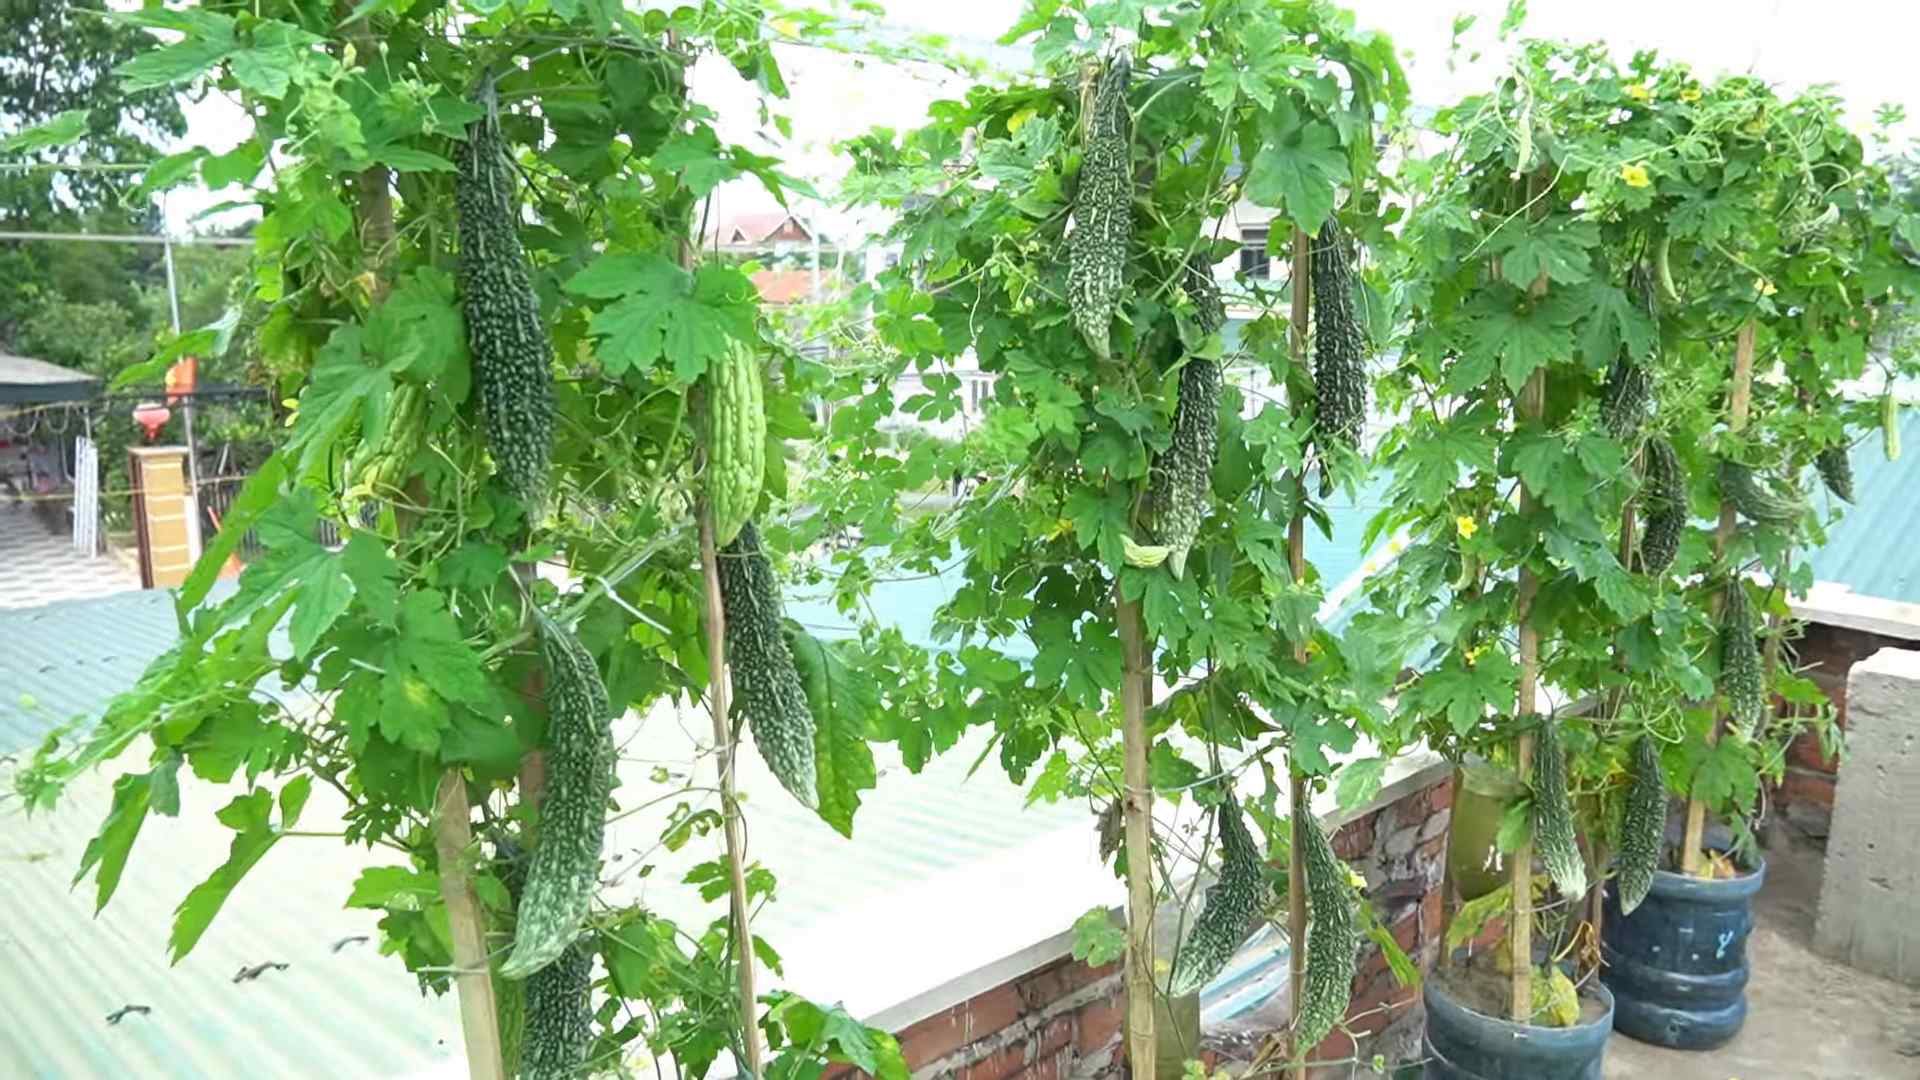
Phase 4: Harvesting Your Bitter Gourd
The moment you’ve been waiting for! Harvesting your own homegrown bitter gourd is incredibly rewarding.
1. Harvest Time: Bitter gourd is typically ready to harvest about 2-3 months after planting. The fruits should be firm and green, but not too hard. The size of the fruit will vary depending on the variety.
2. Harvesting Technique: Use a sharp knife or pruning shears to cut the bitter gourd from the vine. Leave a small piece of stem attached to the fruit.
3. Harvest Regularly: Harvest the bitter gourd regularly to encourage continued fruit production. Overripe fruits will turn yellow and become bitter.
4. Storage: Store harvested bitter gourd in the refrigerator for up to a week.
Tips for Success
Here are a few extra tips to help you succeed in growing bitter gourd at home:
* Choose the Right Variety: Select a variety that is well-suited to your climate and growing conditions.
* Provide Plenty of Sunlight: Bitter gourd needs at least 6-8 hours of sunlight per day.
* Ensure Good Drainage: Bitter gourd does not tolerate soggy soil. Make sure your soil is well-draining.
* Protect from Frost: Bitter gourd is sensitive to frost. If you live in an area with frost, protect your plants with row covers or blankets.
* Be Patient: Growing bitter gourd takes time and patience. Don’t get discouraged if you don’t see results immediately.
Troubleshooting
Even with
Conclusion
So, there you have it! Growing your own bitter gourd at home is not only achievable, but it’s also incredibly rewarding. From the satisfaction of nurturing a plant from seed to the joy of harvesting fresh, organic produce, this DIY project offers a multitude of benefits. We’ve walked you through the essential steps, from selecting the right seeds and preparing the soil to providing adequate support and managing pests.
But why is this DIY trick a must-try? Beyond the obvious advantage of having access to fresh, pesticide-free bitter gourd, growing it yourself allows you to control every aspect of the process. You can choose organic fertilizers, tailor the watering schedule to your specific climate, and even experiment with different growing techniques to maximize your yield. Plus, let’s be honest, there’s a certain pride that comes with serving a dish made with ingredients you’ve grown yourself. It’s a conversation starter, a testament to your green thumb, and a delicious way to connect with nature.
Looking for variations? Consider these ideas to personalize your bitter gourd growing experience:
* Vertical Gardening: If you’re short on space, embrace vertical gardening! Train your bitter gourd vines to climb a trellis, fence, or even a balcony railing. This not only saves space but also adds a touch of greenery to your surroundings.
* Companion Planting: Enhance your garden’s ecosystem by incorporating companion plants. Marigolds, basil, and nasturtiums can help deter pests and attract beneficial insects, creating a healthier environment for your bitter gourd.
* Grafting: For the more adventurous gardeners, grafting bitter gourd onto a stronger rootstock can improve disease resistance and overall plant vigor. This technique requires some skill but can yield impressive results.
* Different Varieties: Explore the diverse world of bitter gourd varieties! From the long, slender types to the shorter, rounder ones, each variety offers a unique flavor and texture. Experiment to find your favorite!
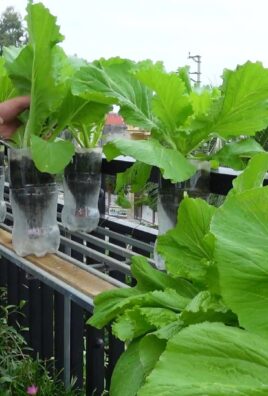
* Container Gardening: If you don’t have a garden, you can still grow bitter gourd in large containers. Make sure the container has good drainage and is large enough to support the plant’s root system.
We wholeheartedly encourage you to embark on this exciting journey of growing bitter gourd at home. It’s a fulfilling experience that connects you with nature, provides you with fresh produce, and allows you to hone your gardening skills. Don’t be afraid to experiment, learn from your mistakes, and most importantly, have fun!
Once you’ve harvested your first crop, we’d love to hear about your experience. Share your tips, tricks, and photos in the comments section below. Let’s create a community of bitter gourd enthusiasts and inspire others to embrace the joys of homegrown produce. Remember, every successful garden starts with a single seed. So, grab your seeds, get your hands dirty, and let the bitter gourd adventure begin! This is your chance to master the art of **growing bitter gourd at home** and enjoy the fruits (or rather, vegetables) of your labor.
Frequently Asked Questions (FAQ)
1. What is the best time of year to plant bitter gourd?
The ideal time to plant bitter gourd is during the late spring or early summer, after the last frost has passed. Bitter gourd thrives in warm weather and requires a long growing season of at least 90-120 days. Soil temperature should be consistently above 65°F (18°C) for optimal germination. In warmer climates, you can also plant a second crop in late summer for a fall harvest.
2. What type of soil is best for growing bitter gourd?
Bitter gourd prefers well-drained, fertile soil that is rich in organic matter. A slightly acidic to neutral pH of 6.0 to 7.0 is ideal. Before planting, amend the soil with compost, aged manure, or other organic materials to improve drainage, fertility, and water retention. Avoid heavy clay soils, as they can become waterlogged and hinder root growth. If you have clay soil, consider growing bitter gourd in raised beds or containers.
3. How much sunlight does bitter gourd need?
Bitter gourd requires at least 6-8 hours of direct sunlight per day to thrive. Choose a planting location that receives ample sunlight throughout the day. Insufficient sunlight can lead to stunted growth, reduced flowering, and lower yields. If you live in a particularly hot climate, providing some afternoon shade can help prevent the plants from overheating.
4. How often should I water bitter gourd?
Water bitter gourd regularly, especially during hot and dry weather. Aim to keep the soil consistently moist but not waterlogged. Water deeply at the base of the plant, avoiding wetting the foliage, which can increase the risk of fungal diseases. A good rule of thumb is to water when the top inch of soil feels dry to the touch. Mulching around the plants can help retain moisture and suppress weeds.
5. What kind of support system does bitter gourd need?
Bitter gourd is a climbing vine and requires a sturdy support system to grow properly. A trellis, fence, or arbor are all excellent options. The support structure should be at least 6-8 feet tall to accommodate the plant’s growth. Train the vines to climb the support structure by gently guiding them and tying them with soft twine or plant ties.
6. How do I fertilize bitter gourd?
Bitter gourd is a heavy feeder and benefits from regular fertilization. Start by incorporating a slow-release fertilizer into the soil at planting time. During the growing season, feed the plants every 2-3 weeks with a balanced liquid fertilizer or compost tea. Avoid over-fertilizing, as this can lead to excessive foliage growth and reduced fruit production.
7. What are some common pests and diseases that affect bitter gourd?
Common pests that can affect bitter gourd include aphids, spider mites, squash bugs, and vine borers. Regularly inspect your plants for signs of infestation and take appropriate action, such as spraying with insecticidal soap or neem oil. Common diseases include powdery mildew, downy mildew, and fruit rot. Ensure good air circulation around the plants and avoid overhead watering to minimize the risk of fungal diseases.
8. When is bitter gourd ready to harvest?
Bitter gourd is typically ready to harvest about 2-3 months after planting, depending on the variety and growing conditions. The fruits should be firm, green, and have a slightly waxy coating. Harvest the fruits when they are still relatively young and tender, as they become more bitter as they mature. Use a sharp knife or pruning shears to cut the fruits from the vine, leaving a short stem attached.
9. How do I store bitter gourd?
Store bitter gourd in the refrigerator for up to a week. Wrap the fruits in a plastic bag or container to prevent them from drying out. Bitter gourd can also be frozen for longer storage. Blanch the fruits in boiling water for 2-3 minutes, then cool them in ice water before freezing.
10. Can I grow bitter gourd in containers?
Yes, you can grow bitter gourd in containers, provided that the containers are large enough to accommodate the plant’s root system. Choose a container that is at least 18-24 inches in diameter and depth. Use a well-draining potting mix and provide a sturdy support system for the vines to climb. Water and fertilize regularly, as container-grown plants tend to dry out and deplete nutrients more quickly than those grown in the ground.

Leave a Comment