

Grow Celery at Home, you say? Absolutely! Imagine stepping into your kitchen and snipping fresh, crisp celery stalks straight from your own garden. No more limp, store-bought celery that’s been sitting on the shelf for days. This isn’t just a dream; it’s a deliciously achievable reality with a few simple DIY tricks.
Celery, with its refreshing crunch, has been enjoyed for centuries. Originating in the Mediterranean, it was initially valued for its medicinal properties before becoming a culinary staple. Now, you can bring this piece of history and healthy goodness right to your backyard or even your windowsill!
Why bother with growing your own celery? Well, for starters, you’ll have access to the freshest, most flavorful celery imaginable. Plus, you’ll know exactly what’s gone into growing it – no harmful pesticides or chemicals. But the best part? It’s incredibly rewarding! I’m going to share some easy-to-follow DIY hacks that will have you harvesting your own celery in no time. Whether you’re a seasoned gardener or a complete beginner, these tips will help you successfully grow celery at home and enjoy the satisfaction of nurturing your own food. Let’s get started!
Growing Celery From Kitchen Scraps: A Beginner’s Guide
Hey there, fellow plant enthusiasts! Ever wondered if you could regrow that celery stalk you were about to toss in the compost? Well, guess what? You absolutely can! It’s a super easy and rewarding DIY project, perfect for beginners and a great way to reduce food waste. I’m going to walk you through the whole process, step-by-step, so you can enjoy fresh, homegrown celery right from your kitchen.
What You’ll Need
Before we dive in, let’s gather our supplies. This is a pretty low-key project, so you probably have most of these things already:
* A celery stalk base (about 2-3 inches from the bottom, with the roots intact if possible, but don’t worry if they’re not!)
* A shallow dish or bowl
* Water (tap water is fine)
* A sunny windowsill or well-lit area
* Potting soil
* A pot (at least 6 inches in diameter)
* A spray bottle (optional, but helpful for keeping the soil moist)
Phase 1: Regrowing the Celery Base in Water
This is where the magic begins! We’re going to coax those little cells in the celery base to start growing again.
1. Prepare the Celery Base: Take your celery stalk base and give it a good rinse under cool water. This will remove any dirt or debris. If there are any really brown or mushy outer stalks, you can gently peel them away.
2. Place in Water: Fill your shallow dish or bowl with about an inch of water. Place the celery base, cut-side up, in the water. Make sure the water level covers the bottom of the base, but doesn’t submerge the entire thing. We want the top to be exposed to air.
3. Find a Sunny Spot: Place the dish with the celery base on a sunny windowsill or in a well-lit area. Celery needs plenty of light to grow.
4. Change the Water Regularly: This is important! Change the water every 1-2 days to prevent bacteria growth and keep the water fresh. This will encourage healthy root development.
5. Observe and Wait: Now comes the patience part. Over the next few days, you should start to see small roots emerging from the bottom of the celery base. You might also notice new, tiny leaves sprouting from the center. This is a sign that your celery is happy and growing! This process usually takes about 5-7 days, but it can vary depending on the celery and the conditions.
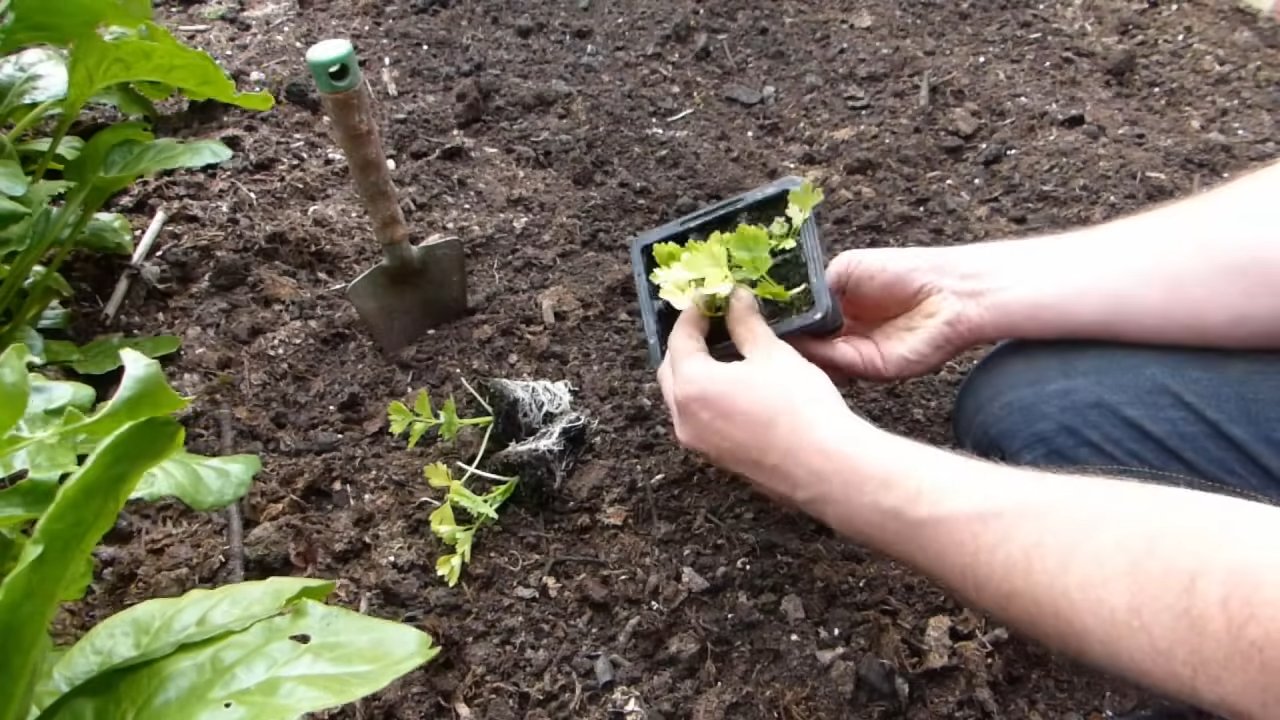
Phase 2: Transplanting to Soil
Once your celery base has developed a good root system (about an inch or two long) and has some new leaves, it’s time to move it to a pot with soil.
1. Prepare the Pot: Fill your pot with potting soil, leaving about an inch of space at the top. Gently pat down the soil to remove any air pockets.
2. Create a Hole: Use your finger or a small trowel to create a hole in the center of the soil, large enough to accommodate the celery base and its roots.
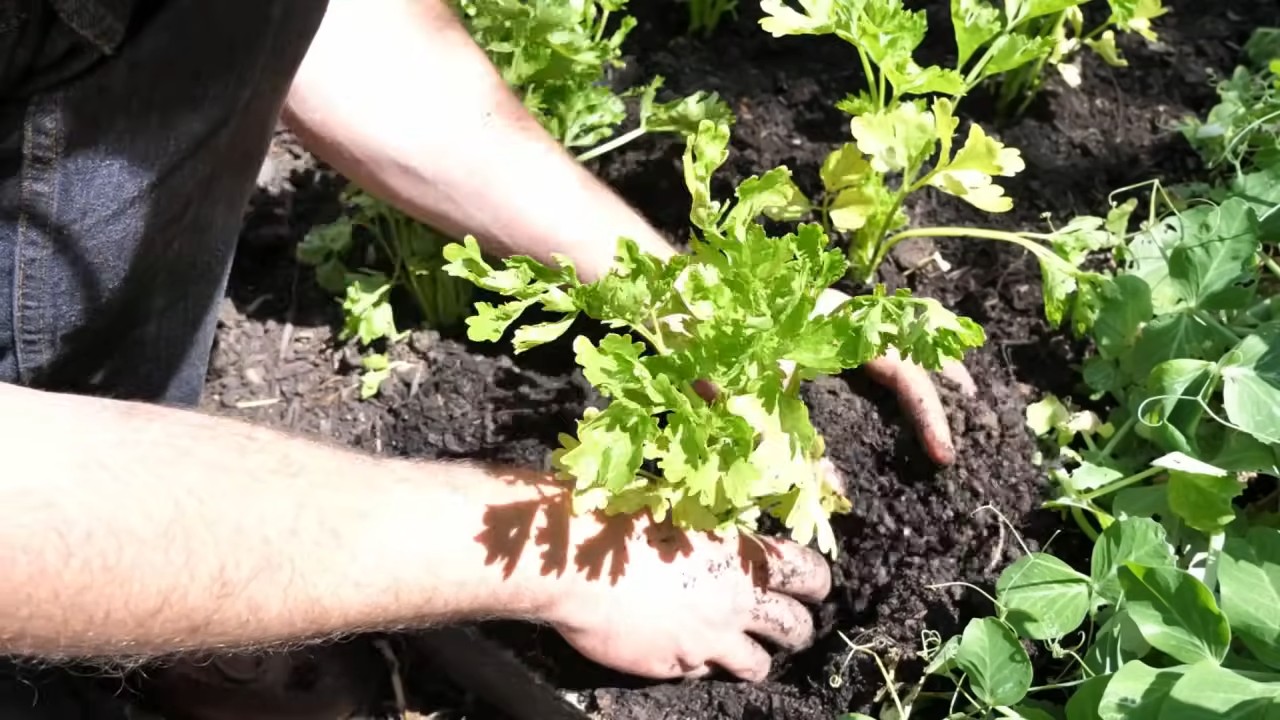
3. Carefully Transplant: Gently remove the celery base from the water. Be careful not to damage the delicate roots. Place the celery base in the hole, making sure the top of the base is level with the soil surface.
4. Fill and Water: Fill in the hole around the celery base with more potting soil. Gently pat down the soil to secure the plant. Water the soil thoroughly until water drains out of the bottom of the pot.
5. Return to Sunny Spot: Place the pot back on the sunny windowsill or in the well-lit area.
Phase 3: Ongoing Care and Maintenance
Now that your celery is planted in soil, it’s time to provide it with the care it needs to thrive.
1. Watering: Celery needs consistent moisture, but it doesn’t like to be waterlogged. Water the plant whenever the top inch of soil feels dry to the touch. Use a spray bottle to mist the leaves occasionally to increase humidity.
2. Fertilizing: To encourage healthy growth, you can fertilize your celery plant every 2-3 weeks with a balanced liquid fertilizer. Follow the instructions on the fertilizer package.
3. Sunlight: Celery needs at least 6 hours of sunlight per day. If you don’t have a sunny windowsill, you can supplement with a grow light.
4. Pest Control: Keep an eye out for pests like aphids or spider mites. If you notice any pests, you can try spraying the plant with insecticidal soap or neem oil.
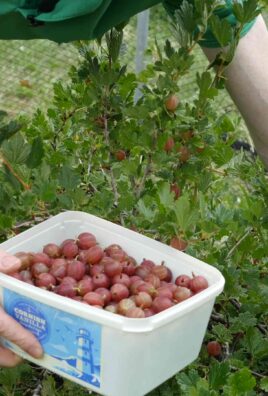
5. Harvesting: While you won’t get a full-sized celery stalk from this method, you can harvest the outer stalks as they grow. Simply cut them off at the base of the plant. This will encourage the plant to produce more stalks. You can also harvest the leaves and use them in salads or soups.
Troubleshooting Tips
Sometimes, things don’t go exactly as planned. Here are a few common problems you might encounter and how to fix them:
* Celery base is rotting: This is usually caused by bacteria growth in the water. Make sure you’re changing the water every 1-2 days. If the base is already rotting, you might need to start with a fresh celery base.
* No roots are growing: This could be due to a lack of light or inconsistent watering. Make sure the celery base is in a sunny spot and that the water level is maintained.
* Leaves are turning yellow: This could be a sign of overwatering or underwatering. Check the soil moisture and adjust your watering accordingly. It could also be a sign of nutrient deficiency, so try fertilizing the plant.
* Plant is not growing: Be patient! Celery can take a while to grow. Make sure the plant is getting enough light, water, and nutrients.
Extra Tips for Success
* Choose a healthy celery stalk: Start with a celery stalk that looks fresh and vibrant. Avoid stalks that are wilted or discolored.
* Use filtered water: If your tap water is heavily chlorinated, you might want to use filtered water to regrow your celery.
* Provide good drainage: Make sure your pot has drainage holes to prevent the soil from becoming waterlogged.
* Rotate the plant: Rotate the pot regularly to ensure that all sides of the plant receive equal sunlight.
* Be patient: Regrowing celery takes time and patience. Don’t get discouraged if you don’t see results immediately.
Why This Works
The magic behind regrowing celery lies in the plant’s ability to regenerate from its base. The celery base contains dormant buds that, when given the right conditions (water, light, and nutrients), will start to grow and produce new roots and leaves. It’s a fascinating process and a great way to learn about plant biology.
Beyond Celery: Other Veggies You Can Regrow
Once you’ve mastered regrowing celery, you can try your hand at regrowing other vegetables from kitchen scraps. Some popular options include:
* Lettuce: Similar to celery, you can regrow lettuce from the base.
* Green Onions: Place the white bulb end of green onions in water, and they will regrow.
* Garlic: Plant a single clove of garlic in soil, and it will grow into a new garlic bulb.
* Ginger: Plant a piece of ginger root in soil, and it will sprout new shoots.
* Potatoes: Plant potatoes with “eyes” in soil, and they will grow into new potato plants.
Regrowing vegetables from kitchen scraps is a fun and sustainable way to reduce food waste and enjoy fresh produce at home. So, give it a try and see what you can grow! Happy gardening!
Conclusion
So, there you have it! Growing celery at home from scraps isn’t just a fun experiment; it’s a sustainable way to reduce food waste, enjoy fresh, crisp celery, and even impress your friends and family. It’s a testament to the resilience of nature and a rewarding experience for gardeners of all skill levels. Forget buying bunches of celery that wilt in your fridge – with a little patience and effort, you can have a continuous supply right from your kitchen.
This DIY trick is a must-try because it’s incredibly simple, cost-effective, and environmentally friendly. You’re essentially giving a new life to something that would otherwise end up in the compost bin. Plus, the satisfaction of nurturing a plant from a seemingly useless scrap is unparalleled. Imagine the pride you’ll feel when you harvest your first stalks, knowing you grew them yourself!
But the fun doesn’t stop there! Feel free to experiment with different varieties of celery. Try growing red celery for a pop of color in your salads, or explore heirloom varieties for unique flavors. You can also adjust the growing conditions to influence the taste and texture of your celery. For example, providing more sunlight can result in sweeter stalks, while ensuring consistent moisture will keep them crisp and tender.
Consider planting your regrown celery in different types of soil or even trying hydroponics for a faster growth rate. You can also companion plant your celery with other vegetables like tomatoes, onions, and garlic, which can help deter pests and improve the overall health of your garden.
Don’t be afraid to get creative with how you use your homegrown celery. Add it to soups, stews, and salads for a burst of freshness. Use it as a healthy snack with peanut butter or hummus. Juice it for a nutritious and refreshing drink. Or, get fancy and use it as a garnish for your favorite cocktails. The possibilities are endless!
We wholeheartedly encourage you to try this DIY trick and experience the joy of growing celery at home. It’s a fantastic way to connect with nature, reduce your environmental impact, and enjoy delicious, homegrown produce. And most importantly, don’t forget to share your experiences with us! We’d love to hear about your successes, challenges, and any variations you’ve tried. Share your photos and stories on social media using [Your Hashtag Here] and let’s inspire others to embrace the magic of regrowing celery. Happy gardening!
Frequently Asked Questions (FAQ)
1. How long does it take to grow celery from a base?
The initial regrowth phase, where you see new leaves sprouting from the base, typically takes about 1-2 weeks. After transplanting to soil, it can take anywhere from 2-4 months to grow a full-sized celery stalk ready for harvest. The exact timeframe depends on factors like sunlight, temperature, and soil quality. Be patient, and you’ll be rewarded with delicious, homegrown celery!
2. What kind of soil is best for growing celery?
Celery thrives in rich, well-draining soil that is high in organic matter. A loamy soil amended with compost or well-rotted manure is ideal. The soil should also be slightly acidic to neutral, with a pH between 6.0 and 7.0. Before planting, make sure to loosen the soil and remove any rocks or debris that could hinder root growth.
3. How much sunlight does celery need?
Celery needs at least 6 hours of sunlight per day to grow properly. However, in hotter climates, it can benefit from some afternoon shade to prevent the leaves from scorching. If you’re growing celery indoors, place it near a sunny window or use a grow light to provide adequate illumination.
4. How often should I water my celery plant?
Celery needs consistent moisture to thrive. Water your plant deeply whenever the top inch of soil feels dry to the touch. Avoid letting the soil dry out completely, as this can stress the plant and affect its growth. During hot weather, you may need to water more frequently. Mulching around the base of the plant can help retain moisture and suppress weeds.
5. What are some common problems when growing celery, and how can I fix them?
Some common problems include bolting (premature flowering), pest infestations (such as aphids or celery leaf miners), and diseases (such as celery blight). Bolting can be caused by stress, such as extreme temperatures or inconsistent watering. To prevent bolting, ensure your celery plant receives consistent moisture and is protected from extreme heat. For pest infestations, try using insecticidal soap or neem oil. For diseases, ensure good air circulation and avoid overhead watering.
6. Can I grow celery indoors year-round?
Yes, you can grow celery indoors year-round, provided you can provide adequate light and moisture. Place your celery plant near a sunny window or use a grow light to supplement natural light. Ensure the plant receives consistent moisture and is protected from drafts. You may also need to fertilize your celery plant regularly to provide it with the nutrients it needs to grow.
7. How do I know when my celery is ready to harvest?
Celery is ready to harvest when the stalks are at least 6-8 inches long and have reached a desirable thickness. The stalks should be firm and crisp, not limp or wilted. You can harvest individual stalks as needed, or you can harvest the entire plant at once. To harvest, simply cut the stalks at the base of the plant with a sharp knife.
8. Can I use the celery leaves?
Absolutely! Celery leaves are packed with flavor and nutrients and can be used in a variety of ways. Add them to soups, stews, and salads for a burst of freshness. Use them as a garnish for your favorite dishes. Or, dry them and use them as a seasoning. Celery leaves are a versatile and delicious addition to any kitchen.
9. What are some variations I can try when growing celery from scraps?
You can experiment with different varieties of celery, such as red celery or heirloom varieties. You can also try growing celery in different types of soil or even using hydroponics. Additionally, you can companion plant your celery with other vegetables like tomatoes, onions, and garlic to deter pests and improve the overall health of your garden.
10. Is growing celery at home really worth the effort?
Absolutely! Growing celery at home is a rewarding experience that allows you to enjoy fresh, crisp celery while reducing food waste and connecting with nature. It’s a simple and cost-effective way to add a touch of homegrown goodness to your meals. Plus, the satisfaction of nurturing a plant from a seemingly useless scrap is unparalleled. So, give it a try and see for yourself!
Leave a Comment