

Grow Ginger at Home – imagine the satisfaction of snipping off a piece of fresh, spicy ginger root right from your own backyard (or even your kitchen counter!). Forget those bland, store-bought rhizomes; we’re diving into the wonderful world of homegrown ginger, and I’m so excited to share my favorite tips and tricks with you!
Ginger, with its fiery zest, has a rich history that stretches back thousands of years. Originating in South Asia, it was prized not only for its culinary uses but also for its medicinal properties. Ancient cultures used ginger to treat everything from digestive issues to inflammation, and it quickly became a staple in traditional medicine systems around the globe. Today, ginger continues to be celebrated for its health benefits and its ability to add a unique flavor to countless dishes.
But why should you bother learning how to grow ginger at home? Well, for starters, it’s incredibly rewarding! Plus, you’ll have access to fresher, more flavorful ginger than you can find in most supermarkets. More importantly, growing your own ginger allows you to control the growing environment, ensuring it’s free from harmful pesticides and chemicals. In this article, I’ll walk you through simple, step-by-step instructions and share some clever DIY hacks that will make growing ginger at home a breeze, even if you don’t have a green thumb. Get ready to spice up your life – literally!
Grow Your Own Ginger: A Beginner’s Guide to a Bountiful Harvest
Hey there, fellow plant enthusiasts! Ever thought about growing your own ginger? It’s surprisingly easy and incredibly rewarding. Imagine having fresh, flavorful ginger right at your fingertips whenever you need it. No more trips to the store or settling for less-than-fresh roots. I’m going to walk you through the entire process, from selecting the right ginger to harvesting your very own crop. Let’s get started!
Choosing Your Ginger Rhizome
The first step to a successful ginger harvest is selecting the right rhizome (that’s the “root” part we eat). Here’s what to look for:
* Look for plump, healthy rhizomes: Avoid anything shriveled, dry, or moldy. You want a rhizome that looks juicy and full of life.
* Choose organic ginger: Non-organic ginger might be treated with growth inhibitors to prevent sprouting. Organic ginger is more likely to sprout readily.
* Check for “eyes”: These are small, green buds or “eyes” on the rhizome. These are where the new shoots will emerge, so the more eyes, the better!
* Source matters: Get your ginger from a reputable grocery store or nursery. This increases the chances of getting a healthy, viable rhizome.
Preparing Your Ginger for Planting
Before planting, we need to wake up our ginger and encourage those eyes to sprout. This process is called “chitting.”
1. Soak the rhizome: Submerge your ginger rhizome in a bowl of lukewarm water for 12-24 hours. This rehydrates the rhizome and stimulates growth.
2. Cut (if necessary): If your rhizome is large, you can cut it into smaller pieces, ensuring each piece has at least one or two “eyes.” Let the cut surfaces callous over for a day or two to prevent rot.
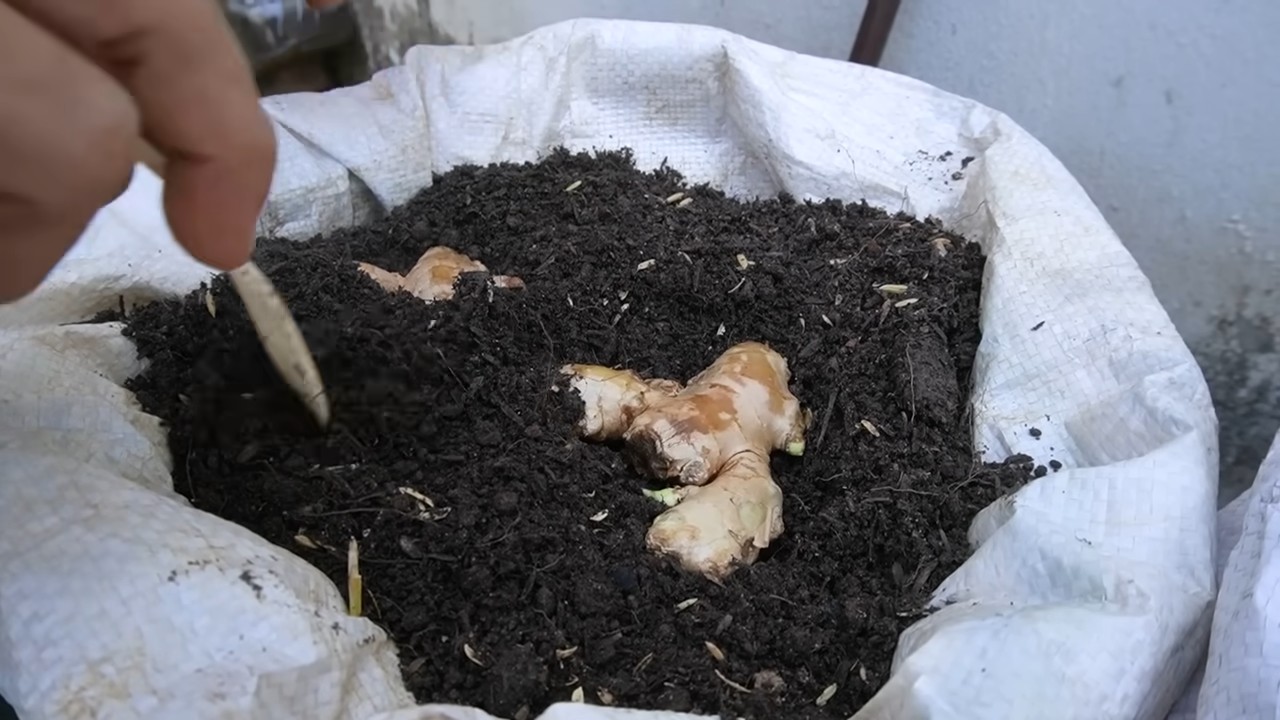
3. Prepare a sprouting container: Fill a shallow container with moist (not soggy) potting mix.
4. Place the rhizome: Lay the ginger rhizome on top of the soil, with the “eyes” facing upwards.
5. Cover lightly: Cover the rhizome with a thin layer of potting mix (about half an inch).
6. Keep it warm and moist: Place the container in a warm, humid location. A sunny windowsill or a greenhouse is ideal. Mist the soil regularly to keep it moist.
7. Wait for sprouts: It can take anywhere from a week to several weeks for sprouts to emerge, so be patient!
Planting Your Sprouted Ginger
Once your ginger has sprouted, it’s time to move it to its permanent home.
1. Choose the right pot: Ginger needs plenty of room to grow, so select a large pot (at least 12 inches in diameter and depth). A wider pot is better than a deeper one.
2. Prepare the potting mix: Ginger thrives in well-draining, nutrient-rich soil. A mix of potting soil, compost, and perlite is ideal.
3. Fill the pot: Fill the pot with your prepared potting mix, leaving a few inches of space at the top.
4. Plant the ginger: Gently dig a hole in the center of the pot and place the sprouted ginger rhizome in the hole, ensuring the sprouts are facing upwards.
5. Cover with soil: Cover the rhizome with soil, leaving the tips of the sprouts exposed.
6. Water thoroughly: Water the pot thoroughly until water drains out of the bottom.
Caring for Your Ginger Plant
Now that your ginger is planted, it’s time to provide it with the care it needs to thrive.
* Sunlight: Ginger prefers bright, indirect sunlight. Avoid direct sunlight, which can scorch the leaves. An east-facing window or a spot under a shade cloth is ideal.
* Watering: Keep the soil consistently moist, but not soggy. Water when the top inch of soil feels dry to the touch. Overwatering can lead to root rot.
* Humidity: Ginger loves humidity. Mist the plant regularly or place the pot on a tray filled with pebbles and water.
* Fertilizing: Feed your ginger plant every 2-3 weeks with a balanced liquid fertilizer during the growing season (spring and summer).
* Temperature: Ginger thrives in warm temperatures (between 65°F and 85°F). Protect it from frost and cold drafts.
* Pest control: Keep an eye out for pests like aphids and spider mites. Treat infestations promptly with insecticidal soap or neem oil.
Troubleshooting Common Ginger Growing Problems
Even with the best care, you might encounter some challenges along the way. Here are some common problems and how to address them:
* Yellowing leaves: This could be a sign of overwatering, underwatering, nutrient deficiency, or pest infestation. Check the soil moisture, fertilize if necessary, and inspect for pests.
* Root rot: This is caused by overwatering and poor drainage. Ensure your pot has drainage holes and avoid overwatering. If root rot is severe, you may need to repot the plant in fresh soil.
* Slow growth: This could be due to insufficient sunlight, low temperatures, or nutrient deficiency. Move the plant to a brighter location, ensure the temperature is warm enough, and fertilize regularly.
* No sprouting: This could be due to using non-organic ginger, planting too deep, or keeping the soil too dry. Try soaking the rhizome for longer, planting it closer to the surface, and keeping the soil consistently moist.
Harvesting Your Ginger
The best part of growing your own ginger is, of course, the harvest!
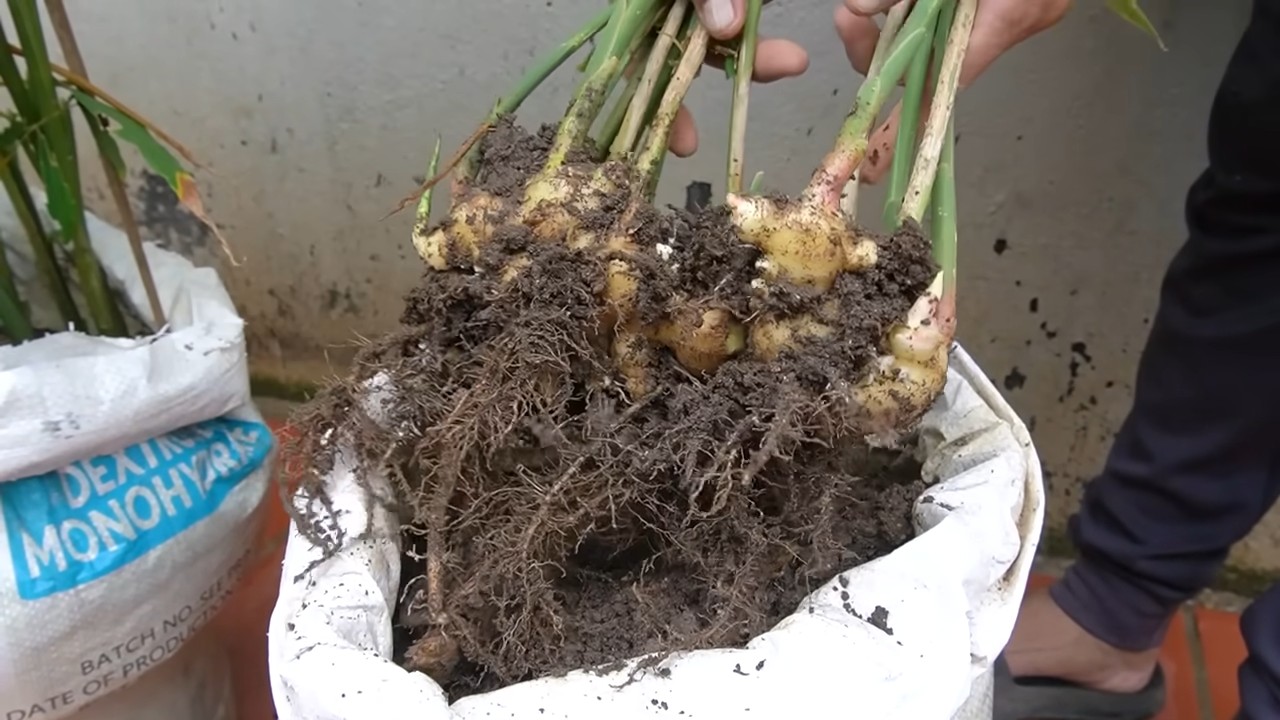
1. When to harvest: You can start harvesting ginger about 8-10 months after planting. The leaves will start to turn yellow and brown when the plant is ready for harvest.
2. Partial harvest: If you only need a small amount of ginger, you can carefully dig around the edges of the pot and harvest a few rhizomes, leaving the rest of the plant to continue growing.
3. Full harvest: To harvest the entire plant, gently tip the pot over and remove the ginger rhizomes from the soil.
4. Cleaning the ginger: Wash the ginger rhizomes thoroughly to remove any dirt or debris.
5. Storing your ginger: Freshly harvested ginger can be stored in the refrigerator for several weeks. You can also freeze it for longer storage. To freeze, peel and chop the ginger, then place it in a freezer bag or container.
Propagating Ginger
Once you’ve harvested your ginger, you can use some of the rhizomes to propagate new plants. Simply follow the steps outlined in the “Preparing Your Ginger for Planting” section. This is a great way to expand your ginger patch and ensure a continuous supply of fresh ginger.
Enjoying Your Homegrown Ginger
Now that you have a bountiful harvest of fresh ginger, it’s time to put it to good use! Here are just a few ideas:
* Cooking: Add freshly grated ginger to stir-fries, soups, curries, and other dishes.
* Tea: Brew a soothing cup of ginger tea by steeping sliced ginger in hot water.
* Smoothies: Add a small piece of ginger to your smoothies for a spicy kick.
* Baking: Use grated ginger in cookies, cakes, and other baked goods.
* Pickling: Pickle ginger to enjoy as a condiment or snack.
Growing your own ginger is a rewarding experience that allows you to enjoy fresh, flavorful ginger whenever you need it. With a little patience and care, you can have a thriving ginger plant that provides you with a continuous supply of this versatile spice. Happy gardening!
Conclusion
So, there you have it! Growing ginger at home is not only achievable, but it’s also a rewarding and surprisingly simple process. Forget those expensive trips to the grocery store for a knob of fresh ginger – imagine the satisfaction of harvesting your own, knowing exactly where it came from and how it was grown. This DIY trick is a must-try for anyone who appreciates fresh, flavorful ingredients and enjoys connecting with the natural world.
But why is this method so compelling? Beyond the cost savings, growing your own ginger offers unparalleled freshness. The ginger you harvest yourself will be bursting with flavor and aroma, far superior to anything you can buy pre-packaged. Plus, you’ll have the satisfaction of knowing you nurtured it from rhizome to harvest.
This isn’t just about growing ginger; it’s about cultivating a connection to your food.
Think of the possibilities! You can experiment with different varieties of ginger, from the common culinary ginger to more exotic types with unique flavor profiles. You can also adjust your growing conditions to influence the ginger’s spiciness and aroma. Want a milder ginger? Provide more shade. Prefer a spicier kick? Give it more sunlight.
And the best part? You don’t need a sprawling garden to make this happen. A simple pot on a sunny windowsill or balcony is all you need to get started. This makes it accessible to everyone, regardless of their living situation.
Consider these variations to personalize your ginger-growing experience:
* **Container Gardening:** Use different sized pots to control the size of your ginger harvest. Smaller pots will result in smaller rhizomes, while larger pots will allow for more substantial growth.
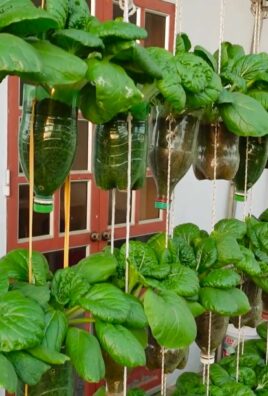
* **Hydroponics:** For a more advanced approach, try growing ginger hydroponically. This method allows for precise control over nutrients and water, potentially leading to faster growth and higher yields.
* **Companion Planting:** Plant ginger alongside other herbs and vegetables that thrive in similar conditions, such as turmeric, galangal, or peppers. This can create a mutually beneficial ecosystem in your garden.
* **Ginger Tea Garden:** Dedicate a small space to growing ginger specifically for making fresh ginger tea. You can even add other complementary herbs like mint or lemon balm to create your own custom tea blend.
We wholeheartedly encourage you to give this DIY trick a try. It’s an easy, affordable, and incredibly rewarding way to add fresh, flavorful ginger to your life. Don’t be intimidated – even if you’re a complete beginner, you can successfully grow ginger at home with a little patience and care.
Once you’ve harvested your first batch of homegrown ginger, we’d love to hear about your experience! Share your photos, tips, and stories with us in the comments below. Let’s build a community of home ginger growers and inspire others to embrace this simple yet transformative DIY project. What worked for you? What challenges did you face? Your insights can help others succeed in their own ginger-growing endeavors.
So, grab a ginger rhizome, find a pot, and get ready to embark on a flavorful adventure. Happy growing!
Frequently Asked Questions (FAQ)
What kind of ginger should I use to start growing?
The best type of ginger to use for starting your own plant is fresh, unblemished ginger root (rhizome) from the grocery store. Look for pieces that are plump, firm, and have visible “eyes” or buds. Organic ginger is often recommended, as it’s less likely to have been treated with growth inhibitors. Avoid ginger that looks shriveled, moldy, or has soft spots. The fresher the ginger, the better your chances of successful sprouting.
How long does it take to grow ginger at home?
Growing ginger at home requires patience. It typically takes around 8-10 months from planting to harvest. However, you can start harvesting small pieces of ginger after about 4 months if you need them for cooking. The plant will continue to grow and produce more ginger over time. The exact timeframe can vary depending on factors such as climate, growing conditions, and the specific variety of ginger.
What are the ideal growing conditions for ginger?
Ginger thrives in warm, humid environments with partial shade. The ideal temperature range is between 65°F and 90°F (18°C and 32°C). It needs well-draining soil that is rich in organic matter. Avoid direct sunlight, which can scorch the leaves. Consistent moisture is important, but avoid overwatering, which can lead to root rot. A location with morning sun and afternoon shade is often ideal.
How often should I water my ginger plant?
Water your ginger plant regularly, keeping the soil consistently moist but not waterlogged. Check the soil moisture by sticking your finger about an inch deep. If the soil feels dry, it’s time to water. During the warmer months, you may need to water more frequently. Reduce watering during the cooler months when the plant’s growth slows down. Good drainage is crucial to prevent root rot.
What kind of soil is best for growing ginger?
Ginger prefers well-draining soil that is rich in organic matter. A good potting mix for ginger would be a combination of peat moss, perlite, and compost. You can also add some aged manure or worm castings to enrich the soil further. The soil should be slightly acidic to neutral, with a pH between 6.0 and 6.5. Avoid heavy clay soils, as they can retain too much moisture and lead to root rot.
Can I grow ginger indoors?
Yes, you can definitely grow ginger indoors! In fact, growing ginger indoors is a great option for those who live in colder climates. Provide your indoor ginger plant with plenty of indirect sunlight, warm temperatures, and consistent moisture. A humidifier can help to increase the humidity levels, which ginger loves. Rotate the pot regularly to ensure even growth.
What are some common problems when growing ginger and how can I fix them?
Some common problems when growing ginger include root rot, leaf spot, and pests such as aphids and spider mites. Root rot is usually caused by overwatering or poor drainage. To prevent it, ensure your soil is well-draining and avoid overwatering. Leaf spot can be caused by fungal infections. Improve air circulation around the plant and treat with a fungicide if necessary. Pests can be controlled with insecticidal soap or neem oil. Regularly inspect your plants for signs of problems and address them promptly.
How do I harvest ginger?
You can start harvesting ginger about 4 months after planting by carefully digging around the edges of the plant and cutting off a piece of the rhizome. Be sure to leave the rest of the plant undisturbed so it can continue to grow. For a larger harvest, wait until the plant is about 8-10 months old. At this point, the leaves will start to turn yellow and die back. Dig up the entire plant and gently wash off the soil. You can then use the ginger fresh or store it for later use.
How do I store harvested ginger?
Freshly harvested ginger can be stored in several ways. You can wrap it in a paper towel and store it in a plastic bag in the refrigerator for up to a few weeks. Alternatively, you can freeze ginger whole or grated. To freeze whole ginger, simply place it in a freezer bag. To freeze grated ginger, spread it out on a baking sheet lined with parchment paper and freeze until solid. Then, transfer the frozen ginger to a freezer bag. You can also pickle ginger or preserve it in syrup.
Can I grow ginger from store-bought ginger?
Yes, you can grow ginger from store-bought ginger, but it’s important to choose the right piece. Look for ginger that is plump, firm, and has visible “eyes” or buds. Organic ginger is often a better choice, as it’s less likely to have been treated with growth inhibitors. Soak the ginger in water overnight before planting to help rehydrate it and encourage sprouting. Follow the same planting instructions as you would for any other ginger rhizome.
Leave a Comment