

Grow Okra Successfully, and you’ll unlock a world of culinary possibilities right in your backyard! Have you ever dreamed of plucking fresh, vibrant okra pods straight from the vine, knowing exactly where they came from and how they were grown? This isn’t just a gardening fantasy; it’s an achievable reality with a few simple tricks and DIY hacks.
Okra, with its fascinating history tracing back to ancient Ethiopia, has been a staple in cuisines across the globe for centuries. From the hearty gumbos of the American South to the flavorful curries of India, okra adds a unique texture and subtle flavor that’s hard to resist. But beyond its culinary appeal, growing your own okra offers a sense of accomplishment and connection to nature that’s truly rewarding.
Why do you need these DIY tricks? Because let’s face it, sometimes gardening can feel a little overwhelming! Maybe you’ve tried growing okra before and haven’t had the success you hoped for. Or perhaps you’re a complete beginner, intimidated by the thought of starting a garden. Don’t worry! I’m here to guide you through the process, sharing easy-to-follow tips and tricks that will help you grow okra successfully, even if you have limited space or experience. Get ready to enjoy a bountiful harvest of delicious, homegrown okra!
Grow Okra Successfully: A Beginner’s Guide
Hey there, fellow gardening enthusiasts! I’m so excited to share my tried-and-true method for growing okra. This southern staple is surprisingly easy to cultivate, even if you’re a complete newbie. Get ready to harvest loads of delicious, nutritious pods!
Choosing the Right Okra Variety
Before we dive into the nitty-gritty, let’s talk varieties. Okra comes in different shapes, sizes, and colors. Picking the right one for your climate and preferences is key. Here are a few popular choices:
- Clemson Spineless: This is a classic for a reason! It’s productive, relatively spineless (making harvesting easier), and produces dark green pods.
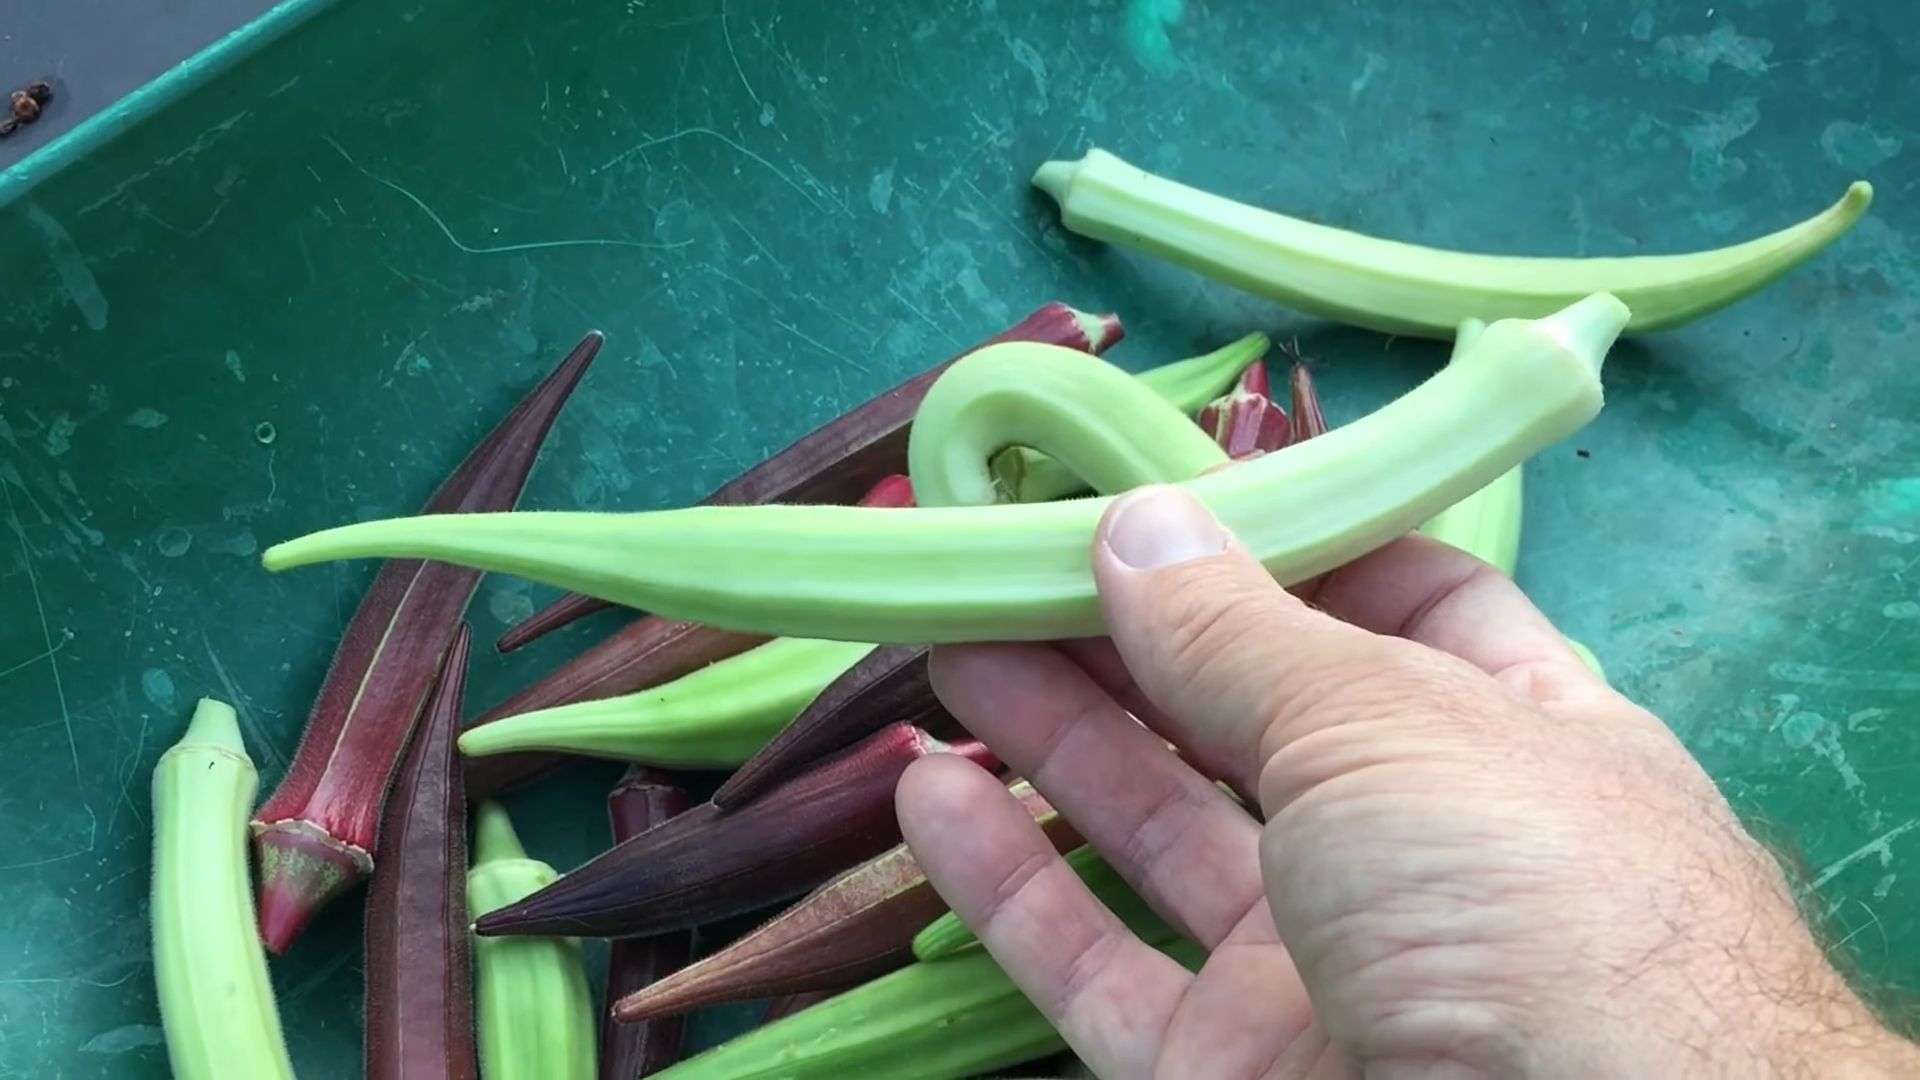
- Burgundy: If you want a pop of color in your garden, Burgundy okra is the way to go. It boasts beautiful red pods that turn green when cooked.
- Emerald: Known for its smooth, tender pods, Emerald is a great choice if you prefer a less fibrous texture.
- Dwarf Green Long Pod: Perfect for smaller gardens or containers, this variety produces long, slender pods on compact plants.
I personally love Clemson Spineless for its reliability and ease of harvest. But feel free to experiment and find the variety that suits you best!
Preparing Your Okra Patch
Okra thrives in warm weather and needs plenty of sunshine. So, selecting the right location and preparing the soil are crucial steps.
- Sunlight: Okra needs at least 6-8 hours of direct sunlight per day. Choose a spot in your garden that gets plenty of sun exposure.
- Soil: Okra prefers well-drained soil that’s rich in organic matter. Amend your soil with compost or well-rotted manure to improve its fertility and drainage.
- Soil pH: Aim for a soil pH between 6.0 and 7.0. You can test your soil pH using a soil testing kit available at most garden centers.
Step-by-Step Planting Guide
Now for the fun part – planting! Okra is a warm-season crop, so it’s best to wait until the soil has warmed up to at least 65°F (18°C) before planting.
- Soaking the Seeds: To speed up germination, soak your okra seeds in warm water for 12-24 hours before planting. This helps soften the seed coat and encourages sprouting.
- Planting Depth: Plant the seeds about ½ to 1 inch deep.
- Spacing: Space the seeds about 6-12 inches apart in rows that are 3-4 feet apart. This gives the plants enough room to grow and prevents overcrowding. If you’re planting in containers, choose a pot that’s at least 12 inches in diameter.
- Watering: Water the seeds gently after planting to keep the soil moist. Avoid overwatering, as this can cause the seeds to rot.
Caring for Your Okra Plants
Once your okra plants have sprouted, it’s important to provide them with the right care to ensure a bountiful harvest.
- Watering: Water your okra plants regularly, especially during hot, dry weather. Aim to keep the soil consistently moist, but not waterlogged. Water deeply at the base of the plants to encourage strong root growth.
- Fertilizing: Okra is a heavy feeder, so it benefits from regular fertilization. Apply a balanced fertilizer (e.g., 10-10-10) every 4-6 weeks. You can also side-dress your plants with compost or well-rotted manure.
- Weeding: Keep your okra patch free of weeds, as they can compete with the plants for nutrients and water. Hand-pull weeds regularly or use a hoe to cultivate the soil around the plants.
- Mulching: Apply a layer of mulch around your okra plants to help retain moisture, suppress weeds, and regulate soil temperature. Organic mulches like straw, wood chips, or shredded leaves are excellent choices.
Dealing with Pests and Diseases
Okra is generally a hardy plant, but it can be susceptible to certain pests and diseases. Here are a few common problems and how to address them:
- Aphids: These tiny insects can suck the sap from okra plants, causing them to weaken and become stunted. Control aphids by spraying them with insecticidal soap or neem oil.
- Corn Earworms: These caterpillars can bore into okra pods, causing damage and making them unmarketable. Handpick the caterpillars or use Bacillus thuringiensis (Bt) to control them.
- Root-Knot Nematodes: These microscopic worms can attack the roots of okra plants, causing them to develop galls and become stunted. Improve soil health by adding organic matter and rotating crops to prevent nematode infestations.
- Fusarium Wilt: This fungal disease can cause okra plants to wilt and die. Choose disease-resistant varieties and avoid overwatering to prevent Fusarium wilt.
I’ve found that regular monitoring and early intervention are key to preventing serious pest and disease problems.
Harvesting Your Okra
The moment you’ve been waiting for – harvesting! Okra pods are typically ready to harvest about 50-60 days after planting.
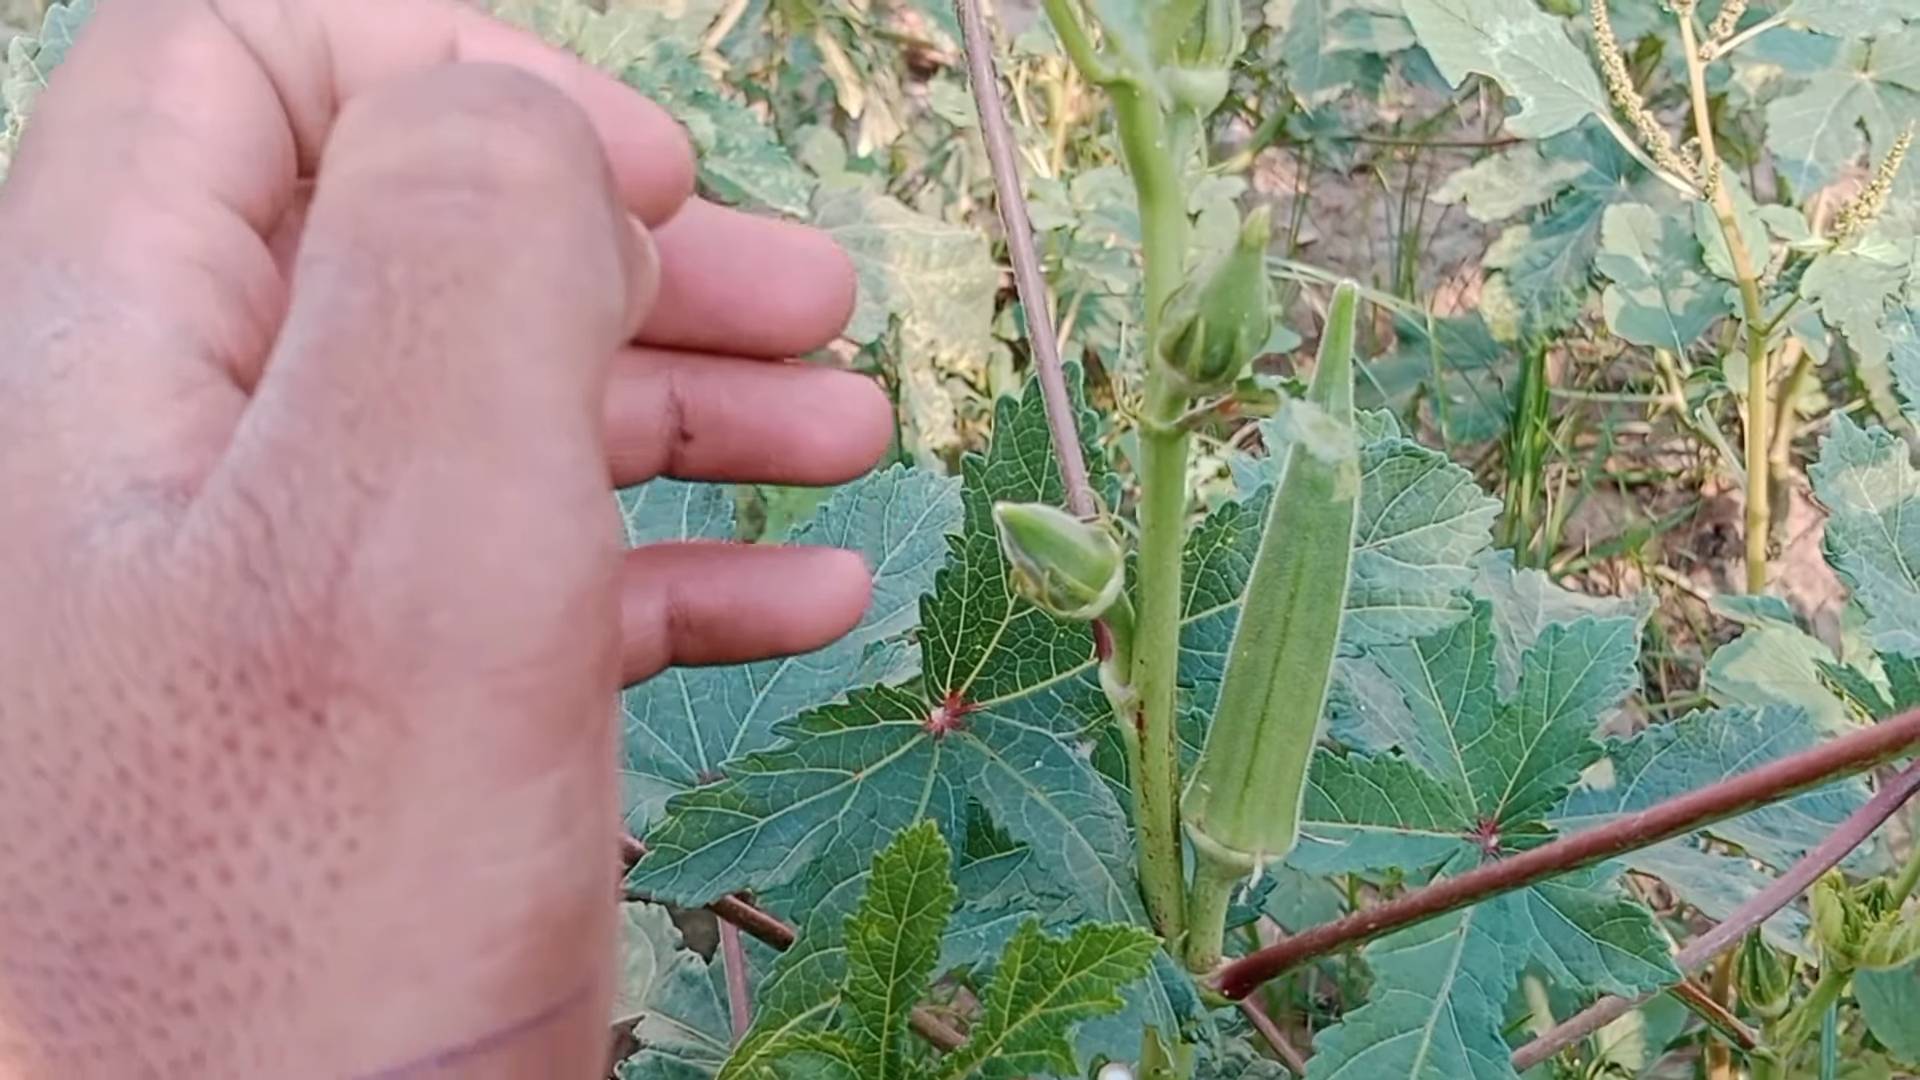
- Harvesting Time: Harvest okra pods when they are 2-4 inches long. Larger pods can become tough and fibrous.
- Harvesting Technique: Use a sharp knife or pruning shears to cut the pods from the plant. Wear gloves to protect your hands from the prickly hairs on the pods and stems.
- Harvesting Frequency: Harvest okra pods every 1-2 days to encourage continuous production. The more you harvest, the more the plants will produce!
Tip: Okra pods can be prickly, so wearing gloves and long sleeves during harvest is a good idea.
Using Your Okra Harvest
Now that you’ve harvested your okra, it’s time to enjoy the fruits (or rather, pods) of your labor! Okra is a versatile vegetable that can be used in a variety of dishes.
- Frying: Fried okra is a classic southern dish. Simply slice the pods, dredge them in cornmeal, and fry them until golden brown.
- Gumbo: Okra is a key ingredient in gumbo, a flavorful stew that’s popular in Louisiana.
- Stewing: Okra can be added to stews and soups to add flavor and thicken the broth.
- Pickling: Pickled okra is a tangy and delicious condiment that can be enjoyed on its own or added to salads and sandwiches.
- Grilling: Grilled okra is a simple and healthy side dish. Toss the pods with olive oil and seasonings, and grill them until tender.
I personally love frying okra with a little bit of cornmeal and serving it with a spicy dipping sauce. It’s the perfect summer treat!
Extending Your Okra Season
Want to keep your okra plants producing for as long as possible? Here are a few tips:
- Succession Planting: Plant new okra seeds every 2-3 weeks to ensure a continuous harvest throughout the growing season.
- Pruning: Prune your okra plants regularly to remove old or damaged leaves and encourage new growth.
- Fall Planting: In warmer climates, you can plant okra in the fall for a late-season harvest.
Troubleshooting Common Okra Problems
Even with the best care, you might encounter some challenges when growing okra. Here are a few common problems and how to fix them:
- Yellowing Leaves: Yellowing leaves can be a sign of nutrient deficiency, overwatering, or disease. Check your soil pH and nutrient levels, and adjust your watering schedule accordingly.
- Stunted Growth: Stunted growth can be caused by poor soil, lack of sunlight, or pest infestations. Amend your soil with compost, ensure your plants are getting enough sunlight, and control pests as needed.
- Lack of Pod Production: Lack of pod production can be caused by insufficient pollination, hot weather, or nutrient deficiency. Attract pollinators to your garden by planting flowers, and fertilize your plants regularly.
Remember, gardening is a learning process. Don’t be afraid to experiment and try new things. With a little patience and effort, you’ll be harvesting delicious okra in no time! Happy gardening!
Conclusion
So, there you have it! Growing okra successfully doesn’t have to be a daunting task. By implementing these simple yet effective DIY tricks, you’re well on your way to harvesting a bountiful crop of this Southern staple right in your own backyard. We’ve covered everything from soil preparation and seed starting to pest control and harvesting, all with a focus on maximizing your yield and minimizing common problems.
But why is this DIY approach a must-try? Because it empowers you to take control of your okra growing process. You’re not relying on expensive store-bought solutions or complicated techniques. Instead, you’re using readily available resources and time-tested methods to nurture your plants and create the ideal environment for them to thrive. This translates to healthier plants, more flavorful okra, and a deeper connection to the food you’re growing.
Think about the satisfaction of serving a dish made with okra you nurtured from a tiny seed. Imagine the pride you’ll feel when your friends and family rave about the taste and texture of your homegrown okra. This DIY approach isn’t just about saving money or avoiding chemicals; it’s about creating a more rewarding and sustainable gardening experience.
And the best part? There’s plenty of room for experimentation and personalization. Feel free to adapt these tricks to suit your specific climate, soil conditions, and personal preferences. For example, if you live in a particularly hot and dry climate, consider using a thicker layer of mulch to conserve moisture. If you’re dealing with a specific pest problem, research natural remedies that are effective in your area.
Here are a few suggestions and variations to consider:
* Companion Planting: Experiment with companion planting to deter pests and attract beneficial insects. Marigolds, basil, and dill are all excellent companions for okra.
* Soil Amendments: If your soil is particularly poor, consider adding compost, aged manure, or other organic matter to improve its fertility and drainage.
* Watering Techniques: Explore different watering techniques, such as drip irrigation or soaker hoses, to ensure that your okra plants receive consistent moisture without overwatering.
* Okra Varieties: Don’t be afraid to try different varieties of okra to find the ones that grow best in your area and suit your taste preferences. Clemson Spineless is a popular choice, but there are many other options to explore.
* Seed Saving: Save seeds from your best-performing okra plants to ensure a continuous supply of high-quality seeds for future growing seasons.
Ultimately, the key to growing okra successfully is to be observant, patient, and willing to learn from your mistakes. Pay attention to your plants’ needs, adapt your techniques as necessary, and don’t be discouraged by setbacks. With a little bit of effort and these DIY tricks, you’ll be enjoying a delicious harvest of homegrown okra in no time.
We encourage you to try these DIY tricks and share your experience with us! Let us know what worked for you, what challenges you faced, and any tips or variations you discovered along the way. Your feedback will help us improve these techniques and empower other gardeners to grow okra successfully. Share your photos and stories on social media using #DIYOkra or tag us in your posts. We can’t wait to see your okra gardens flourish!
Frequently Asked Questions (FAQ)
What is the best time to plant okra?
The best time to plant okra is in late spring or early summer, after the soil has warmed up to at least 65 degrees Fahrenheit. Okra is a warm-season vegetable that thrives in hot weather, so it’s important to wait until the risk of frost has passed before planting. In most regions, this means planting okra in May or June. However, the exact timing will depend on your local climate and growing conditions. You can start seeds indoors 4-6 weeks before the last expected frost to get a head start on the growing season.
How much sun does okra need?
Okra needs at least 6-8 hours of direct sunlight per day to thrive. Choose a planting location that receives plenty of sunlight throughout the day. If your okra plants don’t get enough sunlight, they may become leggy and produce fewer pods.
What type of soil is best for growing okra?
Okra prefers well-drained, fertile soil with a pH between 6.0 and 7.0. Before planting, amend your soil with compost, aged manure, or other organic matter to improve its fertility and drainage. Avoid planting okra in heavy clay soil, as this can lead to root rot. If you have clay soil, consider growing okra in raised beds or containers.
How often should I water okra?
Okra needs consistent moisture, especially during hot weather. Water your okra plants deeply once or twice a week, or more often if the soil dries out quickly. Avoid overwatering, as this can lead to root rot. A good rule of thumb is to water when the top inch of soil feels dry to the touch. Mulching around your okra plants can help to conserve moisture and reduce the need for frequent watering.
What are some common pests and diseases that affect okra?
Some common pests that affect okra include aphids, flea beetles, corn earworms, and stink bugs. Common diseases include powdery mildew, verticillium wilt, and fusarium wilt. To prevent pest and disease problems, practice good garden hygiene, such as removing weeds and debris from around your okra plants. You can also use organic pest control methods, such as insecticidal soap or neem oil, to control pests. Choose disease-resistant varieties of okra to minimize the risk of disease problems.
How do I harvest okra?
Okra pods should be harvested when they are young and tender, typically 2-4 inches long. Use a sharp knife or pruners to cut the pods from the plant. Harvest okra pods every 1-2 days to encourage continued production. If you allow the pods to grow too large, they will become tough and fibrous. Wear gloves when harvesting okra, as the pods can be prickly and irritating to the skin.
Why is my okra not producing pods?
There are several reasons why your okra plants may not be producing pods. Some common causes include:
* Lack of sunlight: Okra needs at least 6-8 hours of direct sunlight per day to produce pods.
* Poor soil: Okra needs well-drained, fertile soil to thrive.
* Insufficient watering: Okra needs consistent moisture, especially during hot weather.
* Pest or disease problems: Pests and diseases can weaken okra plants and reduce their ability to produce pods.
* Pollination problems: Okra flowers need to be pollinated in order to produce pods. If you’re not seeing many bees or other pollinators in your garden, you may need to hand-pollinate your okra flowers.
Can I grow okra in containers?
Yes, you can grow okra in containers, but you’ll need to choose a large container that is at least 12 inches in diameter and 12 inches deep. Use a well-draining potting mix and make sure the container has drainage holes. Water your okra plants regularly and fertilize them every 2-3 weeks with a balanced fertilizer. Place the container in a location that receives plenty of sunlight.
How do I save okra seeds?
To save okra seeds, allow some of the pods to mature on the plant until they are dry and brown. Once the pods are completely dry, harvest them and remove the seeds. Store the seeds in an airtight container in a cool, dry place. Okra seeds can remain viable for several years if stored properly.
What are some ways to use okra in cooking?
Okra is a versatile vegetable that can be used in a variety of dishes. It can be fried, grilled, roasted, steamed, or added to soups and stews. Okra is a key ingredient in many Southern dishes, such as gumbo and jambalaya. It can also be pickled or used to make okra fries. When cooking okra, be sure to avoid overcooking it, as this can make it slimy.
Leave a Comment